
Using Nikon optics on Sony mirrorless systems can enhance your photographic experience significantly. In this article, I outline practical methods to make this transition seamless and straightforward. I focus on different adapter options, discussing their features, advantages, and compatibility with various lenses.
This piece will be beneficial for photographers who own Nikon glass but want to explore the capabilities of Sony’s innovative mirrorless technology. Whether you’re a hobbyist or a serious shooter, these insights will help you achieve your desired aesthetic without investing heavily in new equipment.

I cover a variety of adapter types ranging from passive to electronic, highlighting their functionality and the impact on autofocus and image quality. By the end of the article, you’ll have a clear understanding of how to combine your existing Nikon gear with Sony bodies effectively, optimizing your setup for different shooting scenarios.
Best Methods for Fitting Nikon Optics to Sony Mirrorless Systems
Using Nikon optical products with Sony’s mirrorless setups is entirely feasible, and I recommend starting with a quality adapter. Many adapters available provide electronic communication, maintaining autofocus and aperture control, essential for dynamic photography. Opt for models constructed from metal for better durability and a secure fit.
Before selecting an adapter, I suggest considering the specific type of Nikon mount you are using. Compatibility can vary greatly between different series, influencing functionality and performance. Higher-end adapters often support full electronic integration, while more economical options may require manual focusing and aperture settings.
Adapter Options and Features
- Mechanical Adapters: These permit physical connection without electronic communication. They are budget-friendly but limit features like autofocus.
- Electronic Adapters: These allow functionality such as autofocus and aperture control. They are slightly more expensive but enhance usability.
- Speed Boosters: Some adapters provide added benefits such as increased aperture and improved depth of field, which can be advantageous for low-light conditions.
When testing different models, I recommend checking how well they handle image quality and sharpness. Some adapters may introduce distortion, so evaluating samples before settling on a choice is prudent.
| Feature | Mechanical Adapter | Electronic Adapter |
|---|---|---|
| Autofocus | No | Yes |
| Aperture Control | Manual | Automatic |
| Price | Lower | Higher |
For those who appreciate manual control, a mechanical adapter can provide a unique shooting experience, allowing for precise adjustments. However, for convenience and speed in changing conditions, an electronic option is likely a more suitable investment.
Understanding the Lens Compatibility Factors
When working with different optical equipment, it is important to grasp the intricacies of compatibility. Focusing on the mount type is essential, as it dictates whether or not a specific piece of glass will fit onto a camera body. Each mount system has its own physical and electronic characteristics that affect functionality.
Another factor to consider is the focal length and aperture range. These specifications influence how the resultant images will appear and the amount of light that can be captured. Understanding the crop factor of the receiving body helps in determining the effective focal range when using an adapted optic.
Mechanical and Electronic Compatibility
Mechanical compatibility hinges on the physical dimensions of the mounts and the presence of any mechanical coupling systems, such as aperture control. It can also affect the possibility of infinity focus, which is crucial for landscape photography. If an optical system cannot focus to infinity, the range of potential subjects becomes limited.
On the electronic side, aspects such as autofocus, image stabilization, and lens data transmission are vital. Some adaptations facilitate electronic communication, allowing for features like automatic aperture adjustment and autofocus to remain functional, but this is not universally guaranteed.
- Mount Type: Ensure that the mount interfaces properly without forcing it.
- Infinity Focus: Check if the lens can achieve focus on distant objects.
- AF and Stabilization: Verify if autofocus and stabilization can be managed through the camera.
Understanding these factors enables better decision-making when incorporating various optical systems into one’s workflow, ensuring that creativity isn’t hindered by technical limitations.
Using Adaptors: Types and Selection Criteria
Choosing the right adaptor is fundamental for the seamless operation of vintage optics with contemporary systems. I focus on two main types: passive and active adaptors. Passive options allow for basic mounting without electronic communication, while active adaptors provide control over features like aperture and autofocus through electronic connections.
In my experience, selecting an adaptor begins with understanding the intended use of the lens. For manual focusing and aperture control, a simple passive adaptor suffices. However, if electronic functionalities are desired, an active adaptor becomes necessary for ensuring optimal performance. Compatibility between the camera and lens mount is also crucial, as mismatches can lead to operational issues.
Key Criteria for Selection
- Compatibility: Check for exact mount compatibility to avoid performance problems.
- Build Quality: High-quality materials ensure durability and stability during use.
- Electronic Features: Determine if autofocus and aperture control are priorities.
- Size and Weight: Consider how the adaptor affects the overall weight and balance of the setup.
- Price: Weigh the benefits against costs; sometimes, a higher-priced adaptor is justified by superior features.
Ultimately, testing various adaptors in practical scenarios can provide invaluable insights. I recommend trying them in real-world conditions to see which option aligns best with your shooting style and technical requirements.
Manual Focusing Techniques for Nikon Lenses on Sony Bodies
I often rely on precise focusing techniques when using vintage optical tools with modern bodies. The shift from automatic systems to manual focusing requires a different mindset and approach. Cultivating these skills can significantly enhance the photograph quality and creativity.
One approach I frequently utilize is focusing using the focus peaking function available in many contemporary models. This feature highlights the edges of in-focus areas, allowing for an easier assessment of sharpness. I set it to a high sensitivity level, making it simpler to determine what is sharp, even in challenging lighting situations.
Another effective technique is the use of magnification during the focusing process. Many bodies provide a zoom-in feature when adjusting focus manually. I engage this feature to scrutinize critical details, ensuring the desired subject is perfectly sharp before capturing the image. This can be particularly beneficial in portrait or macro photography, where detail is paramount.
Additionally, I find it beneficial to practice the “focus and recompose” method. This involves focusing on the subject and then shifting the frame to achieve the desired composition. While this technique requires skill, consistent practice can lead to satisfactory results, particularly in dynamic shooting scenarios.
Lastly, I recommend familiarizing oneself with the tactile feedback of the focusing ring. Each optical tool has its own characteristics, and learning the resistance and smoothness can greatly aid in achieving exact focus. This physical interaction creates a more connected shooting experience, enhancing the overall satisfaction of the process.
Exploring Autofocus Options with Nikon to Sony Adaptors
For those transitioning from one camera system to another, exploring autofocus functionalities through third-party adaptors can be enlightening. These adaptors can provide a pathway to maintaining autofocus capabilities, allowing for seamless shooting experiences just like using native optics.
While using Nikon optics with another brand’s body, I have discovered that the effectiveness of autofocus largely depends on the quality of the adaptor. Some models offer phase detection compatibility, resulting in quicker focus acquisition, particularly in well-lit conditions. Contrast detection, on the other hand, may suffice in lower light scenarios but tends to be slower.
Autofocus Performance Assessment
Test different adaptors under various shooting conditions to determine their autofocus performance. Try performing still life setups in contrasting light and action shots in natural environments to assess how well the focus locks on and maintains accuracy. Keep these aspects in mind:
- Speed: Assess how quickly the system can achieve focus on a subject.
- Accuracy: Check for any missed focuses or hunting, especially in low-light settings.
- Tracking: Monitor how well the system keeps up with moving subjects.
Many adaptors come with firmware that can be upgraded, which may enhance autofocus capabilities. Regularly check for updates to maintain compatibility with the latest camera firmware. This can often lead to improvements in autofocus performance that weren’t present initially.
Using these adaptors requires a touch of patience as well. Autofocus achievements can vary greatly depending on the specific combination of adaptor and optical equipment used. Don’t hesitate to experiment with different combinations and settings to find what works best for your shooting style.
Adjusting Lens Aperture for Optimal Shooting Performance
I find adjusting the aperture settings critical for achieving the desired exposure and depth of field in my photographs. Proper aperture management influences not only the brightness but also the sharpness and overall quality of the image.
When using adapted optics, the first step is ensuring that the aperture mechanism operates correctly. Manual control becomes vital if the communication between the lens and the camera body is interrupted. I often use an aperture ring on the lens to make precise adjustments without relying on the camera’s electronic systems.
Aperture Settings and Their Impact
Choosing the appropriate f-stop will significantly affect the final results. For example, a lower f-stop allows more light to enter, which is advantageous in low-light environments. Conversely, a higher f-stop increases the depth of field, enabling more elements to remain in focus, which can be beneficial for landscape photography.
Here are some recommendations I follow:
- Experiment with different f-stops to see how it alters the exposure and focus.
- Utilize wider apertures for portrait shots to create a pleasing blur in the background.
- In bright conditions, adjust to a smaller aperture to avoid overexposing the image.
Pay attention to lens sharpness variations at different apertures. Most lenses will yield optimal sharpness around the middle of their aperture range. I’ve noticed that stopping down a bit from the maximum aperture can enhance clarity and contrast.
Additionally, consider using a neutral density filter if I need to maintain a wide aperture in bright light. This allows for greater flexibility and creativity in controlling the exposure while maintaining the desired depth of field.
Ultimately, mastering aperture settings enhances creative control and ensures consistent results regardless of the setup. This approach is an integral part of my shooting process, allowing me to adapt to various conditions and achieve my vision effectively.
Maintaining Image Quality: Tips for Effective Use
To preserve image quality while using adapted optics, I focus on a few practical strategies. First, I carefully select the right adapter, ensuring it allows for optimal communication between the optical elements and the body. This significantly impacts autofocus accuracy and overall performance.
Moreover, I pay attention to the specifics of each lens. Different models have unique characteristics; understanding these helps me make informed decisions during shooting. Adjusting my shooting settings based on the optical properties leads to improved results.
Key Strategies for Optimum Image Quality
- Use High-Quality Adapters: Investing in well-reviewed and reliable adapters minimizes potential issues with image integrity.
- Manual Focus Techniques: When autofocus struggles, I switch to manual focus. This not only improves precision but also enhances composition.
- Stopping Down the Lens: Using smaller apertures reduces optical aberrations and increases depth of field, resulting in sharper images.
- Optimal Lighting Conditions: Shooting in adequate illumination reduces noise and enhances detail, making the adjustment more effective.
- Stable Support: Utilizing a tripod or stabilizer helps eliminate camera shake, leading to clearer images.
By implementing these strategies, I successfully maximize the performance of my adapted optics while ensuring high image quality. Understanding both the equipment and the subject matter plays a crucial role in achieving desirable results.
Best ways to adapt nikon lenses to sony mirrolrless cameras
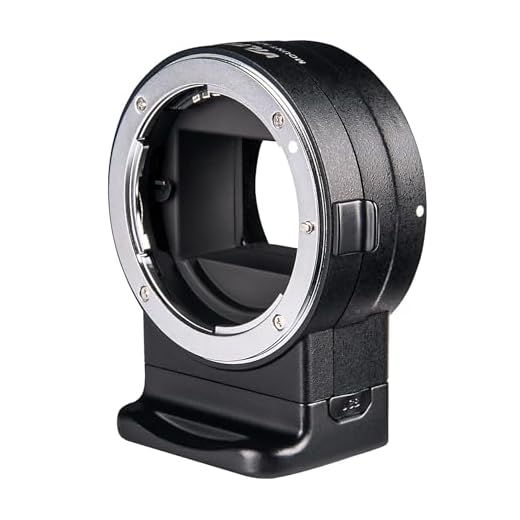
VILTROX NF-Z Lens Mount Adapter for Nikon
Features
| Part Number | JY-NF-Z |
| Model | JY-NF-Z |
| Warranty | 1 year manufacture |
| Color | Black |
| Size | NF-Z |
VILTROX NF-E1 Lens Adapter for Sony Cameras
Features
| Part Number | NF-E1 |
| Model | NF-E1 Adapter |
| Warranty | 1YEAR |
| Color | Black |
| Size | NF-E1 |
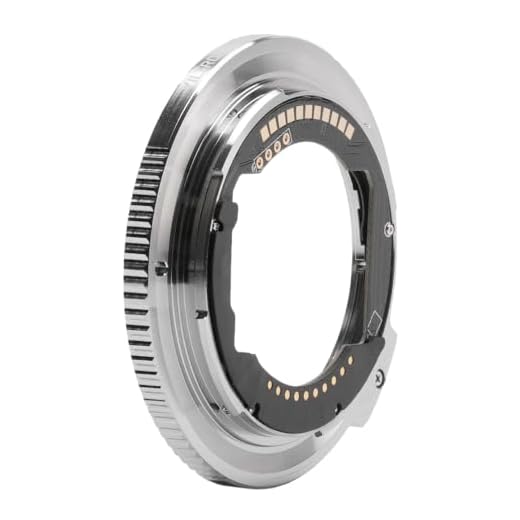
Nikon FTZ II Adapter for F-Mount Lenses
Features
| Part Number | 4264 |
| Model | 4264 |
| Warranty | 1 year manufacturer |
| Color | Black |
| Release Date | 2021-12-31T00:00:01Z |
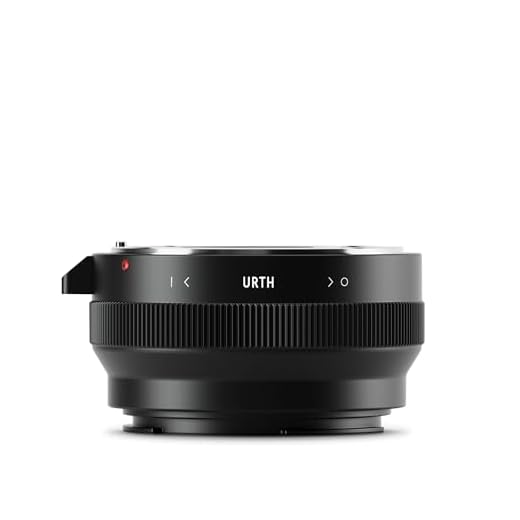
Urth Manual Adapter for Nikon F to Sony E
Features
| Part Number | ULMA-F(G)-E |
| Model | FK40M6P1P |
| Color | Black |
| Size | Compatible with Nikon F (G-Type) |
VILTROX E-Z Booster for Nikon Z Cameras
Features
| Part Number | XH-E-Z |
| Warranty | 1 |
| Size | E-Z |
FAQ:
What are the main methods for adapting Nikon lenses to Sony mirrorless cameras?
There are several methods to adapt Nikon lenses for use with Sony mirrorless cameras. The most common way is through the use of lens adapters specifically designed for this purpose. These adapters vary in features: some allow for electronic connections to maintain autofocus and aperture control, while others are purely mechanical. Another method is using camera-specific adapters that can retain different functionalities, depending on the combination of the lens and the camera body. It’s important to research the compatibility of each lens and adapter, as this can significantly affect performance.
What are some potential challenges when adapting Nikon lenses to Sony cameras?
Adapting Nikon lenses to Sony mirrorless cameras can present a few challenges. Firstly, users may experience compatibility issues, especially with autofocus performance, as some adapters do not support automatic focus features. This can lead to slower or unreliable autofocus compared to using native lenses. Secondly, certain lenses may have issues with light transmission, which could affect exposure and color accuracy. Additionally, physical weight and size of the lenses, in conjunction with the adapter, may balance poorly on the lighter Sony bodies, which could affect handling. Lastly, users should consider that not all functionalities will transfer seamlessly, such as image stabilization, which varies by adapter type.