To swap optics efficiently while photographing outdoors, ensure you have a reliable method to minimize dust and moisture intrusion. As a photographer, I prioritize using a lens pouch or dedicated case to shield the detached element from environmental elements while I make the transition.
This piece highlights various practical strategies for lens replacement in outdoor scenarios. I explore techniques that protect your gear and ensure swift exchanges without compromising image quality. Whether you’re a seasoned shooter or an enthusiastic hobbyist, these insights will enhance your photographic experience.

In the following sections, I cover the importance of preparation before heading out, offer tips for a clean swap, and suggest how to maintain focus on your subject during the process. My goal is to assist you in seamlessly managing these transitions, allowing you to concentrate on capturing the moment rather than on potential mishaps.
Best Way to Change Camera Lenses in the Field
I prioritize preparation before altering optics outdoors. Having a dedicated pouch or case for spare optics ensures that I keep everything organized and free from dust. Always carry a microfiber cloth to clean any debris that might get on the mount surfaces. Before swapping, I check the surroundings for wind or potential contaminants that could enter the assembly.
When I’m ready to swap, I hold the body facing downwards to minimize exposure to dirt. I gently release the current accessory with one hand, while my other remains positioned over the mount to catch any potential fall. As I attach the new component, I make sure to align the dots on the barrel and body accurately, avoiding unnecessary force. It’s crucial to confirm that it’s securely locked into place before raising the gear again.
Additional Tips
- Consider using a lens hood to minimize flare and protect the front element from accidental contact.
- Practice switching optics at home to build muscle memory for quicker transitions.
- Keep an eye on the weather; a rain cover can protect against unexpected downpours.
- Always be aware of your environment, especially in crowded areas or rugged terrain.
- If possible, practice in less challenging conditions before attempting in more demanding circumstances.
Incorporating these practices into my workflow has greatly improved my efficiency and reduced risk. Whether I’m shooting in a bustling city or out in nature, being methodical about switching optics serves me well.
Preparing Your Gear for a Safe Lens Swap
Regular maintenance of my equipment ensures that changing optics in various settings remains a seamless process. Before exiting, I meticulously inspect all gear to confirm everything is in optimal condition. A preventive approach reduces the likelihood of last-minute complications.
Creating a secure environment for lens alterations is paramount. I choose to work in shaded or covered areas to mitigate exposure to dust and moisture. When I need to swap optics, I purposefully shield the camera body with my hand or other materials, minimizing any chance for contaminants to enter.
Strategy for Securing Components
Establishing a well-defined routine aids in maintaining focus. I often follow these steps:
- Ensure that I have a clean microfiber cloth handy to wipe any debris from both the body and the glass.
- Switch to a safe position, ideally with my back against a structure or using a backpack for support.
- Always point the camera downward when changing to let gravity assist in keeping dust at bay.
- Hold the new optic by its edges, avoiding contact with the glass elements and preventing fingerprints.
In each situation, I stay aware of my surroundings to eliminate distractions, allowing me to concentrate and avoid mishaps. I also ensure that I have a dedicated pouch for each lens, reducing the risk of accidental damage during swaps.
| Item | Purpose |
|---|---|
| Microfiber cloth | Cleaning optical surfaces |
| Lens pouch | Protection against impacts |
| Cover for body | Reducing dust entry |
This approach not only safeguards my equipment but also enhances my overall shooting experience. With practice, I have honed this process, making it intuitive and efficient every time I am out capturing images.
Choosing the Right Time and Place for Lens Changes
Determining an appropriate moment for swapping optics requires careful assessment of both surroundings and lighting conditions. I prefer to avoid making adjustments in windy or sandy environments, as these elements can compromise the integrity of equipment. Instead, I look for sheltered areas that offer protection from environmental factors.
Additionally, monitoring lighting is crucial. I tend to reserve lens swaps for times when the light is consistent, as this minimizes potential exposure to dust and sudden changes in illumination. Areas with soft shade or partial cover can provide an ideal backdrop for making these transitions.
Optimal Situations for Lens Adjustments
-
Secure Locations: Look for spots that provide stability and support, such as a flat surface or a sturdy bag.
-
Light Conditions: Aim for times when the sun is not too harsh, avoiding the golden hour if you’re concerned about fast changes.
-
Minimal Movement: Wait for moments when subjects are still and your surroundings are calm, reducing the likelihood of interruption.
-
Preparation: Anticipate situations where specific focal variations might be beneficial, allowing for faster transitions.
I often carry a lens cap or pouch to protect my equipment during transitions. This habit helps shield my gear from unexpected debris. Regularly checking weather conditions also informs my decision, ensuring that I remain vigilant regarding environmental changes that may necessitate further adjustments.
Techniques to Minimize Dust and Debris Exposure
To reduce the risk of dust and debris contaminating my equipment, I prefer to keep my gear covered until I’m ready for a shot. Quick actions are key–using a lens pouch or dedicated case minimizes exposure during swaps. Additionally, I try to make these changes in sheltered areas, like under trees or inside vehicles, to shield my equipment from wind and environmental particles.
I also utilize a few tactical approaches: first, I always have lens caps ready. The moment I detach a lens, I immediately cover the rear element to prevent dust from settling. This encapsulated approach helps maintain clarity and quality in my images.
Additional Strategies
Presence of larger particles can amplify exposure risk. I take care to assess the environment before lens exchanges. Following are more actionable strategies:
- Use a microfiber cloth: Always have one handy to wipe the lens elements before and after each use.
- Positioning: Hold the camera with the lens mount facing down during swaps, reducing gravitational dust intrusion.
- Clean your gear: Regularly clean your camera body and accessories, creating a barrier against dust migration.
- Wind direction: Position myself with my back to the wind while changing lenses to avoid airborne particles.
Being observant of surroundings plays a significant role in safeguarding my equipment.
Implementing these techniques drastically decreases the likelihood of dirt and debris compromising my shots, giving me peace of mind while capturing images.
How to Handle Lenses Properly During Changes
To ensure optimal performance and longevity of your optical tools, it’s vital to follow specific handling techniques during swaps in various settings. I prioritize keeping both the equipment and the environment as dust-free as possible. This proves beneficial in maintaining clarity and preventing damage.
Before removing any component, I make sure to point the body downward to limit the entry of dust and debris. With a steady grip, I gently twist and remove the first part while keeping it close to my chest or within a dedicated, clean pouch. This minimizes exposure to environmental factors that may compromise the components.
Handling Techniques
Maintaining cleanliness while managing components is crucial. Here are steps I adhere to:
- Use a lens cloth or designated pouch for protection.
- Avoid touching optical elements; hold by the edges.
- Align mounting points accurately to avoid damage during attachment.
- Check for dust or smudges before installation.
Using the appropriate techniques allows for seamless transitions between various attachments, preserving functionality while enhancing creativity. Each swap brings new opportunities for capturing moments without the worry of equipment failure.
Ensuring Secure Attachment on Your Camera Body
I always check that the connection point between the lens and the camera body is clean. Any dust or debris can interfere with the attachment and lead to problems with image quality or functionality. A quick wipe with a microfiber cloth is usually sufficient to keep it clear.
Once I have ensured a clean surface, I align the mounting marks on both components. This step is vital; improper alignment can result in an insecure fit. I gently attach the lens by pushing it into place and rotating it until I hear a reassuring click. This sound confirms that the lens is locked securely.
Additional Tips for Secure Attachment
- Always hold your equipment with both hands during the attachment process to maintain control.
- Avoid direct contact with the internal elements of the lens or camera to prevent contamination.
- If using an adapter, ensure that it fits snugly and is compatible with both the lens and the body.
After attaching the lens, I double-check the security by gently tugging on it. If it feels loose, I remove it and reattach it to ensure a proper fit. Keeping an eye on these small details can make a significant difference in my photography experience and results.
Strategies for Rapid Lens Swaps On Site
Practice using faster attachment methods, such as using a quick-release plate for your camera. This allows rapid lens changes without fumbling with tripod connections. I find this significantly speeds up transitions, especially during spontaneous moments.
Avoid unnecessary exposure to dust and moisture by maintaining an organized, covered space for your equipment. I always keep a lens pouch or dedicated bag at hand. This helps in protecting both the current lens and the one I plan to switch to.
Key Tips for Easy Lens Transitions
- Use an extra lens cap or pouch to secure the lens being removed.
- Keep a microfiber cloth close for quick cleaning of any smudges or debris.
- Make use of shoulder straps to keep your gear within reach, minimizing movement.
- Practice changing lenses with your eyes closed to enhance muscle memory.
- Consider using prime lenses with larger openings for versatility in varying light conditions.
By implementing these strategies, I can quickly adapt to different shooting scenarios without losing valuable time or compromising on quality.
Best way to change camera lenses in the field
Durable Waterproof Hard Case for Cameras
Features
| Model | 1154719 |
| Color | Black |
Think Tank Rain Cover for Cameras
Features
| Part Number | 006227 |
| Model | 006227 |
| Warranty | Limited Lifetime Warranty |
| Color | Black |
| Size | 300-600mm |
Protective Lens Pouch for DSLR Lenses
Features
| Part Number | DSLR Lens Pouch |
| Model | BL-0012 |
| Color | Black |
| Size | BL-0012 |
Stylish E Mount Cine Cap for Cameras
Features
| Part Number | KB-Sony-BC |
| Model | Sony-BC |
| Warranty | KONDOR BLUE | LIFETIME WARRANTY: Our Lifetime Warranty covers defects in materials and workmanship for the lifetime of Kondor Blue brand products. Only original, unaltered, and unmodified materials and workmanship are covered by this policy. This lifetime warranty does not cover damage caused by normal wear and tear, improper care, misuse, accident, neglect, or the natural breakdown of materials over time. Products must be returned to us for evaluation. We will inspect the product at no charge to you. If the Warranty Department determines, in its sole discretion, that the product has a defect in materials or workmanship covered under this Warranty, we will repair or replace within approximately two weeks of inspection. Damages due to improper care or accident may be repaired at a reasonable rate. This Lifetime Warranty lasts for the practical life of the product. Coverage ends if you sell or transfer the product. Proof of purchase is required. Shipping fees not covered. |
| Color | Space Gray |
| Size | Sony E Mount Cap |
400-Pack Microfiber Towels for Various Uses
Features
| Part Number | 400PCS |
| Model | 400PCS |
| Color | 5 Colors |
| Size | 400 Pack |
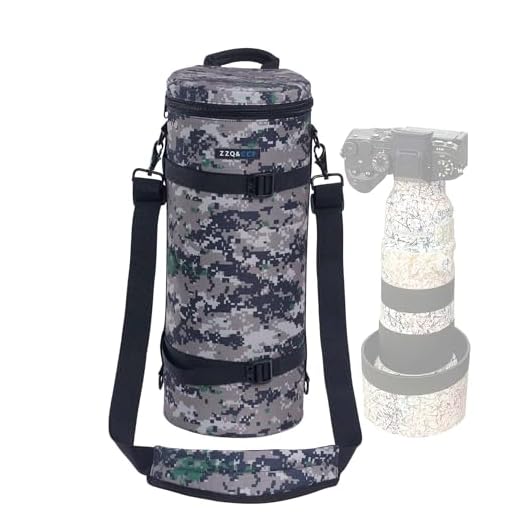
Water-Resistant Lens Pouch for Sony Lenses
Features
| Part Number | ZZQ&CCF for Sony 400-800 Pouch Case |
| Model | MY-A77 |
| Color | #UCP |
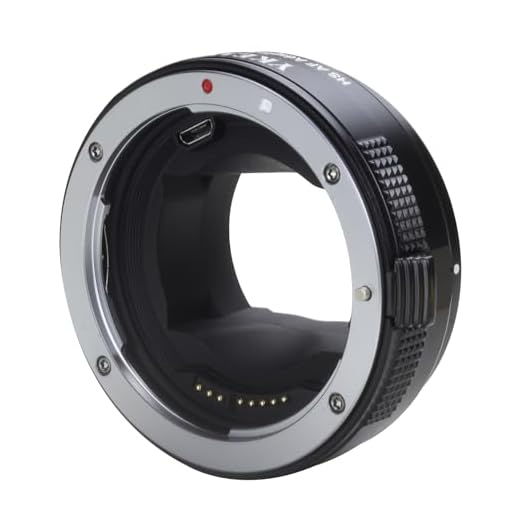
Canon Lens Adapter for Sony E Mount
Features
| Part Number | EF-E |
| Warranty | 1 Year Manufacturer |
FAQ:
What is the best way to change camera lenses without exposing the sensor to dust?
To minimize dust exposure when changing lenses, first find a sheltered location away from wind, dust, or debris. It’s helpful to position yourself with your back to the wind. Before switching lenses, turn off the camera; this will help reduce static and dust attraction. Hold the camera facing downward while you change the lens, which helps prevent dust from falling into the camera body. If possible, do this quickly to minimize the time the sensor is exposed to the environment.
Is there a specific technique for keeping lenses safe while changing them outdoors?
Yes, there are several techniques you can use to protect your lenses. First, use a lens pouch or case to store your unused lens, keeping it safe from bumps and scratches. When changing lenses, try to do it in a shaded area or inside a vehicle to protect from harsh elements. A lens cap should always be kept on the unused lens until you are ready to use it to prevent accidental damage. Additionally, practicing your lens change in a controlled environment can help you become quicker and more efficient in the field.
What should I do if I drop my lens while changing it outdoors?
If you drop your lens, the first step is to inspect it carefully for any visible damage. Check both the glass elements and the mount for any cracks or dents. If the lens appears structurally sound, you can test it on your camera to see if it functions properly. However, if you notice any issues such as cracks in the glass or malfunctioning autofocus, it’s best to have it checked by a professional technician. Always keep a microfiber cloth handy for cleaning lenses in case they get dirty upon impact.
How can I avoid losing a lens cap while shooting?
To prevent losing your lens cap, consider using a lens cap leash. This small accessory attaches the cap to your camera body, so it stays connected even when removed. Some photographers also attach the cap to their camera strap or backpack to keep it secured. If you’re prone to misplacing caps, designate a specific pocket or spot in your bag for storage until it’s needed again. You can also choose to use a lens with a built-in lens hood, which can provide extra protection while reducing the need for a cap.
Are there any tools or accessories that assist in changing lenses in a field environment?
Yes, certain tools and accessories can make changing lenses easier. A lens changing bag provides a dust-free environment to switch lenses and can be particularly useful in windy or dusty conditions. Additionally, using a comfortable camera strap that allows for quick access can facilitate faster lens changes. Some photographers also prefer using a camera bag with designated compartments for each lens, helping to keep everything organized and accessible while working outdoors.