Using a dedicated lens pouch made from quality materials is an excellent choice for transporting additional optics securely. I’ve found that many photographers benefit significantly from investing in a well-designed bag that offers both protection and easy access. This article focuses on practical tips and recommendations for individuals looking to enhance their photography experience by ensuring their gear is organized and safely stored.
The insights shared here are tailored for enthusiasts, professionals, and hobbyists alike, showcasing efficient accessory options and ideal practices. We’ll explore various types of carriers, like sling bags, specialized backpacks, and belt systems, emphasizing versatility and comfort while on the move.

Whether you are on a landscape shoot or capturing a bustling cityscape, keeping your glass protected and easily reachable is key. By adopting the strategies outlined herein, you can optimize your workflow and enhance your shooting experience, ensuring each valuable moment is captured flawlessly.
Best Method to Transport Additional Photography Gear
I find that using dedicated lens pouches is an excellent approach for transporting additional photographic equipment. These pouches are specifically designed to provide protection while being lightweight and portable. I opt for pouches with cushioned interiors and secure closures, which prevent any unwanted movement during travel.
Another effective solution involves using a modular system. This enables me to customize my bag based on the lenses I need for a particular shoot. By integrating a lens case that attaches to my main bag, I keep my gear accessible while maintaining organization.
Additional Strategies
Consider the following options:
- Opt for a bag with removable dividers to securely hold multiple lenses.
- Use lens wraps made from soft fabric that can be easily stored in a larger bag.
- Explore waist packs, which allow fast access without the need to set down a larger backpack.
After implementing these strategies, I feel more at ease knowing my valuable equipment is well-protected and organized. Whether hiking or exploring urban landscapes, I can always find the perfect shot without the hassle of misplacing or damaging my gear.
Selecting the Right Lens Bags for Your Gear
Choosing the right storage solutions for my additional optics has greatly improved my shooting experience. I prioritize selecting bags that offer both protection and convenience. Ensuring my accessories remain secure while allowing for easy accessibility during shoots is essential to my workflow.
First, I evaluate the size and type of my equipment. Padded pouches or dedicated lens cases provide excellent cushioning and support. I prefer bags with adjustable dividers, which allow for customized configurations based on my specific needs. This flexibility ensures that each piece of equipment is snugly fit, minimizing any chance of movement or damage.
Considerations for Lens Bags
- Material: Look for durable, weather-resistant fabrics that protect against moisture and dust.
- Weight: Opt for lightweight options to ensure ease of transportation without compromising strength.
- Pockets and Compartments: Additional storage for accessories like filters, hoods, and cleaning kits can be invaluable.
I also find it useful to have a bag with external attachment points for carrying tripods or other gear. This feature allows for increased versatility while out in the field. Additionally, I consider ease of access during shoots; bags that open wide or have quick-access pockets can save precious moments while photographing.
It’s important to test out different bags in real-world scenarios to determine how they perform under pressure. Ultimately, the right choice enhances my experience and ensures my lenses are protected, organized, and ready for use whenever I need them.
How to Organize Lenses Within Your Camera Backpack
I prefer using padded dividers to separate different optical attachments within my backpack. This not only protects them from scratches but also keeps them easily accessible. Placing the heavier items at the bottom creates a stable foundation, preventing any unnecessary movement during transit.
An additional tip is to use lens pouches for extra cushioning. These can be placed in various compartments of the bag, ensuring that each piece has its own secure spot. I find it helpful to label these pouches, making quick identification possible when I need a specific attachment.
Arranging Accessories
To maintain an organized setup, I categorize by focal length or type. For instance, I group wide-angle optics in one section and telephoto units in another. This method streamlines my workflow, especially during shoots where time is of the essence.
- Consider using a modular system, where compartments can be adjusted based on the specific outing.
- Ensure that all necessary accessories, like lens caps and cleaning cloths, are stored within reach to avoid the hassle of searching.
I also recommend keeping a small notebook or a digital device for jotting down notes about which attachments work best in different lighting conditions. This way, I can quickly remember my preferred choices for various scenarios.
| Category | Storage Method |
|---|---|
| Wide-Angle | Padded Dividers |
| Telephoto | Lens Pouches |
| Macro | Dedicated Compartment |
Arranging and securing my optical gear thoughtfully not only provides protection but also enhances my photographic experience. With everything in its place, I can concentrate on capturing the moment.
Essential Accessories for Secure Lens Transport
Utilizing a dedicated padded lens pouch significantly enhances the safety of your optics during transit. These pouches, crafted from shock-resistant materials, not only shield against impact but also provide moisture protection. I prefer those with modular designs, allowing me to customize my setup according to my specific needs.
A reliable lens carrier can complement the pouch, ensuring ease of transport. I favor bags equipped with adjustable dividers, which help organize different focal lengths and sizes efficiently. This prevents unintended collisions and potential damage while moving, whether on foot or in a vehicle.
Additional Protective Measures
- Lens Caps: Always use front and rear caps to guard against dust and scratches.
- Microfiber Cloth: A soft cloth is essential for cleaning the glass without leaving scratches.
- Weather-Sealing: When applicable, utilize weather-sealed gear to protect against moisture and dust.
- Quick Detach Straps: These foster a secure yet accessible means of attaching lenses to my camera bag.
After ensuring the proper organization of equipment, I always double-check the closure mechanisms of my bags and pouches. Zippers and clasps should operate smoothly to prevent any accidental openings during transport.
| Accessory | Function |
|---|---|
| Padded Pouch | Shock absorption and moisture protection |
| Adjustable Dividers | Customizable organization |
| Lens Caps | Dust and scratch protection |
| Microfiber Cloth | Safe cleaning |
Investing in these accessories not only safeguards my equipment but also streamlines my workflow, allowing for a more enjoyable photography experience. Careful preparation ensures that I can focus on capturing moments, rather than worrying about my gear.
Strap Systems: Enhancing Comfort While Carrying Lenses
I’ve discovered that investing in a reliable strap system can significantly improve my experience while transporting additional glass. A well-designed strap not only distributes weight effectively but also allows easy access, minimizing strain during extended outings. Comfort becomes an essential factor, especially during long shoots or hikes.
The choice of materials and design features can greatly influence comfort. A padded strap that conforms to the shoulder helps reduce fatigue, while adjustable lengths accommodate different carrying styles. When selecting a strap, I consider options with breathable fabrics to enhance ventilation and moisture management during warmer weather.

Types and Features to Consider
Several characteristics are noteworthy when selecting a strap system:
- Adjustability: Ensures a personalized fit, reducing tension and enabling seamless adjustments on the go.
- Padded Options: Cushioned designs provide support, particularly beneficial during long periods of use.
- Quick-Release Mechanisms: Allows for efficient attachment and detachment, which is ideal for rapid scene changes.
- Compatibility: Ensures that the strap works with different types of gear solutions and accessories.
In addition, layering components such as chest or hip straps can further balance the weight distribution, making the overall experience more enjoyable. The versatility of these systems means I can customize my setup depending on the situation, whether I’m shooting in a crowded event or wandering through nature.
Ultimately, a thoughtful approach to selecting the right strap system can lead to less discomfort during sessions and greater productivity in capturing the moment. The focus should remain on comfort, accessibility, and the adaptability that these systems offer to enhance my photographic endeavors.
Travel-Friendly Solutions for Lens Protection
Utilizing padded lens sleeves provides an excellent strategy for safeguarding fragile optics during transit. These lightweight wraps easily fit into bags without adding unnecessary bulk. I prefer models with a secure closure to ensure that my equipment stays protected from dust and damage.

An equally effective option is soft cases designed explicitly for storage. Many manufacturers offer such pouches that provide cushioning along with a water-resistant exterior. I found that cases with belt loops or carabiner clips offer added convenience, allowing me to attach them to backpacks or even belts.
Compartmentalized Organizers
Employing compartmentalized organizers enhances both accessibility and protection. These organizers come fitted with multiple padded sections, enabling me to store various pieces without risk of collision. I tend to choose ones with adjustable dividers, providing the flexibility to customize as per my equipment size.
- Look for organizers that have sturdy zippers for reliable closure.
- Pockets for filters or other accessories can be a beneficial addition.
When selecting a travel-friendly solution, I also consider the weight of the product. Heavy cases may diminish practicality during extended trips. Thus, I often opt for lightweight yet robust designs that maintain a balance between safety and convenience.
Remember to think about the materials used in construction. High-quality nylon or similar fabrics tend to resist wear and tear, providing assurance that my equipment remains safe. Researching user reviews can provide insights into which products withstand the rigors of travel.
Innovative Lens Pouches: Compact and Versatile Options
I often find myself needing to transport additional optics securely and conveniently, and I’ve discovered innovative pouches that serve this purpose remarkably well. These pouches are designed to be compact yet spacious enough to accommodate various sizes of optics, providing excellent protection without adding significant bulk to my gear.
What I appreciate most about these pouches is their versatility. They typically feature adjustable compartments and modular designs that allow me to customize the interior layout based on my specific requirements. This adaptability is crucial during shoots where quick access to different optics can make a substantial difference.
Key Features
Many of these pouches come with weather-resistant materials, ensuring that my equipment stays dry even in unpredictable conditions. Some also include padded dividers, which prevent internal shifting and accidental impacts, and secure closures to enhance safety.
- Lightweight construction for ease of transport.
- Multiple attachment points for harnesses and belts.
- Quick-release mechanisms for fast access.
Furthermore, these pouches can often be used in various capacities, whether attached to a backpack, belt, or even used as standalone cases. This functionality allows me to optimize space and keep my gear organized and readily available during shoots.
Investing in quality pouches has transformed how I manage my optics. Keeping them safe and accessible empowers me to focus more on capturing the moment rather than worrying about my gear.
Shoulder Bags vs. Backpack Systems
Choosing between a shoulder bag and a backpack system for transporting additional photographic equipment involves weighing the advantages and disadvantages of each option. Personally, I tend to lean towards one over the other depending on the situation and my needs.
Shoulder bags offer immediate access to my gear, which is crucial during fast-paced shooting moments. They tend to be more stylish and can easily blend in with everyday attire. However, they can become uncomfortable after prolonged use, especially if I’m carrying hefty items. The weight distribution often leads to shoulder strain if I’m walking long distances.
Shoulder Bag Advantages and Disadvantages
- Pros:
- Quick access to gear
- Stylish appearance
- Lightweight for short excursions
- Cons:
- Poor weight distribution for long wear
- Potential strain on the shoulder
- Limited storage capacity
On the other hand, backpack systems distribute weight more evenly across both shoulders, which makes for a more comfortable experience during long hikes or entire day outings. I appreciate the extra pockets for organization and the ability to carry more gear without strain. However, accessing my equipment can be cumbersome, requiring me to set the backpack down or take it off completely.
Backpack System Advantages and Disadvantages
- Pros:
- Better weight distribution
- Increased storage capacity
- More organizational features
- Cons:
- Slower access to gear
- Bulkier appearance
- Can feel heavy if overpacked
Ultimately, the choice comes down to my shooting style and the environments I frequent. For quick trips or city photography, a shoulder bag can be ideal, while extended outdoor adventures call for the practicality of a backpack system.
Quick Access Techniques for On-the-Go Photographers
I often use several strategies to ensure quick retrieval of my spare optics while shooting. One of the simplest and most effective methods involves utilizing lens pouches that are designed for easy attachment to belts or bags. These pouches provide not only protection but also allow for quick access, enabling me to switch lenses seamlessly.
An additional technique I prefer is wearing a camera strap with lens holders. This allows me to keep one lens ready on my body, making transitions between shots rapid. Moreover, I find that having a modular bag system aids in organizing and securing my gear, ensuring I can grab what I need without fumbling.
- Utilize lens pouches for belt or bag attachment.
- Wear a strap with integrated lens holders for accessibility.
- Employ modular bag systems for efficient organization.
- Consider using quick-release connectors for faster lens swaps.
- Use hard cases for long-distance transport, switching to soft cases for on-the-go ease.
In conclusion, investing in the appropriate accessories and techniques significantly improves my photographic experience. It’s all about finding the right balance between protection and accessibility, ensuring I capture every fleeting moment efficiently.
Best way to carry extra camera lenses
BPAULL Lens Pouch for DSLR Cameras
Features
| Part Number | DSLR Lens Pouch |
| Model | BL-0012 |
| Color | Black |
| Size | BL-0012 |
MOSISO Camera Backpack with Tripod Holder
Features
| Part Number | MO-15-Cam-HS-Backpack-Black |
| Model | MOCAMHSBG004 |
| Color | Black |
| Size | 44 x 30 x 19 cm |
Lykus PVC1 Waterproof Hard Case
Features
| Part Number | PVC1-2024 |
| Model | PVC1-2024 |
| Warranty | lifetime limited warranty |
| Color | Black PVC1 |
| Size | 16.3 x 13.4 x 6.9 inches |
Pelican ModPak AV Pouch
Features
| Part Number | AVP-D-TRVL-CHAR |
| Model | AVP-D-TRVL-CHAR |
| Color | Charcoal |
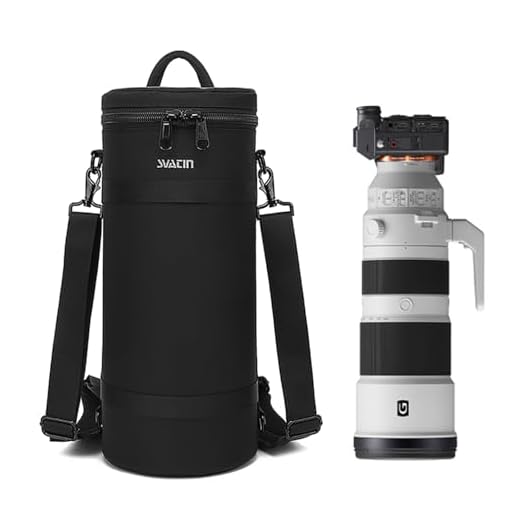
svatin Large Camera Lens Case Bag
Features
| Model | T41 |
| Color | black |
| Size | 17.7 inches (Height) x 8.26 inches (Diameter) |
Peak Design Slide Camera Strap
Features
| Part Number | SL-BK-3 |
| Model | SLBK3 |
| Color | Black |
| Size | 145 |
| Language | English |
Urth Arkose Camera Insert Bag
Features
| Part Number | UBCCSA-BLK |
| Model | UBCCSA-BLK |
| Warranty | Urth – Lifetime coverage on camera straps, clips, and bags; 3‑year coverage on cleaning/lifestyle accessories. Covers manufacturing defects; excludes regular wear. |
| Color | Black |
| Size | Small |
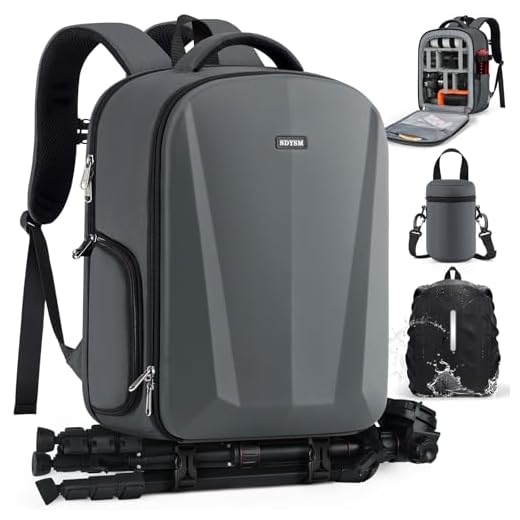
SDYSM Hardshell Camera Backpack
Features
| Part Number | ZEC-SY20016-Gray-US |
| Model | ZEC-SY20016-Gray-US |
| Color | Grey |
FAQ:
What are the best types of bags for carrying extra camera lenses?
When it comes to carrying extra camera lenses, several bag types excel in providing protection and convenience. A dedicated camera backpack is highly recommended due to its padded compartments that safeguard your lenses. These backpacks often have customizable sections to fit a variety of lens sizes. Alternatively, a shoulder bag can be suitable for quick access while on the go, though it may not provide as much padding as a backpack. Another option is a lens case that can attach to your belt or bag, allowing you to carry lenses separately while keeping them secure. Whichever option you choose, consider the level of protection and ease of access you need based on your shooting style.
How can I ensure my extra camera lenses are protected while being transported?
To ensure your camera lenses are well-protected during transport, start by using padded lens cases or dedicated lens pouches that fit snugly around each lens. Make sure to keep the lens caps on at all times to prevent dust and scratches on the glass. If you are using a larger bag, arrange your gear so that the lenses are not touching hard surfaces directly and use dividers to prevent movement. Consider investing in a bag that is weather-resistant for outdoor shoots, providing an extra layer of protection against the elements. When packing, avoid placing heavy items on top of your lenses to reduce the risk of damaging them during transit.