

I recommend utilizing a compact, padded backpack designed specifically for photographers. This type of bag offers both protection and organization, allowing me to securely store my equipment without the bulk of a larger case. Choosing a model with customizable dividers ensures that my gear is firmly held in place, minimizing the risk of damage during transit.
In this article, I will outline various strategies for seamlessly traveling with a primary device and two interchangeable optics. I will cover essential accessories, such as lens pouches and quick-access pockets, which enhance convenience while on the move. This guide is particularly beneficial for enthusiasts looking to streamline their setup without sacrificing functionality.

Key points include the advantages of lightweight materials to reduce strain, specific brands that excel in portability, and tips for efficiently accessing gear in dynamic environments. Whether you’re hiking in nature or attending an event, these insights will help maintain readiness while ensuring everything is kept safe and secure.
Best Method to Transport a Camera with Two Lenses
I recommend using a well-fitted sling bag specifically designed for photography gear. This type of bag allows for quick access to your equipment while ensuring comfort during long walks. The padded compartments help protect your gear while keeping everything organized and easily accessible.
To maximize space and functionality, I suggest using lens pouches that can be attached to the outside of your sling bag. This arrangement offers an opportunity to carry lenses separately without sacrificing safety or accessibility. Additionally, it can help distribute weight more effectively, resulting in a more balanced carry.
Tips for Structuring Your Gear
Organize the interior of your bag effectively: Place the camera body in a dedicated compartment. Position the largest lens closest to the camera for easy attachment, while storing the second lens in a side pocket or a separate lens pouch.
- Select a sling bag with adjustable straps for a custom fit, reducing strain during extended use.
- Regularly check and tighten any loose straps to prevent accidents that may occur while moving around.
- Utilize lens caps and camera body covers to shield your equipment from dust and potential damage.
Consider external accessories: A small tripod can be mounted externally or packed tightly within your sling bag as needed. Choosing a lightweight model can streamline your configuration without compromising your mobility.
By following these suggestions, transporting your photography essentials becomes straightforward and enjoyable, allowing you to focus on capturing the perfect shots instead of worrying about your gear.
Selecting the Right Bag for Your Gear
Choosing an appropriate bag for your photographic equipment involves assessing both functionality and comfort. First and foremost, I prioritize the amount of padding and protection the bag offers. My gear deserves to be safeguarded against impacts, moisture, and dust, so a well-padded compartment is a must.
Next, the organization within the bag plays a key role in my decision. I look for customizable dividers that allow me to arrange my equipment in a way that suits my workflow. This setup saves time when I need to access my gear quickly and effectively. I also appreciate bags with additional pockets for accessories like batteries, memory cards, and filters.
Comfort and Portability
While carrying my gear, comfort is essential. I look for adjustable straps and ergonomic designs that don’t strain my back or shoulders. An option with a chest strap can distribute weight more evenly and make transporting my equipment much easier.
Durability is another factor. I choose materials that stand the test of time, whether it’s a waterproof fabric to protect against the elements or high-quality zippers that won’t fail under stress. A reliable bag simplifies my photographic excursions.
Lastly, the style of the bag is not overlooked. I prefer a design that balances professionalism and casual aesthetics, allowing me to blend into different environments seamlessly. Ultimately, the right bag should reflect my personal style while serving the practical needs of my equipment.
Organizing Your Equipment for Quick Access
I find it essential to arrange my gear in a manner that allows for swift retrieval, ensuring I can capture moments without delay. A well-structured approach begins with selecting an appropriate bag that fits your equipment securely while providing easy access.
In my experience, using padded compartments helps protect each piece and prevents them from knocking against one another. I designate one side for the main device, ensuring it is the most accessible part of the setup. Similarly, lenses should be organized based on their frequency of use; the one I utilize most often stays at the top or the front of the bag.
Optimal Arrangement Techniques
Within the bag, I use smaller cases or pouches for accessories such as filters and batteries. This keeps everything organized and prevents the need to rummage through loose items.
- Labeling: I label each compartment for clarity, streamlining quick identification.
- Padding: I choose compartments that are not just protective but also help in sound dampening, ideal for public settings.
- Weight distribution: I place heavier items at the bottom to maintain balance, reducing strain while carrying.
Having a dedicated lens cap container also saves time. I can quickly grab the required cap while ensuring it doesn’t get misplaced. This simple addition significantly enhances my workflow.
By following these methods, I maximize efficiency, allowing for quick access to my apparatus, and ultimately enhancing my capturing experience.
Choosing the Best Lens Options for Different Situations
In a variety of scenarios, having the right optics can significantly enhance the quality of your images. Every setting demands specific capabilities, so understanding which focal lengths and apertures to utilize is key. For instance, in a tightly composed space, a wide-angle lens is invaluable as it allows capturing more within a limited frame.
Conversely, for portraits or subjects needing isolation from the background, a lens with a longer focal length paired with a wide aperture excels in creating that soft bokeh effect. Selecting lenses based on the scene enhances not just composition, but the emotional impact of your photography.
Lens Selection for Varying Scenarios
Here are some recommendations to help you decide:
- Indoor Events: Opt for a wide aperture lens to ensure adequate lighting. This is effective for low-light conditions and helps achieve a blurred background.
- Outdoor Portraits: A lens with a longer focal length provides flattering compression and depth of field, isolating the subject while keeping background distractions minimal.
- Landscapes: A wide-angle lens is preferred for expansive scenes. It captures more of the sky and ground, providing a grand perspective.
- Street Photography: A versatile zoom lens is ideal here, allowing for adaptability while capturing candid moments from varying distances.
Experimenting with different optics in distinct environments reveals how they interact with light and space, ultimately shaping your creative vision. Keeping a well-rounded assortment tailored to your most frequent shooting styles ensures you’re prepared for any photographic opportunity that arises.
Using Lens Pouches for Added Protection
Choosing high-quality pouches for my optics significantly enhances their security and longevity. These accessories allow me to transport my gear without worrying about scratches, bumps, or other forms of damage that can occur during travel. The added cushioning of fabric and padded interiors offers a reassuring shield against unexpected impacts.

When selecting pouches, I focus on snug fits tailored to each specific lens size. This not only prevents movement within the pouch but also makes it easier to grab the lens I need without unnecessary fumbling. I often opt for ones with exterior pockets, allowing me to store additional items like lens caps or cleaning cloths, keeping my workspace organized and efficient.
Benefits of Using Lens Pouches
- Protection: They act as a barrier against dust and scratches.
- Portability: Lightweight materials make them easy to carry along.
- Organization: Dedicated space for each lens prevents tangling and damage.
- Accessibility: Quick access to lenses during shoots enhances workflow.
In my experience, using pouches not only ensures the safety of my lenses but also improves my overall shooting experience. Selecting the right materials, such as water-resistant fabrics, adds another layer of defense against the elements.
Incorporating pouches into my routine reflects my commitment to maintaining gear in pristine condition while promoting a more organized approach to photography.
Creating a Lightweight Setup for Travel
When planning a trip, I prioritize minimizing weight. A streamlined approach includes a compact body and versatile optics, balancing flexibility and size. Selecting lightweight materials for each component significantly reduces the overall load.
One effective strategy is to opt for a prime lens alongside a zoom. This combination allows me to capture a wide range of scenes without the bulk of multiple fixed lenses. A fast prime can also excel in low-light conditions, which is invaluable during evenings or indoor settings.

Additional Tips for Traveling Light
- Choose an all-weather protective case that offers comfort and durability, ensuring my setup remains secure without unnecessary weight.
- Incorporate a lightweight tripod that folds compactly, ideal for long exposures or panoramic shots while taking up minimal space.
- Consider using a shoulder bag or waist pack designed for photographers, providing quick access to my gear while keeping hands free for other tasks.
Preparation plays a key role; testing gear beforehand helps in making adjustments to my collection and understanding what is truly necessary for the trip. Each item should serve a clear purpose, reducing any temptation to overpack.
I ensure my batteries are charged and memory cards formatted, ready to capture every moment. This prevents last-minute hassles and contributes to a smoother travel experience.
Incorporating Accessories Without Adding Bulk
I prioritize minimalism in my photography setup. A streamlined approach allows me to focus on creativity rather than being weighed down by unnecessary items. Choosing compact accessories is essential to keep my gear light and manageable.
One accessory that fits seamlessly into my routine is a multi-functional lens pouch. This compact solution holds multiple filters or lens hoods without consuming extra space. I often attach it to my belt or sling bag, making it easily accessible while preventing clutter. Additionally, I find using a small, lightweight tripod beneficial; it can be stored in my bag without taking up excessive room.
Utilizing Smart Organizers
Smart organization plays a big role in maintaining efficiency. A padded camera insert fits snugly into my messenger bag, providing protection without adding bulk. I arrange my equipment strategically, placing heavier items closer to my back for better weight distribution. This method enhances comfort during longer outings.
For other small items, I use a compact tech organizer. This miniature case holds chargers, cables, and other essentials, keeping everything tidy and in one place. Choosing accessories with multiple uses helps minimize the number of items I need to carry. For instance, a lens cleaning cloth can double as a small accessory pouch.
- Opt for lightweight options when selecting gear.
- Employ multi-functional cases to maximize space.
- Prioritize smart organization for better accessibility.
I embrace versatility and efficiency with every addition to my setup. This thoughtful approach ensures I remain agile and ready to capture life’s moments without the burden of excessive equipment.
Maintaining Comfort While Transporting Your Gear
Choose a padded bag specifically designed for photo equipment. This will minimize discomfort and protect your apparatus. A sling or messenger style bag allows for quick access while distributing weight evenly across your body.
Incorporating a few ergonomic practices can significantly enhance your experience. Adjust your straps to fit snugly without compromising circulation, and switch the side carrying it periodically to avoid fatigue.
- Lightweight Options: Select lighter materials for bags and accessories.
- Smart Packing: Organize items efficiently to keep the weight balanced.
- Comfortable Straps: Invest in padded, wide straps that reduce pressure points.
- Frequent Breaks: Take regular pauses to stretch and relieve tension in your muscles.
Adapting your procedures aligns with your comfort levels and physical condition. Find what suits you best and monitor your discomfort over time.
- Evaluate your load regularly for unnecessary items.
- Consider using a tripod with a carrying case for easy transport.
- Invest in a good-quality lens pouch for additional convenience.
Ultimately, maintaining comfort hinges on the right bag, efficient packing, and breaks during usage. Optimize your setup, and you’ll enjoy the creative process without the burden of discomfort.
Best way to carry around one camera and two lenses
MOSISO Waterproof Camera Backpack with Tripod Holder
Features
| Part Number | MO-15-Cam-HS-Backpack-Black |
| Model | MOCAMHSBG004 |
| Color | Black |
| Size | 44 x 30 x 19 cm |
BPAULL Lens Pouch for DSLR Lens Protection
Features
| Part Number | DSLR Lens Pouch |
| Model | BL-0012 |
| Color | Black |
| Size | BL-0012 |
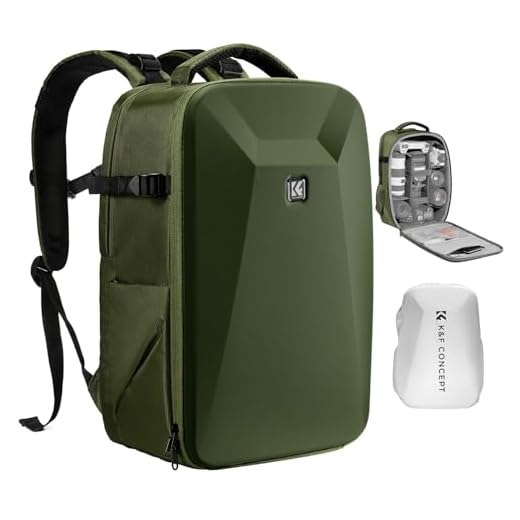
K&F Concept Hardshell Camera Backpack
Features
| Part Number | USKF13.134V3 |
| Model | KF13.134V3 |
| Warranty | Warranty:6-month |
| Color | Green |
| Size | Large |
MOSISO Tactical Camera Backpack with Laptop Compartment
Features
| Part Number | MO-15-Cam-TACLP-Backpack-BK |
| Model | MOCAMTACLPBKPK001 |
| Color | Black |
| Size | 17.13 x 11.81 x 8.27 inches |
Canon EF Telephoto Zoom Lens for SLR Cameras
Features
| Part Number | 6473A015 |
| Model | 6473A003 |
| Warranty | 1 year limited |
| Color | Black |
| Is Adult Product | |
| Release Date | 2000-05-31T00:00:01Z |
| Size | 7.40in. x 4.30in. x 4.30in. |
| Language | English |
Pelican ModPak AV Pouch for Camera Gear
Features
| Part Number | AVP-D-TRVL-CHAR |
| Model | AVP-D-TRVL-CHAR |
| Color | Charcoal |
K&F Concept Ultra Lightweight Carbon Tripod
Features
| Part Number | KF09.077V3 |
| Model | BA225 |
| Color | 60 ''/8KG Load Capacity |
| Size | A225C0/153cm/8kg |
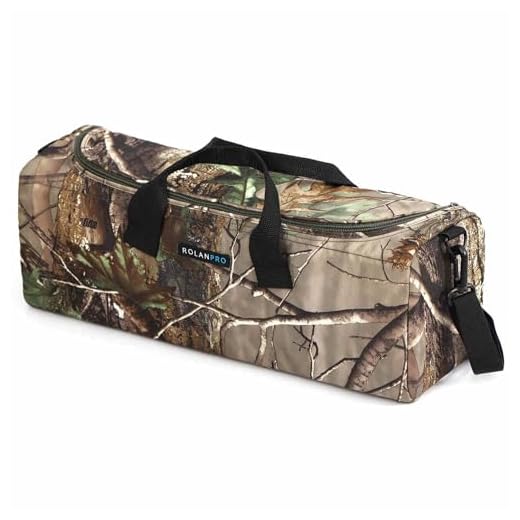
Rolanpro Telephoto Lens Camera Bag
Features
| Model | D1542M |
| Color | Jungle |
| Size | S |
FAQ:
What is the best method to carry a camera with two lenses while traveling?
When traveling with a camera and two lenses, using a quality camera backpack is often the most practical approach. Look for a backpack that has customizable compartments to securely fit the camera body and both lenses. It should also have padding to protect your gear from bumps and drops. Additionally, consider a bag with comfortable shoulder straps and an adjustable waist belt for better weight distribution. Make sure it is lightweight and easy to carry for long periods, especially if you plan to do a lot of walking or hiking during your trip.
Are there specific types of bags recommended for carrying camera equipment?
Yes, there are several types of bags designed specifically for carrying camera gear. A camera backpack is ideal for long outings or travels, as it provides ample space and organization. A shoulder bag can be more accessible for quick photography moments, allowing you to easily retrieve your camera without removing the entire bag. Additionally, some photographers prefer camera inserts that can turn any regular backpack into a camera bag, offering flexibility. When selecting a bag, prioritize size, comfort, and padding for optimal protection of your equipment.
What features should I look for in a camera bag for lenses?
Key features to look for include padded dividers to keep lenses and the camera body from rubbing against each other. Waterproofing is important if you will be shooting in varying weather conditions. Look for external compartments for storing filters, batteries, and cables. Additionally, consider bags with adjustable straps for comfort and a weight distribution system to reduce strain on your back during extended use. Multi-functionality, like a bag that can convert from a camera bag to an everyday backpack, can also be advantageous.
How can I maximize space in my camera bag?
To maximize space in your camera bag, use lens pouches that can be strapped outside the bag for easy access while keeping your main compartment clear. You can also opt for collapsible or lightweight equipment, such as a smaller tripod or lightweight lenses. Organizing smaller accessories, like memory cards and batteries, in zippered pouches can help keep the main compartment tidy and make it easier to find what you need quickly. Lastly, consider removing any unnecessary items that you don’t plan to use on your trip to save space.
What should I do if my camera bag is too heavy to carry comfortably?
If your camera bag feels too heavy, it might be worthwhile to evaluate the gear you are carrying. Remove any non-essential items that you won’t need for your shoot. Alternatively, consider redistributing the weight; some bags allow you to adjust the positioning of heavier items closer to your back for better balance. If the weight is still an issue, you can invest in a lighter bag or utilize a rolling camera bag for easier transport. Remember to take regular breaks to avoid fatigue when carrying heavy equipment.