Choosing the right optical attachment can significantly enhance the clarity and detail of your scans. I recommend considering prime optics with a focal length between 50mm to 100mm to ensure a sharp focus and minimal distortion. These options provide exceptional image quality, especially when capturing flat documents or delicate artworks.
This article addresses enthusiasts, archivists, and professionals seeking to improve their contextual reproductions. I’ll discuss the advantages of various types of optics that can cater to different needs, such as macro capabilities for intricate details, as well as alternatives for wider coverage.

You’ll find insights into specific models, their compatibility with different imaging devices, and tips on how to utilize them effectively. A thorough understanding of these components can transform your archiving process, making it more streamlined and yielding visually stunning results. By the end of this read, you’ll feel equipped to make informed decisions tailored to your digitization needs.
Optimal Lenses for Capturing Images for Digital Conversion
The right choice of optics can significantly enhance the quality of images intended for conversion into a digital format. I recommend using lenses with a wide aperture, as they allow for better light collection and improved detail rendition in various lighting conditions.
When selecting optics, consider focal lengths that provide versatility and sharpness. Standard prime lenses often excel in rendering details, making them a great option for capturing intricate visuals. Zoom optics can also be beneficial, especially those with consistent aperture throughout the zoom range.
Key Features to Look For
- Sharpness: High resolution to ensure clarity and precision in fine details.
- Color Accuracy: Ability to reproduce colors faithfully, crucial for archival work.
- Minimal Distortion: Optics should maintain straight lines in captured images, reducing post-processing work.
- Macro Capabilities: Lenses that can focus closely are important for small objects or fine details.
Observe the differences while testing various optics, as the specific needs of your project can vary significantly. Understanding how each lens interacts with different subjects will aid in making an informed decision.
| Feature | Description |
|---|---|
| Low Light Performance | Wider apertures enable capture in dim settings. |
| Build Quality | Durability is key, especially for frequent handling. |
| Focusing System | Fast and accurate autofocus enhances user experience. |
Choosing the right optic directly influences the fidelity of your digital reproductions. Adjusting to the distinct characteristics of each lens can refine your photographic approach and enhance the overall quality of your work.
Understanding the Importance of Lens Quality in Digitization
Choosing the right optical tool directly impacts image clarity and detail preservation during the scanning process. A high-quality optical attachment will ensure that the intricate features of the subject are captured accurately, which is especially important for archival purposes.
Another aspect is the distortion characteristics of the equipment. Poorly designed optics can lead to curvature and chromatic aberration, which diminish the fidelity of the replicated images. The goal is to achieve precise representations, so investing in reliable optical equipment is paramount.
Factors That Influence Image Quality
- Resolution: The glass elements within the optical system must produce sharp images, eliminating softness at the edges.
- Contrast: High contrast levels can enhance the perceived depth and clarity of an image. Quality lenses maintain excellent contrast across the frame.
- Light Transmission: A lens that transmits light effectively will reduce the need for excessive post-processing adjustments.
- Build Quality: Sturdily constructed optical tools often ensure consistent performance, which is essential during lengthy digitization sessions.
Optical performance is not only about sharpness but also about how colors are rendered. Accurate color reproduction is vital for various applications, including art and document archiving. If the captured image deviates from the original colors, the value of the digitized content might be compromised.
Using high-quality optics facilitates a smoother workflow, minimizing the need for corrections later. Reliability in capturing detail means fewer retakes and lower overall time spent on the entire digitization project.
In conclusion, investing in quality optical tools is foundational for achieving accurate and effective digitized images. The clarity, color depth, and reliability of the equipment directly contribute to the fidelity of the final output.
Features to Look for in Lenses for Archiving Purposes
When selecting an optical attachment for archival imaging, focus on specific functionalities that enhance clarity and detail. Key attributes elevate the quality of captured images, ensuring accurate representation of the original subject.
A significant factor in lens choice is the maximum aperture. A wider aperture allows more light to enter, which improves performance in lower lighting conditions. This feature is particularly helpful when digitizing delicate items or artworks that may not withstand extensive lighting during the process.
Other Important Features
Another crucial aspect is the level of distortion. Using an attachment with low distortion is vital for preserving the integrity of the originals. A lens should provide minimal chromatic aberration to maintain color accuracy, especially for documents with fine text or intricate patterns.
- Focal Length: Choose a lens with a focal length that matches the size of the items being archived.
- Build Quality: Durable construction ensures consistent performance over time.
- Macro Capabilities: If capturing minute details or textures, look for attachments designed for close-up imaging.
- Compatibility: Ensure that the optical accessory is compatible with the imaging device to avoid issues with mounting or image quality.
Lastly, consider the lens’ capability to reproduce colors accurately. The lens should enable the reproduction of hues and tones as close to the originals as possible, reflecting subtle variations that are crucial for archival records.
In summary, a careful evaluation of these features leads to optimal results during the archiving process. Each characteristic plays a significant role in ensuring that the images are true to their original forms.
Comparing Prime vs. Zoom Lenses for Scanning Documents
When I need to capture high-quality images of documents, I often choose between prime and zoom options. Each type offers distinct advantages that cater to different situations in capturing text or images with high accuracy.
Prime options provide fixed focal lengths, which typically result in exceptional sharpness and minimal optical distortion. In many scenarios, this particular lens type clarifies fine details, making it ideal for scanning text-heavy materials where clarity is paramount. Additionally, I appreciate that prime designs often feature larger maximum apertures, allowing for better performance in lower light conditions.
Understanding the Benefits of Each Lens Type
Zoom alternatives offer versatility due to their adjustable focal lengths, which can be helpful in varying environments or when dealing with different document sizes. They enable quick repositioning without the need to switch lenses frequently, which is a significant time-saver during a scanning session. However, the optical quality may not always match that of prime lenses, especially at extreme focal lengths.
| Aspect | Prime Lenses | Zoom Lenses |
|---|---|---|
| Optical Quality | High clarity, minimal distortion | Varies, can have optical imperfections |
| Aperture | Larger maximum apertures | Often smaller maximum apertures |
| Flexibility | Fixed focal length | Adjustable focal lengths |
| Weight | Generally lighter | Can be heavier due to mechanics |
In conclusion, the choice between these options ultimately depends on specific needs. If I prioritize image quality and sharpness, I lean towards primes. If I need flexibility and ease of use during document handling, zoom variants become more appealing.
Recommended Lens Options for High-Resolution Scanning
When aiming for precise scanning results, I find a macro lens to be highly effective. This type of optical device allows for exceptional close-ups, capturing intricate details that standard options might miss. The ability to photograph subjects at a range with minimal distortion is particularly advantageous for archival work.
Choosing a lens with a wide aperture enhances light intake, reducing the need for additional lighting setups. This quality is essential in preserving the original textures and colors of the objects. A good focal length is also important, as it permits flexibility while maintaining sharpness at various distances.
Key Features to Consider
- Magnification Ratio: Look for options that allow 1:1 magnification for true life-size images.
- Optimal Aperture: Wide f-stops facilitate better low-light performance and create pleasing depth of field.
- Image Stabilization: This feature helps to mitigate blur from handshake during handheld shooting.
- High-Quality Glass: Lenses made from superior materials ensure clarity and reduce aberrations.
- Compatibility: Ensure that the chosen lens fits your equipment for streamlined operation.
Utilizing a longer focal length can yield improved results for larger items. Such lenses minimize perspective distortion while allowing for further distance between the camera and subject. This distance is valuable in maintaining a controlled image environment, enhancing detail preservation.
In summary, focusing on macro capabilities, aperture quality, and structural integrity aligns with my goals for high-resolution scanning. These attributes ensure that the nuances of the material are effectively captured, generating results that accurately reflect the original object.
Using Macro Lenses for Detailed Image Capture
Choosing a macro lens significantly enhances the ability to capture intricate details in small subjects. The high level of magnification allows me to explore textures and patterns that would otherwise go unnoticed. When I focus on digitizing documents or small artworks, this level of detail ensures a true representation of the original work.
The benefits of using macro optics extend beyond magnification. These lenses provide exceptional sharpness and clarity, which is vital for archival purposes. By using a macro attachment, I ensure that even fine lines and subtle color variations are accurately reproduced.
Advantages of Macro Optics
Utilizing such lenses offers several clear advantages:
- Precision Magnification: Close-focusing capability reveals minute details.
- Enhanced Depth of Field: Allows for fine control of the focus area, making it easier to capture intricate subjects.
- Reduced Distortion: Ensures that captured images remain true to the original, with minimal alteration of shapes.
When utilizing macro lenses, I always consider the lighting. Proper illumination is key, as even the smallest shadows can affect the quality of the capture. A ring light or diffused lighting setup can help in achieving that perfect shot.
Using a tripod can greatly enhance stability while working with macro shots. The slightest movement can blur details, compromising the integrity of the image. By securing my setup, I maximize the chances of getting sharp, focused images.
In summary, macro optics have transformed how I capture intricate details. The combination of high magnification and precision allows for an unrivaled level of detail in every image.
Evaluating Compatibility with Different Camera Models
When selecting optic equipment, understanding how it interacts with various systems is fundamental. Each unit has distinct specifications that dictate the types of lenses it can accommodate, including differences in mount designs, sensor sizes, and autofocus capabilities.

When I assess compatibility, I first check the mount type. Each brand has its proprietary connectors that require matching. Some optics come with adaptors, but these can sometimes affect performance. It’s imperative to verify whether the chosen item is a native fit orrequires additional modifications.
Understanding Sensor Sizes
Another significant aspect is the sensor size of the unit. Larger sensors can yield higher quality results, but they also mean that the optics used must be designed accordingly. If I use a full-frame piece on an APS-C sensor, for instance, it will not fully utilize the capabilities of the gear, resulting in a crop factor that limits the field of view.
-
Check Compatibility: Always refer to manufacturer’s guidelines or a compatibility chart.
-
Assess Image Circles: Ensure the optic can adequately cover the sensor area for optimal performance.
-
Focus Mechanism: Confirm that autofocus features function harmoniously across different systems.
It’s wise to read user reviews and professional insights about specific combinations. Sometimes, unanticipated issues arise that aren’t immediately clear from the specifications alone. Gathering real-world experiences aids in informed decision-making.
| Factor | Impact |
|---|---|
| Mount Type | Directly influences physical compatibility. |
| Sensor Size | Affects depth of field and image quality. |
| Autofocus | Can vary in accuracy based on the combined systems. |
By meticulously evaluating these factors, I can ensure that the components work together seamlessly, leading to the desired results across different projects.
Tips for Achieving Optimal Light Conditions During Digitization
Utilizing natural light can greatly enhance the quality of the images captured. I recommend setting up your workspace near a large window during the day when sunlight is abundant. Position your materials at a 45-degree angle to the light source to minimize glare and shadows.
If natural light isn’t an option, artificial lighting can be adjusted to create the right environment. Use diffused light sources such as softbox lights or LED panels, and always aim for a color temperature of around 5000K–6500K to ensure accurate color representation.
Practical Steps to Optimize Lighting
- Control shadows: Use reflectors to bounce light and reduce harsh shadows, ensuring a more even lighting across your subject.
- Adjust distance: Experiment with the distance between your light source and the object being captured. This can help balance brightness and prevent overexposure.
- Light positioning: Try positioning multiple light sources at various angles to create depth and reduce flatness in your images.
- Monitor brightness: Use a histogram or exposure meter to check your settings, ensuring details are not lost in highlights or shadows.
- Room arrangement: Keep your workspace clutter-free to avoid unwanted reflections and distractions in the image.
I find it beneficial to test different setups before finalizing the ideal arrangement. Take sample shots and analyze the results critically, making adjustments until the lighting is just right. Achieving precise lighting conditions can significantly improve the quality of your output.
Ultimately, whether using natural or artificial light, consistency is key. Maintain the same lighting conditions throughout your process to ensure uniformity in your results, which will facilitate easier editing later.
Best camera lense for taking photos for digitization
Canon RF35mm F1.8 Macro Lens
Features
| Part Number | 2973C002 |
| Model | 2973C002 |
| Warranty | 1 Year Manufacturer Limited Warranty |
| Color | Black |
| Release Date | 2018-11-15T00:00:01Z |
| Size | 35mm |
Canon EF 50mm f/1.8 STM Lens
Features
| Part Number | 0570C002 |
| Model | 0570C005AA |
| Warranty | 1 year coverage for parts |
| Color | Black |
| Is Adult Product | |
| Release Date | 2015-05-21T00:00:01Z |
| Size | Lens Only |
| Language | English |
| Publication Date | 2019-06-17T00:00:01Z |
ULANZI CL-003 HD Phone Macro Lens
Features
| Part Number | ULANZI Phone Macro Lens |
| Model | ULANZI Phone Macro Lens |
| Warranty | 12 Months |
HB100U Upgraded Macro Lens with Light
Features
| Part Number | APL-FL26 |
| Model | HB100UFL26 |
| Warranty | 1 Year Manufacturer |
| Color | Black |
| Size | HB100UFL26 |
Sony Alpha 7R IV Mirrorless Camera
Features
| Part Number | ILCE7RM4A/B |
| Model | ILCE7RM4A/B |
| Warranty | 1 year limited manufacturer |
| Color | Black |
| Release Date | 2021-06-21T00:00:01Z |
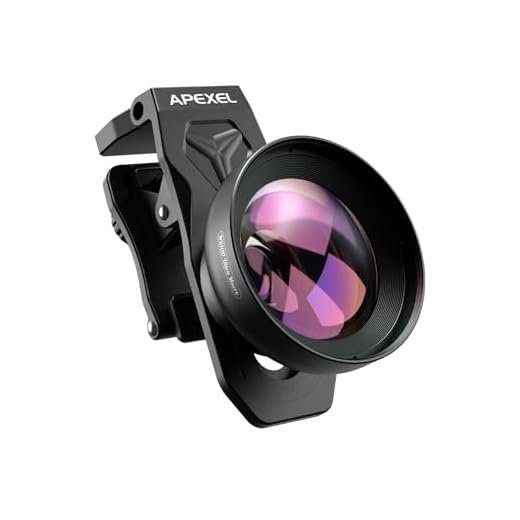
APEXEL 100Ultra Macro Lens for Smartphones
Features
| Part Number | HB100U-US |
| Warranty | 1 year |
Tamron 28-75mm F/2.8 Di III G2 Lens
Features
| Part Number | AFA063S700 |
| Model | AFA063S700 |
| Warranty | 6 Year Limited USA Warranty |
| Color | Black |
| Release Date | 2021-11-18T00:00:01Z |
| Size | Sony FE Mount |
FAQ:
What type of lens is recommended for digitizing photographs?
For digitizing photographs, a macro lens is highly recommended. These lenses are designed to focus closely on subjects, allowing for fine details to be captured without distortion. A good macro lens typically has a focal length of 60mm to 100mm, which provides the necessary magnification for high-quality reproduction of the original image. Additionally, lenses with a wide aperture, such as f/2.8 or f/4, can help in achieving sharp images with good depth of field.
How does focal length affect the quality of digitized photos?
The focal length of a lens significantly influences the perspective and detail captured in digitized photos. A longer focal length allows for a greater working distance from the subject, which is beneficial when avoiding any potential glare from the glass of the photograph. Meanwhile, a shorter focal length may offer a wider field of view, although it might introduce distortion at the edges of the image. For digitization, a mid-range macro lens (around 85mm) often strikes a good balance, providing both sharp detail and the ability to avoid distortion.
What features should I look for in a camera lens for digitizing large format photos?
When digitizing large format photos, it’s best to choose a lens that has a flat field of focus. This feature ensures that the entire image remains sharp from edge to edge, which is crucial for preserving the quality of the original photo. Additionally, look for lenses with minimal chromatic aberration and distortion. A lens with a focal length of around 90mm to 210mm is typically ideal. Having image stabilization can also help reduce motion blur in handheld shooting situations.
Are there specific brands or models of lenses recommended for photo digitization?
Several brands are known for producing quality lenses suitable for photo digitization. Canon’s L-series macro lenses, Nikon’s Micro-NIKKOR lenses, and Sigma’s Art series offer great options. For example, the Canon EF 100mm f/2.8L Macro IS USM lens provides excellent sharpness and image stabilization, making it a popular choice. Additionally, the Nikon 85mm f/3.5G ED VR Micro lens is another great option, known for its clarity and detail in digitizing. Ultimately, the best choice may also depend on your camera system and personal preferences.