When capturing the beauty of the night sky, I’ve found that having the right optic can make all the difference. A wide aperture is a must; I recommend looking for lenses that offer at least f/2.8 or wider. This allows for more light, which is crucial when photographing celestial phenomena.
In this article, I will explore various optics that excel in night sky captures and discuss their unique features. From prime to zoom options, you’ll find insights on how each can enhance your astrophotographic endeavors. Whether you’re a beginner wanting to improve your nighttime shots or a seasoned photographer looking to upgrade, this guide will serve as a helpful reference.
I’ll cover key specifications, such as focal lengths and coatings that minimize flare, along with tips for maximizing your results. By the end, you will have a clear understanding of which optics will best suit your needs when aiming for stunning nocturnal imagery.
Best Camera Lenses for Milky Way Photography
I recommend using a wide aperture lens with a focal length between 14mm and 24mm for capturing the night sky. A lens with a maximum aperture of f/2.8 or wider allows for better light intake, which is crucial when photographing celestial objects. It ensures that the stars remain sharp and pronounced even in low-light conditions.
Another important aspect is the lens construction. Look for models with high-quality optics that minimize lens aberrations and distortions. Good build quality will help in reducing flare and ghosting caused by bright stars and moonlight during your sessions. Additionally, consider lenses with weather sealing if you plan to shoot in varying conditions.
Key Features to Consider
- Aperture: Aim for f/2.8 or wider.
- Focal Length: 14mm to 24mm is ideal for expansive views.
- Optical Quality: Look for lenses that minimize distortion and aberration.
- Build Quality: Consider weather-sealed options for durability.
Using a lens with these specifications enhances the overall quality of the images and allows for a more immersive experience while shooting the night sky. I’ve found that experimenting with different settings and compositions can lead to unique and stunning captures that convey the beauty of the cosmos.
Wide Apertures: Key to Night Sky Clarity
Utilizing wide apertures significantly enhances the clarity and brilliance of celestial photography. By allowing more light to enter the optical unit, a broader aperture captures intricate details of the night sky, revealing stars and nebulae with remarkable sharpness.
The essence of photographing stars lies in maximizing light intake while minimizing movement blur. With a wider aperture, I can achieve lower ISO settings, reducing noise and providing a cleaner image. This is particularly important when capturing the Milky Way, where subtle hues and contrasts are critical for stunning results.
Impact of Aperture on Night Sky Photography
Wide apertures do more than just allow in light; they influence depth of field and overall image quality. Here are a few elements to consider:
- Light Gathering: A larger opening collects more photons, making it easier to capture faint stars.
- Shutter Speed: Faster shutter speeds help prevent star trails, crucial for crisp images.
- Focus Precision: Wide apertures create a shallower depth of field, enhancing focus on celestial points of interest.
In my experience, balancing aperture settings with ISO and shutter speed is key to achieving breathtaking captures of the night sky. Each component plays a role in forming clear and vibrant images of the universe.
Understanding the mechanics behind light capture allows me to experiment more freely, ultimately improving my astrological photography skills. Wide apertures open up creative possibilities, resulting in photographs that not only depict the Milky Way but also convey a sense of wonder and beauty.
Focal Length: Finding the Sweet Spot for Milky Way Shots
For capturing the cosmic beauty of our galaxy, I recommend a focal length between 14mm and 24mm. This range allows for expansive views, enabling me to convey the grandeur of the night sky while including interesting foreground elements. Wider angles help to gather light and minimize distortions in the starry expanse.
When selecting a focal length, I also pay attention to the maximum aperture. A wider aperture, like f/2.8 or wider, is beneficial for collecting more light, which is essential in low-light conditions. This enables me to maintain short exposure times, reducing star trails and enhancing the clarity of celestial objects.
Finding the Right Balance
Using focal lengths on the wider side means I can capture more of the night sky, but it also requires managing distortion especially near the edges of the frame.
- 14mm: Ideal for broad vistas, capturing both the Milky Way and interesting ground elements.
- 24mm: Offers more flexibility with subjects and slightly less distortion while still gathering ample light.
It’s also important to consider the crop factor of my camera sensor. If I’m working with an APS-C sensor, my effective focal length will multiply, requiring adjustments in my technique and composition.
Experimenting with various focal lengths helps me understand how they influence the visual narrative of my work. I often take test shots to compare the effects and find the most compelling combinations of depth, perspective, and clarity in my night sky photography.
Prime vs. Zoom: Which Lens Type for Astrophotography?
When aiming to capture the night sky’s beauty, I often lean towards prime options due to their unparalleled sharpness and wider apertures. These fixed focal length pieces provide minimal distortion and superior clarity, which are essential for detailed star and celestial imaging. The larger maximum aperture also aids in gathering more light, allowing for shorter exposure times and reduced noise in my photographs.
On the other hand, zoom lenses offer versatility that can’t be overlooked. Their adaptability enables me to frame shots quickly, adjusting the zoom to various subjects without changing my position. This feature is particularly useful when dealing with unpredictable conditions like moving clouds or shifting perspectives in a wide night sky.
Factors to Consider
- Sharpness: Prime lenses excel in sharpness across the entire frame, while zoom lenses might show slight softness at the extremes of their focal range.
- Aperture: A wider aperture on primes allows for excellent low-light performance and the ability to isolate objects with shallow depth of field.
- Weight and Size: Typically, primes are lighter and more compact, making them easier to carry during hikes to remote locations.
- Flexibility: Zooms eliminate the need to switch lenses, which can save time and prevent potential weather damage during long sessions.
In my experience, the choice between prime and zoom comes down to the specific requirements of each shoot. If I am set on capturing detailed star fields or deep-space objects, prime lenses usually deliver superior results. However, for general astrophotography or when I wish to photograph various elements of the night sky without switching gear frequently, zoom lenses make the process much more convenient.
Lens Coatings: Enhancing Star Detail and Reducing Flare
Using quality lens coatings significantly improves the results I achieve when capturing celestial wonders. These coatings are meticulously designed to enhance light transmission, which is critical for photographing stars and other night sky phenomena.
One of the advantages of good coatings is their ability to minimize flare and ghosting. This often occurs when bright objects, like stars or planets, are included in the frame, causing unwanted reflections within the glass elements. By choosing optics with advanced multilayer coatings, I can enhance contrast and clarity, ensuring that the vibrant details of the night sky are rendered beautifully.
Types of Coatings and Their Impact
Different types of lens coatings play various roles in image quality:
- Anti-reflective coatings: These reduce lens flare by allowing more light to pass through, which is particularly beneficial in low-light scenarios.
- Hydrophobic and oleophobic coatings: These repel moisture and fingerprints, maintaining optical clarity during shooting sessions and facilitating easier cleaning.
- Protective coatings: These guard against scratches and damage, ensuring the longevity of the optics and maintaining performance over time.
When photographing the cosmos, investing in quality coatings is as important as considering aperture and focal length. The right choice will yield sharper, more defined images that capture the intricate beauty of the universe.
Compatibility with Camera Bodies: Selecting the Right Mount
Choosing the appropriate mount is fundamental to achieving optimal results with your photographic setup. Each mount is tailored specifically to certain brands and types of devices, making it essential to understand the compatibility factors before making a selection.
When evaluating potential optics, I consider factors such as sensor type, focal length compatibility, and physical dimensions. Most mounts are designed to create tight physical connections with the device, enhancing stability and focus accuracy. This precision allows for capturing greater detail in dim lighting scenarios, which is especially beneficial during nocturnal photography.

Key Factors in Selecting the Right Mount
- Brand Matching: Ensure that the optical attachment aligns with the manufacturer’s specifications for your model. This guarantees a secure fit and optimal functionality.
- Sensor Size Compatibility: Understand if your device has a full-frame or crop sensor, as this affects the effective focal length and field of view.
- Focus Mechanism: Review whether the attachment supports automatic focusing or requires manual settings. Compatibility in this area affects user experience and shooting speed.
- Image Stabilization: Check if the attachment provides or is compatible with stabilization features. This can mitigate blur from handheld shooting in low-light conditions.
<pEnsuring compatibility not only optimizes the photographic experience but also enhances the quality of the final images. By carefully selecting the right mount, you can significantly improve your chances of capturing breathtaking visuals under the night sky.
Budget Considerations: High-Quality Lenses at Various Price Points
For those aiming to capture the beauty of the night sky without breaking the bank, I recommend considering options across different price brackets. It’s possible to find sharp and wide optics suitable for astrophotography in a range of budgets, ensuring quality results regardless of financial constraints.
Here’s a breakdown of appealing choices at different price levels:
- Under $500:
- Rokinon 14mm f/2.8 IF ED UMC – A favorite among amateur astronomers, this manual focus lens offers excellent performance at an affordable price.
- Tokina 11-16mm f/2.8 – This versatile zoom is perfect for those who want flexibility while maintaining good low-light capability.
- $500 – $1000:
- Sigma 14mm f/1.8 DG HSM Art – Known for its sharpness and minimal distortion, this optic is excellent for low-light environments.
- Canon EF 16-35mm f/4L IS USM – A more expensive choice, but its image stabilization and versatility make it a worthy investment.
- Above $1000:
- Nikon AF-S NIKKOR 14-24mm f/2.8G ED – This premium lens offers superior optical quality, making it a go-to for serious night sky enthusiasts.
- Canon EF 11-24mm f/4L USM – A superb ultra-wide zoom with incredible image quality and well-regarded by professionals in the field.
In conclusion, setting a budget does not mean compromising quality. The options listed provide a variety of choices that cater to different needs and financial capabilities. Prioritizing wide aperture and focal length is key to successfully photographing the breathtaking wonders of the night sky.
Best camera lense for milkyway pictures
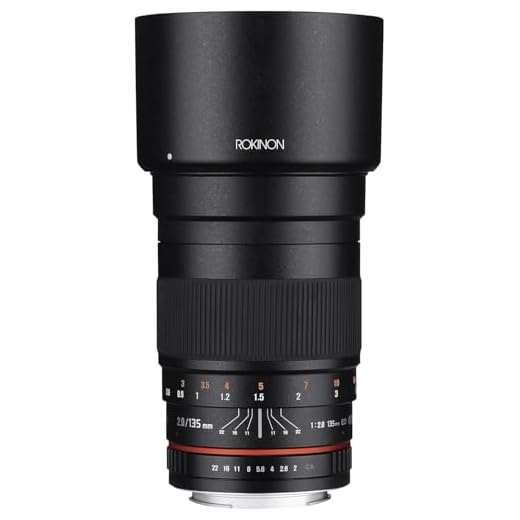
Rokinon 135mm F2.0 Telephoto Lens
Features
| Part Number | 135M-C |
| Model | 135M-C |
| Warranty | Limited 1 Year Manufacturer |
| Color | Black |
| Release Date | 2022-04-01T00:00:01Z |
| Language | English |
Canon EF 50mm f/1.8 STM Lens
Features
| Part Number | 0570C002 |
| Model | 0570C005AA |
| Warranty | 1 year coverage for parts |
| Color | Black |
| Is Adult Product | |
| Release Date | 2015-05-21T00:00:01Z |
| Size | Lens Only |
| Language | English |
| Publication Date | 2019-06-17T00:00:01Z |
TTArtisan 7.5mm F2.0 Fisheye Lens
Features
| Part Number | TT 7.5mm F2.0-E Mount |
| Model | TT 7.5mm F2.0-E Mount |
Canon RF 16mm F2.8 STM Lens
Features
| Part Number | 5051C002 |
| Model | 5051C002 |
| Warranty | 1 year manufacturer |
| Color | Black |
| Release Date | 2021-10-14T00:00:01Z |
| Size | 16 mm |
JINTU 420-800mm Telephoto Zoom Lens
Features
| Part Number | JT-420cn |
| Model | 420-800mm super telephoto lens |
| Warranty | 1 year warranty |
| Color | black |
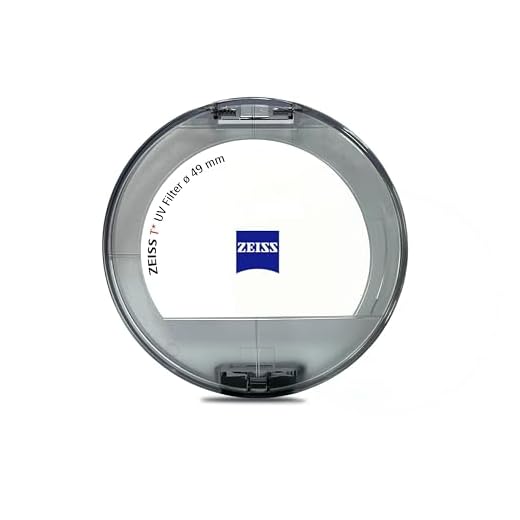
ZEISS T* Anti-Reflective UV Filter
Features
| Part Number | 2003-603 |
| Model | 000000-2003-603 |
| Warranty | Two year limited |
| Release Date | 1900-01-01T00:00:01Z |
| Size | 49mm |
| Language | English |
Canon EF-EOS R Mount Adapter
Features
| Part Number | 2971C002 |
| Model | 2971C002 |
| Warranty | 1 Year Manufacturer Limited Warranty |
| Color | Black |
| Release Date | 2018-10-09T00:00:01Z |
| Size | full-size |
FAQ:
What type of lens is best for capturing the Milky Way?
For photographing the Milky Way, a wide-angle lens is often preferred because it can capture a larger portion of the sky. A lens with a focal length between 14mm and 24mm is ideal, as it allows for expansive views of the night sky. Additionally, a lens with a fast aperture, such as f/2.8 or wider, helps gather more light, making it easier to capture the delicate details of the stars and the Milky Way’s structure.
How does aperture affect Milky Way photography?
The aperture of a lens plays a significant role in Milky Way photography. A lower f-stop number (like f/2.8 or f/2.0) indicates a wider aperture, which lets in more light. This is particularly beneficial when photographing the night sky, as it helps bring out the faint details of stars and the Milky Way. A wider aperture also allows for shorter exposure times, reducing the chances of star trails caused by the Earth’s rotation during longer exposures.
Can I use a zoom lens for Milky Way photography?
Yes, you can use a zoom lens for Milky Way photography, but it’s important to choose one with a suitable focal length and a fast maximum aperture. A zoom lens that covers a range, such as 16-35mm, can provide flexibility in framing the shot. However, be cautious of the lens’s maximum aperture, as some zoom lenses may not open wide enough (typically f/4 or higher) to effectively capture the night sky in low light. Ideally, a fast zoom lens with an aperture of f/2.8 or faster will yield the best results.
What features should I consider when choosing a lens for astrophotography?
When selecting a lens for astrophotography, consider several key features: first, the focal length, with wider ranges (14mm to 24mm) being more suitable for Milky Way shots. Next, the maximum aperture should be looked at; lenses with apertures of f/2.8 or wider allow more light, which is crucial for night photography. Also, check for lens quality regarding sharpness and low distortion, as these factors can greatly affect image clarity. Lastly, consider whether the lens has a sturdy construction and weather sealing if you plan to shoot in remote or variable conditions.