


To enhance your photographic experience, I highly recommend incorporating a specific attachment that minimizes unwanted light and glare. This accessory plays a pivotal role in improving contrast and color fidelity, ultimately leading to more vivid and professional-looking images.
By preventing stray light from entering the optics, this tool significantly reduces the impact of lens flare and ghosting. In situations involving bright light sources, using this attachment can dramatically improve the clarity and quality of your shots. It’s particularly beneficial during outdoor shoots or in high-contrast environments.
Additionally, this accessory offers a layer of protection for the front of your glass. While its primary function is to control lighting, it can also shield the fragile surface from dust, scratches, and accidental impacts, extending the lifespan of your equipment.

I suggest choosing the right size and type that matches your specific optical device, as this will ensure compatibility and maximize its effectiveness. Investing in this accessory can be a straightforward yet impactful upgrade to your photographic toolkit.
Application of Lens Shades
I find that these accessories are invaluable tools for photographers. They serve primarily to block unwanted light sources, which can create glare and reduce contrast in images. By positioning the shade correctly, I can significantly enhance the quality of the captured scene, especially under bright conditions.
Minimizing Flare
In situations with strong light sources, such as the sun or bright artificial lights, I often notice the differences when using these tools. They effectively minimize lens flare, allowing me to achieve cleaner, more defined shots. This is particularly beneficial when photographing reflective surfaces or shooting outdoor scenes.
Defending Against Physical Damage
Aside from light management, I appreciate how these accessories provide a layer of protection for the front element of the optical device. During shoots, they act as a barrier against accidental bumps and scratches. This added security gives me peace of mind, knowing that my gear is somewhat shielded from unexpected incidents.
Overall, incorporating these tools into my photography routine has elevated the quality of my work while also extending the lifespan of my equipment.
Understanding the Purpose of a Lens Hood
A lens hood is instrumental in enhancing image quality by minimizing unwanted glare and stray light. When capturing images, it becomes crucial to prevent light from hitting the front element at extreme angles, which can lead to lens flares and decreased contrast. This accessory can be the difference between a stark image and one filled with vibrant details.
Utilizing a lens shade also provides additional protection for the front element. It acts as a barrier against accidental bumps, fingerprints, and dust, contributing to the longevity of the equipment. When I’m outdoors, this feature proves invaluable, particularly in dynamic environments.
In terms of composition, employing a lens shield allows me to better control the framing and perspective. By extending the front element further into the scene, it subtly influences the background and can enhance the overall depth of field. This technique can create a more engaging and immersive viewer experience.
| Benefit | Description |
|---|---|
| Reduces Glare | Prevents stray light from impacting image quality. |
| Protects Lens | Offers physical protection against scratches and dust. |
| Improves Composition | Aids in controlling framing and enhances depth of field. |
Selecting the appropriate shade for the specific lens is also crucial. Different designs, such as petal-shaped or cylindrical, can yield varying results based on the focal length and shooting conditions. Adapting this choice based on the scene leads to improved photographic outcomes.
How Lens Hoods Reduce Lens Flare
To minimize lens flare, I recommend using a lens shade tailored to your specific lens type. This accessory effectively blocks stray light from entering the lens, which can cause unwanted reflections and reduce image quality. By preventing light from hitting the front elements at extreme angles, the lens shade maintains contrast and enhances color saturation in images.
Mechanism of Lens Flare Reduction
Lens flare occurs when bright light sources, such as the sun or artificial lights, scatter within the optical system. Using a correctly sized and shaped lens shade helps control this phenomenon. Here’s how:
| Function | Effect |
|---|---|
| Blocks Side Light | Reduces scattering and prevents ghosting artifacts. |
| Improves Contrast | Enhances the visual depth and richness of colors. |
| Prevents Direct Sunlight | Avoids hard shadows and overly bright spots in images. |
Optimal Use Tips
For the best results, ensure that the lens shade is securely attached before shooting. Experiment with positioning to find the angle that maximizes light blockage for your particular scene. Regularly check for any obstructions, such as dirt or fingerprints, on the shade’s surface, as these can also contribute to flare issues.
Minimizing Reflections with Lens Hoods
In my experience, the most effective way to reduce unwanted reflections when shooting is to attach a lens shade to the front of the optic. This accessory helps block stray light that can lead to ghosting or other artifacts in the final image.
How They Work
The design of these attachments serves to limit the angle at which light can enter the lens. By restricting the incoming light, particularly from the sides and above, they prevent unwanted reflections that bounce off the surface of the glass elements. This is especially beneficial in situations with bright sources of illumination, such as sunlight or artificial lights.
Practical Tips
When shooting outdoors in bright conditions, I always position the lens accessory to point towards the light source. Adjusting the angle slightly can make a significant difference in maintaining contrast and clarity. Additionally, keeping the front element clean will ensure maximum performance, as dirt or smudges can also create reflections that compromise image quality.
Improving Contrast in Photographs
Utilizing a lens accessory significantly enhances image contrast. By blocking unwanted light, it allows colors to pop, making details more pronounced.
Benefits of Enhanced Contrast
- Amplifies color saturation, resulting in richer hues.
- Minimizes haziness around objects, sharpening edges.
- Facilitates better differentiation between shadows and highlights.
Application Techniques
- Choose the right angle: Position yourself to maximize the effectiveness of this attachment by ensuring direct illumination of the subject.
- Adjust your framing: Ensure that the subject fills the frame adequately to reduce any potential interference from peripheral light.
- Combine with other tools: Pair this accessory with filters for added depth and character in your shots.
Implementing these practices leads to striking visuals with depth and clarity that captivate viewers.
Protecting Your Lens from Physical Damage
Using a lens shield provides a solid barrier against scratches, impact, and environmental elements. I always ensure to attach this accessory as it significantly reduces the risk of unintentional damage while moving or storing gear. The shield not only helps prevent scratches on the front element from accidental bumps, but it also protects against dirt and moisture when shooting in challenging conditions.
Particularly during outdoor shoots, I find that having this protective component can be a lifesaver. Whether in a crowded area or among unpredictable weather, the additional coverage offers peace of mind. I make it a practice to choose a lens shield that closely matches the focal length and design of my lenses to maximize protection. This way, I can focus on capturing stunning visuals without the constant worry of damaging my equipment.
Additionally, when transporting gear in a bag, the shield acts as an extra layer of defense against pressure from other equipment. This can prevent inadvertent jarring or collisions that could lead to misalignment or cracks. By prioritizing the use of this accessory, I extend the lifespan of my lenses and maintain their integrity, ensuring they perform at their best when it’s time to shoot.
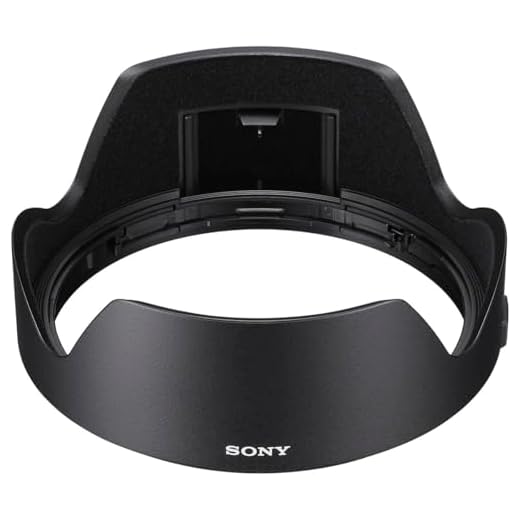
Types of Lens Hoods: Standard vs. Petal
Choosing between standard and petal designs can significantly impact photographic outcomes. Standard hoods, typically cylindrical, provide uniform protection against stray light, ensuring consistent shading across the frame. They excel in scenarios with minimal obstructions, maintaining the overall image quality. For average focal lengths and standard lenses, these are a dependable choice.
On the other hand, petal-shaped hoods, or tulip hoods, are designed with cutouts that accommodate wide-angle lenses. Their unique shape allows maximum light blockage while preventing vignetting, enhancing the overall clarity in images. These are particularly advantageous in landscape and architectural photography, where corner sharpness is crucial.
To enhance your shooting experience, I recommend testing both types with your gear. Determine which style complements your lens characteristics while catering to your photographic preferences. Remember, the right choice can lead to richer, more detailed captures.
Choosing the Right Lens Hood for Your Lens
Pick the appropriate shade based on the focal length and type of your lens. If you’re using a wide-angle lens, opt for a petal-shaped model to avoid vignetting. Standard cylindrical shades work well for telephoto lenses. Check compatibility with your lens’s filter thread size for a perfect fit.
Material Considerations
Consider the material of the accessory. Plastic hoods are lightweight and often more affordable, while metal options provide enhanced durability and can resist wear better. Both types can effectively block stray light, but select based on your shooting environment.
Field Testing
Before committing, perform tests in various lighting situations. Observe how light interacts with the attachment and ensure it aligns with your imaging needs. Sometimes the difference in image quality with or without this accessory becomes apparent only in practice.
Impact of Lens Hood on Depth of Field
The inclusion of a sunshade can influence the perception of depth in imagery. While not directly altering depth of field, it plays a significant role in enhancing the overall quality of focus in photographs. By minimizing stray light, it allows the optical system to function more effectively, thereby contributing to sharper images.
Additionally, when shooting in high-contrast environments, having such an accessory ensures that the subject remains distinct against its background, thus affecting how depth is perceived. Reduced lens flare enables a clearer view of details in both the foreground and background, making depth of field appear more pronounced.
For optimal effects, particularly in scenarios where depth is crucial, I recommend maintaining an appropriate distance from the subject. This enhances the three-dimensional feel in compositions, allowing the benefits of a lens shade to truly shine.
By utilizing this accessory correctly, I find that it improves not only the clarity but also the dimensionality of my images, leading to a more immersive experience for viewers.
| Aspect | Impact |
|---|---|
| Reduction of Stray Light | Enhances sharpness and clarity |
| Contrast Enhancement | Improves subject-background separation |
| Focusing Ability | Increases precision in shallow depth scenarios |
| Distance to Subject | Improves three-dimensional appearance |
Using Lens Hoods in Bright Lighting Conditions
In bright environments, I always attach a shade to minimize glare and enhance image quality. This simple accessory effectively blocks unwanted light, ensuring the captured scene remains vivid and true to life.
Benefits
- Enhanced Contrast: By preventing stray light from entering the lens, I notice a significant boost in contrast in my images, making colors appear richer.
- Reduced Glare: Direct sunlight can create distracting reflections. With the attachment in place, glare is minimized, leading to clearer results.
- Focusing on Subject: The shade helps to direct attention to the main subject by preventing background distractions caused by bright light.
Additional Tips
- Always assess the angle of light. Positioning myself correctly with the lens shield can optimize performance in challenging conditions.
- Experiment with different types of shades, as some may work better depending on the lens and the situation.
- Keep the accessory clean; dirt or smudges can compromise image quality, even with protective elements in place.
Using this tool regularly has undeniable advantages, particularly in sunny settings where clarity and detail matter most to me. It’s a simple yet effective way to significantly improve the overall quality of my images.
Compatibility of Lens Hoods with Different Lenses
Ensure compatibility by matching the hood with the specific diameter of the lens thread. Most hoods are designed for particular focal lengths or types, so knowing your lens specifications is critical.
Check if the field of view aligns with your lens type. For wide-angle lenses, use hoods that have a petal shape to prevent vignetting, while standard hoods work well with telephoto options.
Brands might vary; typically, a manufacturer will recommend hoods explicitly made for their lenses. However, third-party options can be a viable choice, provided they fit the specified diameter and crop without causing unwanted effects.
Test the hood on your lens prior to significant shoots. Visual confirmation helps identify any issues like vignetting or interference with zoom mechanisms. If you’re using different lenses, consider a collapsible option for versatility.
Be aware of the light conditions you often face. A longer hood can provide additional shielding but may also limit quick adjustments in tight spots. Evaluate usage based on your typical shooting scenarios.
Research is paramount; look into user reviews and compatibility charts. Manufacturer websites often contain detailed compatibility guides that are beneficial when selecting among various options.
How to Attach and Detach a Lens Accessory
To connect this accessory correctly, align the mounting points on the lens and the accessory. Gently twist it clockwise until you hear a click or feel it lock into place. Ensure that it’s securely fastened before moving on to shooting.
Detaching the Accessory
To remove, press the release button or rotate it counterclockwise gently, depending on the design. Make sure to handle it carefully to avoid any accidental drops. Store it in a safe place to prevent scratches or damage.
Cleaning Tips for Your Lens Accessory
To maintain clarity and functionality, follow these steps to clean your lens accessory effectively:
- Use a microfiber cloth to gently wipe down the surface. This prevents scratches.
- For stubborn smudges, lightly dampen the cloth with lens cleaner or distilled water. Avoid direct application to the accessory.
- Utilize a blower to remove dust and debris before wiping, ensuring no particles cause scratches.
- If the accessory has crevices, use a soft brush to dislodge dirt without scratching.
Avoid harsh chemicals as they can damage coatings, leading to reduced performance. Regular maintenance helps prolong its life and ensures optimal image quality.
Store it in a protective case when not in use to minimize exposure to dust and scratches. Regular inspections for wear and tear will help catch any issues early on.
When Not to Use a Lens Hood
Skip the lens shade in scenarios where you’re shooting in a tightly controlled environment, such as indoors with soft lighting. The focused beams won’t cause significant flare or unwanted reflections, and the added bulk may be unnecessary.
Avoid using it in low-light situations. The extra light loss can lead to unflattering results in your images, especially if you’re already working with a wide-open aperture.
If you’re at risk of bumping into objects in a crowded environment, it might be wise to remove the accessory temporarily. This precaution can prevent accidental damage to both the lens and the filter attached.
In macro photography, the added shadow of a lens shield may hinder your ability to achieve the desired look, especially with very close-up shots. In such cases, it could be helpful to work without it.
For panoramic shots, particularly when using wide-angle lenses, I find that a lens cover can become a hindrance. Unintended vignetting can occur, distracting from the overall composition.
Finally, if you’re using a built-in filter or glass cover meant exclusively for protection, combining it with a lens piece may be redundant. Keeping your setup streamlined can reduce waste and improve handling.
Effect of Lens Hoods on Wide-Angle Lenses
Using a lens shade with wide-angle optics significantly decreases unwanted light scatter. This is especially important for achieving higher clarity in images. Since these lenses typically encompass a broader view, the chances of flare and distortion increase. A well-fitted lens shade will help mitigate these issues.
Reduction of Vignetting
While some argue that certain shades might introduce vignetting in ultra-wide-angle designs, selecting the right one can enhance overall image quality. When choosing a shade, look for a model specifically designed for wide-angle applications. These shades are often petal-shaped, aimed at preserving the field of view without obstructing corners.
Real-World Benefits
Here’s how effectively utilizing a lens shade can enhance the output of wide-angle lenses:
| Benefit | Description |
|---|---|
| Flare Control | Blocks stray light rays, reducing flare and enhancing image integrity. |
| Improved Contrast | Maintains richer colors by preventing light washout. |
| Physical Protection | Offers a layer of defense against impacts and scratches without hindering the lens’s performance. |
Incorporating a shade can elevate the performance of wide-angle glass by enhancing contrast and preserving detail, making it a valuable addition to photographic gear.
Lens Hoods in Video Shooting Scenarios
In video production, I consistently find lens accessories invaluable for achieving optimal footage quality. Implementing a protective shade during my shoots significantly enhances visual integrity.
Enhancing Image Quality
When shooting video, I notice that these accessories play a vital role in mitigating issues caused by stray light, which can reduce overall image quality. Here are the key benefits:
- Reduces lens flare during outdoor shoots with harsh lighting.
- Improves color depth and contrast, creating a more engaging scene.
- Minimizes reflections from surfaces, preventing distractions in the frame.
Physical Protection
Beyond visual enhancements, I appreciate how these accessories provide physical safeguarding against accidental impacts. They help to:
- Shield the front element from dust, scratches, and fingerprints.
- Protect expensive optics in crowded or dynamic environments.
In scenarios where lighting is unpredictable, such as during events or documentaries, these accessories are a must-have in my kit. I recommend ensuring compatibility with my specific focal lengths for best results. Choosing the right option enhances my creative potential and streamlines my shooting process.
Comparing Lens Hoods with UV Filters
Lens hoods serve specific roles in photography that differ significantly from those of UV filters. Understanding these distinctions is key to making informed choices about accessories. Here’s how they compare:
Purpose and Functionality
- Lens Protection: Hoods provide physical shielding against impacts and stray light, while UV filters primarily safeguard against scratches and dust.
- Light Management: Hoods block unwanted light, reducing flare and enhancing contrast; UV filters do not influence light in the same way.
- Image Quality: Utilizing a hood can improve the overall image clarity, while a UV filter may introduce slight degradation in sharpness depending on quality.
Application Scenarios
- Bright Light Conditions: Hoods excel in direct sunlight situations, effectively combating glare. UV filters offer no additional help in this area.
- During Physical Activities: A hood is beneficial in preventing lens damage during dynamic shoots. A UV filter, while protective, doesn’t offer the same level of impact resistance.
- Post-Processing: Images captured with a hood often require less adjustment for brightness and contrast, unlike those shot with just a UV filter.
In practice, I often choose to use both, leveraging the unique advantages of each. A hood enhances my images while a quality UV filter provides extra protection for the lens without compromising quality significantly. Knowing when to utilize each can enhance photographic outcomes dramatically.
Impact of Lens Hood Shape on Performance
The design of a lens shade significantly influences shooting outcomes, particularly in terms of light control and contrast management. Petal-style configurations tend to excel with wide-angle optics, minimizing vignetting while ensuring that peripheral light interference is reduced. This shape allows for the most effective shielding against unwanted rays without obstructing the image frame.
Optimal Shapes for Specific Lenses
Choosing between circular and petal designs hinges on the focal length and intended usage. Circular models work well with standard lenses, providing uniform protection, while petal shapes cater to wide-angle applications, preventing cutoff at the edges. The better the fit and design, the more effectively it eliminates flare and enhances image fidelity.
Factors Influencing Light Management
Additionally, the diameter and depth of the accessory impact its effectiveness. A deeper component generally offers superior light blockage, particularly during bright daylight conditions. The material used also plays a role; matte finishes inside minimize reflections, further enhancing overall image quality.
Understanding the Materials Used in Lens Hoods
Choosing a lens shade involves considering the materials, as they significantly influence performance and durability. Commonly, you’ll find lens shades constructed from plastic, metal, or a combination of both. Plastic options tend to be lighter and more affordable, making them popular for everyday use. However, they can be less robust compared to metal variants. Metal shades offer superior durability and a more professional feel, but they also add weight to your gear.
When selecting a design, consider not only the aesthetics but also the functionality. Some manufacturers utilize high-quality plastics that mimic the feel of metal while still reducing weight. The choice of material can affect how well the shade minimizes lens flare and minimizes damage during accidental bumps. Ultimately, the right choice balances weight, durability, and price, tailored to how and where you plan to shoot.
Advanced Materials and Technology
Innovative manufacturers increasingly explore advanced materials like carbon fiber composites for lens shades. These materials provide an excellent combination of lightweight design and exceptional strength, making them appealing for serious photographers. Additionally, internal coatings on these shades can enhance light absorption, further reducing aberrations and improving overall image quality.
It’s also wise to consider how the chosen material interacts with your shooting environment. For instance, a durable metal shade may be beneficial in outdoor settings where rough conditions prevail, while a lightweight plastic variant could suit studio work where weight reduction is paramount. The right selection not only protects your lens but also optimizes your photographic experience.
Modifying Lens Accessories for Special Effects
Consider attaching materials such as black foam or felt around the rim of a standard accessory. This can enhance the control of stray light and create unique shadow effects in sunny conditions.
Experiment with varying shapes in the front filter of the accessory. Using circular cutouts or flattening the edges can yield creative bokeh and distinctive flaring patterns.
For a soft-focus effect, lightly smudge a clear filter with a non-abrasive polish. This will diffuse the light while maintaining sharpness on the subject.
Try creating a DIY gradient by applying translucent colored gels or transparencies to the inner surface. This introduces color shifts at the edges, ideal for artistic portraits or landscapes.
- Use black tape to cover specific sections of the front glass, resulting in targeted light leakage and vignette effects.
- Stack multiple accessories together, ensuring they are compatible. This can lead to unexpected artistic outcomes.
- Create a custom-sized hood by reshaping plastic or cardboard, allowing greater versatility for various shooting conditions.
Incorporating these techniques can open avenues for innovative expressions without the need for expensive gear. Adjustments to the accessory can elevate your creative output significantly.
Exploring Pop-Up Lens Hoods: Pros and Cons
Utilizing a retractable accessory can simplify the shooting process, but there are specific advantages and drawbacks to consider. Convenience stands out as a primary benefit; it’s easily stored when not in use, eliminating the need for separate storage. This can be particularly beneficial for those who prioritize portability.
| Pros | Cons |
|---|---|
| Compact design for easy storage | Less effective in blocking stray light compared to fixed designs |
| Quick deployment for spontaneous shooting | Potentially less durable than rigid options |
| Often lighter, aiding in overall gear weight | May require frequent adjustment depending on lighting conditions |
| Versatile for different situations | Risk of malfunction if the mechanism is jammed or broken |
While convenience is a major advantage, it’s essential to assess the potential reduction in effectiveness due to design limitations. Frequent photographers may find that a fixed model better suits their needs in specific lighting conditions, while casual users could benefit from the simplicity that pop-up options provide. It’s important to consider personal shooting habits and environments when selecting the most appropriate tool for capturing images.
Specialized Lens Hoods for Telephoto Lenses
When working with telephoto optics, a dedicated lens shading accessory can greatly enhance image quality and shooting experience. These specific hoods are designed to manage light more effectively due to the longer focal lengths involved.
Key Benefits
- Improved Light Control: Longer lenses are more prone to light flares. A specialized design minimizes unwanted glare from off-axis light sources.
- Enhanced Contrast: By reducing stray light, these shields help maintain tonal fidelity and contrast, crucial for high-quality images.
- Physical Protection: These accessories also offer a buffer against bumps and scrapes, safeguarding the lens elements from damage.
Unique Considerations
- Shape Variation: Depending on your specific model, the shape may vary significantly. Many telephoto shades feature a cylindrical design, optimizing coverage without obstructing the field of view.
- Material and Build: High-quality materials used in specialized hoods can further enhance durability while remaining lightweight to avoid adding bulk.
- Proper Fitting: Ensure that the hood is tailored for your particular telephoto lens to achieve optimal performance.
Incorporating a correctly designed light-shielding apparatus into my photography toolkit allows me to capture sharp and vivid images, even under challenging lighting conditions.
Lens Hoods and Their Effect on Vignetting
Using a lens shade can significantly influence vignetting, where the corners of an image appear darker than the center. By extending the lens’s effective aperture, a hood helps to control light entering from extreme angles, which reduces the risk of light falloff in the corners. This is especially important for wide-angle optics, where vignetting is more pronounced due to the design of the lens.
While employing a hood, it’s advisable to select one that complements the lens focal length to maintain uniform exposure across the frame. Petal-shaped hoods, for example, are designed specifically for wide-angle lenses, allowing for maximum shading without interfering with the field of view. This helps preserve image clarity and ensures that light is captured uniformly, minimizing the chances of unwanted vignetting.
Testing various hoods on your lenses can also yield insights into their impact on vignetting. Capture test shots with and without a hood to visualize the differences. This practical approach allows me to identify which shade delivers optimum results based on my specific shooting conditions and the characteristics of my lenses.
In conclusion, taking advantage of a lens accessory goes beyond just glare reduction; it plays an important role in maintaining image integrity by addressing vignetting, thus enhancing overall photographic quality.
Using Lens Hoods in Street Photography
When capturing candid moments on the streets, I always attach a shade to my lens. This simple tool can significantly enhance image quality by preventing light from hitting the glass at unfavorable angles. The result is sharper pictures with improved contrast, especially in bright surroundings.
During daylight, the sun can create unwanted glare and reflections on the lens, diminishing photo clarity. A properly designed lens shade blocks excessive light, ensuring that my images remain true to the scene. I often find that colors appear more vibrant, with deep blacks and brighter highlights, which is particularly beneficial for street scenes rich in detail.
Physical protection is another major advantage. Walking through busy streets exposes my gear to potential impacts or debris. A shade acts as a barrier, preventing scratches or dust from settling on the front element. This additional layer of safety allows me to focus on capturing fleeting moments without fretting over lens damage.
In dynamic environments like urban settings, versatility is crucial. I prefer a petal-style shade that complements my wide-angle lens, optimizing the field of view while minimizing unwanted vignetting. This design also allows more breathing room for creative compositions, especially in tight spaces.
Lastly, I consider the size and shape of the shade carefully. I often experiment with different types to find the most suitable for various shooting conditions. Each outing presents unique challenges, and being adaptable is key to seizing that perfect shot.
Lens Hoods and Their Role in Outdoor Photography
In outdoor photography, a lens accessory serves multiple purposes that enhance image quality and protection. I always opt for this attachment when shooting in bright locations. It effectively blocks stray light, reducing unwanted glare that can wash out colors and diminish contrast.
This tool plays a significant role in minimizing reflections caused by sunlight bouncing off the lens elements. By creating a physical barrier, I achieve clearer images, especially when capturing landscapes or subjects against bright skies. It’s particularly beneficial during sunrise or sunset when light conditions are tricky.
Moreover, using this accessory can improve the vibrancy of colors in my photographs. The added shading allows for deeper blacks and more pronounced hues, which is essential for outdoor scenes where natural lighting can be unpredictable. I find that this device enables me to maintain image integrity even under harsh sunlight.
Beyond optical benefits, I value the protective qualities this gear provides. It safeguards the lens from accidental bumps and scratches while I’m moving through various terrains. When I’m hiking and setting up for shots, having that extra layer of defense gives me peace of mind.
In terms of practical usage, I recommend checking compatibility with your lens type. Different designs exist, and some may be better suited for specific shooting scenarios. Understanding the intended application, whether it’s for wide-angle or telephoto setups, can greatly impact the outcome of your work.
Overall, incorporating this accessory into my outdoor gear has transformed my shooting experience, enabling me to capture high-quality images with greater ease. The results are consistently impressive, proving that this small addition can make a substantial difference in outdoor photography.
Cost Considerations for Different Lens Hoods
Investing in the right accessory can significantly impact photography quality. Prices vary widely based on the design, material, and brand. Basic hoods can be purchased for less than $20, while premium options made from high-grade materials can exceed $100. This range reflects both build quality and functionality.
Budget-Friendly Options
Economical variants often offer adequate protection against glare and flare but may be less durable. For those starting out or on a tight budget, these choices serve well without compromising essential features. However, be cautious; some cheaper models may not fit securely or may not shield against extreme lighting effectively.
Premium Hoods: Worth the Investment?
High-end versions typically feature advanced optical designs optimized for specific lenses, enhancing performance in bright conditions. Investing in these can yield sharper images and better color accuracy. Photographers who frequently shoot outdoor scenes or in difficult lighting environments will find these products particularly beneficial.
Common Mistakes When Using Lens Hoods
One frequent mistake is using a hood that doesn’t match the lens’s focal length. Always ensure that the hood’s design complements the specific type of glass you’re working with to avoid vignetting.
Another error is leaving the accessory attached during low-light conditions. This can inadvertently obstruct light from entering the lens, resulting in soft or unclear images. Detach it when not needed to maintain optimal clarity.
Many photographers neglect the importance of cleaning the hood. Dust and smudges on the surface can diminish image quality by causing unwanted obstructions. Regular cleaning is paramount. Use a microfiber cloth for best results.
Some individuals assume that hoods aren’t necessary when shooting in overcast conditions. However, they can still enhance contrast and protect against stray light sources. It’s beneficial to keep it on in these scenarios.
Not considering the angle of the sun is a mistake. Positioning the camera towards the light source without a proper attachment can lead to lens flare. Adjust your shooting angle or utilize the hood to mitigate this issue.
Finally, neglecting compatibility can lead to frustrating experiences. Always verify that the attachment fits snugly without any wobbling before finalizing your setup. A secure fit ensures maximum efficacy.
By paying attention to these common pitfalls, I have consistently improved my photographic outcomes and protected my gear effectively.
How to Store Lens Hoods Properly
To ensure longevity and maintain the quality of your lens accessory, I recommend storing it separately from other gear to prevent scratches. A padded lens case or dedicated compartment in your camera bag works nicely. Always attach the protective cover when not in use to keep dust and debris away.
Ventilation and Temperature Control
Storing in a cool, dry location is beneficial. Avoid placing in spaces with fluctuating temperatures, like cars or attics, as this can warp materials over time. If possible, include silica gel packets in your storage area to minimize moisture and protect your gear further.
Avoiding Compression Damage
Be cautious about stacking heavy items on top of your lens accessory. It can lead to deformation, affecting its fit and functionality. For optimal protection, consider using a dedicated storage pouch that fits snugly to avoid any movement while transporting.
Understanding the Color of Lens Hoods
Choosing a lens cover color can significantly influence the results in various lighting scenarios. Matte black options help with light absorption, minimizing reflections that could disrupt the final image. This is particularly valuable when shooting in bright environments where glare is more pronounced.
Light-colored versions, like white or silver, reflect light, which may benefit in specific situations, enhancing exposure control in lower-light photography. However, one must be cautious as this could result in unwanted reflections if there’s a strong light source nearby.
Considering the color, I’ve observed that photography genres affect my choice. For street photography, darker colors tend to create a less obtrusive presence, allowing for candid captures. In nature photography, brighter colors may enhance visibility while still proving to be functional.
It’s essential to test the hood in the conditions I plan to shoot in, as color can impact overall image quality. A simple experiment can reveal which hue offers the best results for my specific needs.
Lens Hoods for Portrait Photography: Why They Matter
In portraiture, utilizing a lens accessory is critical for enhancing image quality. This accessory helps in controlling light hitting the front element, which can dramatically improve the clarity and detail of facial features.
Controlling Light and Shadows
During portrait sessions, positioning subjects against challenging light sources can lead to unwanted highlights and deep shadows. Implementing an appropriate lens accessory mitigates these issues by preventing direct light from creating harsh contrasts. This control can create softer, more flattering shadows that enhance skin tones.
Adding Depth to the Subject
This tool plays a role beyond glare reduction. By minimizing stray light, it allows for greater contrast in images, making subjects pop against their background. The added depth provided results in portraits that are more engaging and intimate.
How to Test the Effectiveness of Your Lens Hood
To assess how well your lens accessory works, begin by taking test shots in various lighting conditions. Capture images with and without the attachment under similar settings to compare the results. Focus on areas prone to glare and reflections to evaluate the difference.
Use a high-contrast scene to really gauge its performance. Position the light source directly within the frame, such as the sun or an artificial light. Look for any reduction in flare or ghosting effects in the images with the accessory attached.
Experiment with different angles and distances. Sometimes, the impact is more pronounced at certain focal lengths or apertures. For wide-angle setups, carefully observe any vignetting present when using the attachment. This can differ significantly from one type to another.
Analyze color saturation and contrast between shots. An effective accessory should enhance the richness of colors while maintaining true-to-life details. Compare the sharpness and overall image quality as well.
Perform these tests in various outdoor settings, especially in bright environments where sunlight is intense. Track how the accessory behaves in low-light conditions as well; this can provide insights into its versatility.
After testing, review all images on a large display to identify subtle differences. Document findings to guide future photography sessions and assist in selecting the right variant for different lenses.
Lens Hoods vs. Lens Caps: What’s the Difference?
Lens hoods are designed primarily to block stray light, while lens caps serve to protect the front element from scratches and dust. When shooting, I rely on a hood to prevent flare and maintain contrast, whereas a cap is used when storing my equipment.
While both accessories play important roles, their functions differ significantly. A hood remains attached during shooting for optimal image quality, while a cap is removed instantly before taking a shot. The hood can enhance the overall clarity of images under various lighting conditions, something a simple cap cannot achieve.
In terms of design, a hood typically features a specific shape that correlates with the lens’s focal length, maximizing its effectiveness, while caps come in a universal fit. When packing my gear, I prioritize having the correct hood on my lens to ensure I capture the best possible photographs.
Ultimately, both accessories complement each other in preserving the integrity of the lens; the hood enhances image quality during takes, and the cap safeguards against physical damage when not in use. I ensure both are part of my photography toolkit for complete lens care.
FAQ:
What functions does a camera lens hood serve?
A camera lens hood primarily serves to block unwanted light from hitting the lens and causing lens flares. By preventing stray light from entering the lens at certain angles, it helps to enhance contrast and overall image quality. Additionally, it provides some protection for the lens against accidental bumps and impacts, as well as shielding it from dust and moisture. Some photographers also find that using a lens hood helps minimize the risk of light reflecting off the lens surface, allowing for clearer and sharper images.
Are there different types of lens hoods for various lenses?
Yes, lens hoods come in various designs tailored to different types of lenses. The two primary styles are petal and cylindrical hoods. Petal hoods, characterized by their flower-like shape, are commonly used with wide-angle lenses as they provide maximum shading while accommodating the lens’s field of view. Cylindrical hoods, on the other hand, are often used with telephoto lenses. It’s important to choose a hood that matches your lens’s specific focal length and diameter to ensure optimal performance. Using the appropriate hood can significantly aid in maintaining image clarity and reducing glare.


