


For achieving a specific artistic vision, selecting the right conversion element can significantly expand your options. I recommend first assessing your existing glassware; understanding the mount compatibility will streamline the process. For instance, adapting a prime or zoom optic from one system to another can breathe new life into your current setup, enhancing quality without a complete overhaul.
After identifying the compatible models, attaching the converting mechanism is straightforward. Make sure to secure the unit properly and confirm that there are no obstructions in the connection points. This ensures optimal image quality, preventing any unwanted vignetting or distortion that could impact results. Testing various settings will reveal the strengths and limitations of your new configuration.

Experiment with aperture settings to comprehend how different combinations affect depth of field and overall sharpness. I often find that certain conversions lend themselves beautifully to portraiture or macro work while providing unique perspectives in wider shots. Keeping thorough notes during these trials can guide future sessions and cultivate a deeper understanding of your gear’s capabilities.
How to Use a Lens Converter
Attach the converter to your primary device first, aligning the mounting points carefully to avoid damage. Ensure that the fit is secure; a loose connection can affect performance and may lead to misalignment.
Next, select your desired optic. Make sure it fits the inner specifications of the converter. Compatibility is key, as incorrect pairings might lead to blurred images or unwanted vignetting.
When adjusting settings, take into account the modified focal length. Depending on the type of addition, the effective aperture can change, resulting in exposure differences that need addressing. Check your exposure meter to confirm accurate adjustments in lighting conditions.
Utilize manual focus for better precision. Autofocus systems may struggle with certain combinations, especially in low light. Practice focusing manually to get accustomed to the new distances and depth of field.
While shooting, be aware of the balance. The added weight might alter handling, so find a comfortable grip. Employ a tripod if necessary, especially for long exposures or telephoto work.
Finally, review captured images on your device. Pay attention to sharpness and any potential artifacts that may arise from the added element. This helps you gauge performance and make necessary adjustments in technique during future sessions.
Understanding Camera Lens Adapters
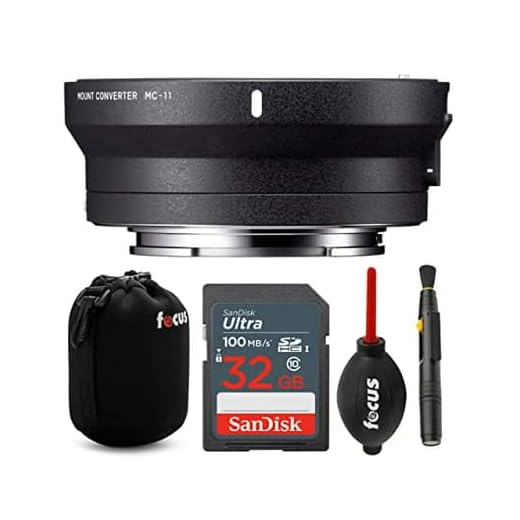
Selecting the correct mount converter for specific combinations of lenses and bodies can significantly alter the shooting experience. I focus on checking compatibility before purchase. Cross-reference brand specifications or use trusted online resources to determine which products fit together seamlessly.
Another consideration is the type of adapter you choose–mechanical or electronic. Mechanical variants allow manual control, while electronic ones maintain autofocus and image stabilization, although they may increase cost. Knowing the capabilities and limitations of both types is key to achieving desired outcomes.
Key Features to Consider
| Feature | Description |
|---|---|
| Build Quality | Assess for durability; lightweight materials may not withstand rigorous use. |
| Optical Elements | Some models integrate glass; be mindful of potential optical distortion. |
| Crop Factor | Factor in sensor dimensions when adapting lenses; this affects focal length. |
| Firmware Updates | Adapters with firmware flexibility can improve functionality over time. |
Practical Tips
Regularly inspect the mount and contacts for dust or wear; cleanliness directly impacts performance. I also recommend practicing with manual focus if the adapter is non-electronic. This may enhance proficiency with different lens characteristics, providing a broader understanding of how focal lengths behave under varying conditions.
Lastly, experimenting with various combinations in different lighting scenarios gives insight into strengths and weaknesses of the setup, allowing for refined techniques and greater creativity in shooting.
Types of Lens Adapters Available
For versatility in photography, I explore different varieties of lens converters tailored for specific needs. These include:
1. Mount Adapters
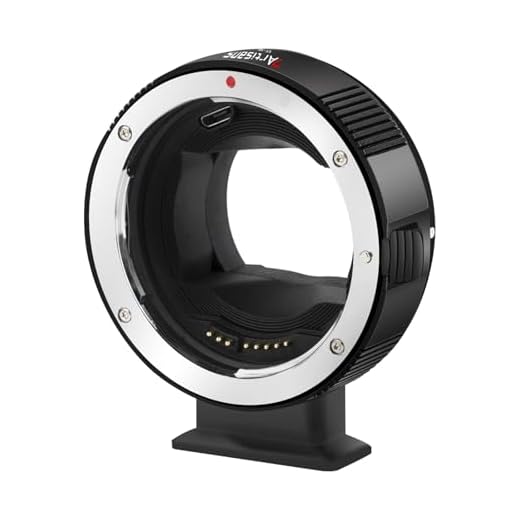
These converters allow lenses from one brand to fit onto bodies of another brand. For instance, a Canon lens can be attached to a Nikon body, expanding the options of glass available to me. It’s crucial to check compatibility as each brand may have unique specifications. Some mount adapters retain electronic contacts, allowing for autofocus functionality and electronic aperture control.
2. Focal Reducers
Focal reducers are a unique category that not only adapts the lens but also decreases its focal length. This results in a wider field of view and increases the maximum aperture, enhancing low-light performance. These are particularly useful when adapting lenses designed for full-frame sensors to crop sensors, providing more versatility for shooting wide-angle images.
3. Simple Adapters
These basic converters provide a straightforward way to mount lenses without additional electronic connections. They are often lightweight and affordable. However, I’ll sacrifice automation, meaning that focusing and aperture adjustments will need to be performed manually. This can offer creative control, perfect for more experienced photographers who prefer a hands-on approach.
4. Specialty Adapters
Some adapters cater to unique requirements, such as tilt-shift or other specialized photographic techniques. These converters allow me to achieve selective focus or perspective adjustments that standard mounts might not offer. Such functionality can be a game-changer for architectural or landscape photography.
Choosing the right adapter is pivotal for gaining access to diverse lens options while maintaining quality and functionality. Each type carries distinct characteristics and benefits, making the selection process essential for achieving desired results in my photography endeavors.
Choosing the Right Adapter for Your Camera
Assess the mounting system of your device first. Knowing the specific brand and model allows for precise matching with compatible attachments.
Factors to Consider
- Lens Compatibility: Check if the desired optic aligns with your chosen mount type, as variations exist across manufacturers.
- Stability and Build Quality: Opt for options made from sturdy materials. A well-constructed accessory ensures reduced vibration and longevity.
- Optical Quality: Investigate if the connector maintains image integrity. Any loss in light transmission or introduction of distortions should be avoided.
- Aperture Control: Some versions allow for manual or automatic aperture adjustments. Consider your shooting style when selecting this feature.
Brand Reliability
- Research Brand Reputation: Focus on reviews and feedback regarding durability and performance from other users.
- Warranty and Support: Reliable manufacturers often provide a warranty and customer service, indicating confidence in their products.
After narrowing down your choices based on these criteria, make a well-informed decision that aligns with your photography goals and equipment.
Compatibility Between Lenses and Adapters
To achieve optimal results, ensure your lens and mount converter are compatible. Here are key points to check:
- Mount Type: Identify the mount types for both the lens and the connecting piece. Common mounts include Canon EF, Nikon F, and Sony E. Cross-reference this against the specifications of the converter.
- Crop Factor: Understand the sensor size of your camera body. Using a full-frame lens on an APS-C sensor will yield a crop factor, affecting the field of view. Consider this when planning your shoots.
- Features: Some converters support autofocus and electronic aperture control, while others do not. Confirm whether desired functionalities are preserved with your selected pairing.
- Physical Compatibility: Check for any mechanical limitations. Specific combinations may obstruct the ability to attach or detach lenses. Ensure adequate space is available for mounting.
- Image Quality: Read reviews regarding optical performance. Some connectors may introduce lens aberrations or flare, impacting image quality. Picking a reputable manufacturer can mitigate such issues.
Testing a combination before finalizing your choice can help identify any limitations early. It’s beneficial to consult user forums or professional reviews for insights into practical experiences with specific lens-adapter pairings.
Tools Required for Installation
To ensure a successful setup, I recommend having the following tools on hand:
Basic Tools
A small, flathead screwdriver is necessary for adjusting screws on both the lens and camera body. A microfiber cloth will help in cleaning any dust or smudges on the surfaces before assembly.
Advanced Tools
If necessary, a lens cleaning kit, which includes a blower, brush, and cleaning solution, can be beneficial. For those who prefer precise positioning, a set of calipers may come in handy to measure the dimensions of the devices. Additionally, consider using a tripod during the installation for stability and ease of access to the equipment.
Step-by-Step Guide to Attaching a Lens Adapter
Begin by verifying that both your optical equipment and the converter are clean. Ensure there is no dust or debris on the contact points of each component. This prevents potential scratches or interference when connecting and using them.
Next, align the mount of the optical device with the corresponding mount of the converter. Gently rotate the attachment without forcing it. Look for the alignment marks present on both items to assist with proper placement.
Once aligned, gently press and turn the lens until you hear a click, indicating secure connection. Pay attention to the sound, as this confirms that the locking mechanism is engaged. If no click occurs, double-check alignment before attempting again.
After successfully attaching the optical accessory, test for play or looseness. Hold the combined assembly and perform a subtle shake. No movement should be felt; if there is, detach and reconnect the components.
After verification, adjust your camera settings to ensure compatibility with the new configuration. Depending on the types of optics and converters used, manual adjustments may be necessary to achieve optimal performance.
| Step | Action |
|---|---|
| 1 | Clean both components |
| 2 | Align mounts |
| 3 | Press and turn until you hear a click |
| 4 | Check for any looseness |
| 5 | Adjust settings for compatibility |
Finally, perform a test shot to ensure everything is functioning correctly. Examine the results for any issues before your next shoot.
Checking for Proper Fit After Installation
Once the modification has been completed, confirming the precise alignment is crucial. First, examine the connection point–ensure there are no gaps between the components. A secure fit prevents light leaks and ensures optimal performance.
Visual Inspection
Begin with a thorough visual evaluation. Hold the setup against a bright background to identify any irregularities. Look for uneven gaps or misalignment along the edges, which may indicate an improper fit.

Functional Testing
Next, mount the assembly onto the device and conduct a test shot or video capture. Check for sharpness and clarity across the frame. Any noticeable blurriness or vignetting may suggest the assemblies are not fitting correctly.
| Test Method | Description |
|---|---|
| Visual Inspection | Examine the junction for gaps while against a bright surface. |
| Test Shot | Capture an image focusing on various elements to check for clarity. |
| Adjustment Check | Revisit the alignment if discrepancies appear in initial tests. |
Following these practices ensures that everything remains optimally functional. If issues arise, reassessing the installation process might be necessary for achieving a proper fit.
Adjusting Settings for Different Lenses
When switching optics, I always check the aperture settings first. Different glass can have varying maximum and minimum apertures, affecting exposure. For instance, a prime lens may have a wider maximum aperture than a zoom lens, requiring adjustments to the exposure triangle.
Focusing Techniques
Focusing also varies significantly. I often switch between manual and autofocus, depending on the lens. With vintage or specialized lenses, manual focus is often more reliable. For autofocus systems, knowing the compatibility with the camera is essential to ensure accurate focusing.

Correct Exposure and ISO Settings
I adjust the ISO based on the lens’ characteristics. A lens with image stabilization allows for lower ISO settings in low-light conditions. In contrast, older lenses without stabilization might necessitate higher ISO values to achieve the same exposure.
Each lens brings unique attributes to the table, and keeping these adjustments in mind allows for optimal performance and results.
Using Manual Focus with Adapters
Switching to manual focus can greatly enhance precision when working with various optical attachments. Begin by selecting a lens designed for this mode. Manual focus allows complete control over the focal point, particularly useful with non-native optics.
Follow these pointers for better results:

- Engage the focus ring on the lens firmly. A smooth, controlled action aids in accurate adjustments.
- Utilize focus peaking on your camera, if available. It highlights in-focus areas, making adjustments easier.
- Set your camera to magnify the viewfinder or LCD screen. This feature allows you to precisely pinpoint the desired focus point.
- Practice depth of field management to achieve the intended visual effect. Knowing your lens’s characteristics helps in predicting sharpness.
- Experiment with aperture settings. Wider openings reduce depth, while smaller sizes enhance depth of field.
Regular practice enhances familiarity with the focusing mechanism. Adjusting to manual control can take time, leading to improved skill in capturing images that engage viewers.
Test various subjects and scenes to understand how different combinations of lenses and settings impact your final imagery. This hands-on approach fosters intuition that becomes crucial for achieving the desired outcome in photography.
Exposure Settings When Using an Adapter
Adjusting exposure settings is critical while employing an attachment for various optics. Switching to a lens that differs in aperture or focal length demands specific changes in exposure to achieve optimal results.
Aperture Settings
Always check the maximum and minimum aperture values on the lens in conjunction with the mounted device. If the optical element has a wider maximum aperture than your native glass, adjust the exposure accordingly. Use the following guidelines:
| Max Aperture | Adjustment (Stops) |
|---|---|
| f/1.4 | No change required |
| f/2.8 | +1 Stop |
| f/4 | +2 Stops |
| f/5.6 | +3 Stops |
When pairing with an older lens that may not communicate electronically, I dial in the settings manually, using the light meter as a reference. Be aware that some attachments prevent automatic aperture adjustments, so manual control will be necessary.
Shutter Speed Considerations
As the optical characteristics change, the ideal shutter speed needs adjustment as well. A lower f-number typically allows for faster shutter speeds. Here are some recommendations:
| Focal Length | Minimum Shutter Speed |
|---|---|
| 35mm | 1/35s |
| 50mm | 1/50s |
| 100mm | 1/100s |
Movement or subject speed can necessitate even higher shutter speeds to prevent blur. Experimentation will enhance this calibration.
Lastly, don’t overlook ISO settings. Increasing ISO amplifies sensitivity, which is particularly useful when light situations are limited. However, be mindful of increased noise at higher ISO values.
Using Lens Adapters with Vintage Lenses
To maximize the creative potential of vintage optics, I always check the specific characteristics that each lens brings to my setup. These older models often feature unique optical qualities, such as color rendition and bokeh, which can add a distinct flair to my images.
Before attaching a vintage lens to my gear, I ensure that I have the correct connecting mechanism. Most vintage glass requires a specific mount, so I meticulously research the mount type in relation to my current equipment. This attention to detail helps in avoiding compatibility issues.
Focusing manually is a common practice with these classic lenses. I adjust the diopter setting on my primary device to compensate for any discrepancies in focus brought on by the additional elements inherent in the connection. Using focus peaking or magnification functions available in my device assists in achieving pinpoint accuracy.
While capturing images, I pay close attention to the exposure settings. Vintage lenses may not communicate electronic data like modern options, requiring me to adjust shutter speed and aperture manually. A handheld light meter proves beneficial here, ensuring my exposures are spot on.
Additionally, I often experiment with different focal lengths and apertures to discover their unique rendering qualities. Stopping down usually enhances sharpness, but I enjoy the character found at wider openings. This trial and error is key to unlocking the true potential of each lens.
When snapping images, I anticipate some variations in color and contrast compared to modern optics. I embrace these differences, often correcting in post-processing if needed. This approach leads to a distinctive look that underscores the charm of vintage photography.
I also frequently explore the use of filters to control flare and enhance color dynamics, as older glass may be more susceptible to stray light interference. Circular polarizers or ND filters can provide creative opportunities that enhance the overall aesthetic.
Potential Issues with Lens Adapters
When working with lens converters, I frequently encounter several pitfalls that can impact performance and image quality. It’s key to stay informed and prepared for these challenges.
Common Problems
- Vignetting: Dark corners can occur, especially with wide-angle optics. I often check for this through test shots and adjust as necessary.
- Infinity Focus: Certain mounts may prevent achieving infinity focus. I verify this before committing to any critical shots.
- Electronic Communication: Non-native lenses may lack autofocus and aperture control, leading to a reliance on manual adjustments. I keep this in mind for effective shooting.
- Image Quality: Adapters can introduce optical distortions or degrade clarity. I recommend evaluating the setup with test photos to ensure acceptable results.
Durability Concerns
- Build Quality: Cheaply made converters can result in misalignment or wear. I always choose reputable brands to avoid frequent replacements.
- Functionality Over Time: Regular use may wear down components, impacting performance. I inspect my gear regularly to maintain reliability.
I find understanding these issues helps in achieving the best possible outcomes. Proper testing and adjustments are essential for seamless integration of different optics.
Common Problems and Troubleshooting
If there’s difficulty achieving focus, check the alignment of the attachment. Misalignment can result in soft images. Ensure the adapter is securely and correctly mounted on both the camera body and the lens.
In case of erratic exposure readings, verify that the lens’s aperture mechanism is functioning properly. Some adapters may disrupt electronic communication, leading to incorrect exposure values. Manually setting the exposure can be a reliable workaround.
Blurry Images
Inconsistent sharpness often occurs due to insufficient fit. I recommend tightly securing the lenses and inspecting for dust or debris on both surfaces. Additionally, using a tripod can help maintain stability, especially with heavier lenses.
Compatibility Issues
If the lens isn’t recognized, compatibility may be the issue. Cross-reference specifications of the lens and the mount. Some older lenses may lack proper electronic contacts, so manual settings adjustment is necessary for accurate exposure and aperture control.
Maintaining Your Lens Adapter
Regular upkeep of your lens coupling device is vital for optimal performance. Here are some practical steps I follow:
Cleaning the Adapter
- Use a microfiber cloth to gently wipe the exterior surfaces.
- For stubborn spots, use a small amount of lens cleaning solution.
- Avoid using rough materials that could scratch the surface.
Inspecting for Wear and Tear
- Check for any signs of damage, such as cracks or warped edges.
- Ensure that the mounting mechanism is secure and functions smoothly.
- Regularly examine the electrical contacts, if present, for debris.
Proper storage is equally important. Always place the device in a protective case when not in use. Maintain a dry environment to prevent moisture buildup, which can lead to corrosion.
Following these practices extends both the life and functionality of your lens coupling apparatus, ensuring reliable operation and quality results in your photography endeavors.
Adapting Lenses for Different Camera Systems
To achieve the best optical performance, I focus on understanding the specifications of each lens and mount type. When selecting a lens for my body, I verify compatibility not just mechanically, but also regarding performance characteristics such as focal length and aperture. Thoroughly researching the unique attributes of my specific setup enables me to optimize results.
Typically, I determine the correct adapter by considering the flange distance, which indicates the optimal distance between the lens mount and the sensor. If I’m adapting a lens with a shorter flange distance to a system with a longer distance, I might need an appropriate spacer or converter to maintain focus accuracy.
Calibration becomes crucial after installation. I test the adaptability by taking sample shots at varying distances and apertures to assess sharpness and color rendition. In cases where advanced features like autofocus are disabled, I shift to manual techniques, paying meticulous attention to focus accuracy.
While adapting vintage optics can yield unique results, I pay close attention to potential vignetting or distortion effects, which may differ significantly from modern glass. I often experiment with these characteristics, finding creative ways to enhance images.
Regular maintenance on my adapters ensures longevity. I clean mounting surfaces and check for wear and tear periodically, avoiding any potential disruptions in performance. Such practices keep everything functional and reliable for future shoots.
Impact on Image Quality with Adapters
Assessing image clarity is vital when employing a lens converter. Here are key factors that directly influence the resulting quality:
- Optical Design: The internal construction of an adapter can significantly affect sharpness. High-quality, well-engineered options minimize optical distortion.
- Light Transmission: Some adapters can introduce vignetting or reduce light transmission, impacting exposure and color purity. Choose models that optimize light flow.
- Chromatic Aberration: Adapters may introduce chromatic aberrations, especially at wide apertures. Consider testing performance before finalizing your setup.
- Focusing Mechanism: If the adapter supports autofocus, ensure it maintains accurate focusing capabilities. Manual focus can often mitigate some issues when autofocus is unreliable.
- Build Quality: Sturdier materials ensure a secure fit and reduce light leaks, preserving the integrity of the captured image.
Consistently evaluating the results you obtain will provide insights into specific impacts of the adapter you select. Individual performance will vary based on lens and body combinations, so conducting comparative tests can yield the clearest conclusions. Adjusting your technique depending on the adapter’s influence on image quality can also enhance your overall outcomes.
Testing for Lens Distortion and Aberration
Conduct testing with a reliable chart, such as a grid or checkerboard pattern. Capture images at various focal lengths and apertures to assess performance across a range. Analyze the results for signs of distortion like barrel or pincushion effects, common when adapting lenses. To spot chromatic aberration, observe edges of high-contrast subjects and look for color fringing.
Recommended Tools
| Tool | Purpose |
|---|---|
| Test Chart | To visually identify distortion and aberration. |
| Tripod | To ensure stability and consistency while testing. |
| Photo Editing Software | For analyzing images and correcting any detected issues. |
For accurate results, keep lighting conditions uniform. Adjust the camera settings manually to maintain consistency. Evaluate images in post-production; zoom in on critical areas to discern minute details. If significant distortion or aberration is found, consider trying a different lens or performing corrective adjustments in your editing process.
Using Adapter with Macro and Wide-Angle Lenses
Employing an adapter with macro and wide-angle optics significantly enhances versatility in photography. Both lens types can capture unique perspectives and intricate details when combined effectively.
Macro Lenses with Adapters
For macro lenses, select an adapter that maintains the necessary focus distance. It’s crucial to avoid vignetting; tested combinations yield the best results. Increasing working distance can improve lighting flexibility.
Ensure to incorporate a tripod to stabilize shots at high magnifications. Experimenting with extension tubes via the adapter can achieve extreme close-up effects, unveiling minute details in subjects.
Wide-Angle Lenses with Adapters
When attaching wide-angle optics, check for corner sharpness as this can be affected by the adapter’s quality. Some designs may introduce distortion; select a reputable model to mitigate this issue. Comparing various adapters can pinpoint the one delivering optimal image quality.
Employing lens correction profiles in post-processing software can rectify minor distortions. Consider a neutral density filter to balance light exposure during daylight shooting.
| Lens Type | Key Considerations | Tips |
|---|---|---|
| Macro | Focus distance, vignetting | Use tripod, experiment with extension tubes |
| Wide-Angle | Corner sharpness, distortion | Use a reputable adapter, lens correction in post-processing |
Strategically utilizing these optics with the right attachments transforms your photographic capabilities, allowing for creative expression through detailed macro compositions and expansive wide-angle scenes.
Benefits of Using Lens Adapters
Extending the versatility of equipment provides significant advantages for any enthusiast. Adapting optics opens doors to various creative possibilities and enhances the functionality of existing gear.
Expand Lens Options
Utilizing a conversion ring allows me to mount lenses from different brands or systems, significantly broadening my selection. This compatibility means I can use vintage glass or specialty lenses without committing to an entirely new system.
- Access to unique focal lengths
- Ability to experiment with various optical characteristics
- Utilization of high-quality, older lenses
Cost-Effectiveness
Investing in a conversion mechanism saves money compared to purchasing a new lens lineup. This strategy allows one to maximize what is already owned, reducing overall expenses while enhancing creative capabilities.
- More economical than buying new lenses
- Can achieve quality results without high costs
- Maintain existing investment while exploring new options
Unique Aesthetic Qualities
Many vintage lenses possess distinct character traits that can impart a unique look to images that modern options may lack. Using an old lens can introduce creative flair, such as smoother bokeh or varied color rendering.
Practice Manual Control
Employing older optics often necessitates manual settings, enhancing my skills in focus and exposure. This process encourages a deeper understanding of photographic principles and fosters creativity through experimentation.
- Improvement in techniques through hands-on experience
- Mastery of manual focus enhances composition skills
- Opportunities to experiment due to varied functionality
Interoperability Across Platforms
Using conversion rings offers the ability to adapt lenses from non-native systems onto bodies, ensuring I can integrate various equipment regardless of brand. This interoperability is beneficial for those who move between formats.
- Seamless integration of multiple systems
- Simplified transitions between different photographic styles
Embracing versatility through lens adaptations not only enriches my photography but also allows me to discover new creative avenues. Each shoot transforms into an opportunity for experimentation and artistic expression.
Selecting Adapters for Specialty Lenses
For niche optics, it’s crucial to ensure compatibility with your body. I recommend prioritizing options that guarantee seamless connections to avoid losing functionality. Research brands known for reliability, such as Metabones or Fotodiox, which often accommodate a wide variety of specialty lenses.
Pay Attention to Mount Type
Identify the mount specifics of your optical equipment. For instance, if utilizing a Leica lens, seek adapters specifically tailored for that model. Using generic mounts may lead to compromised image quality or focus issues.
Consider Optical Elements
Some converters incorporate additional glass elements to adjust focal lengths or correct aberrations. These can enhance performance but may also introduce distortion. Assess whether the benefits outweigh potential drawbacks for the tasks at hand.
Lastly, opt for an adapter offering lens stabilization support if your specialty lens has that feature. Stabilization improves the final images, especially in low-light situations. Reading user reviews can be beneficial for practical insights before committing to a purchase.
Understanding Focal Length Adjustments
When working with lens converters, I adjust the effective focal length based on the crop factor or focal length multiplier specific to the mounted lens. A full-frame lens on an APS-C body typically results in a 1.5x crop factor. For example, a 50mm lens behaves like a 75mm equivalent. Knowing this helps in composing shots accurately and maintaining desired framing.
Calculating Focal Length
To determine the effective focal length, simply multiply the original focal length by the crop factor. If I attach a 35mm lens to a camera with a crop factor of 1.6, the effective focal length becomes 56mm. This calculation is essential for understanding depth of field and perspective changes as I switch lenses.
Implications of Focal Length Changes
Focal adjustments alter not just the framing but also the image characteristics. Wider angles may introduce distortion, while longer lengths compress backgrounds. When I adapt vintage lenses with different focal lengths, I pay close attention to how they might change image quality, particularly in corner sharpness and vignetting. Testing different setups is crucial to achieving preferred results.
Exploring Autofocus Versus Manual Focus
For optimal results with attached optics, understanding the difference between autofocus and manual focus is vital. Autofocus systems are designed for speed, allowing rapid adjustments based on detected subjects, making them ideal for dynamic scenes.
However, manual focusing grants precise control over depth of field and composition. This is particularly advantageous in macro photography, where minute adjustments can dramatically alter outcomes. I prefer manual focus when shooting in low-light conditions, as this can enhance accuracy despite autofocus challenges.
When utilizing older optics and converters, consider the following:
| Autofocus | Manual Focus |
|---|---|
| Quick adjustments for moving subjects. | Precision in composition and depth control. |
| May struggle in low-light or complex scenarios. | Consistent performance regardless of light conditions. |
| Suited for general photography and videography. | Preferred for macro, portraits, and artistic captures. |
| Relying on technology can sometimes lead to missed opportunities. | Requires practice and skill to master. |
Experimenting with both methods can enhance skills and outcomes. Each approach has its time and place, and recognizing when to switch can lead to impressive photographs.
Using Adapters for Time-Lapse Photography
When capturing time-lapse sequences, precision and control over exposure settings are paramount. I recommend carefully selecting an adapter that provides a secure fit between your lens and body to avoid light leaks. Ensure that you have thoroughly tested the combination before commencing your shoot.
Key Considerations
- Manual Control: Rely on manual focus and exposure settings. This reduces potential autofocus anomalies during long sequences.
- Intervalometer Use: Invest in an intervalometer to automate shooting. This tool can be crucial for maintaining consistent intervals between shots.
- Stability: Employ a sturdy tripod to minimize vibrations. Any movement can jeopardize the smooth progression of your time-lapse video.
Best Practices for Optimal Results
- Choose a suitable focal length that complements your scene. Longer focal lengths can compress time effectively.
- Set a fixed aperture to maintain depth of field throughout the series. This prevents variations that may arise from changing light conditions.
- Conduct a test shot to assess the overall exposure. Adjust settings accordingly to ensure your captures remain consistent.
- Use a power source if intending to shoot over extended periods. Prolonged sessions drain batteries rapidly, leading to potential interruptions.
Timing remains critical; consider environmental changes during the shoot duration. Capture varying lighting conditions to produce more dynamic results. Investing time in preparation and execution with a lens connection will significantly enhance the overall quality of your sequences.
Sharing Lens Adapters Among Different Cameras
I often find that sharing lens mounts across various models opens up new creative avenues. Here’s how to effectively manage this process while ensuring compatibility and performance.
Key Considerations for Shared Use
- Check the mount type: Ensure that the lenses conform to the respective mounts of the bodies you intend to utilize.
- Evaluate focal length: Different systems can affect the effective focal length, altering the framing of your shots.
- Know the aperture mechanics: Some mounts may restrict control over aperture settings, impacting your exposure flexibility.
Sharing Tips and Tricks
- Keep a log: Document the lenses and mounts you have access to, along with any specific quirks observed per combination.
- Regularly test combinations: Frequent testing ensures optimal performance and helps identify any issues early on.
- Engage with communities: Forums and social media groups can provide insights and personal experiences that enhance understanding of compatibility.
Sharing mounts allows for a diverse range of photography experiences. By adhering to these guidelines, I can maximize my gear’s potential while reducing costs associated with purchasing new proprietary equipment.
Handling Adapters with Different Mount Types
Always verify compatibility before attempting to attach a new mount. Each lens type corresponds to specific mounts, so consult manufacturer specifications and compatibility lists. Understanding the physical differences between mounts is critical; different flange distances can affect focus and overall functionality.
For those experimenting with various systems, using adapters can enable access to a vast range of optics. However, keep in mind that not all combinations work seamlessly. Some mounts allow full electronic communication, while others may restrict autofocus functionality or aperture control. When adapting lenses from various brands, it’s wise to expect some limitations.
Testing and Adjusting Fit
After securing an adapter, perform a thorough check for fit consistency. Loose fittings can introduce play, negatively impacting image quality. I recommend using a tripod to assess sharpness and alignment on test shots, focusing on the corners of the frame. This step is crucial, especially with vintage or off-brand optics that may not align perfectly with new mounts.
Advantages of Versatility
Experimenting with different mount configurations allows for extensive creative freedom. I often find that adapting a lens can breathe new life into my work and broaden artistic expression. Just remember to retain some caution regarding adjustments in exposure settings, as this can affect the desired outcome. Knowledge of how different mount types interact with specific devices is key to maximizing artistic potential while minimizing technical challenges.
Creative Techniques with Adapted Lenses
Exploring the unique characteristics of vintage optics offers exciting opportunities for creativity. For instance, shooting with a Helios 44-2 can produce mesmerizing swirls in the background, perfect for portrait photography. I recommend using a wide aperture to enhance this effect, resulting in an attractive bokeh.
Playing with Focus
Manual focusing with adapted optics can introduce a level of artistry in storytelling. I often play with selective focus, drawing attention to specific elements while allowing others to fade into soft blur. This technique can transform even mundane scenes into compelling images, guiding the viewer’s eye to where I want it.
Experimenting with Lens Distortion
Utilizing wide-angle or fisheye lenses through adapters opens creative avenues in landscape photography. The distortion can create dynamic perspectives, particularly when photographing architectural subjects or vast open spaces. I suggest getting close to the subject to amplify the effect, enhancing the visual impact significantly.
Exploring Third-Party Adapter Brands
In my experience, selecting the right third-party brands can significantly enhance your shooting capabilities. Brands such as Metabones, Viltrox, and Fotodiox are recognized for their reliability and performance. Each offers various models tailored for specific systems, ensuring compatibility and functionality.
Metabones
Metabones is often praised for its speed boosters, which not only allow mounting of lenses from different manufacturers but also increase the effective aperture, enhancing low-light performance. Their sleek design minimizes light loss and maintains image quality.
Viltrox
Viltrox caters to photographers seeking affordability without sacrificing quality. Their adapters support various lens types while providing seamless autofocus capabilities. I often find their build quality impressive for the price point.
Fotodiox focuses on unique solutions, offering specialized adapters that cater to niche requirements, such as macro or tilt-shift applications. These products provide versatility, allowing for creative exploration across different styles.
While working with third-party options, I’ve noticed minor variances in performance. It’s advisable to read reviews and consider personal needs before making a decision. Testing adapters in-store, if possible, helps gauge their functionality with your specific set-up.
Always ensure that any chosen third-party brand complements your primary equipment, enhancing your workflow rather than hindering it. Ultimately, experimenting with various adapters from these brands can lead to unexpected creative possibilities.
Weight Considerations with Adapters
The weight of an attachment can significantly impact handling and balance. Selecting a lightweight option is crucial for maintaining stability during shooting sessions. Heavier models may necessitate adjustments in grip and posture, potentially leading to fatigue over time.
Balancing Rigidity and Portability
Prioritize models that offer a balance between durability and lightness. Materials like aluminum provide sturdiness without excessive weight. Always evaluate your setup; if you’re using larger lenses, opt for robust firmness to ensure safety and reliability.
Weight Distribution Effects
Consider how the weight is distributed. An imbalanced configuration can cause difficulty in maintaining composure, especially during extended periods of use. Testing various combinations of lenses and attachments beforehand helps find the optimal setup for your style.
Factors Affecting Lens Performance with Adapters
Several aspects significantly influence how well an optical attachment performs. Understanding these variables can enhance the quality of your captures.
1. Mount Compatibility
- Ensure that the connection between the optical attachment and the body is secure. Any gaps can cause light leaks or misalignment.
- Check the specific mount types for both the lens and the camera for a proper fit.
2. Focal Length Changes
- Using an optical converter can alter the effective focal length, impacting framing and perspective.
- Be mindful of how this affects telephoto versus wide-angle shooting.
3. Aperture Range Limitations
- Some optical mounts restrict maximum aperture, which can reduce low-light performance.
- Verify any changes in depth of field or bokeh quality after installation.
4. Autofocus Performance
- Autofocus may be slower or less accurate with certain configurations. Test autofocus functionality thoroughly to avoid missed shots.
- Manual adjustments might be necessary for precise focusing.
5. Optical Quality
- Evaluate any potential loss of sharpness, contrast, or color rendition due to additional glass elements.
- Conduct tests for distortion and chromatic aberration to understand the attachment’s impact on overall image fidelity.
6. Vignetting and Light Falloff
- Watch for darkening at the corners of the frame, especially with wide apertures. This can vary by combination.
- Consider using software correction for minor issues, if necessary.
Being aware of these factors while experimenting with optical converters equips you with the insight needed to maximize performance and achieve desired visual effects.
FAQ:
What types of camera lens adapters are available, and how do I choose the right one for my setup?
There are several types of camera lens adapters designed to connect lenses from various manufacturers to different camera bodies. Common types include mount adapters which fit specific lens mounts, focal reducers that allow for wider apertures, and tilt-shift adapters that enable perspective control. Choosing the right adapter involves considering the lens mount of your camera, the lens you wish to use, and any additional features you might need, like image stabilization or electronic communication for autofocus. Researching compatibility and user reviews can also assist in making an informed decision.
How do I properly attach and detach a lens adapter without damaging my camera or lens?
To attach a lens adapter, start by ensuring both your camera and lens are turned off to prevent any potential damage. Align the adapter with the camera mount and gently twist it until it locks into place, listening for a click or feeling a snug fit. For detaching, press the release button on the adapter, if available, and twist it counterclockwise to remove it from the camera. Always handle both the adapter and camera with care, keeping the contacts clean and avoiding unnecessary force to prevent damage.
Will using a lens adapter affect the image quality of my photos, and if so, how?
Using a lens adapter can influence image quality in various ways. Some adapters may introduce vignetting, distortion, or softness at the edges of the frame, particularly if they are not well manufactured. Additionally, the adapter may impact the lens’s effective aperture and focal length, affecting exposure and depth of field. High-quality adapters are generally designed to minimize these effects, so investing in a reputable brand can help maintain image quality. It’s wise to conduct tests with your specific setup to understand how your images may change with the use of an adapter.


