

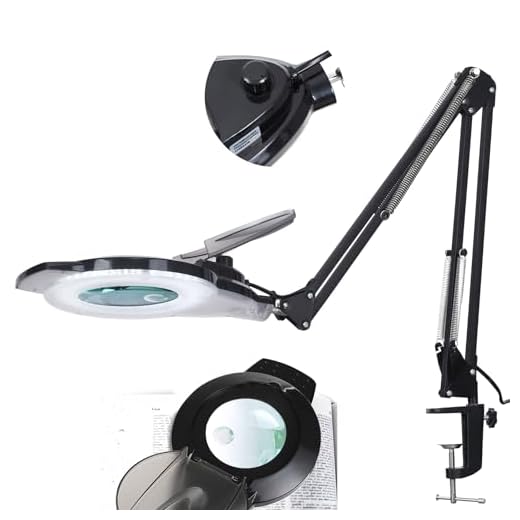


Begin with disassembling your optical unit. Ensure you have the right tools–screwdrivers, lens spanners, and a clean workspace. Carefully unscrew the components, making sure not to damage the delicate parts. Pay attention to the arrangement of elements for reassembly later.
Next, address the glass surfaces. Use a microfiber cloth and a specialized lens cleaning solution to remove fingerprints, dust, and smudges. For stubborn spots, a gentle rub with a lens brush can help. Avoid using household cleaners, as they may cause damage.
Inspect the internal mechanics for dust or dirt accumulation. A blower brush can effectively dislodge particles without harming the optical surfaces. If you’re comfortable, removing and cleaning the mirrors and prisms can enhance clarity significantly.
Reassemble the components in the reverse order of disassembly, ensuring each piece fits snugly. Calibration may be necessary; check the alignment using test shots. Lastly, perform a visual inspection in good light to confirm there are no smudges or flaws.
Refurbishing Optical Equipment
First, I disassemble the unit carefully using a set of precision tools. Each component is labeled and organized to prevent confusion during reassembly. For cleaning internal parts, I use a blower to remove dust, followed by a soft brush for stubborn particles.
Next, I take special care with the glass elements. A microfiber cloth combined with a lens cleaning solution effectively removes smudges and debris without scratching the surface. I avoid excessive pressure to maintain the integrity of the coatings.
Hardware inspection follows. I check for any signs of damage or wear on the mount and focus mechanism. If necessary, I replace worn screws or lubricate moving parts with appropriate grease to ensure smooth operation.
Once all components are clean and inspected, I begin reassembly by reversing my initial disassembly steps. A torque screwdriver ensures that I apply the correct amount of pressure to each screw, preventing future mechanical issues.
Lastly, I conduct a series of tests. Checking for alignment and focus accuracy is critical. I use a test chart to evaluate sharpness and any potential optical aberrations. This step guarantees that the refurbished equipment meets desired performance standards.
Assess the Condition of Your Lens
To accurately evaluate your optical equipment, thoroughly examine both the exterior and interior components. Start by inspecting the glass surface for scratches, fungus, or dust particles. A magnifying glass can help identify fine imperfections that are not visible to the naked eye.
- Exterior Damage: Look for dents, scratches, or any signs of impact that may affect the functionality.
- Fungus or Mold: Shine a bright light through the lens to check for any internal growth. This can affect image quality.
- Dust Accumulation: Use a blower to remove loose particles. A microfiber cloth can help clean the surface, but avoid using excessive force.
Next, check the moving parts such as the focus ring and aperture blades. They should operate smoothly without any grinding or stiffness. If you feel any resistance, it indicates that lubrication may be needed.
- Focusing Mechanism: Rotate the focus ring to see if it moves fluidly. Listen for any unusual sounds.
- Aperture Blades: Ensure they open and close quickly and evenly. Lagging blades can lead to exposure inaccuracies.
Lastly, test the lens on your camera to assess image quality. Capture a series of test shots, focusing on both near and far subjects. Inspect the images for sharpness, contrast, and any signs of vignetting or distortion.
- Sharpness: Check if the images retain clarity across different apertures.
- Contrast: Evaluate if colors appear vivid or washed out.
- Vignetting: Observe if there’s a darkening around the corners of the frame.
Taking these steps will give you a clear understanding of the current state of your lens and the necessity for any repairs or enhancements.
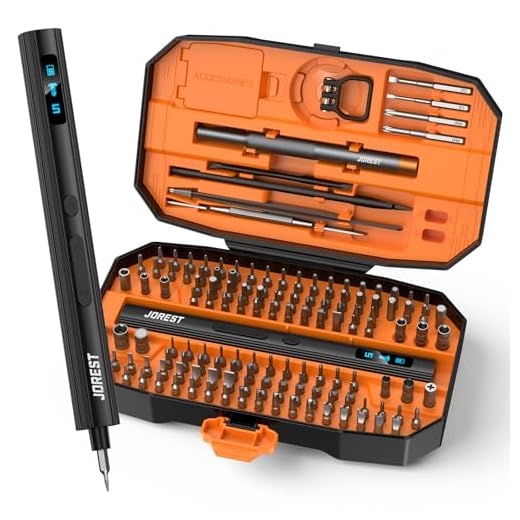
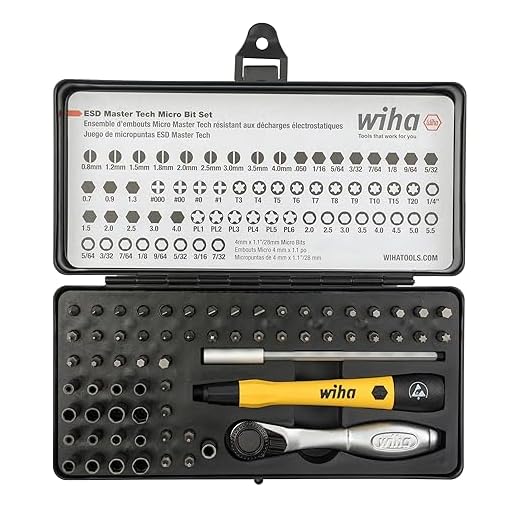
Gather Necessary Tools for Refurbishment
I recommend collecting the following tools to ensure a smooth process of rejuvenating your optical equipment:
- Precision Screwdrivers: A set of small, high-quality screwdrivers, including Phillips and flathead, is vital for accessing the internal parts.
- Lens Cleaning Kit: This should include microfiber cloths, lens cleaning solution, and brushes to remove dust and fingerprints.
- White Cotton Gloves: Wearing these helps prevent fingerprints or scratches on glass surfaces.
- Tweezers: Fine-tipped tweezers allow for safe handling of small components during disassembly.
- Spanner Wrench: Useful for loosening and tightening the retaining ring of the glass elements.
In addition to tools, I advise gathering the following supplies:
- New Seals and Gaskets: Replace any worn seals to prevent dust and moisture ingress.
- Lubricants: A light, non-damaging lubricant is necessary for smooth focusing mechanisms.
- Lens Paper: Designed specifically for optics, this is perfect for ensuring lenses are pristine after cleaning.
Having the right tools and supplies ready will streamline the process and ensure that the maintenance of your optical devices is effective. Proper preparation prevents unnecessary delays and potential damages during the procedure.
Clean the Exterior of the Lens
Use a microfiber cloth for cleaning. Ensure it’s free from any debris to avoid scratching the surface. Gently wipe the exterior using circular motions. If there are stubborn spots, slightly dampen the cloth with distilled water or lens cleaning solution before wiping.
Materials Needed
- Microfiber cloth
- Distilled water
- Lens cleaning solution
- Soft-bristled brush
- Compressed air (optional)
Step-by-Step Process
- Remove any dust or particles using a soft brush or compressed air.
- Dampen a section of the microfiber cloth with distilled water or a lens-safe cleaner.
- Wipe the exterior gently, focusing on areas with fingerprints or smudges.
- Use a dry part of the cloth to polish the surface after cleaning.
- Inspect the lens for any remaining marks and repeat the process if necessary.
Ensure to store your cleaning materials in a dust-free area. Regular maintenance will keep the exterior surfaces clear for optimal handling and aesthetics.
Inspect and Clean the Lens Glass
First, I examine the glass for any visible imperfections like scratches, dust, or fungus. Using a bright flashlight helps to reveal any hidden flaws. For minor spots or smudges, I use a soft brush or an air blower to remove dust particles without touching the surface.
Next, I take a microfiber cloth, lightly dampened with a lens cleaning solution, and gently wipe the glass in circular motions, starting from the center and moving outward. This minimizes the risk of creating new scratches. It’s crucial to avoid using paper towels or rough fabrics, as they might cause damage.
If fungus is present, I apply a specific anti-fungal solution recommended for optical glass and let it sit for the recommended time. After treatment, I repeat the cleaning process to ensure a clear finish.
For stubborn residue, I might need to soak a cotton swab in the cleaning solution and delicately address the trouble spots. Careful attention is necessary to ensure no threads or fibers remain on the surface.
Once the glass feels clean, I inspect it again under the light to confirm that all residues are gone and there are no new scratches from the cleaning process.
Remove Dust and Debris from Inside the Lens
I recommend using a blower to eliminate loose dust particles. Aim to direct air into the lens while holding it at an angle to facilitate dust removal.
For more stubborn debris, follow these steps:
- Carefully disassemble the lens according to the manufacturer’s guidelines.
- Utilize a microfiber cloth dampened with lens cleaning solution to gently wipe internal surfaces.
- Employ a soft brush to flick away any dirt particles that remain after initial cleaning.
- Use a vacuum with a narrow nozzle cautiously if necessary, ensuring you do not touch any optical components.
After cleaning, reassemble the lens carefully. Make sure all parts are correctly aligned to avoid misalignment issues that could affect performance.
Finally, test the lens for functionality and ensure that no additional debris has settled during reassembly. Check for smooth operation while zooming or focusing, as this indicates a successful cleaning process.
Check for Fungus and Other Damage
Begin your inspection under a strong light source. Look through the glass elements to identify any signs of fungus, a common issue. This appears as a cloudy, web-like structure or dark spots on the internal surfaces of the elements.
Identifying Fungus
- Inspect multiple angles to reveal hidden spots.
- Use a magnifying glass for closer examination.
- Check areas near the lens mount and rear element.
If fungus is evident, consider the potential impact on image quality. It can spread and lead to further degradation if not managed swiftly.
Other Damage to Look For
- Scratches: Examine both the front and rear glass for any visible scratches or abrasions. Minor ones may not affect functionality, but severe scratches can impair image sharpness.
- Coating Issues: Look for peeling or haze which can indicate damaged anti-reflective coatings.
- Internal Dust: Unevenly distributed dust particles can create flaws in images; check between glass elements with a bright light.
- Kinks or bends in the barrel: Physical deformities can affect focusing and zoom mechanisms.
Document all observed issues in detail. This will guide your approach for repairs and cleaning. Prioritize urgent repair needs, especially when fungal growth is present, to preserve the integrity of the optical elements.
Use Proper Cleaning Solutions for Lenses
For optimal maintenance, I rely on isopropyl alcohol, specifically the 70% concentration. It’s effective for dissolving oils and removing smudges without leaving residue. I apply it using a microfiber cloth, which prevents scratches and helps maintain clarity.
For stubborn spots or grime, I have found specially formulated lens cleaning solutions to be invaluable. These solutions are designed to be gentle on coatings and effective against dust and fingerprints. I avoid using household cleaners; they often contain ammonia or other harsh chemicals that can damage coatings.

When cleaning, I mix a few drops of the solution with distilled water, ensuring a gentle, effective blend. If a stubborn particle clings to the surface, I use a blower to dislodge it before I proceed with the solution, minimizing the risk of scratches.
For internal elements, I steer clear of any liquids and instead use a lens brush that’s soft and gentle. This way, I can effectively lift dust without the risk of harming delicate internal surfaces.
Finally, I always ensure my tools are clean before starting the process. I regularly wash my microfiber cloths separately without fabric softeners to avoid any residues that could impede the cleaning process. This routine guarantees that I maintain the integrity of my equipment while ensuring optimal performance.
Replace Broken or Scratched Elements
Removing damaged components is a critical step to restore functionality. First, assess whether the front or rear glass elements require replacement. For glass elements, purchase high-quality replacements specific to your model.

Begin by disassembling the assembly where the damage is located. Use a precision screwdriver to gently remove screws holding the element in place. Always work in a clean, dust-free environment to avoid introducing more particles into the mechanism.
Once exposed, carefully lift the broken element out. If there are clips or retaining rings, use appropriate tools to remove them without damaging surrounding areas. Clean the seat where the new element will be placed, ensuring it’s free of dust or residue.
Position the new glass carefully. It should sit flush with the assembly without any wobbling. Reattach retaining clips or rings securely, and make sure the orientation is correct to avoid optical errors.
Below is a summary of the steps involved in replacing damaged components:
| Step | Action |
|---|---|
| 1 | Acquire high-quality replacement glass |
| 2 | Disassemble the lens carefully |
| 3 | Remove the damaged element or component |
| 4 | Clean the area for the new part |
| 5 | Install the new element securely |
| 6 | Reassemble the lens fully |
Ensure that all screws are tightened properly and conduct a test to confirm that the assembly operates smoothly before finalizing the reassembly process.
Reassemble the Lens after Cleaning
Begin by aligning the elements according to the sequence recorded during disassembly. Pay close attention to any alignment markers on the parts. Gently place the front and rear elements back into their respective housings, ensuring a snug fit without applying excessive force.
Use a microfiber cloth to grab any fingerprints or debris that may have settled on the surface after cleaning. As you reassemble, make sure all screws and mechanical parts are properly seated. This prevents damage to internal components and ensures smooth operation.
When reinserting screws, apply a minimal amount of locking compound if needed, but avoid overuse, as this can complicate future servicing. Tighten screws in a crisscross pattern to ensure even pressure distribution.
Reconnect any electrical components carefully, ensuring no wires are pinched. If your optical system has a diaphragm mechanism, verify that it operates smoothly by testing its movement before sealing the casing.
Finally, inspect all assemblies for secure attachment and correct alignment. Place any protective front or rear caps back on the lens. Give the exterior a final clean using a specialized lens wipe. This ensures the outer layer is free of smudges before the lens is stored or used again.
Calibrate the Focus Mechanism
First, ensure the lens is securely mounted to a compatible camera body. Set the aperture to its widest setting to maximize light intake. Equip yourself with a target for autofocus calibration, such as a focus calibration chart, which can be printed or purchased. Place the chart at a distance of about 50 times the focal length of the lens.
Next, utilize the camera’s autofocus system to lock onto the chart and take a test shot. Review the image for sharpness, focusing on the details close to the center and edges of the frame. If the focus appears off, it’s time to adjust the calibration.
Adjusting Focus
To begin the adjustment, access the camera’s menu and locate the lens correction settings. Here, you can fine-tune the focus by making incremental adjustments. I recommend starting with small changes, like +5 or -5, depending on whether the focus is front-focusing or back-focusing.
After each adjustment, take another test shot and analyze the results. Repeat this process until the focus aligns perfectly with the target. Once satisfied, ensure the settings are saved.
Final Checks
It’s prudent to double-check the focus accuracy under different lighting conditions and distances. This thorough approach guarantees that your adjustments hold true across various scenarios, providing consistent performance. If persistent issues arise, consider deeper mechanical adjustments or consult a specialist.
Test the Aperture Functionality
To ensure the diaphragm operates smoothly, I begin by attaching the optical device to a compatible body. I then set the aperture to its widest setting and check for any impediments in the movement of the blades. Next, I incrementally adjust the f-stop values, observing any irregularities in opening and closing. It’s crucial that the blades respond promptly and accurately to changes, avoiding any sticking or lagging behavior.
Conducting a Manual Check
I often manually actuate the aperture control from the lens to observe the movements of the blades. This direct approach reveals potential misalignments or mechanical issues that may not be apparent during electronic testing. Listening for unusual noises during this process also helps identify loose components or binding that might require further attention.
Evaluate Through Photography
Finally, I take several test shots at varied f-stop settings, examining the images for exposure consistency and sharpness. This practical evaluation helps confirm that the aperture operates as intended across its entire range. If discrepancies arise, further investigation into the mechanism’s assembly may be necessary.
Ensure Smooth Zoom Operation
I check the zoom mechanism for any signs of stiction or roughness. Applying a small amount of lubricant specifically designed for optical mechanisms can greatly enhance the smoothness. I prefer using a lightweight synthetic grease to avoid buildup that could attract dust and particles.
Lubrication Process
Carefully disassemble the zoom assembly, taking note of the order of components. I clean any old grease with a lint-free cloth and a suitable solvent. After cleaning, I apply a thin layer of lubricant to the contacting parts of the zoom barrel and the helicoid threads. This ensures that the motion remains fluid without excess friction.
Testing the Zoom Functionality
After reassembly, I test the zoom operation by extending and retracting it several times. This not only helps to distribute the new lubricant evenly but also allows me to check for any unusual resistance or noise. If any issue arises, I disassemble it again to reassess and correct the lubrication application.
Check Electrical Contacts for Functionality
I begin by closely examining the electrical contacts on the mount of the optic. These contacts are essential for communication between the lens and the body of the device. Any corrosion or dirt can impede connectivity and functionality.
Steps to Ensure Proper Functioning
Using a magnifying glass, I inspect the pins and contacts for signs of wear or damage. If any issues are found, I prepare to proceed with cleaning and testing.
| Contact Condition | Action Required |
|---|---|
| Corrosion Present | Clean with isopropyl alcohol and a soft brush. |
| Physical Damage | Consider replacement of the damaged contacts. |
| Debris Accumulated | Use compressed air to blow out dust and particles. |
| Functionality Uncertain | Test on a compatible body to verify connection. |
After cleaning, I conduct a functionality test by mounting the lens onto a compatible system to confirm that all electronic features operate smoothly. If the contacts are still not working correctly, further inspection inside may be necessary.
This attention to detail in checking electrical contacts can prevent future issues and ensure optimal performance of the optical equipment.
Test the Lens on a Camera Body
Attach the optic to the compatible mount on the body. Ensure it clicks securely in place. Switch on the power and check the display for any error messages regarding the attachment.
Engage the autofocus system. If functioning correctly, the focus should be quick and accurate. Take a few shots at different focal lengths to assess sharpness across the zoom range. Don’t forget to look closely at the images on a large screen after capturing them.
Evaluate Aperture Performance
Vary the aperture settings while observing the viewfinder or live view. Ensure diaphragmatic blades are moving smoothly without any sticking. Verify that the exposure appears accurate at each f-stop.
Test Additional Features
If the optic has a stabilizer, activate it and take a few handheld shots to assess if it compensates for camera shake effectively. Listen for unusual sounds during operation, which may indicate internal issues. Ensure all buttons and switches operate as intended, confirming electronic connections are intact.
Evaluate Image Quality After Refurbishment
Conduct meticulous tests to evaluate the performance of the restored optic. First, choose a consistent lighting environment. I often select a well-lit indoor setting or an open outdoor location. This helps accurately assess exposure and sharpness.
- Use a tripod to stabilize the camera and maintain a fixed position.
- Set the camera to a high-quality image format, such as RAW, to capture maximum detail.
- Utilize a range of apertures; start wide open, then stop down to higher f-stop values to analyze depth of field and clarity.
Inspect the captured images for the following:
- Sharpness: Zoom in on images to examine details. Look for any signs of softness or lack of definition.
- Color Accuracy: Check the reproduction of colors under various lighting. Compare with known color standards when necessary.
- Distortion: Observe the edges of images for any curvature or bending that might indicate unresolved imperfections.
- Chromatic Aberration: Look for color fringing around high-contrast edges. Take note if adjustments are needed.
- Flare and Ghosting: Test against strong light sources to reveal any unwanted artifacts that could affect image quality.
Finally, document all findings. If any issues arise, it may indicate a need for further examination or adjustments to the elements within the optic. Regular practice and comparison with known benchmarks will enhance the evaluation process over time.
Document the Refurbishment Process
Keep a detailed record while working on your optical gear. This documentation serves as a reference and helps identify any recurring issues in the future. Start with a checklist before beginning the project, noting each part of the device and its condition.
Steps to Document
At each stage, take clear photographs. Document the interior and exterior components, capturing before and after shots. Include notes about any specific challenges faced during disassembly and reassembly, specifying tools used for each task.
| Step | Observation |
|---|---|
| Initial Inspection | Record visible damage, wear signs, and any loose parts. |
| Disassembly | Keep track of screws and components order to ensure proper reassembly. |
| Cleaning | Note which cleaning solutions were effective for specific areas. |
| Reassembly | Document any difficulties encountered and solutions found. |
| Final Testing | Record performance metrics and any remaining issues. |
A well-kept log provides insight into the refurbishment journey, making the process smoother next time. It will help you determine the longevity of repairs and the effectiveness of methods employed.
Store the Lens Properly Post-Refurbishment
After completing the restoration of the optical device, proper storage is critical for maintaining its condition. I use a dedicated padded case that prevents physical damage while also keeping dust at bay.
Firstly, I ensure that the lens cap is securely placed on both ends to protect the glass surfaces from scratches and contaminants. Using a silica gel packet in the case helps to absorb moisture and prevents fungal growth.
I store the assembly in a cool, dry environment, avoiding exposure to extreme temperatures or humidity. This way, I minimize the risk of internal components becoming misaligned or damaged over time.
Regularly checking the storage conditions and the state of the equipment is also part of my routine. If I notice any signs of humidity or dust buildup, I address it immediately to avoid long-term issues.
Lastly, keeping a record of the storage conditions and any maintenance checks ensures I stay on top of the care for the optical instrument.
When to Consider Professional Help
Seek professional assistance if you encounter significant internal damage, such as broken elements or severe fungus that affects optical performance. Additionally, if you lack the necessary tools or experience for delicate tasks, like calibrating the focusing mechanism or replacing glass elements, it’s wise to consult an expert. Certain repairs, particularly relating to electronics or complex assembly, can risk further damage if attempted without proper knowledge.
Signs Indicating a Need for Assistance
Watch for inconsistent image quality, which could signal misalignment or internal contamination. If reassembly proves challenging or if minor adjustments don’t rectify issues, involving a specialist can save time and potential frustration. Remember, investing in expert repairs often pays off in longevity and performance of your equipment.
Understanding the Value of Professional Services
Evaluating the cost of professional repair versus DIY efforts is crucial. If repair costs exceed the current market value of your gear, consider alternatives like replacement. An experienced technician can provide insights into the feasibility and longevity of repairs, ensuring your investment remains worthwhile.
Learn Common Lens Issues for Prevention
Identifying and understanding common problems with optical devices is crucial for their upkeep. Below are frequent issues to be aware of, along with tips for prevention.
| Issue | Description | Prevention Tips |
|---|---|---|
| Dust Accumulation | Fine particles can settle on the glass, affecting image quality. | Use a protective case and keep in a clean environment. |
| Fungus Growth | Moisture can lead to mold developing on internal elements. | Store in a dry area with silica gel packets to absorb moisture. |
| Scratched Glass | Improper cleaning can cause scratches on the surface. | Use microfiber cloths and designated cleaning solutions only. |
| Loose Components | Wear and tear can lead to loose focusing or zoom mechanisms. | Avoid dropping and give thorough inspections before and after use. |
| Electrical Failures | Dirt or corrosion on contacts can disrupt electrical functionality. | Regularly check and clean electrical contacts with a soft brush. |
By staying aware of these issues and following the suggested precautions, I ensure longevity and performance in my optical tools. Consistent adherence to best practices will also save on repair costs and enhance overall shooting experiences.
Understand the Costs of Lens Refurbishment
Assessing the financial implications of lens rejuvenation is crucial. The typical expense can vary widely based on several factors:
- Type of Lens: High-end optics usually demand higher refurbishment costs due to complex designs and premium materials.
- Extent of Repair: Simple cleaning may cost less, whereas significant repairs, like element replacements or mechanical adjustments, will increase the total.
- Service Provider: Rates differ significantly between local technicians, specialized shops, and manufacturers. Getting estimates can provide a clearer view.
In general, budget anywhere from $50 for basic cleaning to upwards of $300 or more for comprehensive repairs involving multiple elements or mechanisms. It’s advisable to get a detailed quote before proceeding, itemizing expected repairs and services. Consider the value of the lens against its refurbishment cost; it should still make sense economically.
Also, factor in potential downtime. While your optical equipment is in the shop, you might want to consider a temporary replacement, which could add to your overall costs. Preparing a budget that encompasses these various areas can help avoid surprises.
Finally, keep an eye out for warranty conditions or service guarantees offered by the technician or company. This might provide additional reassurance regarding your investment.
Find Replacement Parts for Old Lenses
Begin with researching online marketplaces and specialty stores that focus on photographic gear. Websites like eBay, KEH, or B&H Photo often have listings featuring used, refurbished, or new replacement components. Ensure to check item conditions and seller ratings to avoid low-quality parts.
Utilize Dedicated Forums and Groups
Join forums such as Fred Miranda or DPReview, where enthusiasts buy and sell gear. Connecting with fellow photographers can lead to finding rare parts or getting recommendations on where to look. Local camera clubs are also excellent resources for networking with individuals who might have the components you need.
Contact Manufacturers
Reach out to the original manufacturers for their suggestions on acquiring parts for discontinued models. Brands often have service departments or authorized repair centers that can guide you towards legitimate sources or even provide replacements directly, if available.
Keep an eye out for local repair shops that might hoard older tools and components. They often have a stock of spare parts from outdated lenses that can be repurposed, enhancing the lifespan of similar models.
Lastly, make use of search engines effectively by combining specific model names with terms like “parts” or “replacement.” This can lead to niche suppliers or individual sellers who specialize in rare components.
Explore DIY Resources and Communities
I recommend visiting websites like DIYPhotography.net and The-Digital-Picture.com, which provide a wealth of guides and tutorials for anyone looking to take on lens restoration projects. These platforms often feature articles penned by experienced enthusiasts who share their personal insights and methodologies.
Joining dedicated forums such as PhotographyTalk and FredMiranda can also be invaluable. Engaging with other hobbyists allows for exchanging techniques, troubleshooting difficulties, and accessing first-hand stories about common pitfalls and successes during renovation tasks.
YouTube is another excellent resource, filled with practical video walkthroughs. Channels like The Camera Store TV and YouTuber photographers often showcase step-by-step procedures on disassembly and cleaning, making it easier to visualize the process.
Social media groups on platforms like Facebook or Reddit can create a sense of community. Look for groups focused on photographic equipment repair where members actively share tips, replacement parts, and project experiences. Participating in these groups can accelerate your learning curve by connecting you with mentors and fellow restorers ready to offer advice or support.
Finally, consider exploring local maker spaces or workshops. These facilities sometimes host classes or meetups centered around camera gear maintenance, providing hands-on experiences alongside like-minded individuals.
Compare Refurbishment Techniques
For cleaning and restoring optical instruments, I typically choose between a few distinct methods based on the specific issues present. The basic approach I often employ involves a thorough exterior cleansing using microfiber cloths and specialized solutions. This provides a solid foundation for further work, particularly for maintaining the external appearance.
For internal cleaning, I lean towards either the compressed air method or the careful disassembly of the optical assembly. The compressed air technique is less invasive and works well if there’s minor dust build-up. However, disassembly allows for comprehensive cleaning and is invaluable in cases of fungus or significant internal debris.
When dealing with scratched or damaged elements, I find that the option to replace is often optimal. While polishing can sometimes reduce the visibility of scratches, it risks affecting the optical performance. Replacement ensures that the integrity of the glass remains untouched.
Calibration of the focusing mechanism is another critical stage. I prefer a systematic approach to aligning elements, ensuring that focusing remains accurate post-cleaning. Verification through tests on a compatible body helps confirm that all adjustments maintain functionality.
The method of storing refurbished items is also worth discussing. I favor airtight cases with silica gel packets to mitigate any moisture issues. This simple addition extends the life of any newly restored equipment significantly.
Finally, engaging with online communities for support or advice is a technique I recommend. Sharing experiences often leads to innovative solutions that I may not have considered, allowing for continuous improvement in my restoration practices.


