

Begin the process by carefully removing the back cover of the device using a heat gun or a hairdryer. This helps soften the adhesive, making it easier to lift open without causing damage to internal components.
Once you gain access, locate the screws securing the protective bracket over the optical module. Use a precision screwdriver to remove these screws, and set them aside in a safe place to avoid any loss.
Gently detach the lens from its housing, taking care not to damage the delicate connectors. If the lens is stuck, a slight twist while pulling can help. If you encounter any resistance, applying a bit of isopropyl alcohol can help dissolve the adhesive.
Before installing the new optical unit, ensure the surrounding area is clean to prevent dust from entering the system. Position the replacement carefully and press it into place, ensuring it’s aligned correctly. Finally, reattach the bracket and screws methodically, sealing the back cover once finished.
Lens Replacement Procedure for Samsung S7
Begin by powering off the device and removing the back cover using a plastic pry tool. Carefully detach the battery, ensuring not to damage any internal components.
Next, locate the camera module. You may need to remove screws securing the assembly. Use a precision screwdriver for this task.
Gently lift the camera away from its housing. If the lens is glued in place, apply heat to soften the adhesive, then use a razor blade to slice through it. Exercise caution to avoid scratching surrounding surfaces.
Once the old lens is removed, clean the area of any residue or debris. Align the new lens with the housing, ensuring it fits snugly. Use adhesive suitable for electronics to secure the lens in place.
Reassemble the camera module, reconnect the battery, and snap the back cover onto the device. Finally, power on the phone to test the new lens functionality, ensuring clarity and focus.
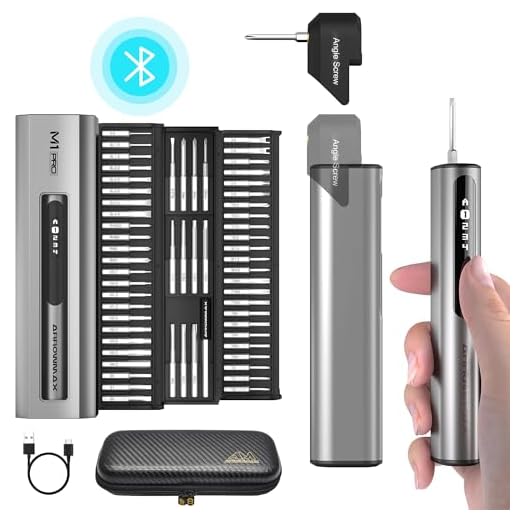
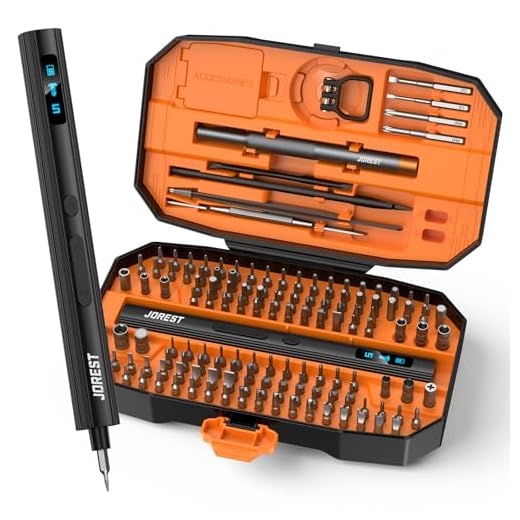
Gather Necessary Tools for Lens Replacement
Begin with a small Phillips screwdriver, as it will be pivotal in loosening screws without damaging them. Ensure a precision set to accommodate the size of the screws in the unit.
A plastic opening tool is indispensable for safely prying open the device’s casing. This will help to avoid scratches or breaks during the disassembly process.
An adhesive remover or isopropyl alcohol will assist in softening the glue that holds the lens in place. This step simplifies the removal of the damaged optical component.
It’s wise to have a microfiber cloth on hand. This prevents fingerprints on the new lens and ensures cleanliness before installation.
Additionally, a pair of tweezers can be useful for manipulating small components, especially when dealing with tiny screws or delicate parts.
Finally, consider using a small flashlight to illuminate the workspace. This will help in identifying screws and components that might otherwise be difficult to see.
Identify the Symptoms of a Damaged Lens
I often notice specific indicators that suggest a lens might be compromised. Common signs include distortion in photos, such as blurriness around the edges or a noticeable drop in overall image quality. Additionally, if I observe spots or haze in images, this often points to scratches or debris on the lens surface.
Another telltale sign is persistent focus issues. If the device struggles to focus or produces images that appear out of focus, it may indicate damage. Furthermore, I keep an eye out for physical cracks or chips on the lens itself, which are clear symptoms of harm.
Sometimes, I see discoloration in images, where colors appear washed out or inconsistent. If the lens appears foggy or has visible moisture trapped inside, it could mean the seal has been broken, allowing humidity to enter. Regularly checking for these symptoms can help prevent further complications.
Power Off Your Samsung S7 Before Starting
I always make it a point to turn off my device before working on any repairs. To power down the S7, press and hold the power button located on the right side. A menu will pop up on the screen; select “Power Off” and confirm your choice. This protects the internal components and prevents accidental activation during the process.
A complete shutdown also reduces any risk of short circuits while I’m handling sensitive parts. It’s a simple step, but it guarantees safety throughout the procedure.
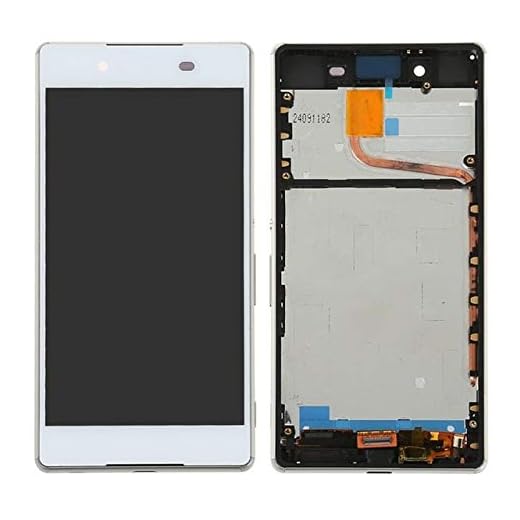
Remove the Back Cover of Your S7
To access the internal components, I carefully detach the back cover of my device. Follow these steps:
- Gather a heat source, such as a hairdryer, to gently warm the edges of the back cover. This can help soften the adhesive.
- Use a plastic opening tool to pry up the cover. Start at one corner to create a gap.
- Slowly work the tool around the edges. Keep the pressure consistent to avoid cracking the glass.
- Once you’ve created enough space, using your fingers is often easier. Slowly lift the cover away from the frame.
- Be cautious of any cables connected to the back cover, such as the fingerprint sensor. Disconnect them if necessary.
After removing the cover, I carefully place it aside in a safe location. This ensures no damage occurs while I proceed with the necessary repairs.
Disconnect the Battery for Safety
I always prioritize safety before performing any repairs. First, I locate the battery connection in the device. I use a plastic spudger or a similar tool to gently pry up the battery connector from its socket on the motherboard. This step ensures that there is no power running through the device during the lens replacement process, preventing any potential short circuits or damage to internal components.
After disconnecting it, I make sure the battery remains separated from the device throughout the entire procedure. Keeping it disconnected not only protects the device but also provides peace of mind while handling various parts. Ensuring safety during a repair can significantly reduce the risk of accidents and make the overall process smoother.
Locate and Unfasten the Camera Module
Gently lift the protective layer over the module using a plastic spudger. This can be done by inserting the tool at the edges to avoid damaging any surrounding components. The goal is to access the screws that hold the module in place.
Once the cover is removed, identify the screws securing the module. Typically, these will be small Phillips screws, so use the appropriate screwdriver. Carefully unscrew and place them in a safe location to prevent loss.
Remove the Camera Assembly
After unscrewing, gently lift the module from the housing. If there’s adhesive, use the spudger to carefully break the seal. Avoid excessive force; any strong pressure may cause damage to adjacent parts. The assembly should detach with minimal resistance.
Take note of any connectors attached to the module. Disconnect these carefully to ensure no wiring is damaged during removal. Once fully detached, the camera assembly can be set aside for lens replacement.
Carefully Remove the Old Lens
Using a plastic opening tool, gently pry around the edges of the existing lens. Apply controlled pressure to avoid damaging other components.
Start at one corner and work your way around in a circular motion. Be cautious of adhesive that may hold the lens in place.
Once the lens becomes loose, carefully lift it out with tweezers, ensuring no debris falls into the device.
Inspect the area for any remnants of adhesive. If found, use a soft cloth or cotton swab dipped in isopropyl alcohol to clean the surface.
- Tools: Ensure the opening tool is thin but sturdy to provide adequate leverage.
- Precision: Avoid using metal tools to prevent scratches or further damage.
- Cleaning: Keep the surrounding area clear of moisture and grime.
Once the old element is removed and the area is clean, you’re ready for the next steps in your repair process.
Clean the Camera Housing Before Installation
Thoroughly clean the area around the lens mount on the rear housing before installing the new glass. Use a microfiber cloth or an alcohol wipe to remove dust, fingerprints, and any debris that may have accumulated. This prevents contamination during installation.
Tools for Cleaning
A soft brush can also be handy for dislodging stubborn particles without scratching the surface. Ensure the housing is completely dry before placing the new lens, as moisture can lead to internal damage and affect image quality.
Final Check
After cleaning, visually inspect the housing for any remaining residue or damage. A clean and intact surface is crucial for a proper seal and optimal functionality of the new lens.
Align the New Lens Properly
Ensure the newly installed optical component is aligned with precision. I carefully position it over the designated mounting area, verifying that all edges are flush with the surrounding framework.
Check Alignment During Installation
While placing the new part, I pay close attention to the orientation. The lens should fit seamlessly within the housing, preventing any light leakage or distortion. Taking a moment to double-check reduces the risk of subsequent adjustments.
Testing the Fit
Once secured, I perform a quick test. I take a few photos to confirm clarity and focus. If issues arise, I reassess alignment before fully sealing the device.
| Steps | Details |
|---|---|
| Position | Align the component evenly in the designated area. |
| Check Flushness | Verify all edges are level with the surrounding surface. |
| Perform Test | Capture images to ensure proper function. |
| Reassess if Needed | Make adjustments if alignment is incorrect. |
Secure the New Lens in Place
To ensure stability of the new component, I apply a small amount of adhesive around the outer edges. This secures the lens and prevents any movement after installation. Using a precision applicator makes it easier to control the amount of adhesive used.
Align and Press Firmly
After applying the adhesive, I carefully position the new part into the housing. It is crucial to align it accurately with the existing fittings. Once aligned, I press down gently but firmly for around 10 to 15 seconds, allowing the adhesive to bond well.
Let it Cure
I wait at least an hour for the adhesive to set completely before reassembling the device. This step is vital; rushing can lead to misalignment or future detachment. Ensuring a strong bond now saves from potential issues later.
Reinstall the Camera Module into the Body
Align the camera module carefully with the corresponding connectors on the motherboard. Ensure that the cables are directed correctly to avoid damage during installation.
Steps to Reinstall the Module
- Gently place the module into its designated slot, ensuring that it fits snugly.
- Reconnect any flex cables attached to the module, being cautious of orientation to avoid bending or breaking.
- Use a screwdriver to secure the module with screws; do not overtighten to prevent cracking.
After securing everything, double-check all connections are tight and the module is firmly in place. This will ensure optimal performance when the device is powered on.
Final Checks
- Inspect the surrounding area for any debris or misplaced components that could obstruct functionality.
- Ensure that there are no tools left inside the device before reassembling the cover.
- Prepare the phone for testing by reconnecting the battery if it was disconnected earlier.
Reattach the back cover, applying gentle pressure until it clicks into place. Before turning the phone on, verify that all parts align seamlessly, ensuring a proper fit and finish.
Reconnect the Battery After Replacement
Align the battery connector with the motherboard’s socket carefully. Gently press down until it clicks into place, ensuring a snug fit. Avoid using excessive force during this step to prevent damage to the connectors.
Once secured, take a moment to inspect the connections for any visible issues. If everything appears properly attached, proceed to the next phase.
Before applying the back cover, I suggest checking the functionality of the newly installed component. Power on the device by pressing the power button briefly. Observe if the screen lights up and if the features operate as expected.
If the device powers up correctly, proceed with reassembling. Starting from one side, gradually push the back cover down to secure it. Ensure it clicks into place to prevent any loosening over time.
Finally, perform a test of the camera functions to verify that the replacement was successful. Capture a few images and review them to confirm clarity and focus are restored.
Replace the Back Cover of the Device
To gain access to the interior components of the device, the back cover must be removed carefully.
Necessary Steps
- Use a heat gun or hairdryer to warm the edges of the back cover. This softens the adhesive and makes removal easier.
- Utilize a plastic opening tool or a thin blade to pry the back cover gently. Insert it into the gap between the cover and the device frame.
- Work your way around the edges, applying gentle pressure to avoid cracking the glass.
- Once the cover is loose, lift it away carefully to avoid damaging any internal components.
After Removal
Inspect the internal areas for dust or debris. This preparation step is crucial for ensuring a clean environment for any component replacement.
- If the adhesive is still intact, it can be reused during reassembly. Otherwise, a fresh adhesive strip should be sourced.
- Handle all internal parts with care, ensuring no static electricity affects delicate components.
Power On Your Device to Test the New Lens
After securing the new optical element, I press the power button to turn on my device, ensuring all components are properly connected and intact. Once the screen lights up, I navigate to the camera application.
I take a few sample photos in different lighting conditions, checking for clarity, focus, and any potential distortions. It’s vital to explore various angles and settings to confirm the functionality of the replacement.
If the images come out clear and sharp, along with an absence of blurry or out-of-focus shots, the installation is successful. Should any issues arise, I will need to assess the alignment and secure attachment of the optical part once more.
| Test Scenario | Expected Outcome |
|---|---|
| Standard Brightness | Clear and focused images |
| Low Light Conditions | Decent exposure without excessive noise |
| Close-Up Shots | Sharp details and accurate focus |
If results are unsatisfactory despite thorough testing, I will repeat previous steps to ensure precise installation of the new component. Achieving optimal performance is key to enhancing the photo-taking experience.
Check for Image Clarity and Focus
After installing the new optical component, it’s crucial to evaluate whether it’s functioning correctly. Begin by capturing a series of test shots in various lighting conditions to examine the clarity of the images. Pay close attention to both outdoor and indoor environments.
Evaluating Sharpness
- Take close-up shots of detailed subjects, such as text or intricate patterns.
- Inspect the images at 100% zoom to assess sharpness and detail retention.
Assessing Focus Accuracy
- Use different focus modes on your device to determine if the system locks onto subjects effectively.
- Check if the autofocus mechanism is quick and precise. Try focusing on both stationary and moving objects.
Ensure you examine the results in varying conditions. If there are any signs of blurriness or inconsistencies in focus, further adjustments might be necessary. Take your time to verify every aspect to confirm the quality before resuming regular use.
Inspect for Any Gaps or Misalignment
After securing the new optic, I carefully examined the assembly for any irregularities. My goal was to ensure a snug fit without gaps between the frame and the lens. Both the outer edge of the replacement and the surrounding housing should meet seamlessly.
What to Look For:
| Condition | Action |
|---|---|
| Visible Gaps | Remove and reposition the lens, pressing firmly |
| Uneven Alignment | Adjust until symmetrical with the housing |
| Looseness | Ensure proper adhesive or housing screws are in place |
Using a flashlight can help spot any misalignment or spaces not visible in regular light. Approaching this task with patience is key; a misaligned component can lead to poor image quality or further damage.
Consider Updating Camera Software if Needed
Before proceeding with the replacement of the optical element, I recommend checking for any software updates available for the device. Outdated firmware can affect image quality and performance of the replacement part.
Go to Settings, scroll to About Phone, and tap on Software Update. If an update is available, download and install it. This ensures the device runs the latest enhancements, potentially improving the overall imaging capability.
After installation, restart the device to apply changes. This step may resolve any existing software-related issues that could interfere with the new optical element’s functionality.
Post-update, confirm that the camera’s settings are optimized for your photography needs, including resolution and image processing options. A well-configured software environment can significantly enhance the effectiveness of the newly replaced optical component.
Document the Repair Process for Future Reference
I recommend taking detailed notes and photos at each step of the procedure. Capturing the state of the device and the orientation of each component will prove invaluable if I need to refer back to the process later.
Notate any specific tools or parts used during the repair, including their brand and model numbers. This documentation will facilitate easier replacements down the line, reducing potential confusion.
Consider creating a step-by-step guide incorporating images taken throughout the process. Label these images clearly to ensure a smooth experience for anyone else who might attempt a similar fix in the future.
Additionally, save any relevant links or resources that informed my approach. This could include tutorials, repair forums, or manufacturer’s documentation that clarifies any intricate details.
Store this information in a specific location, either digitally or in a physical folder, to remain easily accessible for future repairs. Having this systematic record will streamline subsequent servicing tasks.
Seek Professional Help if Issues Persist
If complications arise after replacing the optical component, I recommend seeking assistance from a trained technician. This step is particularly important if the device displays persistent signs of malfunction, such as blurred images or consistent focus issues, which may indicate underlying damage beyond the lens itself.
Consider visiting an authorized repair center where experts can thoroughly diagnose and address any problems. Technicians possess the specialized tools and knowledge necessary to conduct repairs that exceed basic lens replacement. They can also ensure that any residual debris or adhesives are properly handled, preventing further damage.
Keep in mind that opting for professional support can save time and reduce frustration, especially if prior attempts don’t yield satisfactory results. A qualified professional can also provide pertinent advice regarding future maintenance to sustain optimal performance of the device.
Documenting the initial issues and attempted repairs will be helpful when consulting with a technician. Clearly communicating the symptoms observed can facilitate a quicker and more accurate assessment.
Ultimately, prioritizing the integrity of the device over DIY solutions will enhance my overall experience and ensure reliable functionality.


