


I prioritize checking the camera mount type to determine compatibility with various optic options. Each piece of equipment has a specific attachment, whether it be Canon’s EF, Nikon’s F, or Sony’s E-mount. I often consult my camera’s manual or manufacturer’s website for precise specifications related to this connection.
Next, I focus on the sensor size, as it influences the effective field of view. For example, full-frame models provide a wider perspective than crop sensors. I pay attention to the crop factor, as it will dictate how a certain focal length translates to my actual shooting experience.
Additionally, I analyze my photography style to select appropriate glass for my needs. Whether I’m gravitating toward wide-angle for landscapes or telephoto for wildlife shots, I consider the maximum aperture as it affects low-light performance and depth of field. Choosing high-quality optics enhances image clarity, minimizing distortion and chromatic aberration.

Before proceeding with a purchase, I find it essential to check compatibility with any existing accessories, such as filters or stabilization systems. This thorough approach ensures that I make informed decisions, ultimately enhancing my photographic endeavors.
Determining Compatibility of Optical Attachments
Consult your device’s specifications to ascertain the mount type. This key detail guides the selection process for appropriate optical additions. Manufacturers often provide detailed information about compatible attachments.
Utilizing Resources for Compatibility
Online databases and forums are valuable for cross-referencing mount types and user experiences. Engage with photography communities or dedicated websites to gather insights about suitable options based on personal requirements.
- Manufacturer’s website: Look for sections addressing peripherals or accessories.
- Photography forums: Participate in discussions specific to your equipment.
- Retail websites: Check customer reviews for compatibility experiences.
Physical Examination of Attachments
When possible, test optical accessories in-store. Handling the device first-hand allows for direct assessment of fit and functionality. Ensure the attachment locks securely and aligns properly with your setup.
- Check for any wobble or misalignment during attachment.
- Verify that electronic contacts (if applicable) engage correctly.
Keep an eye on the focal length and aperture range specific to your needs, as these factors impact performance significantly. With patience and thorough research, securing the right optical additions becomes a straightforward task.
Understanding Camera Mount Types
Determine the mount type of your device to ensure compatibility with various optics. Most manufacturers have specific mount systems, such as Canon’s EF, Nikon’s F, or Sony’s E mount. Knowing your model’s mount type is critical in the selection process.
Identifying Mount Types
Check your device’s manual or official website for specifications on the mount system. Additionally, you can often find the mount type printed near the lens attachment area. Online resources and forums can also provide insights based on user experiences and shared diagrams.
Adapters for Compatibility
If you want to explore optics from different brands, consider using lens adapters. These tools can enable various mounts to attach to your model. Research the performance implications, as some adapters might affect autofocus or image quality. Always verify user reviews before making a purchase.
Identifying Your Camera Brand and Model
First, check the body of your device for a label or engraving that displays the manufacturer and model. Common locations include the bottom or around the grip section.
Use the menu system on your body; many devices provide this information in the settings or ‘About’ section. This feature often includes additional specifications relevant for choosing compatible accessories.
| Brand | Example Model |
|---|---|
| Canon | EOS Rebel T7 |
| Nikon | D3500 |
| Sony | A7 III |
| Fujifilm | X-T30 |
| Pentax | K-70 |
Online resources offer valuable help. Search for specifications or manuals using the brand and model number. Manufacturer websites typically have extensive information on their models, including links to compatible products.
Utilize communities and forums dedicated to photography. Experienced users often share insights on compatibility with various products and modifications.
Checking the Lens Mount Compatibility
To ensure seamless attachment of optics, I check the mount type of my gear. Each manufacturer has specific mounts, so identifying mine is the first step. Common mounts include Canon EF, Nikon F, Sony E, and Micro Four Thirds. I research my model specifications to confirm the exact design.
Next, I consult the manufacturer’s website or user manual. They often provide detailed information on compatible optics. If I’m uncertain, I can search forums or communities where users share compatibility advice tailored for various brands and models.
When exploring third-party options, I look for compatibility markings. Many suppliers indicate which mounts their products support. I pay attention to reviews that mention successful pairings with identical systems.
I also verify if any adapters are available. While they exist, I consider potential drawbacks such as reduced functionality or image quality. Adapters might allow using different styles of optics, but I ensure they will not compromise the intended performance of my gear.
Lastly, I occasionally visit local camera stores or rental houses. Hands-on experience enables me to assess the fit of various options directly, and I can often receive expert advice from staff regarding suitable selections for my system.
Exploring Full-Frame vs. Crop-Sensor Options
Choosing between full-frame and crop-sensor formats greatly influences versatility and adaptability of your photographic setup. Each format caters to different needs and styles, impacting the selection of optics.
Advantages of Full-Frame Systems
- Wider field of view allows for greater compositional options, especially in landscapes and architecture.
- Better low-light performance due to larger sensor size, resulting in less noise at higher ISO settings.
- Provides an enhanced depth-of-field control, useful for achieving specific blurring effects.
Benefits of Crop-Sensor Systems
- More affordable options make it easier for enthusiasts to start without significant investment.
- Extended effective focal length enhances telephoto capability, ideal for wildlife and sports photography.
- Generally lighter and more compact bodies, improving portability during travel or long shooting sessions.
Assess your shooting style, the types of subjects you capture, and budget constraints to determine the right path. Whether opting for full-frame or crop-sensor, each choice has unique advantages that can elevate your photographic experience.
Researching Lens Compatibility Lists
I check compatibility through various sources, including manufacturer websites and dedicated photography resources. These lists provide specific details regarding which optical attachments are suitable for my gear.
Manufacturer Websites
Directly accessing the official page of the camera maker often yields the most accurate compatibility information. Here’s a typical process:
- Navigate to the support or product section.
- Search for the specific model of my device.
- Look for a section detailing compatible accessories.
Community Forums and Expert Reviews
Online forums and photography communities can be invaluable. Engaging with fellow enthusiasts helps uncover practical insights. Here are steps I take:
- Join photography forums focused on my brand.
- Post questions or search for existing threads about accessory compatibility.
- Review expert articles or video guides that outline optimal pairings.
Combining these resources gives a thorough understanding of what options are available, ensuring my gear performs at its best.
Consulting Manufacturer Websites for Specifications
Visiting the official websites of manufacturers is a reliable method for obtaining detailed specifications for photographic accessories. Most brands offer extensive resources to help enthusiasts determine compatibility with their equipment.
Direct Access to Specifications
Begin by locating the section on the manufacturer’s site dedicated to lenses or optics. Most companies provide downloadable PDF manuals or detailed web pages containing model-specific information. Look for areas that highlight physical dimensions, mount types, and performance characteristics.

Support and FAQs
Check the support or FAQ section for insights on compatibility. Often, manufacturers address common inquiries regarding their products, including compatible attachments for specific models. This area is invaluable for clarifying uncertainties and understanding the limitations of various choices.
| Manufacturer | Specification Resources |
|---|---|
| Canon | Lenses Section |
| Nikon | Lenses Overview |
| Sony | Lens Information |
| Fujifilm | X-Series Lenses |
Incorporating this approach guarantees access to the most accurate and relevant information for making informed choices regarding optics for your equipment. Regularly checking these resources is beneficial, particularly with new releases or updates in technology.
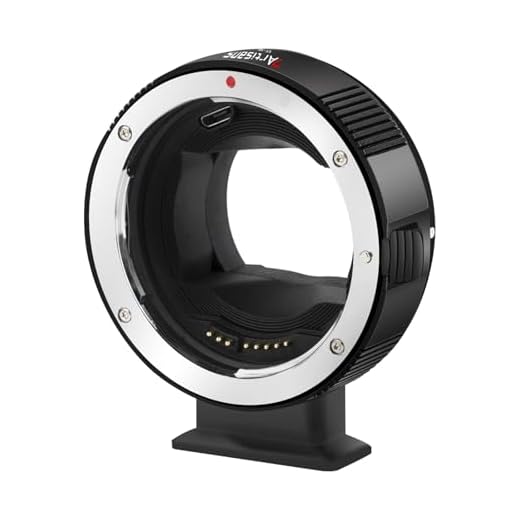
Using Lens Adapters for Cross-Brand Compatibility
Adopting adapters allows me to expand my options by mounting optics from different manufacturers onto my device. To ensure successful pairing, I research compatible adapters specific to the camera model and desired glass. Some manufacturers produce their own adapters, guaranteeing optimal performance and features.
It’s crucial to examine the adapter’s specifications, as several factors, including autofocus functionality and electronic communication, may vary between products. Selecting high-quality adapters minimizes potential issues, ensuring that the quality of images isn’t compromised.
While most adapters function mechanically, some also support electronic connections, allowing autofocus and aperture adjustments directly from the device. When using manual lenses, I am prepared to adjust settings manually, which often increases my control over the shooting process.
I utilize online forums and user reviews to gather insights on experiences with particular adapter combinations. This research helps me avoid pitfalls and identify reliable options for my setup.
Lastly, I keep in mind potential limitations like vignetting or reduced sharpness, especially at the edges of the frame. Understanding these factors allows me to make informed decisions and optimize my photography experience.
Considerations for Autofocus Functionality
When selecting compatible optics, autofocus performance must be a priority. Autofocus systems vary significantly across different brands and models, impacting not just speed but also accuracy and consistency.
Understanding Autofocus Systems
Familiarize yourself with the type of autofocus employed by your device. Many manufacturers utilize phase detection, while others may prefer contrast detection or hybrid systems. Each approach has benefits and limitations; for instance, phase detection is generally quicker but may struggle in low light compared to contrast detection.
Compatibility of Autofocus Features
Not every optical attachment will support all autofocus features available on your device. Check if the aftermarket option utilizes the same contacts or protocols as OEM alternatives. Additionally, some advanced features, like subject tracking or eye detection, may only function with specific combinations of camera and glass.
Evaluating Focal Length Requirements
To determine the appropriate focal lengths for various shooting environments, I assess my photography needs first. A prime lens with a fixed focal length is ideal for portraits, providing stunning bokeh. For landscapes and wide-angle shots, a zoom range of 16-35mm suits my requirements perfectly.
For close-up work, a macro lens of 90-105mm allows me to capture intricate details. In low-light settings, a lens with a maximum aperture of f/1.4 or f/1.8 ensures sharp images while minimizing noise levels. I also consider whether I need versatility; a standard zoom lens around 24-70mm typically covers multiple situations.
When assessing focal lengths, I factor in the crop factor of my equipment, as this can alter the effective focal length. For instance, a 50mm lens behaves like an 80mm equivalent on a crop sensor. Understanding these conversions is crucial when selecting appropriate options for my needs.
Additionally, taking into account personal style and preferred subjects can guide my lens choices. Experimenting with different focal lengths informs my decisions, allowing me to align my gear with my artistic vision. Keeping track of my experiences ensures informed choices in future purchases.
Exploring Prime vs. Zoom Lens Choices
Choosing between fixed and variable focal lengths significantly impacts my photographic experience. Fixed optics, or prime choices, excel in sharpness and low-light performance. They often provide wider apertures, allowing for stunning background blur. I appreciate their lightweight design, encouraging me to focus on composition rather than equipment.
Advantages of Prime Optics
These options typically yield higher image quality and are less complex mechanically. Durability is enhanced due to fewer moving parts, which is crucial for my adventure photography. I often find that working with a single focal length pushes my creativity, forcing me to explore angles and perspectives to capture the desired shot.
Benefits of Zoom Options
On the other hand, variable focal lengths offer versatility, making them ideal for varied shooting scenarios. Packing fewer items means I can be more spontaneous without being weighed down. Zooming provides the flexibility to compose shots quickly as situations change, allowing me to capture fleeting moments effortlessly.
My decision between these types hinges on the genre of photography. For portraits, I lean towards primes; for events or travel, zooms are usually my go-to. Each choice brings distinct advantages that cater to different shooting styles and preferences.
Reading User Reviews on Compatibility
Examining user feedback is invaluable for gauging the suitability of specific optics for your device. Look for reviews that emphasize compatibility, detailing the experiences others have had with similar models. Focus on comments regarding ease of attachment, performance issues, or lack of functionality.
Key Aspects to Look For
Focus on the following elements when assessing reviews:
- Praise or complaints about the autofocus functionality with particular optics.
- Reports on build quality and whether the combination affects handling.
- Feedback on image quality and distortion artifacts that may arise.
Comparative Experiences
Many users share their insights about mixing brands or using adapters, providing a direct insight into the practical compatibility. Comments on specific brands can often highlight hidden issues not evident in official specifications. Pay attention to any recurring themes that indicate common problems or triumphs.
| Review Aspect | Positive Indication | Negative Indication |
|---|---|---|
| Autofocus Performance | Fast and accurate | Slow and inaccurate |
| Build Quality | Solid and reliable | Loose or unbalanced |
| Image Quality | Sharp and clear | Soft or distorted |
Incorporating feedback from actual users who have purchased and utilized the equipment ensures a deeper understanding of potential challenges and advantages. This practical perspective can guide better choices and enhance overall satisfaction with your selected gear.
Joining Online Photography Forums for Advice
Engaging with online photography forums can provide valuable insights and assistance in your quest for compatible optic gear. I recommend starting by registering on popular platforms such as Reddit’s r/photography or dedicated photography community websites. These spaces are filled with enthusiasts and seasoned professionals who share their experiences and knowledge.
Active Participation
Pose specific questions related to your equipment and ask for recommendations. When sharing details about your apparatus, include the brand and model. The more information you provide, the better the feedback you’ll receive. I’ve found that actively participating by responding to others’ inquiries can also yield helpful information in return.
Utilizing Search Functions
Many forums have robust search functions. Use keywords to find previous discussions about compatibility challenges or success stories with different optics. This can save time and offer direct examples from other users who have faced similar issues. Bookmark useful threads for future reference.
Understanding the Importance of Lens Speed
Choosing lenses that feature a wider maximum aperture is crucial for achieving greater light-gathering capability, which directly influences image quality, particularly in low-light conditions. The speed of a lens, often indicated by its f-stop number, determines its performance in various lighting scenarios. For example, lenses with a maximum aperture of f/2.8 or wider excel in capturing sharp and well-exposed images even in dim environments.
Benefits of Fast Apertures
Fast lenses allow for more creative control over depth of field, enabling stunning subject isolation with a blurred background (bokeh effect). This characteristic is particularly beneficial for portrait and macro photography. Additionally, achieving faster shutter speeds reduces motion blur, making these optics advantageous for action shots.
| Aperture | Light Gathering | Depth of Field | Typical Use Cases |
|---|---|---|---|
| f/1.2 | Excellent | Very Shallow | Portraits, Low Light |
| f/1.8 | Very Good | Shallow | Street, Events |
| f/2.8 | Good | Moderate | General Photography |
| f/4 | Fair | Deeper | Landscape, Well-Lit Scenes |
Considerations for Selecting Fast Optics
When evaluating a new optic, consider not only the aperture size but also compatibility with autofocus systems, as some fast models may offer slower autofocus performance. Additionally, it’s beneficial to read user reviews and test any potential purchases to assess real-world performance.
Comparing Brand-Specific Options vs. Third-Party Alternatives
I prioritize brand-specific optics when seeking guaranteed compatibility, optimal performance, and excellent autofocus efficiency. These products are designed for a precise match with camera systems, ensuring full access to special features like image stabilization and electronic communication between the body and glass.
However, I find that third-party alternatives often present a cost-effective solution while delivering impressive image quality. Brands like Sigma, Tamron, and Tokina produce competitive glass that may outperform equivalent proprietary products in certain aspects, such as wider apertures or unique focal lengths. These choices expand my creative options significantly.
It’s essential to review user feedback before purchasing third-party items, as compatibility can vary even among established names. Additionally, I consider checking firmware updates from manufacturers, as these can enhance the performance of third-party materials on particular models.
Ultimately, both paths offer unique advantages. If my priority is seamless integration and brand loyalty, I lean toward manufacturer-specific offerings. If I’m exploring new creative possibilities without the hefty price tag, third-party options often provide a valuable alternative that should not be overlooked.
Checking for Image Stabilization Features
I look for image stabilization options when considering new equipment. Many manufacturers offer in-lens stabilization (IS or VR) or in-body stabilization that enhances performance in low-light situations or when shooting handheld.
Here are some steps I take to evaluate stabilization capabilities:
- Identify if my current system supports in-lens stabilization or in-body stabilization.
- Review specifications on the manufacturer’s website for details about stabilization systems.
- Examine user reviews and expert opinions to gauge real-world effectiveness.
Some common stabilization systems include:
- Canon’s Optical Image Stabilization
- Nikon’s Vibration Reduction
- Sony’s SteadyShot
- Panasonic’s Dual I.S.
Each system has its strengths; for instance, lens-based stabilization is effective for medium to long focal lengths, while in-body options offer wider compatibility across various optics.
I prefer to try equipment in-store when possible to test stabilization effects. Physical experience helps determine which setup meets my needs better. Additionally, I consult user forums to discuss stabilization experiences with specific gear, as this can provide valuable insights.
Identifying the Importance of Filter Sizes
Understanding filter sizes is critical for optimizing my photography. Different filters enhance images by affecting light, contrast, and color. The size of the filter must align with the diameter of my lens’s front element. Most lenses will have a specified filter thread size, usually indicated on the front or in the specifications.
To confirm the appropriate filter diameter, I check the lens itself, seeking indications such as “ø58mm” which denotes that I need a 58mm filter. It’s vital to adhere to this measurement to prevent vignetting or obstruction in the field of view.
Utilizing step-up or step-down rings can help me adapt various filters to fit multiple lenses, enhancing versatility. However, I ensure that the rings do not compromise image quality or introduce unwanted distortions.
When selecting filters, considering their quality is paramount. Higher-quality filters will maintain optical performance while providing protection or effects compared to lower-end versions. Hence, I often look for brands known for their superior glass and coatings.
Lastly, I evaluate my shooting style to determine if I need certain filters like polarizers for glare reduction or ND filters for controlling exposure in bright conditions. This intentional selection of filter sizes and types enhances my photographic outcomes significantly.
Learning About Lens Angle of View
Understanding the angle of view is fundamental for achieving desired compositions in photography. The angle of view defines how much of a scene will be captured, influencing the overall aesthetics of your images. Here are key points to consider:
Key Factors Affecting Angle of View
- Focal Length: Shorter focal lengths provide a wider angle of view, making them ideal for capturing expansive scenes, while longer focal lengths narrow the view, focusing on distant subjects.
- Sensor Size: Larger sensors, such as full-frame, yield a wider angle of view compared to smaller crop sensors for the same focal length.
- Aspect Ratio: The shape of the image sensor (e.g., 4:3, 16:9) can affect the way the angle of view is perceived, altering the framing of your shots.
Evaluating and Choosing Appropriate Focal Lengths
To determine the ideal focal length for your photographic needs:
- Identify the type of photography pursued. For landscapes or architectural photography, consider wide-angle options (e.g., 16-35mm).
- If the focus is on portraits, longer focal lengths (e.g., 85mm – 135mm) are often preferred for flattering perspectives.
- Experiment with different focal lengths to see how they affect the angle of view in practice. Test both prime and zoom types to gain insight into versatility and quality.
By understanding these principles, I can refine my photographic skills and select the right equipment to capture the vision I have in mind. Knowledge of the angle of view not only enhances composition but also broadens creative possibilities.
Researching Macro and Specialty Options
For achieving stunning close-up photography, I focus on lenses that offer that specific capability. Macro varieties excel at capturing fine details, allowing for life-sized images of small subjects. Checking the minimum focusing distance is crucial; shorter distances enable more intricate shots. Additionally, assessing magnification ratios, such as 1:1 or 2:1, aids in selecting the right tool for my vision.
Specialty Choices
Unique options like tilt-shift or fisheye provide creative angles that standard equipment cannot. Tilt-shift lenses facilitate perspective control, perfect for architectural shots. Fisheye models, on the other hand, distort images dramatically for artistic expression. When researching these variants, compatibility with my mount is essential. I often explore brands known for high-quality specialty glass, as well as user reviews that share practical insights on performance and usability.
Engaging with photography communities online enhances my understanding of available choices. I find discussions on specific models and their practical results incredibly helpful. Ultimately, combining personal research with community feedback guides me in choosing the right tools for unique photography styles.
Understanding the Impact of Lens Element Design
Choosing elements designed for specific purposes deeply influences image quality. Factors like the number of elements, their shapes, and types of glass affect sharpness, distortion, and chromatic aberration. A lens with more multi-coated elements can reduce flare and increase contrast, vital for achieving quality results in various lighting conditions.
Element Configuration and Optical Performance
The arrangement of optical components significantly affects performance. A combination of aspherical and low-dispersion elements can enhance sharpness while minimizing color fringing. These designs help control light more effectively, yielding clearer and more accurate imagery.
Understanding Specialized Elements
Some lenses incorporate specialized elements such as super-low dispersion (SLD) glass for rich color accuracy. Knowledge of these features helps select models tailored to specific shooting styles, such as portraiture or astrophotography, ensuring optimal visual output regardless of the shooting environment.
Evaluating Weight and Size Compatibility
Always examine the physical dimensions and weight of new optics before making a decision. A hefty accessory can alter the balance and handling of the setup, potentially causing strain during extended usage. Understanding the specifications helps achieve a more comfortable shooting experience.
Weight Specifications
Check the manufacturer’s weight details for each attachment you consider. For portability, I prefer gear that doesn’t overly tax my strength. A lighter choice enhances mobility, especially during long shooting sessions.
Size Considerations
Comparing the physical size of the attachment with your body is paramount. Large additions may hinder accessibility to controls and be cumbersome in tight spaces. I typically favor compact options that blend well with my setup.
| Feature | Recommendation |
|---|---|
| Weight | Ideal under 1 kg for long shoots |
| Length | Avoid exceeding body dimensions significantly |
| Diameter | Compatible with existing filters and accessories |
Always consider the combined weight and dimensions of your complete gear. Balance is key to achieving the best results, allowing for smooth operation without discomfort during photography sessions.
Finding Local Camera Shops for Guidance
Visiting a nearby photography store can significantly enhance your understanding of suitable optics for your device. Knowledgeable staff can offer personalized advice tailored to your specific model.
Consider these steps:
- Search for Specialty Shops: Use Google Maps or local business directories to locate shops specializing in photography equipment.
- Ask About Workshops: Inquire if the shop hosts workshops or classes about gear selection. Participating can provide insight from experienced photographers.
- Engage with Staff: Speak with sales representatives about compatibility issues. They often have direct experience helping clients with technical concerns.
- Check for Try-Before-You-Buy Options: Some stores allow you to test products before purchase, ensuring they match your expectations.
- Look for Community Boards: Many shops feature bulletin boards with upcoming events, sales, or local photography meetups.
Connecting with local shops enriches your understanding and may lead to discovering new accessories suited for your equipment.
Exploring Rental Options Before Purchase
Renting photographic glass before committing to a purchase provides invaluable hands-on experience. I recommend checking local camera shops or online platforms that specialize in rental services. Many offer a robust selection of optics from various manufacturers, allowing a direct comparison to see what aligns best with my photographic style.
Benefits of Rental Services
Utilizing rental options allows me to test the performance, weight, and feel of different focal lengths. Pay attention to how each piece interfaces with my device, particularly in terms of autofocus speed and image stabilization features. This practical approach often showcases attributes not easily discernible through specifications alone.
Considerations While Renting
Before selecting a rental, I ensure to verify compatibility details. It’s beneficial to look for rental houses offering a trial period, enabling me to conduct thorough tests in varied lighting conditions. Reading user reviews and seeking feedback within photography communities can also guide my choices and enhance my understanding of each option’s strengths and weaknesses.
Reviewing Photography Blogs and YouTube Channels
I recommend following several high-quality photography blogs and YouTube channels that specifically discuss gear and accessory compatibility. These platforms often provide detailed reviews and comparisons.
- Blogs:
- DPReview – Offers comprehensive reviews on cameras and accessories, including detailed lens specifications.
- PetaPixel – Shares news and reviews, frequently highlighting various types of photographic equipment.
- The Phoblographer – Features in-depth reviews and practical advice on gear suitability and selection.
- YouTube Channels:
- Tony & Chelsea Northrup – Known for gear reviews that break down compatibility and performance metrics.
- Jared Polin (FroKnowsPhoto) – Provides discussions on various mounts and brands while demonstrating real-world usage.
- SLR Lounge – Covers lens reviews alongside tutorials for understanding mount types and camera systems.
Engaging with these content creators allows access to first-hand experiences and technical insights into compatibility. Additionally, joining their comment sections can yield answers to specific questions from a community of photographers.
Look for focused episodes or articles on particular brands, mount types, and user compatibility, as these can clarify misconceptions and provide visual demonstrations. This way, you’ll enhance the learning process and make informed decisions about your future purchases.
Investigating Lens Construction and Durability
When selecting optics, one key aspect is the construction quality and overall durability. Synthetic materials like polycarbonate are lightweight but can lack the robustness of metal options. I tend to favor all-metal designs, especially for professional settings where gear may endure rough handling.
Assessing Weather Sealing
Weather sealing significantly enhances resilience against moisture and dust. I look for specifications indicating sealed joints and rubber gaskets, factors that are crucial for outdoor shooting in challenging conditions. Always check for user feedback regarding real-world performance under various environmental settings.
Examining Glass Quality and Coatings
Optical clarity is essential; high-quality glass elements, often treated with special coatings, minimize flare and ghosting. I pay attention to terms like ED (Extra-low Dispersion) glass for reduced chromatic aberration, ensuring sharp, vibrant images. Knowledge about coatings can also inform me about light transmission efficiency and protection against scratches. Using filters can add another layer of defense for the front element, extending lifespan.
Understanding the Cost vs. Benefit of Different Lenses
Opting for the right glass involves evaluating the price against the value it delivers. Quality optics can be an investment that influences the output of my captures significantly.
Evaluating Price Points
When assessing different options, here are key factors to consider:
- Brand Reputation: Well-established names often reflect higher prices due to quality assurance and trust.
- Optical Quality: Premium elements yield sharper images and better color rendition, impacting overall satisfaction.
- Durability: Robust construction and weather sealing increase longevity, reducing replacement costs down the line.
Benefits Beyond Price
The return on investment includes various aspects:
- Versatility: A multi-focal option may replace multiple fixed models, streamlining my kit and enhancing efficiency.
- Creative Potential: Unique features like fast apertures or macro capabilities allow for creative exploration and distinct imagery.
- Resale Value: High-quality brands maintain better resale pricing, offsetting initial expenditure if upgrades become necessary.
Prioritizing personal needs and shooting style ensures that my purchasing decisions align with the objectives I’m aiming to achieve. An informed approach enhances satisfaction and results in a collection that serves me well for years to come.
Learning About Optical Performance Ratings
Optical performance ratings are crucial for evaluating glass options. Familiarizing myself with key specifications enhances the selection process and ensures alignment with my photographic goals.
Key Ratings to Consider
- Aperture: Wider f-stop numbers allow more light, enhancing low-light performance and providing shallower depth of field.
- Sharpness: Review laboratory tests and user feedback to assess sharpness across various apertures.
- Chromatic Aberration: Look for ratings indicating the degree of color fringing, particularly in high-contrast scenarios.
- Distortion: Check for barrel or pincushion distortion, especially in wide-angle options.
- Vignetting: Understand potential light fall-off in corners, especially on full-frame systems.
Finding Reliable Sources
- Visit photography review sites, such as DPReview, to access laboratory test results and side-by-side comparisons.
- Examine user reviews on platforms like B&H or Amazon to gather real-world insights.
- Seek comprehensive guides from experienced photographers on blogs or video tutorials focusing on optical performance.
Making informed decisions based on these ratings and sources will significantly enhance my photography experience and outcomes.
Considering Future Photography Needs
Evaluate upcoming projects and photographic styles to ensure a suitable investment in optical equipment. If I plan to explore landscape or architectural photography, consider wide-angle options. Conversely, for wildlife or sports shoots, I might focus on telephoto alternatives.
Anticipating Evolving Interests
Identify areas of photography that spark my interest for the future. Investing in versatile zooms may provide flexibility as I transition between different genres. For those leaning toward portrait or macro photography, specialized options should be prioritized early on to avoid future constraints.
Budgeting for Future Purchases
Allocate resources for potential upgrades or additional accessories. Quality optics generally enhance image quality, but be prepared for the associated costs. Balancing between brand-specific products and third-party choices can maximize both performance and savings.
| Photography Style | Recommended Optics |
|---|---|
| Landscape | Wide-angle zooms |
| Wildlife | Telephoto options |
| Portrait | Prime fast aperture |
| Macro | Dedicated macro units |
Planning ahead not only protects my investment but also ensures a seamless transition to diverse photographic pursuits as interests evolve.


