


For optimal image clarity, precise adjustments of optical elements are non-negotiable. I recommend utilizing laser alignment tools for accurate measurements during the setup process.
Ensure the mounting is securely fixed to avoid any shifts that could compromise alignment. It’s essential to check the distance between the glass components regularly to maintain uniformity.
When assembling, I find that using a collimator can greatly assist in ensuring that light passes through the system correctly. This procedure enhances the quality of images and minimizes distortions that can arise from misalignment.
Consistently inspect the optical path for any anomalies. If initial tests reveal discrepancies, slight adjustments to the positioning of the elements often suffice to achieve the desired optical performance.
Understanding Lens Alignment Basics
Focus on precision during assembly. Each element within the optical system must be placed with meticulous care to ensure they work harmoniously to deliver sharp images.
Utilize laser alignment tools to achieve accuracy. These tools project beams to precisely define the optical axis, aiding in the pinpointing of misalignments that require correction.
Regularly inspect components for signs of wear or physical distortion. Even minor imperfections can lead to significant focus issues and image degradation.
Adjustment Techniques
Employ shims or spacers when needed. This allows for minute adjustments in the position of elements, enhancing optical performance.
Be attentive to the tightening torque of screws during assembly. Over-tightening can warp elements, while insufficient torque can lead to looseness, ultimately impacting image quality.
Testing and Validation
Conduct resolution tests post-alignment to verify improvements in image clarity. Utilizing specialized testing apparatus can provide quantifiable data regarding optical performance.
Review image samples under varying conditions; different focal lengths or apertures may reveal misalignments that initial tests do not. Adjust as necessary to refine results.
Importance of Accurate Lens Alignment
Precise alignment of optical components directly affects sharpness and overall image quality. Slight misalignments can lead to noticeable aberrations, reducing clarity and causing uneven focus across the frame.
Effects on Image Quality
Distortion, chromatic aberration, and vignetting may become prominent when elements are not perfectly positioned. This degradation in performance can detract from the intended aesthetic and compromise the integrity of the capture.
Impact on Autofocus Systems
For systems employing autofocus mechanisms, misalignment can impede performance and accuracy. This can lead to slow acquisition times and increased focus errors, making it challenging to achieve precise results in dynamic scenarios.
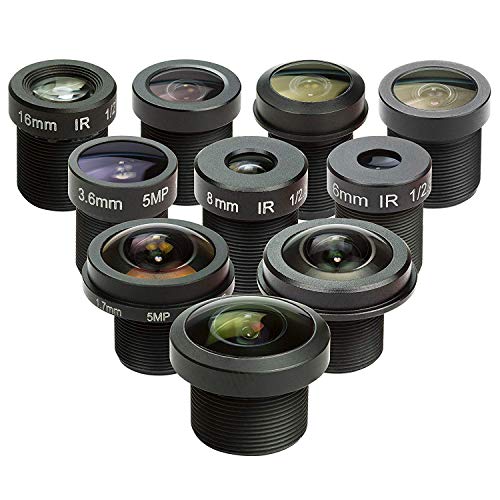
Tools Required for Lens Alignment
To achieve precision in the positioning of optical elements, several tools must be utilized effectively. Here’s a detailed list of items I find indispensable for achieving optimal alignment:
- Collimators: Essential for checking the direction of light rays passing through the assembly, ensuring that optics are correctly oriented.
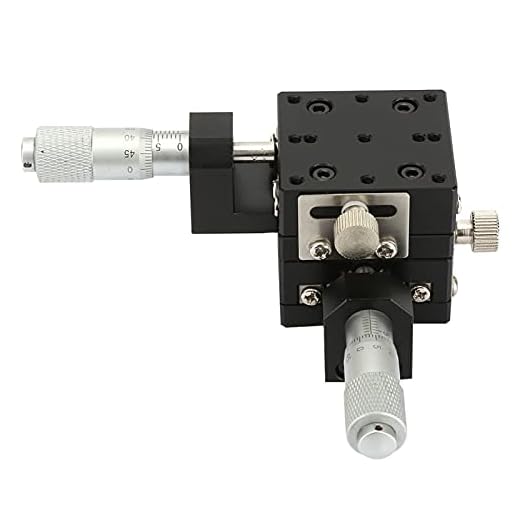
- Optical benches: Provide a stable platform for testing and adjusting configurations. It’s vital for maintaining a straight path for light.
- Laser alignment tools: Useful for achieving high accuracy. The laser beam helps in visualizing the alignment of multiple components.
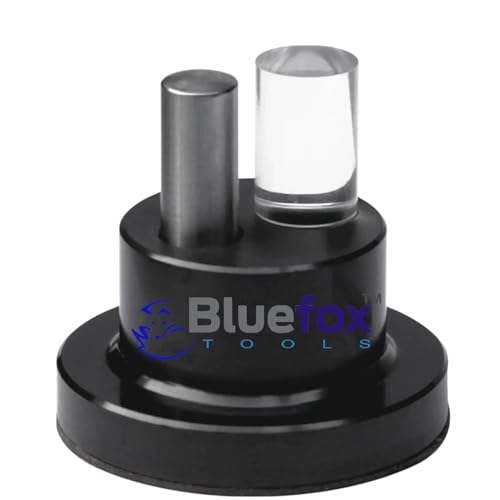
- Alignment jigs: Custom fixtures designed to hold lenses securely in place during adjustments.
- Micrometers: Allow for precise measurements of distances between various elements, ensuring exact placement.
- Software for optical simulation: Programs that help predict how adjustments will impact the overall performance of the setup.
- Fine adjustment knobs: Aid in making minute changes that can greatly affect the focusing and sharpness of the output.
- Optical windows: Help in protecting sensitive components while allowing light to pass through during realignment procedures.
Using these tools in combination promotes accuracy and consistency, resulting in enhanced optical performance.
Identifying Misalignment in Optical Components
Begin by examining the images produced by your device. Look for signs of distortion, such as blurriness, uneven focus, or vignetting. If one side of the frame appears less sharp or darkened, this may indicate a shift in the positioning of elements.
Visual Indicators
Pay attention to the sharpness gradient across the image. A consistent decline in clarity towards the edges can reveal misalignment. Take test shots at various apertures to observe how the quality of the corners is affected. Sudden changes in image quality when shifting focus also signal potential issues.
Physical Inspection
Perform a manual assessment by checking the mount for any physical gaps or deviations. Inspect each element’s housing and connections. Use a collimator to ensure that the optical path aligns properly; misalignment can often be detected when comparing the light path through different components. Additionally, look for obvious wear patterns or damage on the surfaces, which may disrupt functionality.
Common Causes of Lens Misalignment
Inadequate handling is a frequent factor leading to misalignment. The physical impact from drops or hard bumps can easily shift components out of place.
Among other contributors, temperature fluctuations can affect the materials used in lens construction. Expansion and contraction can lead to misalignment over time.
Improper Installation or Assembly
Incorrect assembly during manufacturing or repairs can result in alignment issues. Always check that components are fitted correctly to avoid future problems.
Wear and Tear
Over time, the natural wear on parts can contribute to misalignment. Regular maintenance is essential to mitigate this effect and prolong the lifespan of optical equipment.
- Aging adhesive used in lens assembly may lose its effectiveness.
- Moving parts such as zoom mechanisms may develop play, causing misalignment.
Additionally, environmental factors like dust and moisture can hinder proper functioning. Keeping lenses clean and storing them in appropriate conditions is crucial to prevent damage.
Basic Techniques for Lens Adjustment
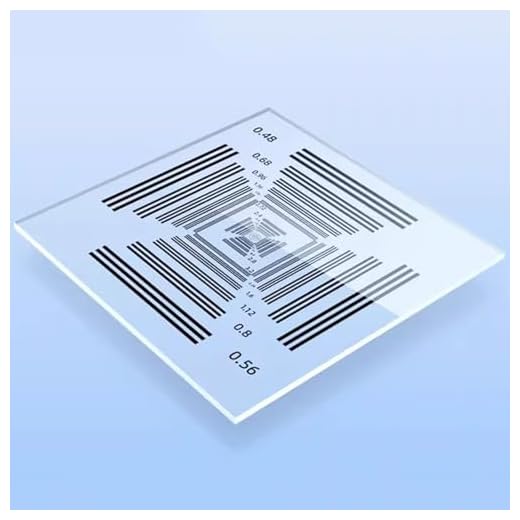
Using a calibrated lens testing chart provides a clear starting point for precise calibration. Position the chart at a specific distance, typically around 50 times the focal length of the optic. Make sure it is perfectly flat and well-lit to avoid distortions.
Step-by-Step Calibration
- Center the optical element on the camera mount.
- Focus on the center of the test chart and check for sharpness.
- Repeat this process across the entire field of view to identify any discrepancies.
Adjusting the tilt and shift using a dedicated fixture assists in achieving optimal alignment. Tighten or loosen the specific screws to make micro-adjustments, ensuring that the optics maintain a parallel angle to the sensor plane.

Verification and Testing
- Capture images of the test chart after each adjustment.
- Analyze the results for consistency in focus across various apertures.
- Use software tools to enhance the accuracy of the analysis.
Regular verification after each procedure allows for continuous improvement and maintaining precision. Anomalies should be documented for future reference, enabling adjustments to be fine-tuned further.
Checking Focusing Accuracy After Alignment
To verify focusing precision after adjusting optical elements, utilize a high-resolution target. A test chart or a focused image of a fine detail object is ideal for this purpose.
Verification Steps
- Position the test chart at a predetermined distance, generally around the lens’s specified focus distance.
- Use a tripod to stabilize the setup and minimize movement.
- Set the aperture to the lens’s widest setting to assess overall sharpness.
- Take several images, adjusting the focus manually to capture multiple versions.
- Analyze the images on a computer, zooming in on critical areas to inspect clarity.
Evaluating Results
If the sharpness isn’t consistent across the test images, re-check the alignment. Pay attention to corner sharpness as well, as it can indicate issues with optical alignment despite central focus being accurate.
For precision, consider using focus peaking features that some cameras offer, ensuring you have the most accurate focus possible at the selected aperture. This method helps identify any remaining misalignments that could lead to a lack of sharpness in final images.
- Document findings to compare adjustments over time.
- Repeat these checks periodically, especially after transporting equipment or following a significant drop.
- Consider external factors that might affect focusing accuracy, such as temperature changes or humidity levels.
Calibration Methods for Precision Alignment
Implementing calibration techniques is critical for achieving precise positioning of optical components. One effective approach is using a laser alignment system, which projects a coherent beam across reference points. This setup allows for real-time monitoring of alignment and ensures repeatability.
Adjustment Techniques
Utilize the following methods to achieve accuracy:
- Optical Bench Calibration: Place the assembly on a stable optical bench to check the alignment in multiple configurations.
- Colimation Testing: Use collimators to ensure that light paths converge correctly through the assembly.
- Auto-collimation: This technique helps verify that the optical axes are parallel.
Software-Assisted Calibration
Employ software tools that analyze image distortion and calibrate accordingly. These programs provide quantitative data, enabling fine adjustments to be made swiftly. Automating alignment procedures minimizes human error and ensures consistent results.
| Method | Advantages | Limitations |
|---|---|---|
| Laser Alignment | High precision, fast setup | Requires careful calibration of the laser source |
| Optical Bench | Versatile for various configurations | Space-consuming setup |
| Software Calibration | Data-driven adjustments | Dependency on software accuracy |
Regular calibration should become part of maintenance protocol to ensure ongoing precision in optical assemblies. By employing these strategies, I am achieving enhanced alignment consistency and optical performance.
Using Optical Collimators in Lens Alignment
For precise alignment of optical components, employing optical collimators proves invaluable. These devices emit a beam of parallel light, allowing me to assess if the optical path is aligned correctly across the entire system. By utilizing these collimators, I achieve a high level of precision that standard tools may not offer.
Setup Process
To start, I position the collimator at a fixed distance from the element being tested. It is imperative to ensure that the collimator itself is perfectly aligned; any misalignment here will affect the outcome. After this setup, I can project the collimated beam onto a target surface, which allows me to evaluate any angular or positional deviations visually.
Benefits of Using Optical Collimators
Optical collimators help identify alignment issues that might not be visible through standard visual inspection. They simplify the adjustment process and provide real-time feedback on the effectiveness of any corrections made. This immediate feedback loop improves efficiency, as I don’t need to disassemble the system after each adjustment to check alignment with other methods.
| Feature | Benefit |
|---|---|
| High Precision | Minimizes error in alignment assessments. |
| Real-Time Feedback | Allows for immediate corrections and adjustments. |
| Visual Confirmation | Helps in validating the positioning of all optical elements. |
In conclusion, by incorporating optical collimators into my workflow, I ensure a higher quality of alignment and, consequently, improved optical performance across the systems I work on.
Aligning Lenses in Multi-Lens Systems
To achieve optimal performance in multi-element systems, I recommend starting with a clear alignment strategy. Ensure that each optic is securely mounted and is aligned along a common optical axis. Implement the use of fixtures designed to hold different elements in place during adjustments. This stability helps prevent any unintended shifts that can impact optical quality.
Iterative Adjustment Process
In complex arrangements, I find that employing an iterative adjustment method yields the best results. Begin by making small adjustments to shift one element at a time. After each change, conduct a thorough check on image quality. This approach allows me to isolate issues, ensuring that any refinements improve the overall system instead of complicating it.
Utilizing Reference Points
Using reference points on the housing or mounting brackets aids in consistent positioning. I mark critical positions on a fixture to maintain relative alignment of all components throughout adjustments. This practice minimizes the risk of drift between calibrations, especially in setups with multiple elements where displacement can accumulate.
Incorporating optical testing equipment, like beam splitters and image sensors, provides immediate feedback during this alignment phase. I place a high priority on the accuracy of each lens element’s position since even minor misalignments can lead to substantial degradation of performance in the final output.
I keep meticulous records of each adjustment. This documentation offers insights into historical alignments, making future setups more efficient and informed. By applying these methods consistently, I enhance both the reliability and precision of multi-element optical systems.
Impact of Temperature on Lens Alignment
Temperature fluctuations can significantly affect the precision of optical assemblies. I recommend monitoring the operational environment closely, particularly during calibration and adjustment procedures.
When the temperature rises, materials such as glass and metal expand, potentially leading to misalignment of components. Conversely, cooling causes contraction, which may alter the positioning and optical performance of the system.
For optimal stability, it’s beneficial to conduct alignment tasks in a controlled environment where temperature variations are minimized. A steady range between 20°C and 25°C (68°F to 77°F) is often ideal.
Using materials with similar coefficients of thermal expansion can mitigate misalignment. For instance, matching the thermal properties of the lens groups and housing helps maintain alignment during temperature changes.
Several key factors should be tracked:
| Temperature (°C) | Expected Lens Shift (μm) | Material Type |
|---|---|---|
| 0 | 5 | Standard Glass |
| 25 | 0 | Low Expansion Glass |
| 60 | -5 | Plastic Polymers |
A frequent practice is to allow the system to acclimatize before adjustments to reduce the risk of error due to thermal stress. Furthermore, utilizing thermal cameras can identify hot spots that may indicate potential misalignment issues.
Regular assessments of alignment after significant temperature shifts can determine whether adjustments are necessary. Implementing these precautions can enhance the overall performance and longevity of the optical system.
Routine Maintenance for Lens Alignment
Regularly inspect and clean all optical parts to maintain optimal alignment. Use a microfiber cloth to gently wipe surfaces, avoiding any abrasive materials that can scratch the lens. For more thorough cleaning, employ a lens cleaning solution specifically designed for optics.
Check mounting screws and adjustment rings periodically for tightness. Loosening can lead to unwanted shifts in positioning, impacting precision. If any components appear worn or damaged, replace them immediately to prevent further misalignment.
Conduct a basic test focusing on distant subjects to assess positional accuracy. If images appear blurry or distorted, adjustments may be necessary. Consider establishing a schedule for inspections, ideally after extensive use or exposure to adverse conditions, such as humidity or extreme temperatures.
Utilize a calibration chart during maintenance sessions. This method provides a clear visual reference to evaluate sharpness and alignment accuracy. Calibration should be performed under consistent lighting conditions to avoid discrepancies in results.
For systems with multiple optical elements, check each component individually. Ensure they are aligned with one another and don’t interfere with the overall system performance. If one part is out of sync, it can affect the entire assembly.
Temperature changes can cause components to expand or contract, leading to misalignment. Store equipment in a temperature-controlled environment to minimize these fluctuations. Regular checks after substantial temperature variations can help ensure continued precision.
Keeping complete records of alignment sessions, adjustments, and conditions can assist in tracking performance over time. Documenting these details informs decisions on maintenance intervals and helps anticipate wear patterns.
DIY Lens Alignment: Step-by-Step Guide
To achieve optimal performance from optical devices, precise alignment is non-negotiable. Here’s a straightforward method to align optics effectively.
Step-by-Step Procedure
1. Preparation: Gather the required tools as listed below. Ensure your working environment is well-lit and free of distractions.
2. Disassembly: Carefully open the housing of the optical system. Make sure to keep track of screws and components for reassembly.
3. Initial Inspection: Examine each optical element for physical damage or dirt. Clean using appropriate solutions and cloths if necessary.
4. Alignment Setup: Place the primary optical element onto a stable surface. Use alignment tools to establish reference points on the optical path.
5. Adjustment: Manually adjust the positioning of each optical component. Use shims or adjust the mounting mechanisms to correct any misalignment.
6. Testing: Employ a light source and aperture to test the alignment. Observe the optical path for consistency in image focus and clarity.
7. Final Assembly: Once alignment is confirmed, securely reassemble the optical housing. Ensure all screws are tightened to prevent shifts during use.
Tools Required
| Tool | Purpose |
|---|---|
| Shim Material | To adjust the position of optical elements |
| Optical Bench | To provide a stable base for testing alignment |
| Collimator | For precision adjustment and testing |
| Cleaning Kit | To remove dust or smudges from optics |
| Screwdriver Set | For disassembly and assembly of the optical housing |
This straightforward guide allows the effective alignment of optical equipment, enhancing performance and image quality. With practice, the repetitive process can improve my skills significantly, leading to more precise outcomes.
When to Seek Professional Lens Alignment Services
Schedule a visit to an expert when experiencing consistent focus issues, unusual distortion, or blurry images across various settings. If adjustments using basic techniques do not yield improvements, it’s time to consult a specialist.
Utilize professional services under the following circumstances:
| Situation | Recommended Action |
|---|---|
| Persistent Misalignment | Seek expert assessment and correction. |
| Complex Multi-Lens Systems | Engage a technician for intricate configurations. |
| Significant Physical Impact | Request thorough evaluation post-collision or fall. |
| High-Precision Requirements | Consult a professional for exacting calibration. |
| Unexpected Temperature Variations | Assess lens integrity after substantial temperature shifts. |
Invest time in understanding your optical tools. An imperfectly set-up assembly can lead to unanticipated results, impacting your work quality. Exploring options for professional alignment can yield significant long-term benefits, ensuring reliability and superior performance in photography or film production.
Understanding the Role of Lens Mount in Alignment
To achieve optimal optical performance, I focus on the lens mount’s precision. The mount serves as the critical interface between the lens and the camera body, directly influencing alignment accuracy. A securely positioned mount ensures that the optical elements remain correctly oriented relative to the sensor plane.
The mounting system typically features precision-engineered components that fit tightly, preventing any unwanted movement. During assembly, I verify that the mount aligns with both mechanical and optical standards. Any deviation can lead to significant focus issues and image distortion.
When exploring different mounts, I pay attention to their design specifics. For instance, bayonet mounts provide quick attachment but require careful consideration of their alignment features. I routinely check the alignment points during installation, ensuring they match the manufacturer’s specifications.
Proper maintenance of the lens mount is paramount. Regular cleaning and inspection prevent debris accumulation, which can disrupt the mount’s integrity. I also advise using alignment tools to test mount positioning after servicing or when changing focal lengths.
In multi-lens systems, the mount plays a more complex role. I ensure that all mounts maintain a consistent alignment through precise calibration techniques, which might involve optical collimators for comprehensive checks. Each lens must meet the same alignment criteria to prevent focus discrepancies across different focal lengths.
Temperature fluctuations impact material expansion and contraction, potentially altering mount alignment. I monitor environmental conditions closely, especially during critical shoots.
In summary, the lens mount’s alignment is foundational to image quality. I prioritize meticulous attention to detail during setup and maintenance, ensuring that every connection supports precise optical performance.
Correcting Tilt and Shift in Lens Alignment
To rectify tilt and shift inaccuracies in optical assemblies, my first step involves obtaining a sturdy calibration rig, ensuring stability. Frequent adjustments require a repeatable setup to minimize errors.
Precision adjustment often demands fine-tuning the lens position using shims or adjusting screws that affect alignment. I focus on both vertical and horizontal axes, checking for proper registration at various focal lengths.
Utilizing a grid target for alignment assessment proves valuable. I observe distortions in rectangular grids to identify deviations. If the grid appears warped, adjustments are necessary.
Common tools for correcting tilt include:
- Digital level for angle measurement
- Optical collimator for accurate alignment
- Screwdriver set for fine adjustments
- Shims for elevation correction
Innovative methods often come into play, such as utilizing an adjustable lens mount, allowing for minimal shifts. I adjust the position incrementally, observing the effects in real-time.
Once I believe I’ve achieved accuracy, I conduct test shots at varying distances. A photo comparison against standard results indicates resilience to both tilt and shift. Regular inspections determine whether the corrections maintain consistency over time.
It’s essential to consider environmental factors, such as temperature, which may influence alignment stability. Frequent adjustment and validation routines help counteract these variations.
Ultimately, frequent calibration is my strategy to ensure precision across all adjustments. This methodical approach guarantees the equipment delivers optimal performance in diverse shooting conditions.
Evaluating Image Quality Post-Alignment
To assess image integrity after adjustment, I utilize a combination of visual inspections and specific metrics.
Visual Assessment
I examine sample images taken at various apertures and focal lengths. Pay attention to:
- Sharpness across the frame.
- Color accuracy.
- Distortions or aberrations.
- Field curvature and vignetting.
Quantitative Analysis
For a more precise evaluation, I employ software tools that analyze:
- MTF (Modulation Transfer Function) curves to gauge resolution performance.
- Histogram analysis for exposure and tonal range assessment.
- Sharpness measurements using pixel peeping techniques.
Comparing results before and after adjustment provides critical insights into alignment success. If discrepancies persist, further tweaking might be required to refine any residual issues.
Software Solutions for Lens Alignment Verification
Utilizing specialized software significantly enhances the precision of verifying optical component positioning. I recommend leveraging programs that are capable of analyzing image quality metrics and displaying alignment data in real time. Tools that offer visual feedback through graphical user interfaces can streamline the adjustment process.
Key Software Features
Focus on selecting software that provides detailed analysis tools, including wavefront aberrometry and spot size measurements. Advanced features like automatic data logging and comparative analysis against baseline metrics can identify discrepancies efficiently. Ensure the selected application integrates smoothly with existing imaging systems for an uninterrupted workflow.
Recommended Applications
Consider using software such as ZEMAX or Code V for simulation and optimization tasks. These programs help in assessing performance under various configurations. For verification purposes, software like MTF Mapper can offer insights into modulation transfer functions, confirming whether the optical system meets set standards.
Integrating these software solutions not only enhances accuracy in verification processes but also aids in maintaining the overall quality of optical systems over time.
Common Myths About Lens Alignment
Many believe that misalignment is solely caused by physical damage, overlooking that even wear and tear can cause issues over time. Regular use, vibration, and environmental factors contribute to alignment problems.
Another common misconception is that adjusting a lens requires specialized skills that most enthusiasts do not possess. In reality, with the right tools and careful observation, even hobbyists can perform basic adjustments effectively.
Myth: Realignment is Always Possible
Some argue that any misalignment can always be corrected with adjustment. However, severe misalignment or extensive internal damage may render a lens irreparable, requiring professional intervention or complete replacement.
Myth: Optical Performance Doesn’t Change
Many assume that minor misalignments have no visible effect on image quality. In truth, even slight deviations can lead to noticeable softness, distortion, and reduced contrast in images, impacting overall performance.
Impact of Lens Alignment on Image Distortion
Misalignment can significantly degrade image quality, introducing various types of distortion that affect the final output. If the optical path deviates from the intended design due to misalignment, one might observe issues such as barrel distortion, pincushion distortion, and even chromatic aberrations. Each of these anomalies can detract from the sharpness and clarity of photographs.
Accurate alignment plays a pivotal role in maintaining the integrity of image projection. For instance, barrel distortion causes straight lines to appear curved outward, commonly found in wide-angle systems. Conversely, pincushion distortion makes lines curve inward, typically seen in telephoto optics. Both distortions can be minimized through precise positioning of optical elements.
Regular inspections of alignment are crucial. An effective method I utilize involves testing with a grid target. If the grid appears warped or distorted in the captured image, this signals that further adjustments are needed. Adjustments can be made using mirrors or shims to reposition elements without overhaul.
During my calibration practices, I also keep an eye on geometric precision. Slight shifts in alignment can lead to uneven focus across the image plane. Therefore, meticulous checking of focusing accuracy post-adjustment ensures that all areas of the frame achieve optimal sharpness.
An efficient approach involves the use of optical collimators to ensure that all elements are pointing along the same optical axis. This tool provides visual feedback, making alignment tasks more straightforward and accurate.
Environmental factors also influence alignment. Fluctuations in temperature can cause materials to expand or contract, affecting positioning. I always consider storing optical devices in stable environments to mitigate these risks.
Ultimately, attention to detail in this area will minimize distortion effectively, ensuring images are captured as intended. Understanding the impact of lens alignment leads to enhanced image quality and overall performance in any optical system.
Case Studies: Successful Lens Alignments
In practice, a precise adjustment significantly improves image clarity. One notable example involves a high-end prime optical unit, initially suffering from pronounced imaging defects. A thorough assessment revealed slight misplacement between elements. Following corrective measures, not only did the sharpness enhance, but chromatic aberration also decreased remarkably.
Real-World Application: A Vintage Zoom
A vintage zoom optic, cherished for its unique characteristics, displayed focus inconsistencies. With the aid of specialized alignment tools, I undertook a detailed alignment process. By employing an optical collimator, I was able to assess the alignment of each lens group systematically. Post-alignment evaluations confirmed improved uniformity across the zoom range, validating the efficacy of the adjustments.
Modern Ultra-Wide Performance
In the case of a modern ultra-wide angle optic, challenges arose due to misalignment during assembly. Utilizing software solutions for verification and an iterative calibration method, the alignment process was streamlined. Subsequent tests exhibited a remarkable reduction in distortion, with enhanced corner sharpness–a testament to the importance of precision in adjustments.
Advanced Techniques for Experienced Technicians
Mastery of precise alignment in optical assemblies involves the use of advanced techniques that can significantly enhance performance. One such technique is the implementation of the laser collimation method, which allows for fine adjustments in alignment through the projection of a coherent light source. This method is particularly beneficial for pinpointing any discrepancies in optical paths within assembly units.
Utilizing laser levels can also contribute to achieving better alignment. When establishing a baseline, placing the level at predetermined points along the optical path can help identify any tilt or shift. This technique requires a steady hand and careful placement of the device to ensure accuracy.
Another effective strategy involves shimming. By inserting thin materials or specialized shims between various components of the optical assembly, I can make micro-adjustments that compensate for any misalignment. This technique is particularly useful in intricate systems where small variances can lead to significant optical errors.
For systems with multi-component arrangements, utilizing jig fixtures aids in maintaining stability during adjustments. These fixtures provide a rigid structure that can hold components in the desired configuration, allowing for precise fine-tuning of the alignment.
Regular evaluation with test patterns facilitates the identification of optical distortions that may arise post-adjustment. This practice ensures that all elements perform optimally and any misalignments are promptly addressed.
Finally, I advocate for the documentation of adjustments made during the alignment process. Recording each step and the results provides valuable data for future calibrations and adjustments, enhancing overall efficiency in system maintenance and performance verification.
Future Trends in Lens Alignment Technology
Advancements in automation will significantly influence precision in optical device setups. Incorporating AI-driven analysis can enhance the speed and accuracy of the alignment process. With machine learning algorithms, systems can adapt over time, learning from previous adjustments to improve future calibrations.
Integration of Smart Technologies
Incorporating smart sensors will likely enhance real-time monitoring capabilities. Sensors can detect minute shifts in position or alignment, providing immediate feedback. This integration will enable technicians to make on-the-fly adjustments and reduce downtime during production.
Use of Virtual Reality for Training
Implementing virtual reality (VR) simulations for training purposes will allow technicians to practice alignment techniques in a controlled environment. By immersing trainees in realistic scenarios, the learning curve can be shortened, facilitating a deeper understanding of complex alignment processes without the risk of damaging actual equipment.
FAQs About Lens Alignment Process
For anyone involved in optical systems, understanding common queries regarding the alignment process can significantly enhance efficiency. Below are frequently asked questions to consider.
What are the signs of misalignment?
- Blurred images despite correct focus settings.
- Asymmetric vignetting or uneven brightness across the frame.
- Distortion patterns inconsistent with the lens design.
How can misalignment affect performance?
- Reduced sharpness, particularly at the edges of the image.
- Increased chromatic aberration leading to color fringing.
- Loss of contrast in captured images.
Is it necessary to recalibrate after making adjustments?
Yes, recalibration ensures that all optical parameters are optimized, allowing for precise focusing and accurate rendering.
What tools are essential for checking alignment?
- Optical collimators for verifying straightness.
- Test charts to assess resolution and distortion.
- Laser alignment tools for achieving accurate positioning.
How often should alignment checks be performed?
I recommend performing checks periodically, especially after transporting equipment or after significant environmental changes.
Can temperature fluctuations impact alignment?
Yes, temperature changes can cause materials to expand or contract, potentially leading to misalignment. Keeping equipment within a stable temperature range is beneficial.
Are there common myths about alignment processes?
- Misalignment is a rare occurrence. In fact, it can happen frequently, especially in multi-element designs.
- Only professionals can perform alignment. Many users can effectively manage basic adjustments with the right tools.
What to do in cases of persistent misalignment?
If adjustments do not yield results, seeking professional services may be necessary to avoid further damage and achieve optimal performance.
Is it possible to perform DIY adjustments safely?
With the correct tools and following established guidelines, many adjustments can be done without professional help, but caution is crucial to prevent damage.