If you’re looking to attach classic glass to your Canon setup, the answer is a definitive yes. Adaptation options abound, with simple third-party adapters readily available for a seamless connection. By exploring various mounts, one can easily integrate choices from legacy manufacturers.
Important to note is the effect on focal length. The crop factor of the sensor will alter the perceived field of view, so understanding your specific model’s specifications is critical. For example, a 50mm lens will translate to a more extended effect on an APS-C sensor, enabling creative opportunities for portraiture.
Another aspect to consider is aperture functionality. Many vintage optics retain full manual control, granting the photographer precision over depth of field. This manual approach can enrich one’s craft, prompting a deeper connection with photographic processes. Some adapters even provide electrical contacts for automatic features, enhancing usability with modern gear.

Exploring different glass not only broadens artistic expression but also taps into distinct optical qualities from bygone eras. Embracing this approach can yield unique renditions, imbuing images with character often lacking in contemporary alternatives.
Film Optics on Canon Digital Bodies
Adapting vintage optics from older systems to modern imaging devices is readily achievable, particularly with Canon equipment. Attaching these older optics may require an appropriate adapter, which is widely available in photography shops and online marketplaces.
Pay close attention to the mount compatibility; for instance, Canon FD lenses demand a specific adapter for seamless integration, while other types like M42 can be more straightforward. I recommend checking the flange distance, as improper adjustments can lead to focusing issues.
Manual focus is generally a standard feature with these setups, which may enhance the user experience for those familiar with traditional photography techniques. Exposure settings might not communicate between the optics and the body, thus operating in manual mode is essential.
Image quality will benefit from these classic lenses due to their unique rendering characteristics. Some users appreciate the character and warmth they bring, providing an alternative aesthetic to modern glass.
Be prepared that autofocus systems will be non-functional in most cases, requiring hands-on adjustment. Practice makes perfect; the learning curve with manual operation can ultimately enhance one’s skills behind the lens.
In summary, integrating older optics into contemporary setups can broaden creative possibilities, allowing for a distinct visual style while also utilizing existing equipment. Always verify compatibility specifics and choose an adapter wisely for the best results.
Understanding Mount Compatibility with Canon Cameras
To achieve compatibility between older optical products and modern bodies from Canon, it’s essential to ascertain the mount type. Most older optics are designed for the EF or EF-S mounts. These are typically the easiest to adapt, as current interchangeable models retain the same mounting system.
For those considering utilizing a classic series, such as the FD mount, a specific adapter is necessary. Canon’s FD lenses do not directly fit on EF or EF-S mounts. The addition of an adapter can lead to potential issues including loss of electronic communication and difficulties with focus, particularly at infinity.
Adapters and Their Usage
Utilizing adapters can bridge compatibility gaps, but results may vary. Many adapters allow manual adjustments, which can hinder automatic functionalities like autofocus. I recommend opting for high-quality adapters to minimize the risk of distortion and degradation in image quality.
Focusing and Metering Challenges
Focus accuracy might be impacted when using older products, requiring manual focus adjustments. Metering technology may also differ, leading to potential exposure inaccuracies. Testing different settings will aid in achieving optimal results.
In conclusion, thorough research into the specific mount type and its compatibility is key for successful integration of legacy optics with today’s Canon offerings. Careful selection of mounts and adapters could enhance the shooting experience while retaining the character of classic optics.
Identifying Types of Film Lenses for Canon
Determining the category of lenses suitable for Canon systems involves recognizing specific attributes and designations. Begin by checking the mount type–popular choices include EF, EF-S, and RF. Each type corresponds to particular models and age groups, dictating compatibility with various camera bodies.
Common Lens Types
Within the broader classifications, various examples stand out, narrowing down the choices:
| Lens Type | Characteristics |
|---|---|
| Prime | Fixed focal length, known for sharpness and wider apertures. |
| Zoom | Variable focal lengths, offering versatility for different shooting scenarios. |
| Macro | Designed for extreme close-up shots, highlighting intricate details. |
| Wide-angle | Captures expansive scenes, ideal for landscapes and architecture. |
| Telephoto | Suitable for distant subjects, providing magnified details. |
Understanding Compatibility
It’s vital to consult lens specifications for any unique features, such as autofocus capabilities and image stabilization. Legacy models might lack modern enhancements, so pay close attention to the operational mechanisms and adaptors available in the market.
Differences Between Film and Digital Lens Design
Opting for vintage optics introduces a unique challenge due to variations in optics engineering. Film optics generally feature distinct characteristics, primarily focusing on the needs of 35mm and medium format sensors, leading to different design practices compared to modern equivalents.
A primary distinction lies in the coating technology. Older optical components often lack the advanced coatings found in contemporary varieties, resulting in different light transmission and color rendition. This discrepancy can influence contrast and flare, making some vintage options less suitable for high-contrast scenes.
Another factor is distortion management. Film architecture may exhibit pronounced barrel or pincushion distortion to accommodate the softer film surfaces, while newer designs prioritize correction for sharper imaging sensors. Adapting the older models to high-resolution platforms can reveal these imperfections more keenly.
Moreover, lens construction materials have evolved. While earlier models often employed metals and glasses designed for durability, the current approach leans towards plastics and composites, affecting weight and handling. Consequently, performance traits like autofocus speed and image stabilization exhibit noticeable differences.
Finally, the aperture mechanism often displays variation. Older designs might feature less precise blades, resulting in less favorable bokeh when paired with advanced imaging technologies. Understanding these nuances ensures informed choices while integrating classic optics into modern setups.
Using Adaptors for Film Lenses on Digital Cameras
Adapters provide a practical solution for mounting vintage optics onto modern imaging devices. When selecting an adapter, ensure compatibility between the mount from the optical device and the receiver of your imaging apparatus. Popular choices include M42 to EF, FD to EF, and other specialized arrangements.
Focus at infinity can be a concern with some adaptors. To address this, using high-quality items designed specifically for your lens and camera combination is advisable. This prevents issues related to optical performance and maintaining essential focus functionalities.
Auto aperture control, common in many newer systems, may not function correctly with older optics. Some adapters facilitate manual control of the diaphragm, while others might lack electronic connections. Confirm the adapter’s capabilities before making a purchase to avoid frustration during shooting sessions.
Image quality can vary based on the quality of the adapter used. I recommend investing in adapters with solid construction and minimal optical elements to prevent degradation of image fidelity. Look for brands known for precision machining and positive user reviews.
Testing different focal lengths and shoot modes can help assess how well the combination works for your specific needs. Adaptors can sometimes introduce artifacts or vignetting at the corners of the frame, especially with wide-angle optics. A few test shots at various aperture settings will provide insight into how these factors may affect final results.
Lastly, be cautious with any adapter that includes optical elements. While they can extend compatibility further, they often compromise image quality. Rigorous testing and patience with adjustments can yield rewarding results, allowing me to explore creative possibilities with historical glassware on contemporary equipment.
Common Adaptors for Canon Film Lenses
Among the popular options for bridging the gap between classic optical equipment and modern imaging technologies are adaptors. These devices allow for the attachment of older optics to contemporary devices, enhancing creativity and expanding possibilities.
Types of Adaptor Rings
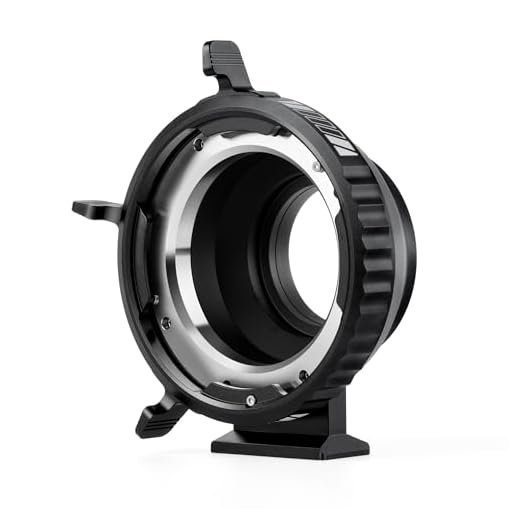
Commonly available are M42 to Canon EF, FD to EF, and K mount to EF adaptors. M42 adaptors are versatile, providing compatibility with various vintage optics. FD adaptors, designed specifically for Canon’s old range, often come with built-in glass to facilitate infinity focus. K mount adaptors expand versatility, offering the chance to leverage Pentax glass.
Key Features to Look For
When selecting an adaptor, consider build quality, ease of use, and whether it retains autofocus or electronic control. Many glass-less adaptors maintain simplicity and lower weight, while those with glass ensure focus at infinity but may introduce minor optical compromises. Additionally, some adaptors include a chip for aperture control, allowing for better exposure settings.
Manual Focus: Tips for Using Film Lenses
Choosing to rely on manual focus enhances the experience of working with vintage optics. Here are some practical tips to improve accuracy and efficiency:
- Focusing Techniques: Utilize the technique of “focus peaking” if available on your device. This highlights the areas in sharp detail, making it easier to gauge precise focus.
- Take Advantage of Depth of Field: Understanding the depth of field helps determine where subjects should be positioned in relation to the camera. Use wider apertures for narrow depth and closer focusing, or smaller apertures for broader scenes.
- Use a Tripod: Stability is key. Employing a sturdy tripod allows for better control when adjusting focus manually, preventing minor shakes or misalignments.
- Practice with Different Subjects: Experiment with a variety of subjects–portraits, landscapes, and macros. This helps in getting accustomed to the feel of the focusing ring and the distance needed for perfect focus.
- Set Exposure First: Focus last in scenarios where lighting changes quickly. Set your exposure based on the light conditions, then fine-tune the focus.
- Mark Focus Points: When working on a steady subject, consider marking your focus points on the lens. This can save time in repetitive shooting situations.
- Learn the Lens Sweet Spots: Each optic has a “sweet spot,” where sharpness is at its peak. Familiarize yourself with your equipment to maximize this quality.
By integrating these strategies into your workflow, honing skills in manual focusing becomes more intuitive and rewarding.
Aperture Control Techniques with Film Lenses
I often manipulate exposure by mastering aperture on vintage optics. One key technique involves using the aperture ring directly on the lens. Many classic glass varieties feature tactile clicks for each f-stop, allowing precise adjustments, which helps create desired depth of field.
In low-light situations, I occasionally open up to wider apertures like f/1.8 or f/2.8 to gather maximum light. This assists in achieving bokeh effects while also isolating subjects from distracting backgrounds.
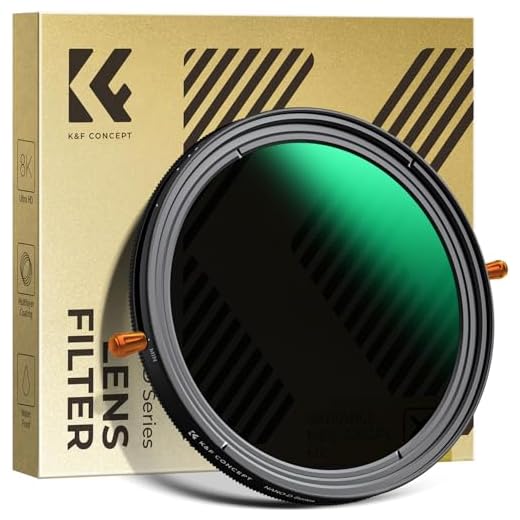
Additionally, when shooting in bright conditions, I find that employing ND filters is invaluable alongside these older pieces of glass. They permit me to maintain a wide aperture while still controlling exposure levels, crucial for those dreamy, sharp images.
Another aspect I leverage is understanding the exposure triangle. With film optics, I calculate the necessary adjustments to shutter speed when making changes to the aperture for consistent exposure across various shooting scenarios.
I also utilize aperture presets available on some lenses, allowing a quick switch between preferred settings without continual adjustments. This saves time in fast-paced environments.
Finally, practicing with manual modes enhances my control over exposure through these classic lenses. By embracing full manual settings, I can creatively influence not just light but also the artistic presentation in my imagery.
Potential Image Quality Differences Explained
Image quality can vary significantly when swapping optical components designed for film with digital systems. One main factor is the resolution difference; modern sensors often exceed the resolving power of older optics. This can lead to sharper images overall, but it might also expose inherent flaws in the older glass that were less noticeable on film.

Color Rendition and Contrast
The way colors are rendered can shift due to the coatings used on glass surfaces. Some vintage optics may provide warmer tones but lack contrast, resulting in images that feel flatter compared to contemporary designs. I recommend testing specific models to see how they handle color and contrast, especially in varied lighting situations.
Flare and Distortion Characteristics
Older optical designs may have different flare characteristics. While some users appreciate the ‘character’ introduced by these older optics, I often find that excessive flare can degrade overall image quality. Checking for distortion, particularly in wider angles, is also essential as older lenses might exhibit barrel distortion more prominently than newer alternatives.
Finally, evaluating bokeh and depth of field can provide insight into how the optical properties of older components interact with modern sensors. Issues such as vignetting might also arise, particularly at wider apertures, which can alter the perceived quality of an image significantly. Testing in real-world environments can help gauge these potential discrepancies.
Distortion and Vignetting in Classic Optics on Modern Sensors
When adapting vintage optics to a modern sensor, be prepared for certain optical anomalies like distortion and vignetting. These can significantly affect image quality, depending on the specific glass constructed in the past.
Understanding Distortion Types
Common types of distortion encountered include:
- Barrel Distortion: Edges of the image appear to bulge outward. This is prevalent in wide-angle solutions.
- Pincushion Distortion: Edges curve inward, often seen in telephoto choices.
While some of these effects can be undesirable, they may also provide a unique aesthetic for artistic captures.
Managing Vignetting
Vignetting manifests as a gradual darkening of the corners compared to the center. Here are tips to evaluate and reduce its impact:
- Post-Processing: Software can aid in correcting vignetting during editing.
- Aperture Adjustment: Using a wider aperture often minimizes peripheral darkness.
- Lens Hood: Employing a hood can sometimes mitigate this issue by blocking extraneous light.
Understanding these optical characteristics allows for better control of final imagery while experimenting with vintage optical artifacts. Embrace the quirks; they often add character to the photographs.
Assessing Light Loss with Adaptors
Light loss can significantly impact image quality when attaching glass from older models via adaptors. It’s crucial to assess how much light is transmitted through the adaptor system. The primary consideration is the f-stop value, which correlates to the amount of light reaching the sensor.
Measuring Light Transmission
To quantify light loss, consider the following:
- Check the adaptor’s construction. Metal adaptors typically allow more light compared to plastic ones.
- Calculate the effective aperture. For example, using an adaptor might require you to increase the f-stop by one or two stops to achieve the same exposure level.
- Perform a test shot comparing with a standard lens. Reviewing the histogram and exposure might reveal differences in brightness.
Practical Tools for Evaluation
Use the following methods for accurate assessment:
- Lightmeter: Measure the light in different conditions with and without the adaptor attached.
- Software Analysis: Use editing programs to analyze exposure levels between shots taken with adapted and native optics.
- Troubleshoot: If light loss is excessive, consider using high ISO settings to compensate, adjusting the shutter speed, or using external lighting sources.
Understanding the implications of light loss is paramount for achieving desired results with adapted optics in capturing stunning imagery.
Sensor Crop Factor and Field of View Impact
The sensor crop factor significantly affects composition when adapting older optics for modern setups. Understanding this ratio allows for precise calculation of field of view adjustments.
For instance, an image sensor with a crop factor of 1.6x alters the effective focal length of standard glass: a 50mm optic effectively behaves like an 80mm equivalent. This impacts how subjects are framed and backgrounds are compressed.
Examining subject isolation becomes crucial, especially for portraits or macro work. The narrower field of view introduces challenges that necessitate adjustments during shooting. I recommend testing various focal lengths to become familiar with how compositions shift.
Keep in mind that the reduced depth of field can enhance subject focus, but it may also require meticulous focusing techniques, particularly with manual systems.
The crop factor is essential, but understanding the implications for field of view and composition ensures intentional image creation. Experimentation and practice lead to mastery across adapted optics.
Compatibility with Image Stabilization Features
When integrating vintage optics with modern gear, attention to stabilization capabilities is essential. Most traditional glass lacks built-in stabilization mechanisms. If your body incorporates in-lens stabilization, it may not interact optimally with adapted optics. Manual shake can become a significant issue, particularly at slower shutter speeds.
Consider utilizing a tripod or monopod for stability. For handheld shooting, practice steady grip techniques. The absence of optical stabilization means I’ve adapted my shooting style to rely on faster shutter speeds to offset potential blur. Also, if my camera possesses in-body stabilization, it can somewhat mitigate these challenges by providing support during handheld photography.
Post-processing can compensate for minor shake. Software stabilization tools can often correct minor imperfections, though this might introduce cropping or reduced image quality. Experimenting with different settings allows fine-tuning to specific scenarios.
In summary, be mindful that legacy optics may not support sophisticated stabilization features, prompting adjustments in technique and setup for optimal results.
Using Vintage Film Lenses Creatively
Explore unique aesthetics by utilizing older glass to achieve distinctive effects impossible with modern optics. Start with manual focus techniques to enhance precision; the tactile feel of the focus ring allows for creative storytelling through shallow depth of field or selective focus.
Character and Imperfections
Embrace the inherent imperfections of vintage optics, such as softness, color rendition, and blooming highlights. These aspects can add character, transforming ordinary scenes into evocative images. Experiment with different apertures to observe how bokeh quality changes and to find the sweet spot that adds desired artistic flair.
Unconventional Compositions
Use these classic pieces for unconventional perspectives. Try stacking filters or extension tubes for macro photography; this can produce fascinating close-ups with a unique twist. Additionally, consider shooting through textured glass or reflections to create multidimensional effects.
Don’t hesitate to mix and match various older pieces. Different focal lengths can yield surprising results–wide-angle shots can appear cinematic and immersive, while telephoto options can compress space, creating a striking architectural perspective.
Documenting everyday moments with character-rich glass brings authenticity alive. Vintage lenses can inspire spontaneous compositions, prompting me to frame shots in new ways. Let creativity lead; the pleasing unpredictability of using these older optics often results in compelling narratives and styles that resonate deeply.
Testing for Color Rendition Variations
To accurately evaluate how older optics render colors on modern sensors, a systematic approach is required. Start with the following steps:
- Select Standardized Subjects: Choose a set of subjects that represent a variety of colors and textures, such as a color chart, natural scenes, and artificial light sources.
- Consistent Lighting Setup: Utilize a controlled lighting scenario to minimize external influences on color. Daylight-balanced LED lights work well for this purpose.
- Capture Reference Images: Use the camera’s native lens to capture reference photos under the same conditions. This establishes a baseline for color accuracy.
- Swap to Vintage Glass: Replace the native lens with the adapted optic and take identical shots of the same subjects.
- Analyze Color Profiles: Import both sets of images into editing software capable of detailed color analysis. Compare the differences in color rendition, focusing on saturation and temperature.
- Evaluate Color Consistency: Check if certain colors appear more pronounced or muted with the vintage glass. Note any color casts that might affect the scene.
This method reveals how the age of an optic influences color output, which can guide creative choices when employing these materials in photography. Understanding the variations aids in selective usage for desired artistic effects.
Finding Film Lenses at Affordable Prices
Visit local thrift stores and flea markets for hidden gems. I often find vintage optics at surprisingly low prices, sometimes under $50. Estate sales can also yield unique glassware, particularly if the owner was a photography enthusiast.
Online marketplaces like eBay and Facebook Marketplace frequently list great deals. Set alerts for specific models or brands, allowing for timely notifications on price drops or new listings. I recommend checking completed sales on eBay for fair market values.
Camera shops, especially those that focus on used gear, can be treasure troves. Building relationships with store staff often leads to early notifications about incoming inventory. Join photography forums or groups that specialize in classic equipment–members frequently sell their extras at reasonable prices.
Consider lens swaps with fellow enthusiasts, which can provide fresh perspectives while minimizing spending. Participating in photography meetups may lead to opportunities for bartering or trading.
| Source | Suggestions |
|---|---|
| Thrift Stores | Search for vintage lenses at low prices |
| Online Marketplaces | Set alerts for desired models |
| Camera Shops | Build relationships for tips on new stock |
| Photography Forums | Engage in trading among members |
| Meetups | Potential for lens swaps |
By utilizing these strategies, I successfully expand my collection without overspending, enjoying the unique characteristics that older optics bring to my work.
Cleaning and Maintaining Older Film Optics
Regular maintenance is key to preserving the quality of vintage optics. Start by using a blower to remove loose dust and debris from the exterior elements.
For smudges on glass surfaces, employ a microfiber cloth and a designated lens cleaner. Avoid using household cleaners, as they can damage coatings. Apply the cleaner to the cloth, never directly on the optics, to prevent drips that could seep into the housing.
Inspect the lens for fungus or haze. If found, consider professional cleaning, as these issues can degrade image quality.
Storage Recommendations
Keep older optics in a dry, temperature-controlled environment to minimize humidity, which promotes mold growth. Utilize protective pouches or soft cases to avoid physical damage.
For added protection, silica gel packets can help absorb moisture within storage containers.
| Maintenance Task | Frequency |
|---|---|
| Dusting with a blower | Before each use |
| Cleaning glass | As needed |
| Professional cleaning | Every few years |
| Inspect for fungus | Periodically |
Check for smooth operation of the focus and aperture rings. If movement is stiff, apply a small amount of lubricant recommended for camera equipment.
A regular maintenance routine ensures optimal performance and longevity of older optics, allowing for stunning captures with a timeless character.
Popular Canon-Compatible Film Lenses Reviewed
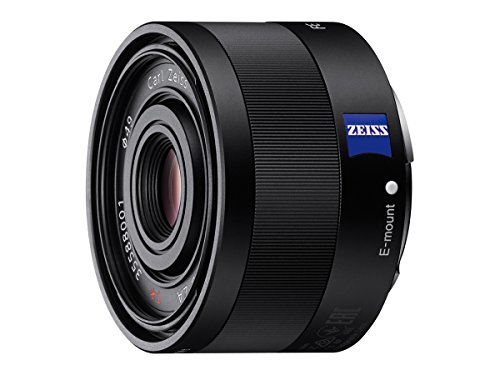
The Canon EF 50mm f/1.8 is a favorite among those who appreciate a classic fast prime. Its lightweight build and sharp image quality make it an excellent choice for portraiture and low-light scenarios. The bokeh produced is pleasing, and at an affordable price point, it’s a must-have for any enthusiast.
Next up, the Canon FD 85mm f/1.8 offers a beautiful vintage perspective. This lens is compact and features stunning color rendition, ideal for capturing portraits. With an adapter, it can bring a unique character to modern shots, perfect for those wanting to experiment with a softer focus.
For wide-angle aficionados, the Canon FD 24mm f/2.8 is highly regarded. Its broad field of view excites landscape photographers. You’ll find edge-to-edge sharpness with minimal distortion, vital for architectural photography. With an adapter, this gem can adapt well to current sensor formats.
The Canon EF 28-70mm f/2.8L is popular due to its versatility. This zoom lens allows for excellent depth of field control, making it suitable for both portraits and landscapes. It’s rugged, with weather sealing, appealing for outdoor shooting.
Lastly, the Canon FD 135mm f/2.5 stands out for those interested in shallow depth of field. Its smooth autofocus experience and rich contrast elevate any subject. The vintage feel, combined with a good adapter, offers an artistic touch that sets compositions apart.
These selections illustrate the variety available for enthusiasts looking to merge classic optics with modern technology, making photography a creative venture laden with countless possibilities.
Limitations of Using Film Lenses on Digital Bodies
When integrating vintage optics with modern devices, several notable challenges arise that affect usability and performance. Most importantly, compatibility issues can lead to limited functionality, particularly regarding autofocus capabilities. Many older glass elements were designed for manual operation, necessitating a hands-on approach for focusing.
Another aspect to consider involves the influence of mount variations. While some constructions allow for adaptation, the physical alignment might not always be spot-on, leading to focusing errors and reduced sharpness at the edges of the images. Additionally, the size and design of these older optics can hinder convenience, making it difficult to balance and operate effectively on contemporary hardware.
Aperture control may also pose difficulties; many classic optics lack electronic communication with today’s systems. Adjusting the aperture might require manual settings, impacting exposure decisions during shooting sessions. Furthermore, light loss through adaptors could reduce the overall brightness of images, necessitating adjustments in ISO settings or shutter speeds, which can lead to compromised dynamic range.
Vignetting is another common issue when pairing traditional lenses with advanced sensors, leading to darkened corners that can distract from the subject matter. Lastly, older glass pieces may exhibit chromatic aberrations and optical distortion more prominently than modern equivalents, which can necessitate post-processing corrections to achieve desired results.
Professional Advice for Transitioning to Digital
Begin with specific adaptors suited for the mount of your existing optics. This ensures compatibility and minimizes potential issues. Researching brands that offer well-reviewed adaptors can save time and money.
- Evaluate the required aperture settings. Manual adjustment may be necessary, as many adaptors do not support electronic control.
- Familiarize yourself with focusing techniques unique to vintage optics. A focus peaking feature on your new apparatus can greatly assist in this regard.
- Prioritize a practice routine with various focal lengths. Understanding depth of field differences between older and contemporary optics enhances shooting confidence.
- Keep a lens cleaning kit accessible. Older glass may need meticulous maintenance to maintain clarity and avoid ghosting or haziness.
Consider the characteristics of the sensor in your chosen apparatus. The crop factor significantly alters the effective focal length, which may affect your composition strategies.
- Conduct tests to observe potential light loss through adaptors. Take note of exposure differences in various lighting scenarios.
- Inspect your images for distortion or vignetting effects. Understanding these elements can aid in post-processing corrections.
- Explore creative avenues by utilizing unique bokeh qualities of older optics. This offers a distinctive aesthetic that stands apart from modern equivalents.
Budgeting for second-hand glass opens doors to affordable historic models. Sites dedicated to camera gear or local markets frequently have hidden gems.
Building technical proficiency with older optics requires patience and practice. Embrace the learning curve and enjoy the unique perspectives these tools can offer.
Real User Experiences: What to Expect
I found using vintage optics on modern equipment to be an exciting adventure. I was surprised at how much character these older models added to my images. The process might appear daunting at first, but with a little patience, it becomes second nature.
One major highlight was the unique rendering of colors and light. Many enthusiasts reported that the tonal qualities differ significantly from contemporary optics. I experienced a particular warmth in hues, giving my photographs a nostalgic feel that modern glass struggled to replicate.
A frequent challenge involves achieving sharp focus. Manual adjustment is mandatory, which means developing a new skill set. However, it was rewarding when I finally captured that perfect shot. I recommend practicing with various subjects to build confidence with manual focus techniques.
Additionally, the way these older optics handle distortion and vignetting varies. I discovered that some lenses may offer pleasing fall-off effects, adding creative depth to my compositions. It became a fun trial-and-error process to identify which sub-optimal characteristics could be leveraged creatively.
I noticed light loss when using adaptors, especially with certain models. This means adjusting your exposure settings is crucial. Carrying a light meter proved to be immensely helpful in making accurate adjustments on the fly.
When it comes to maintenance, many users, including myself, found cleaning older glass quite simple. A microfiber cloth and lens cleaner were often sufficient to rejuvenate them. Establishing a regular cleaning schedule helped prolong the lifespan of my equipment.
Testing out various focal lengths allowed me to understand the crop factor effects. The field of view dramatically shifts, so I made sure to experiment with different framing techniques to achieve my desired aesthetic. This aspect of using classic optics added a layer of creativity to my workflow that I didn’t anticipate.
Ultimately, exploring vintage optics brought a layer of enjoyment to my practice. The community surrounding this niche is welcoming and supportive, offering insights and tips that helped me refine my technique and choices. Engaging with fellow enthusiasts has opened doors to invaluable experiences and connections in my photographic journey.
| Experience | Notes |
|---|---|
| Color Rendering | Distinct warmth and tonal richness. |
| Manual Focus | Requires practice, rewarding when mastered. |
| Distortion/Vignetting | Can add artistic effects, worth exploring. |
| Light Loss | Adjust exposure settings accordingly. |
| Maintenance | Simple cleaning prolongs lifespan. |
| Crop Factor | Effects framing and composition. |
Educational Resources on Lens Adaptation
To enhance your expertise, I recommend several books focused on vintage glass and adaptors. “The Vintage Lens: A Photographer’s Guide” offers insights into various optical systems and their unique characteristics. Additionally, “Adaptable Magic: Using Legacy Lenses on Modern Systems” discusses the intricacies of using vintage optics with modern devices.
Online forums such as DPReview and Flickr groups are invaluable for real-time advice from enthusiasts. Engaging with communities dedicated to lens adaptation can provide practical experiences and troubleshooting techniques. Websites like RetroPhotographic and The Photographer’s Guide offer curated lists of adaptors compatible with different mounts.
Youtube channels focusing on photography gear often feature hands-on demos and comparisons. For example, Tim’s Tech Tips has numerous videos showcasing various adaptors and their performance in real-world scenarios.
Workshops and webinars hosted by local photography clubs provide opportunities for practical experience. These sessions often include interaction with professionals who share their experiences and techniques for maximizing the potential of vintage glass.
Lastly, manufacturers’ websites often have resources and guidelines for their adaptors, including compatibility charts and user manuals which can be essential when working with various systems. Utilizing these resources will significantly enhance your understanding of optics and adaptation methods.
Exploring Third-Party Lens Options
For those looking to expand their arsenal, numerous third-party options are available that may enhance creative expression. Brands like Sigma, Tamron, and Tokina produce superior quality glass compatible with the Canon system. I often find that these alternatives provide unique characteristics, such as special bokeh effects or distinctive color rendering, which can differentiate my work.
Benefits of Third-Party Optics
Third-party manufacturers offer a diverse array of focal lengths and apertures, often at more affordable price points compared to original Canon offerings. For instance, a wide-angle lens from Sigma might provide a comparable performance to its Canon counterpart but at a fraction of the cost. This encourages experimentation without heavy financial commitment.
Challenges to Consider
Despite the advantages, certain challenges arise with third-party options. Autofocus systems may not always match the accuracy of Canon lenses, particularly in dynamic settings. Additionally, some models lack weather sealing, which can limit usability in adverse conditions. Ensuring compatibility with adapters is essential for achieving optimal performance.
Best Practices for Shooting with Adapted Lenses
To achieve optimal results while working with adapted optics, smooth operation requires specific techniques and adjustments. Here are some effective practices I’ve found beneficial:
Focus Techniques
- Utilize focus peaking features if available; this will help in achieving sharpness more efficiently.
- Take time to practice; manual focusing can be challenging initially, so try different subjects and lighting conditions.
- Use hyperfocal distance calculations for landscapes to maximize depth of field.
Aperture Management
- Familiarize yourself with the aperture ring location on your equipment; manual adjustments are often necessary.
- Experiment with different f-stops to notice variations in sharpness and background blur.
- Keep in mind that older optics may have an inconsistent aperture mechanism, requiring careful handling.
Consider testing various adaptations in different environments, allowing creative flexibility. Assessing the effects of light and distance on your results can lead to better compositions. Regular practice will enhance comfort with using these unique optical tools effectively.