


Absolutely, incorporating classic photographic elements with current imaging technology is feasible and often yields stunning results. Many enthusiasts and professionals have embraced vintage optics for their unique characteristics, such as distinctive bokeh and color rendering that contemporary models may lack.
Adapting these older optics typically involves specific mount adapters, which are widely available for a variety of camera systems. These adapters allow seamless attachment between the vintage glass and modern bodies, maintaining functionality while enhancing creative possibilities.

Furthermore, the tactile experience of manual focusing with these traditional optics can also be rewarding. The precise control and engagement provide a different photographic experience, reminiscent of earlier times in photo history. Experimentation with these lenses can certainly provide unique artistic outcomes that stand apart from the uniformity of mass-produced contemporary options.
Using Vintage Optics on Modern Imaging Devices
Adapting classic optics to modern imaging tools can yield stunning results. The process typically involves a lens mount adapter to ensure compatibility. Many adapters allow adjustment of focus and aperture, which is essential for achieving desired effects.
Before proceeding, check the following compatibility aspects:
| Factor | Recommendation |
|---|---|
| Mount Type | Confirm the specific mount of your vintage optics; adapters vary to fit different models. |
| Crop Factor | Be aware of the crop factor on my imaging device as it affects the effective focal length. |
| Focus Mechanism | Manual focus is standard; familiarity with manual controls enhances shooting experience. |
| Image Quality | Inspect glass condition for dust, scratches, or fungus; these factors significantly impact image quality. |
Experimenting with different focal lengths and aperture settings opens creative possibilities. Each optical piece brings its unique character, resulting in distinct imaging effects. Be prepared for a learning curve when adjusting to manual controls and understanding the nuances of various optics.
Engaging with legacy optics enriches the photographic experience and broadens artistic expression. With careful selection and adaptation, vintage optics can enhance modern imaging practice significantly.
Compatibility of Analog Lenses with Digital Cameras
Transitioning older glass to modern bodies can yield rewarding results. First, research the specific mount type of the optic and match it with an appropriate adapter. Many models are available, varying in quality and functionality.
Manual focus might be required because autofocus systems in contemporary bodies often do not support these vintage optics. Be prepared for a learning curve while composing shots without auto exposure settings, as handling aperture adjustments will also be manual.
Image quality might differ from standard setups, with color rendition and sharpness exhibiting unique characteristics. Some users appreciate a certain aesthetic that vintage glass provides, often sought after for its distinctive bokeh or soft focus. Testing different combinations can lead to unexpected creative opportunities.
Compatibility checks are vital. Certain cameras have limits on the maximum aperture allowed through the adapter, impacting exposure speeds. Using stop-down metering on some camera models may be necessary, allowing the sensor to gauge light based on the currently set aperture before the shot is taken.
Compatibility can extend beyond mechanical fitting. Certain brands or models may display significant vignetting or chromatic aberration, requiring post-processing adjustments. Understanding these quirks enhances overall shooting experience.
In conclusion, adapting legacy optics involves a blend of technical knowledge, patience, and creative exploration. Emphasizing compatibility ensures an enriching venture into melding past and present in photography.
Types of Analog Lenses for Digital Use
Choosing the right type of vintage optics can significantly enhance photographic results. Various categories of these optics exist, each offering unique traits and compatibility features.
1. Prime Optics
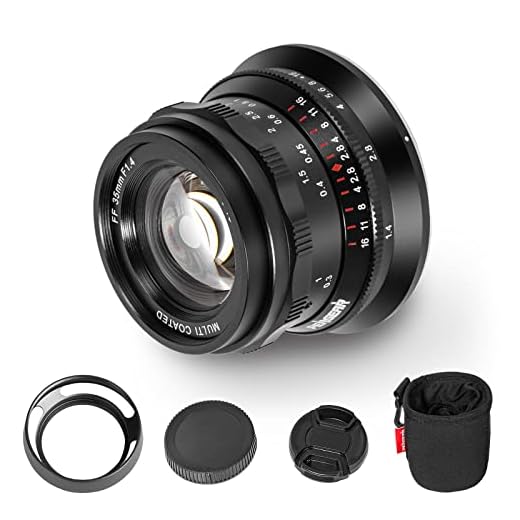
Prime optics are characterized by a fixed focal length, offering superior sharpness and reduced distortion. Their simple design often results in higher image quality. Popular choices include:
- 50mm f/1.4 – Excellent for portraits due to its flattering compression.
- 35mm f/2 – Great for street and landscape photography, capturing wider scenes effectively.
- 85mm f/1.8 – Perfect for close-up portraits, providing beautiful bokeh.
2. Zoom Optics
Zoom optics provide flexibility with variable focal lengths, making them ideal for diverse shooting situations. Key models are:
- 28-70mm f/3.5-4.5 – A compact option for everyday photography.
- 70-210mm f/4 – Excellent for wildlife and sports, offering a broad range.
- 24-105mm f/4 – Versatile for both landscapes and portraits, striking a balance between range and quality.
Each type of vintage glass has distinct advantages and ideal applications. Select based on personal photographic style and specific needs.
Adapting Analog Lenses to Digital Cameras
To achieve optimal performance while attaching vintage optics to modern imaging devices, utilize appropriate adapters tailored to specific mounts. Many manufacturers produce a wide range of conversion rings, facilitating seamless integration between these two distinct systems. Research the compatibility of both lens and camera mounts before purchasing an adapter to ensure a secure fit and proper functionality.
Manual focus and exposure settings often accompany legacy optics, which may require some adjustment in technique. Take time to practice and familiarize yourself with these controls, as precision plays a crucial role in capturing stunning images.
Pay close attention to the sensor size of your device. Full-frame sensors generally offer the best experience with wide-angle and telephoto legacy optics, but crop sensors can efficiently accommodate certain focal lengths, leading to the use of alternative compositions.
Keep in mind, the image quality produced can vary widely. Factors like flare, distortion, and vignetting might arise, improving with advanced post-processing techniques. These characteristics can add a unique aesthetic, which many photographers find appealing.
| Aspect | Considerations |
|---|---|
| Adapters | Check compatibility between mounts; choose quality brands. |
| Manual Controls | Familiarize with manual focus; practice exposure settings. |
| Sensor Size | Select lenses based on crop factor for desired framing. |
| Image Quality | Expect potential inconsistencies; explore post-processing options. |
Exploring these vintage optics can lead to exciting creative possibilities, enriching your photography experience. Embrace the unique characteristics and limitations that come with this endeavor, and capture images that reflect both nostalgia and innovation.
Popular Analog Lens Mounts Explained
Understanding various mounts enhances flexibility in incorporating vintage glass into modern setups. Here are some widely recognized mounts to consider:
24x36mm and Medium Format Options
- Canon FD: A significant choice for 35mm shooters, compatible with numerous adapters. Noteworthy for its smooth manual focus and good optical quality.
- Nikon F: Known for its durability and versatility, this mount covers a wide range of professional lenses. Excellent for anyone who prefers hands-on adjustments.
- Minolta MD: Features compact design and unique rendering style. Works well with adapters, allowing creative applications.
- Leica R: High-quality optics and build offer superior images. Requires specialized adapters that maintain optical characteristics.
- Contax/Yashica (C/Y): Renowned for sharpness and contrast, this system includes unique Zeiss glass options. Adapters available for various brands.
Medium Format Glass
- Pentax 6×7: Ideal for large film formats, achieving remarkable depth and detail. Adapters exist but might affect weight and balance.
- Hasselblad V: This versatile system offers top-tier optics. It may require specialized adapters that ensure proper alignment.
- Mamiya 645: Provides excellent field of view, with many wide-angle options. Popular for portraits and landscapes alike with the right connectors.
Choosing the right mount involves considering the desired aesthetics, handling preferences, and the practicalities of adapting each lens to a new setting. Compatibility varies by mount, so thorough research and testing yield better outcomes in achieving that vintage look paired with modern technology.
Identifying the Right Adapter for Your Lens
Choosing an appropriate adapter is fundamental for successful integration of older optic systems with new imaging technology. I recommend starting by determining the specific mount type of the vintage optic. Brands like Canon, Nikon, Pentax, and M42 each have distinct fittings, so it’s vital to find an adapter that matches precisely to avoid damaging either component.
Researching Adapter Options
Numerous manufacturers provide adapters, often tailored for specific combinations. Look for well-reviewed options that feature solid construction and compatibility claims from verified users. Brands such as Fotodiox, Metabones, and K&F Concept are reputable sources offering various solutions. Ensure the adapter has the correct functionality, such as aperture control or electronics, if these features are necessary for the specific use case.
Adapter Quality and Features
Pursuit of quality should guide your choice. A robust adapter not only enhances functionality but also ensures stability and minimizes optical degradation. Some adapters may include additional features like tripod mounts or glass elements to correct focus issues. Reading user reviews or consulting photography forums can provide insights into performance and reliability before making a purchase.
Understanding Focal Length Differences
Focal length plays a critical role in achieving the desired composition and perspective in photography. When adapting vintage optics to modern devices, understanding how focal lengths translate is essential to achieving the results I want.

The focal length of a lens, measured in millimeters, determines the angle of view and depth of field. Shorter focal lengths, like 24mm, provide a wide perspective, capturing more of the scene, while longer ones, such as 85mm, compress the subject and produce a more pronounced bokeh effect. I often consider what type of photography I pursue–landscapes may benefit from wider angles, whereas portraits might require longer distances.
Another aspect that influences the outcome is the crop factor inherent in many contemporary devices. For instance, with a crop factor of 1.5x, a 50mm optic effectively behaves like a 75mm lens. This adaptation often calls for recalibrating my expectations regarding composition and framing. I make a mental note to account for this difference, especially when I’m working with a limited selection of optics.
I have discovered that matching the optical characteristics is just as significant as the focal length. Certain optics produce unique rendering qualities, and understanding their specific behaviors helps me choose the right piece for each project. Chromatic aberration, distortion, and character vary significantly between different types of glass, which can enhance or detract from the final image quality.
Considering all these factors, thoroughly researching the specs and performance of each piece in my arsenal proves rewarding. Measurement and the type of subject being captured guide my choice of optics immensely. Each project can benefit from distinct focal lengths, influencing how I frame and present my visual narrative.
Impact of Sensor Size on Lens Performance
The size of the sensor directly influences how optical elements perform. Larger sensors typically capture more light, leading to better low-light performance and wider dynamic range. This characteristic allows for greater detail and improved color accuracy in images.
Crop Factor Considerations
With smaller sensors, a crop factor comes into play, effectively increasing the focal length of attached optics. For example, a 50mm optic on an APS-C sensor behaves like a 75mm equivalent. Understanding this transformation is crucial for achieving the desired framing and composition in shots.
Depth of Field Variations
Sensor dimensions also affect depth of field, with larger sensors providing shallower depth. This feature is advantageous for portraiture, allowing for beautiful background blur while keeping the subject sharp and in focus. Conversely, smaller sensors create deeper depth of field, which may be beneficial for landscapes or macro photography.
Manual Focus Techniques for Analog Lenses
Mastering manual focus requires practice and precision. Begin with a reliable focus chart or a detailed scene, ensuring you have sufficient contrast to enhance focus accuracy. Utilize the depth of field preview feature, if available, to determine how much of the scene will be in sharp focus.
Focusing accurately with old glass often involves utilizing the focus peaking feature found in many modern systems. This will highlight the edges of objects in focus, making it easier to ensure sharpness. Alternatively, magnification functions allow for zooming in on the screen, providing a closer look at critical focus areas.

Pay attention to the distance scale markings on the lens barrel. Familiarizing yourself with these markings enables better estimation of focus points, especially with wide apertures where shallow depth of field is prevalent. Practicing with different distances and subjects will improve your ability to estimate focus, making it quicker over time.
Operating in challenging lighting conditions might require increasing the gain or ISO settings on the capturing unit. This enhances visibility through the viewfinder or screen, minimizing guesswork when focusing. Additionally, consider using a tripod for fixing the stance and ensuring stability while adjusting focus manually.
Finally, keep the aperture wide open during focus adjustments to achieve maximum light transmission, then stop down after locking the focus. This method allows for easier focus acquisition, especially in low-light scenarios, while maintaining sharpness in the final image. Develop these techniques consistently to enhance your proficiency with older optical systems.
Achieving Correct Exposure with Analog Lenses
To achieve accurate exposure while working with vintage optics, begin by utilizing a light meter or the camera’s built-in metering system. This will provide initial readings to guide settings adjustments.
Always consider the maximum aperture of the lens. Familiarize yourself with exposure equivalents, as older optics may differ in light transmission efficiency. If the lens has a smaller maximum aperture, you’ll need to compensate with longer exposure times or higher ISO settings.
Utilizing the histogram feature can enhance exposure accuracy. Aim for a balanced histogram without clipping in the shadows or highlights. This method allows for better post-processing flexibility.
Manual adjustments are essential. Set the shutter speed and aperture according to the metering results, then make incremental adjustments based on real-time feedback. If shooting in varying light conditions, take test shots to verify exposure levels before finalizing settings.
Additionally, utilizing neutral density filters can help control exposure, especially in bright environments. These filters reduce light entering the lens, making it easier to maintain desired settings without overexposure.
Keep in mind any potential discrepancies due to the sensor’s characteristics. Full-frame sensors might render the exposure differently than crop sensors when using the same aperture and shutter speed settings. Adjust accordingly based on the specifics of your camera system.
Regular practice with these techniques will enhance proficiency in achieving correct exposure while utilizing vintage glass, allowing for more creative freedom and satisfying results in your photography.
Using Analog Lenses for Video Recording
When choosing vintage optics for video capture, focus on manual control for precise adjustments during shooting. The inherent character of these optics can beautifully enhance footage, providing unique bokeh and rendering effects. Pay attention to lens sharpness across the aperture range, as some may exhibit pronounced spherical aberrations or vignetting wide open.
Focusing Techniques
Utilizing focus peaking or magnification features in your viewing system aids in achieving accurate manual focus. A follow focus device can significantly assist in maintaining focus during dynamic shots, ensuring smooth transitions without distracting jitter. Test different focal lengths prior to your recording session to familiarize yourself with each lens’s unique behavior in terms of focus and depth of field.
Exposure Settings
To achieve optimal exposure, leverage your camera’s histogram and zebras. Understanding the exposure triangle–aperture, shutter speed, and ISO–is critical when working with vintage optics that may lack electronic communication with modern systems. Adjusting the aperture manually allows control over light intake, which can dramatically affect the mood of the footage. Always perform test shots before beginning an actual shoot to fine-tune each setting according to the environmental conditions.
Exploring Vintage Lens Aesthetics in Digital Photography
Incorporating vintage optics into my photography opens up a realm of unique artistic expression. The distinct characteristics of these older components often impart a warmth and depth that modern glass may lack.
Here are specific aspects to consider when exploring these older optics:
- Bokeh Quality: Many vintage optics feature rounded aperture blades that produce smoother bokeh, creating visually appealing backgrounds, especially in portraits.
- Color Rendition: The color palette of vintage lenses can differ significantly; some may yield vivid colors, while others generate softer tones. Experimenting with various options yields diverse results.
- Optical Aberrations: Embrace imperfections like vignetting or softness around the edges for an artful, nostalgic effect. These quirks can enhance storytelling within photographs.
- Flair and Glare: Many vintage optics exhibit distinct lens flare characteristics. Utilizing strong light sources can result in unique artistic images that modern designs often suppress.
To extract the best qualities from these lenses, adapting them to contemporary bodies gives me the flexibility to match both aesthetic and functional needs:
- Experiment: Embrace the eclectic mix, pairing various optics with different subjects and lighting conditions to discover combinations that resonate with your artistic vision.
- Master Manual Focusing: Since most vintage variants lack autofocus, honing my manual focusing skills translates into more intentional compositions.
- Play with F-Stops: Adjusting aperture settings allows me to control depth of field creatively, influencing how subjects are isolated against their backgrounds.
Incorporating vintage optical elements transforms my photography approach, challenging conventions while enhancing creative possibilities. Knowing their inherent traits enables more intentional artistry, allowing me to express my vision uniquely.
Lens Flare and Bokeh: Making the Most of Vintage Optics
To achieve unique lens flare and artistic bokeh with vintage optics, select focusing techniques carefully. The characteristics of older glass often create distinct flare patterns when light hits the elements at certain angles. Positioning your subject against a bright light source can result in captivating effects. Experimenting with various apertures will yield different flare results; open apertures often enhance the flare’s aesthetic qualities.
For bokeh, choose lenses with wider maximum apertures, such as f/1.4 or f/1.8. This allows for a shallower depth of field. When isolated from the background, subjects become more prominent, while background elements dissolve into soft shapes. Pay attention to the shape of the lens’s aperture blades, as circular designs contribute to more pleasing bokeh compared to angular shapes.
Consider the age and design of the glass. Some vintage optics exhibit unique bokeh qualities that modern lenses may lack. Testing various focal lengths can help identify which ones produce the most appealing bokeh specific to the aesthetic desired.
Shooting in diffused lighting conditions can enhance bokeh and lens flare effects. Overcast days or shaded areas often yield softer light, improving the overall outcome. Utilize a tripod to stabilize during long exposures, where lens flare and bokeh can be particularly pronounced.
Post-processing can complement effects achieved in-camera. Adjusting contrast and saturation in editing software allows one to enhance lens flare and refine bokeh, giving a more ethereal feeling to the final image. The key lies in balancing in-camera techniques with careful post-production adjustments.
Limitations of Using Analog Lenses on Digital Bodies
Adapting vintage optics to modern imaging systems comes with certain drawbacks that need close attention. One prominent issue is the lack of automatic functionality in many older models. This translates to manual adjustments for aperture and focus, which adds a layer of complexity for those accustomed to digital automation.
Image Quality Degradation
Another significant concern is potential image quality degradation. While some classic optics can deliver unique characteristics, others might produce soft images or pronounced aberrations upon pairing with high-resolution sensors. Sensor resolution can expose flaws that were inconsequential with film, leading to disappointing results.
Compatibility Issues
Mount compatibility is a crucial aspect. Not all vintage variants fit seamlessly onto contemporary systems, necessitating custom adapters that might introduce additional optical elements, resulting in light loss or distortion. It’s crucial to research specific combinations to prevent any unforeseen limitations.
Comparison of Image Quality: Analog vs. Digital
When assessing image quality between vintage optics and modern sensors, specific considerations arise.
- Color Rendition: Vintage optica often exhibit unique color profiles, characterized by subdued tones and distinct character. While contemporary models tend to provide more accurate color, the warm hues from older glass can add charm to certain photographic styles.
- Contrast: Older glass can produce lower contrast images due to the coating technology of their time. Optics designed today usually have advanced coatings that enhance contrast, yielding punchier images.
- Sharpness: Modern designs generally outshine their predecessors regarding sharpness across the frame. However, some enthusiasts prefer softer edges that vintage lenses create, especially for portraiture.
- Chromatic Aberration: Vintage designs might display more color fringing, especially at wide apertures. Advanced fabrication techniques in current models effectively minimize these issues.
- Distortion: Older lenses can introduce noticeable barrel or pincushion distortion, whereas contemporary pieces are engineered for minimal optical distortion, providing a cleaner look.
- Bokeh Quality: The aesthetic quality of background blur often varies. Vintage varieties might produce pleasing, creamy bokeh due to their optical designs, compared to more clinical bokeh in modern optics.
Ultimately, the choice reflects personal style, desired outcomes, and specific photographic scenarios. Balancing the distinct visual character of classic glass with the optimization of modern technology can yield diverse and exciting results.
Common Issues When Using Analog Lenses Digitally
Experience various challenges while integrating vintage optics with modern imaging systems. Here are key issues to anticipate:
- Focus Inaccuracy: Many older optics lack autofocus capabilities, leading to reliance on manual adjustment. Expect a learning curve in achieving sharp images.
- Incompatible Mounts: Different mounting systems often require specific adapters. Research compatibility carefully to avoid unwanted surprises.
- Flare and Distortion: Vintage glass can exhibit unwanted flare or distortion. Test these characteristics to assess their impact on compositions.
- Light Metering Issues: Automatic metering systems may not function with older optics. Adjust settings manually for accurate exposure results.
- Weight and Size: Many vintage models are bulkier compared to modern variants. Consider the balance and weight on newer bodies to ensure comfort during use.
- Color Rendering: Each optic has its unique color profile. Be prepared to adjust post-processing for a consistent visual aesthetic.
- Limited Aperture Control: Some older models may have restrictions on aperture adjustments. Verify compatibility with electronic control systems to maintain exposure flexibility.
Anticipating these potential pitfalls can enhance the experience and results when experimenting with classic optics in a contemporary setting.
Focusing with Depth of Field Considerations
When working with vintage glass mounted on a modern body, achieving sharp focus is critical. The depth of field (DOF) is influenced by several factors, including aperture, focal length, and sensor size, all of which require attention during the focusing process.
Start by selecting the appropriate aperture. Lower f-stop numbers result in a shallower depth of field, which is beneficial for isolating subjects but demands precise focusing. If your intention is to capture greater detail throughout the scene, opt for higher f-stops. This will expand the depth of field, allowing more of the image to fall within acceptable sharpness.
Consider the effective focal length, especially when adapting lenses designed for film. Doubling the focal length due to crop factor can significantly narrow the DOF. For instance, a 50mm lens on a crop-sensor camera behaves like a 75mm lens, which naturally narrows the depth of field.
Sensor size also plays a role. Larger sensors provide a wider DOF, giving more flexibility with focusing. In contrast, smaller sensors create a shallower depth, making accurate focusing even more critical, particularly in portrait or macro photography.
Employ manual focus techniques, such as focus peaking or magnification, to ensure accuracy. These features enhance the visibility of delicate focus adjustments, particularly on compact screens. Additionally, familiarize yourself with the lens’s focusing mechanics; some may have distinct depth-of-field markings that can aid in estimating the zone of sharp focus.
Lastly, practice is key. Understanding how various settings affect the focus and depth of field will allow for more consistent results and a refined approach to photography using classic optics.
Finding Analog Lenses: Where to Look
For quality vintage glass, I recommend starting with local thrift shops and flea markets. These places often have hidden gems at unbeatable prices. Estate sales can also yield fantastic finds; keep an eye on advertisements in your area.
Online Marketplaces
eBay and Craigslist host vast selections of used optical equipment. Setting alerts for specific searches will help in tracking down rare models. Specialized photography forums and websites like Fred Miranda or Rangefinder Forum provide classified sections where enthusiasts buy and sell items. For higher-end finds, consider B&H and KEH, renowned for their rigorous quality checks and expansive selections.
Camera Fairs and Expos
Attending local camera fairs or expos allows face-to-face interactions with sellers and experts. Networking can lead to private sales and insider tips on obtaining quality items. Additionally, community groups on social media platforms often organize meetups focused on trades or sales of photography gear.
Furthermore, don’t overlook contacting local camera shops. They occasionally have used inventory or can inform you about trade-ins. Establishing rapport with shop owners may open opportunities to acquire vintage items before they hit the shelves.
Cost Analysis of Using Analog Lenses
Choosing vintage optics can result in substantial savings compared to investing in modern equivalents. Typically, classic glass is available at a fraction of the cost of contemporary models while often maintaining impressive optical qualities. Prices vary widely depending on brand, condition, and rarity, but excellent examples can be found starting as low as $50 to $100, with high-end options climbing from $300 and beyond.
It’s important to factor in compatibility between older optics and modern bodies, as purchasing adapters might incur additional expenses. Quality adapters range from $20 to $100, and investing in a reliable one is crucial to avoid potential damage to both the lens and the camera. Additionally, watch for secondary costs associated with modification or repairs, which may arise particularly with more obscure mount types.
Long-Term Savings and Benefits
Long-term use of vintage glass often leads to lower depreciation rates, making them an attractive option for budget-conscious enthusiasts. Unlike new models, which tend to lose value quickly, vintage pieces can retain or even appreciate in value depending on market interest.
Resale Value
Should there be a desire to upgrade or change collections, many vintage lenses retain a decent resale value. Conducting thorough research on market trends can provide insights on potential resale values, allowing for more informed purchasing decisions.
Maintaining Analog Lenses for Digital Use
Regular cleaning of the glass elements is crucial to keep the optic surfaces clear. I use a microfiber cloth with a dedicated lens cleaning solution to remove dust and smudges. Avoid using household cleaners, as they can damage coatings.
Storage matters as well. I place these optics in a protective case equipped with desiccants to prevent humidity buildup. High humidity can result in fungus growth, which is detrimental to image quality.
Lens mount compatibility is another area to focus on. I ensure that connections between the lens and the adapter are secure, minimizing the risk of misalignment that could lead to focus issues.
| Maintenance Step | Recommendation |
|---|---|
| Cleaning | Use microfiber cloth and lens-specific cleaner |
| Storage | Keep in a protective case with desiccants |
| Usage | Inspect mounts for secure connections |
| Fungus Prevention | Avoid storing in damp environments |
| Inspection | Regularly check for signs of damage |
Testing the functionality of aperture blades periodically can help maintain maximum performance. I manually check their movement to ensure they open and close smoothly.
Finally, always handle these pieces of equipment with care. I avoid applying excessive force during switching or adjusting, protecting the integrity of both the lens and the camera body.
Benefits of Using Analog Lenses with Digital Cameras
One significant advantage I find in pairing vintage optics with modern imaging systems is the unique appearance they produce. The character of vintage glass often offers distinctive color renditions and less clinical sharpness, which can enhance the storytelling aspect of an image.
Here are key benefits:
- Unique Optical Characteristics: Each classic glass has its own signature bokeh, color balance, and contrast, often leading to compelling results.
- Affordability: Many older types can be acquired at lower prices compared to contemporary models, providing cost savings while expanding creative possibilities.
- Robust Build Quality: Vintage products often feature solid construction, enhancing durability and tactile experience during use.
- Broader Creative Range: Certain classic designs, such as Helios or Pentax Takumar, impart artistic flares and softness that modern optics often strive to replicate.
- Enhanced Manual Control: Engaging with mechanical focusing and aperture settings fosters a deeper connection with the photographic process.
This combination has not only revitalized my creative vision but also allowed me to explore various photographic techniques with a different perspective. Each photo becomes not just an image, but a unique expression shaped by legacy glass.
Examples of Successful Analog to Digital Lens Combinations
For exceptional outcomes in photography, pairing specific vintage optics with contemporary imaging systems proves rewarding. One noteworthy example includes the Helios 44-2, a legendary Russian lens renowned for its unique bokeh and contrast. Adapting it to a mirrorless body reveals stunning portraits with an artistic touch.
The Canon FD 50mm f/1.8 is another strong contender. When mounted on a full-frame format, it captures sharp and vibrant images while maintaining character. This setup works beautifully for various types of photography, from street scenes to studio work.
The Zeiss Jena Flektogon 35mm f/2.4 is celebrated for its remarkable sharpness and superb color rendition. Connecting this with a digital camera not only enhances wide-angle shots but also retains the original lens’s distinctive taste across landscapes and architecture.
Another compelling match involves the vintage Pentax SMC Takumar 135mm f/2.5. This telephoto option excels in portrait photography, delivering smooth backgrounds while accurately rendering subjects with a film-like quality. The results are often breathtaking, capturing emotion and depth.
Lastly, the Meyer-Optik Görlitz Oreston 50mm f/1.8 offers intriguing image qualities and can produce dreamy aesthetics. It’s particularly effective in low-light situations or to achieve intentional softness in creative projects when adapted to modern systems.
Testing Different Analog Lenses on Digital Bodies
Focusing on various vintage optics opens opportunities for unique photographic results. I recommend experimenting with M42, Canon FD, and Nikon F mounts, as they are commonly adaptable to modern setups. Each of these mounts typically allows for a diverse range of focal lengths, giving flexibility in creative approaches.
When assessing image quality, I found that certain glass formulations deliver distinctive characteristics, such as pronounced bokeh and unique color rendition. A prime example is the Helios 44-2, renowned for its swirling bokeh that adds a dynamic touch to portraits.
Manual focusing can require practice, particularly with fast-moving subjects. Utilizing peaking feature on mirrorless systems significantly aids precision in these scenarios. Depth of field scales on many vintage units assist in achieving the desired creative effects, especially in low-light settings where sharpness is critical.
To measure exposure, my approach involves using an external meter, which helps in situations where built-in meters might incorrect readings due to differing lens designs. Calibration of exposure compensations may also be required when dealing with light leaks or certain lens coatings that affect light transmission.
Exploring the aesthetic of older glass can be rewarding. Each model often has signature flares and colors that modern optics lack. These distinctive traits appeal to artists who seek to evoke specific moods or styles in their works. However, using these types of optics may introduce quirks, including focus shift or chromatic aberrations, which can either enhance or detract from the final outcome depending on the desired effect.
In my experience, understanding these variables can elevate the photographic process. Drawing comparisons between distinct models becomes an exercise in creativity, allowing for a richer narrative through imagery.
Landscape Photography with Analog Lenses
When capturing vast scenes, choosing the right optic can completely transform the image quality. Using vintage optics offers distinct character and charm that modern equivalents may lack.
For vast vistas, I recommend using wide-angle options to enhance depth and perspective. A focal length between 24mm and 35mm yields impressive results, allowing more of the scene to fit within the frame.
Manual focus becomes essential in these scenarios, particularly when working with shallow depths of field. Employing focus peaking or magnification on the digital body can help ensure sharpness where it matters most.
Consider aperture settings carefully as well. Using an aperture around f/8 to f/11 strikes a balance between depth of field and lens sharpness across the image. Many vintage optics perform optimally in this range, producing delightful clarity.
Lens flare can also add an artistic flair to images. Positioning the light source just outside the frame can create a stunning, ethereal quality that draws the viewer’s eye. Experimenting with backlighting often yields captivating results.
Bokeh effects can be particularly appealing in foreground elements, helping to create a sense of depth. Lenses with complex aperture designs often produce beautiful round highlights, benefiting compositions with foreground interest.
While there are advantages, certain challenges can arise. Inconsistencies in color rendition, chromatic aberration, and distortion must be taken into account. Stopping down the aperture can mitigate some of these issues while enhancing overall image quality.
Post-processing plays a significant role, especially when adjusting colors and contrast. Utilizing editing software to correct lens profiles and enhance imagery can help to elevate the final output.
For anyone embracing the unique aesthetics of vintage optics in landscape photography, understanding these challenges and advantages will lead to more captivating captures.
| Lens Type | Focal Length | Aperture Range | Characteristics |
|---|---|---|---|
| Wide Angle | 24mm – 35mm | f/8 – f/11 | Enhanced depth; great for vast scenes |
| Standard | 50mm | f/1.4 – f/2.8 | Versatile; solid for various compositions |
| Telephoto | 85mm – 135mm | f/2.8 – f/4 | Compression of space; ideal for detail |
Embrace the timeless appeal of older optics while capturing exquisite landscapes with depth and character. Equip yourself with the right knowledge and techniques to bring these vintage treasures to life.
Portraits: Utilizing Analog Lenses Effectively
To achieve stunning portraits, I choose vintage glass known for its unique character and ability to create exquisite bokeh. Models like the Helios 44-2 or the Pentax SMC Takumar 50mm f/1.4 provide an artistic touch, often resulting in a dreamy background that beautifully isolates the subject.
My approach begins with selecting a lens with a wide aperture. This allows for a shallow depth of field, emphasizing my subject against a softly blurred backdrop. Careful consideration of focal length is vital; 85mm to 135mm lenses are optimal for a flattering perspective, reducing distortion and enhancing the subject’s features.
Manual focusing becomes an art form while working with these classics. I often rely on a technique called “focus peaking” available in many modern bodies, which highlights points of sharpness. This feature is invaluable in ensuring that the eyes, often referred to as the windows to the soul, are sharp and captivating.
Lighting plays a significant role too. Soft, diffused light, such as natural light during golden hour or using reflectors, complements the warmth of vintage optics. My preference leans towards low-contrast lighting to harmonize with the soft rendering of color seen in older glass.
Each session becomes a unique exploration of a lens’s qualities, particularly regarding flare and high-contrast scenes. Embracing lens imperfections often leads to striking results that stand out from typical image styles. Experimentation with different focus techniques and framing enhances the creative process.
Post-processing is another key area where I enhance my portrait work. Vintage lenses may produce a softer image that can be discussed in terms of contrast and saturation adjustments, allowing the final product to retain that desired nostalgic feel while ensuring clarity and precision.
In summary, capturing portraits with vintage optics involves thoughtful decisions about lens selection, focusing, and light management. Each shoot is an opportunity to explore the unique characteristics of these wonderful artifacts, presenting subjects in a way that is distinctly memorable and artistic.
Macro Photography: Challenges with Analog Lenses
Focusing accurately at close distances is one of the primary hurdles I encounter when working with vintage optics in macro photography. Many of these older designs were not intended for extreme close-ups, leading to difficulties in achieving desired sharpness and detail.
Another issue arises from the lack of autofocus; every adjustment must be manual. This can be particularly challenging in macro shooting, where even the slightest movement can throw off focus. I rely heavily on my skills in depth of field management to maintain sharpness throughout the subject, which often involves stopping down the aperture significantly.
Lighting presents its own challenges as well. Using legacy glass often requires additional light sources or reflectors to illuminate tiny details effectively. The internal coatings of these older lenses may not be optimized for today’s sensors, which can further exacerbate issues with contrast and color rendition in such close work.
Image stabilization may also be lacking, leading to potential shake when shooting handheld. Employing a sturdy tripod becomes another necessity, especially during extended sessions where even slight vibrations can affect the final outcome.
In terms of compatibility, some classic macros are designed for specific mounts, making pairing them with modern rigs complicated without the right adapters. These adapters may introduce additional factors such as altering the effective focal length or adding limitations on aperture control.
Despite these challenges, the unique character and rendering of vintage glass can yield stunning results. I often experiment with different techniques, such as focus stacking, to compensate for the shortcomings and to capture breathtaking macro images.
Adapting Exposure Settings for Analog Glass
To achieve optimal exposure with vintage optics, I often start by selecting the appropriate ISO setting on my camera. The performance characteristics of older glass can differ significantly from modern equivalents, so I typically opt for a lower ISO, such as 100-200, to minimize noise and better capture the lens’s unique qualities.
Shutter speed adjustments are equally important. Depending on the focal length and aperture used, I find it advantageous to keep shutter speeds at or above 1/Minimum Focal Length to avoid motion blur. For example, using a 50mm lens requires a minimum shutter speed of 1/50s. When shooting in lower light conditions, I sometimes resort to a tripod to maintain stability without sacrificing shutter speed.
Aperture selection plays a vital role in exposure and depth of field. I often experiment with wide openings, such as f/2.8 or f/4, for portraits or close-ups, ensuring a pleasing bokeh. Conversely, for landscapes, I generally close the aperture down to f/8 or f/11 to achieve greater depth of field while still maintaining clarity.
Monitoring the histogram is crucial to ensure the exposure is balanced and avoids clipping highlights or shadows. I check the histogram frequently, especially when transitioning between different lighting conditions or subjects.
Lastly, I allow for slight exposure compensation when necessary, especially when the scene features contrasting light levels. This nimbleness helps me adapt quickly to changing conditions while preserving the unique character of the vintage optics.
Using Filters with Classic Optics on Modern Equipment
Applying filters to vintage optics can significantly enhance image quality and creative expression. Select filters designed to work with specific thread sizes, ensuring compatibility with the front of the lens. Common filter types include polarizing, ND (neutral density), UV, and close-up filters. Each serves distinct purposes, such as reducing glare, managing exposure, or achieving macro capabilities.
Recommended Filters
- Polarizing Filters: Ideal for minimizing reflections and saturating colors, particularly in outdoor settings.
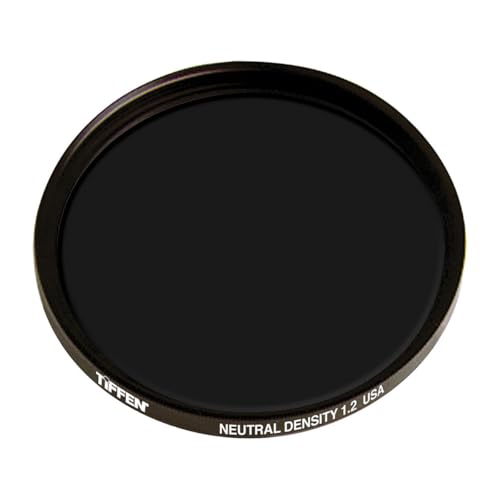
- Neutral Density (ND) Filters: Essential for long exposures, allowing for motion blur in water or clouds without overexposing the shot.
- UV Filters: Primarily serve as a protective layer, reducing haze in sunny conditions.
- Close-Up Filters: Useful for macro photography, enabling detail capture without changing the lens.
Tips for Using Filters
- Ensure proper thread size alignment to avoid vignetting on your images.
- Be mindful of potential loss of light; adjust exposure settings accordingly.
- Regularly clean filters to maintain clarity and prevent unwanted artifacts in images.
- Experiment with stacking filters for unique effects, but be cautious of light loss and distortion.
Selecting the right filter can enhance the functionality of vintage glass, unlocking new creative possibilities while shooting with modern technology.
Understanding Light Transmission in Analog Lenses
Light transmission is a crucial aspect influencing image quality. The performance of vintage glass is affected by various factors, including coatings, aperture design, and lens construction.
Coatings play a significant role in light transmission. Many older optics lack modern multi-coating, which enhances light efficiency. This can lead to lower contrast and increased flare in bright conditions.
Consider the following points regarding light transmission in vintage optics:
- Single vs. Multi-Coatings: Optics with single coatings may produce softer images compared to those with multiple layers, which effectively reduce reflections and enhance color fidelity.
- Aperture Blades: The shape and number of aperture blades influence how light is transmitted. More blades result in a smoother bokeh, affecting aesthetic aspects in images.
- Element Design: The arrangement of lens elements significantly impacts light passage. Vintage designs may introduce distortion or chromatic aberration, affecting image clarity and color accuracy.
- Lens Age: Older lenses may exhibit yellowing or other degradation, affecting overall light quality and requiring thorough inspection before use.
To maximize potential from these optics, consider testing individually and assessing their characteristics in varied lighting conditions. Pay attention to exposure settings and manipulation of the aperture to achieve desired results.
Be mindful of light sources while shooting. Backlighting or strong highlights can often lead to pronounced flare or loss of detail unless managed properly. Experiment with different angles and compositions to find the most favorable light.
Understanding how light interacts with these classic pieces will significantly affect the overall image quality, allowing for artistic expression through unique optical traits.
Comparative Review: Popular Analog Lenses for Digital Use
In my experience, certain classic optics yield stunning results when paired with modern imaging sensors. The following breakdown highlights notable pieces that excel in this synergy:
Helios 44-2 (58mm f/2): Renowned for its distinct swirling bokeh and vintage flair, this lens is a favorite among enthusiasts. The build quality is sturdy, and adapting it for a mirrorless setup enhances its usability for both stills and video.
Canon FD 50mm f/1.4: This gem boasts excellent sharpness and pleasing contrast. Its low-light performance is impressive and works well with a range of adapters, making it a versatile choice for day and night shooting.
Jupiter-9 (85mm f/2): A Soviet-made classic, known for its creamy bokeh and nostalgic character. This piece is perfect for portraiture and can be adapted easily to contemporary systems, offering a unique aesthetic reminiscent of older film styles.
Minolta 50mm f/1.7: Compact with excellent performance, this option is ideal for everyday photography. Its quick focusing and sharp images make it suitable for various situations, from street photography to casual portraits.
Vivitar Series 1 70-210mm f/3.5: A versatile telephoto option, well-regarded for its sharpness and built-in macro capability. While heavier, the results in digital format are often striking, especially in portrait and nature photography.
It’s important to evaluate the optical performance and adaptability of each type. Consider how personal projects may benefit from the unique characteristics of these vintage models. Testing different combinations on your setup will yield insights into their capabilities and potential drawbacks.
Field Testing Analog Lenses: What to Expect
When field testing vintage optics, I usually prepare for various outcomes depending on the specific characteristics of each piece. Start with a solid understanding of the lens’s unique qualities, including its maximum aperture and optical design. This allows for informed decisions regarding shot composition and settings.
Performance Factors to Monitor
Pay close attention to several key performance factors during testing:
- Sharpness across the frame, particularly at wide-open apertures.
- Color rendition and contrast, which can differ significantly from modern glass.
- Distortion levels, especially for wide-angle models.
- Bokeh quality, which varies greatly and can enhance portrait or macro work.
- Lens flare behavior, which can add character or detract from an image.
Documenting Results
Documentation is essential. Keeping a record of settings used, lighting conditions, and results helps in assessing performance later. Consider creating a comparison table for different models tested under similar circumstances:
| Lens Model | Aperture | Sharpness | Color Rendition | Flare Tolerance | Bokeh Quality |
|---|---|---|---|---|---|
| Helios 44-2 | f/2 | 8/10 | Warm | Moderate | Soft |
| Canon FD 50mm f/1.4 | f/1.4 | 9/10 | Neutral | Low | Creamy |
| Vivitar Series 1 70-210mm | f/3.5 | 7/10 | Vivid | High | Chunky |
Experiment with various settings and subjects, noting how each optic performs in real-world shooting scenarios. This hands-on experience not only enhances understanding of the glass but also refines shooting skills. With careful observation and documentation, I can effectively evaluate the strengths and weaknesses of each item in my collection.


