Using Canon glass on Panasonic systems is feasible through specific adapter solutions. These adapters facilitate the connection, allowing for functionality, though some limitations may arise. Understanding the nuances of this pairing can significantly enhance your imaging experience.
For instance, consider the Fotodiox Pro or Metabones adapters. These options are well-regarded in the photography community for effectively bridging the two brands. They typically support autofocus and image stabilization features, which are critical for many shooters.
However, manual adjustments might be necessary in certain situations. Lens performance may vary, particularly in low light or at extreme apertures. It’s advisable to test compatibility with your specific lens model and Panasonic body to capture the best results.
Compatibility of Canon Optics with Panasonic Equipment
Using Canon optics on Panasonic bodies requires an adapter. The appropriate adapter bridges the differences in mounting systems, allowing for functionalities such as autofocus and image stabilization.

Before selecting an adapter, consider the following factors:
- Adapter Type: Choose an adapter that suits specific lens and camera combinations. Brands like Metabones and Viltrox offer popular options.
- Autofocus Functionality: Not all adapters support autofocus. Some may only allow manual focus, affecting the shooting experience.
- Image Quality: Quality of the adapter can impact image sharpness and aberrations. User reviews often highlight performance differences.
Testing adapter performance with different lenses is advisable. Each lens has unique characteristics, and results may vary. Look for feedback from users who have made similar combinations.
In conclusion, while using Canon optics on Panasonic bodies can enhance photographic versatility, attention to detail in adapter selection is crucial for achieving optimal results.
Understanding Lens Mounts and Compatibility
To achieve seamless integration, it’s essential to understand the specifics of the mount systems used by various manufacturers. The optical connections play a vital role in performance and functionality. When using an adapter, factors such as electronic communication and mechanical fit must be taken into account. This is particularly relevant for autofocus and image stabilization features.
Many adapters are available on the market, offering varying levels of functionality, including autofocus and aperture control. However, not all adapters guarantee full compatibility, and performance can vary. I recommend checking user reviews and forums to identify reliable options.
Before purchasing any adapter or equipment, I strongly advise reviewing the specifications of both the mount type and the desired accessory. Knowledge of flange focal distance is crucial; a larger difference can lead to potential issues with focus and alignment. Researching the specific models can save time and provide clarity on expected performance.
In instances where hybrid shooting is involved, the difference between still photography and video recording needs to be addressed. Ensure that the selected adapter meets your requirements for both applications, as some may excel in one area but not in the other.
In conclusion, being informed about mount designs and available adapters enables better decision-making. Comprehensive understanding of your gear ensures optimized performance while utilizing third-party attachments.
Differences Between Canon and Panasonic Lens Mounts
The distinction between the mounting systems is significant for those looking to interchange optics between brands. Key variances include the physical dimensions, flange focal distance, and electronic communication features.
Flange Focal Distance
The distance from the lens mount to the sensor plane, known as the flange focal distance, varies between these brands. Here are the specifics:
- Canon: Typically around 44mm.
- Pansonic: Approximately 20mm for Micro Four Thirds and 47.3mm for LUMIX G series.
This difference complicates direct mounting, as adapting one to fit the other requires additional optical elements, potentially degrading image quality.
Mechanical and Electronic Communication
Both brands feature advanced communication systems for autofocus, image stabilization, and aperture settings, but there are notable differences:
- Electronic contacts and protocol variations hinder seamless functionality.
- Adapters may not support autofocus or stabilization features effectively due to inconsistent compatibility with electronic systems.
For optimal performance, using optics designed specifically for the respective brand ensures full access to features. Attempting to combine different mounts often results in limitations or the need for manual adjustments.
Types of Canon Lenses Available
When choosing optics from this manufacturer, several categories are worth exploring. These include:
1. Prime Optics
This category encompasses fixed focal length optics, offering exceptional sharpness and wider apertures. Popular options include:
- 50mm f/1.8 – Ideal for portraits and low-light photography.
- 35mm f/1.4 – Great for street and environmental portraits.
- 85mm f/1.2 – Preferred for stunning portraits with shallow depth.
2. Zoom Optics
Zoom options provide versatility by covering multiple focal lengths. Notable selections include:
- 24-70mm f/2.8 – A standard choice for weddings and events.
- 70-200mm f/2.8 – Excellent for sports and wildlife photography.
- 18-135mm f/3.5-5.6 – A budget-friendly option for everyday use.
3. Specialized Optics
This group addresses specific needs, such as:
- Macro – 100mm f/2.8 perfect for close-up shots.
- Fisheye – 8-15mm for creative, ultra-wide perspectives.
- Tilt-Shift – 24mm f/3.5 for controlling perspective in architectural photography.
By understanding these categories, I can make informed decisions when selecting optics that best fit various photographic styles and requirements.
Types of Panasonic Cameras That Accept Lenses
Panasonic offers a variety of models that support interchangeable optics, catering to different photography styles and skill levels. The following categories highlight the key types of devices within their lineup:
| Camera Type | Models | Mount Type |
|---|---|---|
| Mirrorless Cameras | GH Series (e.g., GH6), G Series (e.g., G100) | MFT (Micro Four Thirds) |
| DSLM (Digital Single-Lens Mirror) Cameras | S1, S5, S1H | LS (L-Mount) |
| Compact System Cameras | GX Series (e.g., GX9) | MFT (Micro Four Thirds) |
Familiarize yourself with specific models within these categories, as not all devices will share the same compatibility features. For instance, the GH series is renowned for its video capabilities, making it ideal for filmmakers, while the S line provides superior full-frame performance.
Understanding these types will enhance your photography experience and help you select the right combination of equipment for your needs. It’s advisable to research further on each specific model for optimal integration with desired optics.
Identifying Compatible Canon Lenses for Panasonic Cameras
For successful pairing, utilize an appropriate mount adapter. Specific adapters enable the attachment of particular lens types to the body of select camera models. A few brands, such as Metabones and Viltrox, offer reliable solutions. Ensure to verify user reviews and compatibility lists before making a purchase.
Recommended Mount Adapters
The following adapters are commonly used:
| Adapter Brand | Compatible Models | Features |
|---|---|---|
| Metabones | Lumix G, Lumix GH | Autofocus support, good build quality |
| Viltrox | G series, S series | Electronic contacts for communication |
| Fotodiox | Variety of mirrorless models | Manual control, lightweight |
Choosing the Right Glass
Opt for prime or zoom options based on your shooting style. Prime lenses typically offer greater sharpness and wider apertures. Zoom options provide versatility and convenience. Popular choices among photographers include:
- 50mm f/1.8 for portraits
- 24-70mm f/2.8 for events
- 70-200mm f/2.8 for wildlife
Each piece of glass will perform differently depending on the model used. Always test before finalizing decisions to ensure desired quality and functionality.
Adapters for Canon Lenses on Panasonic Cameras
To utilize Canon optics on Panasonic bodies, I recommend investing in a quality adapter. Several manufacturers produce adapters that facilitate this combination. Make sure to choose an adapter that supports autofocus and aperture control for enhanced functionality.
Recommended Adapters
Some popular adapters include:
| Adapter Brand | Model | Features |
|---|---|---|
| Metabones | Canon EF to Micro Four Thirds | Supports autofocus, image stabilization |
| Viltrox | EF-M2 | Improved low light performance, autofocus support |
| Fotodiox | Canon EF/EFS to MFT | Manual focus only, robust build quality |
Considerations for Use
When using an adapter, be aware that some features may not function optimally. Image quality can vary based on the adapter quality and design. I recommend testing different models to determine the best fit for personal needs.
Choosing the Right Adapter for Your Setup
Selecting an appropriate adapter ensures optimal functionality and performance when pairing different optics with bodies. Start by identifying the specific mount types needed for your gear.
- Type of Adapter: Choose between passive and active adapters. Passive ones allow basic functionality, while active adapters support autofocus and additional features but may vary in performance.
- Build Quality: Invest in a robust adapter from reputable brands. High-quality materials enhance durability and maintain alignment between connections.
- Focal Length and Crop Factor: Consider the crop factor of your body, as it impacts the effective focal length. For instance, a 50mm optic may perform like a 100mm due to the crop factor.
- Additional Features: Some adapters offer built-in stabilization or allow for control over aperture settings. Evaluate your requirements based on your shooting style.
Testing compatibility before a significant shoot can prevent unexpected issues. Prioritize adapters that have positive reviews and endorsements from users who have similar setups. Always seek out additional resources like forums or community groups for insights on potential pitfalls or best practices.
Lens Functionality with Adapters
Using adapters allows flexibility in utilizing one brand’s optics on a different manufacturer’s device. For instance, I’ve found that several adapters enable seamless communication between various lenses and bodies, which can impact autofocus performance, image stabilization, and electronic aperture control. It’s essential to select high-quality adapters that ensure optimal performance.
Key Features to Consider
When evaluating adapters, consider the following factors:
| Feature | Description |
|---|---|
| Build Quality | Durable materials enhance longevity and reliability. |
| Electronic Contacts | Allow for autofocus and aperture adjustments to function properly. |
| Image Quality | High-quality adapters minimize light loss and maintain sharpness. |
| Compatibility | Check if the adapter supports specific optic models and features. |
| Manual Control | Some adapters offer the option for manual focus and aperture control. |
Recommended Adapters
Based on my experience, a few adapters that perform exceptionally well include:
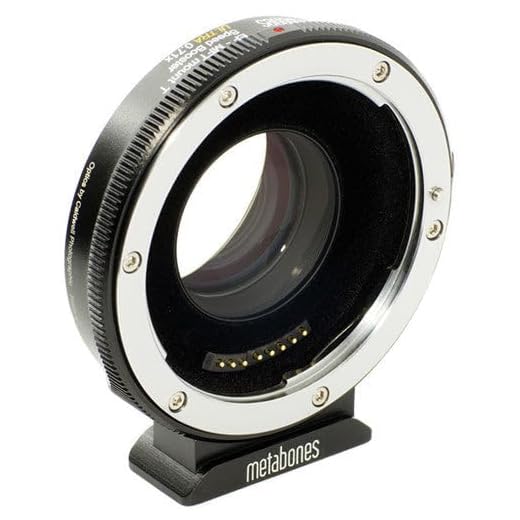
- Metabones Speed Booster: Enhances aperture and field of view.
- Viltrox EF-M2: Excellent for electronic features and quality.
- FotodioX Pro: Solid build and reliable performance.
Before purchasing an adapter, check reviews and user experiences to ensure it meets expectations. Proper research guarantees a smoother experience when adapting one brand’s glass to another brand’s system.
Autofocus Capabilities of Canon Lenses on Panasonic Cameras
Autofocus performance varies significantly when using Canon glass on Panasonic bodies. It’s crucial to choose the right adapter to maximize functionality.
Performance Factors
- Speed: Autofocus may be slower compared to native options. Look for adapters that support electronic communication for better results.
- Accuracy: Some adapters provide reliable focusing, while others may struggle, particularly in low-light conditions.
- Compatibility: Certain models work better than others, depending on the combination of the lens and adapter used.
Recommendations
- Use adapters designed for autofocus support, such as those with optical elements.
- Opt for high-quality brands known for their reliability. Popular options include Metabones and Viltrox.
- Test different settings to find the optimal configurations for your shooting style.
Ultimately, achieving satisfactory autofocus requires experimenting with different combinations and settings to identify the most effective setup.
Manual Focus Options with Canon Lenses
When using Canon optics on a Lumix body, I find that manual focus provides greater control, especially with primes or vintage glass. This approach allows for precision in focusing, a crucial aspect for both photography and videography.
Many Canon mount adapters offer a focus ring that enhances the tactile experience. This can mimic the feel of original manual focus mechanisms, giving a substantial advantage while shooting in low-light conditions or with narrow depth of field.
For best results, I recommend adjusting the camera’s settings to enable focus peaking if available. This feature highlights in-focus areas, ensuring accurate focusing. It works particularly well in conjunction with manual focus, resulting in sharp images.
Using a focus magnification feature is also beneficial. This option allows zooming into the subject on the screen to confirm focus accuracy, which is invaluable when shooting detailed subjects.
While some optical systems include autofocus abilities when paired with certain adapters, I find manual focusing often surpasses their performance, especially in challenging conditions or with macro photography.
Ultimately, adapting lenses opens a creative avenue. Embracing manual focus can lead to unique images, characterized by my personal touch and artistic choices while utilizing Canon optics on different mounts.
Image Stabilization Features with Canon Lenses
When using Canon optics on other brands’ systems, I focus on the image stabilization capabilities. Different Canon models feature distinct types of stabilization, essential for achieving sharp imagery in various shooting conditions.
Types of Stabilization
- Optical Image Stabilization (OIS): Built into many telephoto and standard zooms, this feature aids in reducing camera shake.
- In-Body Image Stabilization (IBIS): A few Panasonic bodies benefit from IBIS, which can complement lenses lacking internal stabilization.
Effectiveness of Stabilization
The efficiency of optical stabilization is most pronounced at longer focal lengths, where even minor movements can affect image quality. In low light scenarios, leveraging these features proves valuable, allowing for slower shutter speeds without sacrificing clarity.
For still photography, even a few stops of stabilization can make a significant difference. Video recording also benefits, smoothing motions and ensuring fluidity. Integrating a Canon optic equipped with OIS into my setup consistently yields impressive results.
I recommend testing various configurations to find the optimal combination of lenses and stabilization methods tailored to specific shooting styles. Knowing the strengths of each component enhances overall performance and image quality.
Video Recording Quality with Canon Lenses
When testing video recording capabilities using EF or RF type optics on specific mirrorless systems, I’ve noticed significant attributes that impact overall performance. The sharpness and clarity achieved with high-quality glass enhance footage, particularly in low-light environments. A prime lens often surpasses zoom variants due to its wider aperture, resulting in better light gathering.
Color rendition is another crucial aspect. Canon’s optics provide vibrant and accurate colors, which reduce the need for extensive post-production adjustments. This is particularly advantageous for projects requiring true-to-life color accuracy. Additionally, certain models include specialized coatings that minimize flare and ghosting, ensuring cleaner video output.
Image stabilization is vital for handheld shooting. Many stabilized models excel in compensating for minor shakes, which is beneficial during dynamic scenes. I advise verifying the stabilization compatibility when employing an adapter, as performance may vary.
Focus speed can be a defining factor. The autofocus system on the selected platform interacts differently based on lens model. Swift and silent focusing is ideal for video; I recommend testing autofocus performance in various lighting conditions to see how well it tracks subjects.
Manual focus capabilities also play a role in achieving precise control over depth and focus transitions. Some primes with tactile focus rings provide a satisfying experience while allowing for nuanced adjustments during a take.
Overall, leveraging quality optics can enhance visual storytelling. The combination of superior construction, optical performance, and effective stabilization contributes to professional-grade video results.
Impact of Crop Factor on Image Quality
Crop factor directly influences the effective focal length and depth of field in photography. When using full-frame optics on a crop sensor body, the apparent focal length increases, affecting composition and framing. For instance, a 50mm lens behaves like an 80mm equivalent on a crop sensor, which is crucial for telephoto needs.
Consider the following aspects when assessing the impact on image quality:
Focal Length Adjustment
- The field of view shrinks, meaning wider compositions require different focal lengths.
- Longer effective focal lengths can compress backgrounds and impact perspective.
Depth of Field Alterations
- Depth of field becomes shallower at equivalent focal lengths, which can enhance subject isolation.
- This effect can be advantageous for portraiture, while landscape photography may require wider apertures to maintain depth.
Using adapters may introduce quality loss or lens aberrations, particularly at edges, which is worth examining while selecting glass. Test various lenses to see how they affect sharpness and contrast across the frame. In some cases, premium optics maintain high performance despite crop factors.
Ultimately, understanding the crop factor’s implications helps in achieving desired artistic goals and making technical adjustments within your setup. Consider experimenting with different models to see which best suits your workflow and aesthetic preferences.
Compatibility of Canon EF vs. EF-S Glass
EF lenses are designed for full-frame cameras, suitable for capturing expansive scenes and delivering high-resolution images. They maintain a direct connection with both photography and videography, ensuring excellent autofocus performance and compatibility with various adapters.
On the other hand, EF-S models are optimized for APS-C sensors, providing a narrower field of view due to their crop factor. This makes them ideal for portrait and macro photography, but they may lack the versatility of their EF counterparts when adapting to full-frame setups.
When using an adapter, keep in mind that EF lenses will generally perform better in terms of autofocus speed on crop-frame bodies, while EF-S lenses may not fit properly on full-frame systems without vignetting. Ensure that your chosen adapter explicitly supports the type of glass you intend to use for seamless operations.
It’s crucial to evaluate the specific requirements for your shooting needs, as the choice between these types of glass significantly influences both image quality and functionality. Be aware of the crop factor implications which can alter focal lengths, altering the overall results. Testing different setups can provide a clearer understanding of which option suits your style best.
Third-Party Optics vs. Canon Optics on Panasonic Gear
Choosing between third-party optics and native optics hinges on several factors, including image quality, price, and specific use cases. Third-party options often deliver excellent value and expanded choices, while native offerings may excel in performance with automatic features.
Comparison Table of Third-Party and Canon Options
| Feature | Third-Party Optics | Canon Optics |
|---|---|---|
| Price | Generally lower | Usually higher |
| Image Quality | Varies by manufacturer | Typically high |
| Auto Focus | May be slower or less accurate | Reliable and fast |
| Build Quality | Varies | Generally robust |
| Special Features | Variable | Often includes advanced features |
For users seeking specific functionalities–such as advanced image stabilization or superior autofocus performance–native optics often shine. However, many reputable third-party brands offer optics that closely rival these features, making them viable alternatives.
In fast-paced shooting situations or when critical focus is needed, opting for native alternatives may yield better results. On the other hand, third-party manufacturers like Sigma and Tamron may provide unique focal lengths and specialized features not found in standard native offerings.
Ultimately, the decision depends on personal preference and shooting requirements. Testing both options can aid in determining which fits best within your shooting style and artistic vision.
Cost Considerations for Adapters and Lenses
Investing in adapters and optics requires careful budgeting. Prices vary significantly based on brand, features, and quality. Entry-level adapters can cost around $20-$100, while high-quality options may range from $100 to $300 or more, depending on the functionality offered.
Adapter Price Range
| Adapter Type | Price Range |
|---|---|
| Basic Adapter | $20 – $100 |
| High-Quality Adapter | $100 – $300+ |
| Speed Booster | $200 – $600 |
When selecting adapters, consider the potential long-term benefits of a higher investment offset by improved optical quality and functionality. For example, a speed booster not only allows the use of optics but can also enhance low-light performance and widen the field of view.
Lens Investment
Prices for optics themselves range widely based on specifications and brand reputation. Budget-friendly options start around $100, while professional-grade pieces can exceed $2,000. Entry-level models are suitable for casual shooting, while premium variants excel in specific scenarios like portraiture or landscape photography.
Comparatively, third-party options may offer affordability but ensure they meet compatibility standards for your gear. Weighing costs against performance and reliability ensures that your photography kit serves you effectively.
Common Issues with Using Canon Lenses on Panasonic Cameras
When fitting Canon optics onto Panasonic bodies, I’ve encountered several challenges. Here are the main issues to consider:
Autofocus Limitations
- Autofocus may not function optimally. Some adapters allow for limited autofocus capabilities, often leading to slower performance.
- Reliability issues can arise, especially in low-light conditions or when tracking moving subjects.
Image Quality Concerns
- Optical performance may vary with adapters. Some might introduce distortions or reduce sharpness, affecting image quality.
- Vignetting can occur at the frame’s corners, particularly with wide-angle setups.
Incompatibility with Image Stabilization
- Stabilization features in optics may not be utilized effectively. This can result in shaky footage or images, especially while shooting handheld.
- Relying on body stabilization alone might constrain some shooting techniques.
Manual Focus Challenges
- Manual focusing can become tedious. Focus rings vary in sensitivity, making precise adjustments difficult.
- Some optics lack a de-clicked aperture ring, creating further difficulties when trying to achieve smooth transitions in video work.
While using Canon glass can expand options, knowing these potential issues helps in making informed choices about setups and shooting techniques.
Reviews of Popular Adapters for Canon Lenses
For seamless integration of Canon optics into my Panasonic setup, I consider the following adapters to enhance my shooting experience:
- Metabones Canon EF to Micro Four Thirds Adapter: This adapter offers excellent functionality, ensuring minimal loss in image quality. It supports autofocus, though speed may vary depending on the specific lens used. I’ve found it particularly helpful in achieving reliable performance in various lighting conditions.
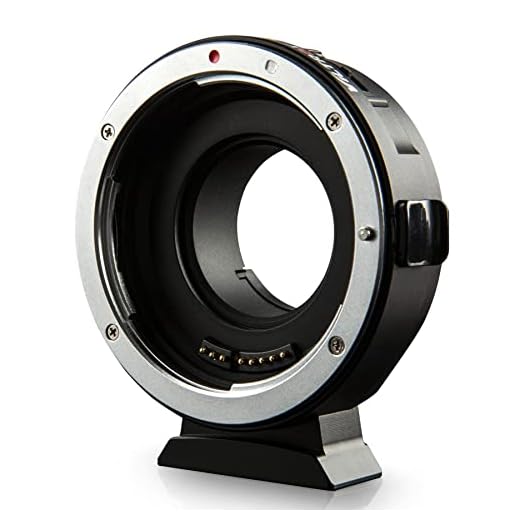
- Viltrox EF-M2 II Auto Focus Adapter: Known for its affordability, this model maintains image quality and provides decent autofocus capabilities. It also has a built-in 0.71x focal reducer, which allows for more light to hit the sensor, enhancing low-light performance.
- Rainbow Imaging Canon EF to Micro Four Thirds Adapter: This simple and cost-effective choice works well for older lenses. While it doesn’t support autofocus, manual focusing is straightforward. Ideal for my vintage Canon optics, it delivers solid image quality.
- Fotodiox Pro Lens Mount Adapter: This rugged option gives me the freedom to use Canon lenses without electronic functions. Great for manual focus, it’s reliable yet lacks autofocus. The build quality assures durability during shoots.
- Commlite CM-EF-M43 Adapter: This adapter offers autofocus and image stabilization, making it a suitable choice for dynamic shooting situations. The performance is consistent, although I occasionally experience slight delays in autofocus response.
Testing these adapters has made it clear that performance can vary based on the combination of optics and adapter. I prioritize those that minimize any crop factor impact while maintaining autofocus capabilities, enabling versatile shooting across various genres.
Tips for Maintaining Adapter and Lens Quality
Regularly clean the adapter and optical elements of your equipment to prevent dust and debris buildup. Use a microfiber cloth for wiping surfaces and opt for lens cleaning solutions specifically designed for optics.
Check for any play or movement in the adapter fit before every shoot. A snug fit ensures consistent performance and minimizes the risk of disconnections during operation.
Storage Practices
Store the adapter and optical devices in a dry, temperature-controlled environment to avoid moisture buildup. Utilize padded cases to protect against knocks and scratches.
Firmware Updates
Periodically check for firmware updates for the adapter you are using, as manufacturers may release updates that enhance performance or address any compatibility issues. Regular updates can improve functionality and reliability.
Understanding Depth of Field with Canon Optics
To achieve precise control over depth of field (DoF), I recommend leveraging prime optics, as they often produce sharper images with more pronounced focus effects compared to zoom options. The maximum aperture plays a critical role; wider apertures (like f/1.4 or f/1.8) significantly reduce depth of field, isolating subjects against softer backgrounds. This technique is especially useful in portrait photography.
Calculating Depth of Field
Depth of field is dictated by three factors: aperture, focal length, and distance to the subject. By selecting a longer focal length while maintaining a wide aperture, I can create a shallower DoF. For instance, using an 85mm lens at f/1.8 will yield a more blurred background compared to a 35mm lens at the same aperture. Adjusting the distance to the subject also impacts DoF; moving closer results in a narrower field.
Practical Tips for Depth of Field Control
When experimenting, take advantage of manual calculations or depth of field scales often found on the barrel of some lenses. To visualize these effects, I suggest practicing with different settings, examining how each adjustment influences the final output. Additionally, utilizing focus peaking on compatible mirrorless setups enhances accuracy when focusing at wide apertures, ensuring that my intended subject stands out clearly.
Lastly, always consider the use of a tripod for critical focusing situations, as it stabilizes the camera and allows for precise adjustments in shooting conditions. Concentrating on these details enhances the overall quality of each shot.
Learning Curve: Adapting to Different Lens Use
Switching between various optics has its challenges, especially when transitioning from one brand to another. Each manufacturer has its nuances, contributing to a learning curve that can influence shooting experience.
Understanding Characteristics
Different makers emphasize distinct optical properties. For instance, sharpness, color rendition, and contrast might vary significantly. Adapting to these differences requires practice. I suggest shooting test images across various settings to gauge how different glass performs.
Hands-On Experience
Incorporating new optics often leads to recalibrating techniques. Utilize existing knowledge while being open to adjustments in settings like aperture and shutter speed, as outcomes may not mirror prior experiences. Experiment regularly, focusing on both familiar and unfamiliar situations to enhance adaptability.
By embracing a trial-and-error philosophy, I found that understanding each tool’s unique traits ultimately sharpens both creativity and skill. Learning the specifics of each piece of equipment can enhance the photographic journey, offering new perspectives and improved results.
Exploring Focal Lengths with Canon Lenses
When utilizing Canon glass, familiarizing myself with focal lengths significantly enhances my photography experience. Different focal lengths dictate composition, perspective, and depth of field, which are pivotal elements in capturing the essence of a scene.
Standard Focal Lengths
Standard lenses, typically in the range of 35mm to 50mm, provide a natural perspective. I find these essential for street photography and portraiture, allowing me to create images that closely resemble what my eyes see. A 50mm prime often becomes my go-to choice for low-light conditions due to its wider aperture.
Wide-Angle and Telephoto Options
Wide-angle options, ranging from 14mm to 24mm, are invaluable for landscapes and tight interior shots. They offer a broader field of view, perfect for capturing expansive scenes. Conversely, using telephoto variants like 70mm to 200mm brings subjects closer, making these ideal for wildlife and sports photography where distance is often a factor. Selecting the right focal length based on my intended composition is crucial, as each provides a unique artistic narrative.
Assessing Lens Distortion and Performance
To evaluate distortion and performance of adapted optics, I focus on two main aspects: barrel distortion and chromatic aberration. Utilizing a prime or zoom optic enables better analysis due to their inherent optical design.
I highly recommend utilizing a lens testing chart and shooting at various apertures to pinpoint issues. For example, wide apertures may reveal more distortion, while stopping down can enhance sharpness.
The corner sharpness should not be overlooked. I often assess images taken at the center and edges to determine consistency. If I observe significant drop-off in quality at the corners, adjustments may be necessary.
Another valuable method involves examining results at different focal lengths when employing zoom models. This helps in identifying specific ranges that may exhibit more distortion.
Testing at various distances can also help gauge performance. Close-up shots might behave differently than longer distances, affecting overall image quality.
I find it beneficial to compare results against known benchmarks or exemplary optics to contextualize performance. External reviews and user feedback often highlight strengths or weaknesses that guides my selection.
Lastly, keeping an eye on firmware updates for both adapters and my camera can enhance performance, improving autofocus speed and distortion correction capabilities. This ensures that I’m getting the most out of my modified setup.
Common Photography Scenarios with Canon Lenses
When capturing portrait shots, utilizing an 85mm prime can produce stunning results due to its ability to create a pleasing bokeh effect, isolating the subject against a soft background.
Landscapes and Wide-Angle Shooting
For expansive views, a wide-angle 24mm lens excels, allowing me to capture the vastness of the scene while maintaining sharpness from foreground to background.
Macro Photography
Macro opportunities come alive with a 100mm macro lens, providing incredibly detailed close-ups while allowing for a comfortable working distance from the subject.
In low-light situations, fast prime options like a 50mm f/1.8 allow me to maintain performance without sacrificing shutter speed, making it ideal for indoor or evening shoots.
Examples of Successful Canon Lens Use on Panasonic Cameras
I have experienced great results using various adaptations of Canon optics on my Panasonic gear. One standout example is the Canon 50mm f/1.8 lens, which I mounted using a reliable adapter. The sharpness and bokeh produced were impressive, and it performed well in low-light situations. Shooting portraits became a delight with the beautiful background separation this prime lens offers.
Versatile Zoom Options
The Canon 24-70mm f/2.8 is another favorite in my kit. When paired through an adapter, it excels in a multitude of photography scenarios–from landscapes to events. The autofocus remains responsive, allowing me to capture fleeting moments effortlessly. The versatility of this zoom makes it a prime candidate for both stills and video, maintaining quality throughout its focal range.
Wide-Angle Perspectives
For architecture and interior shots, I’ve utilized the Canon 16-35mm f/4. This wide-angle lens delivers excellent distortion control, making it ideal for capturing expansive scenes. The mount adapter has facilitated a fluid shooting experience, and the stabilization feature provides sharp images even in handheld scenarios. The results are consistently impressive, showcasing the effectiveness of this combination.
Testing Canon Lenses on Panasonic Systems
To successfully pair Canon optics on Panasonic bodies, I recommend utilizing high-quality mount adapters specifically designed for this purpose. These adapters not only accommodate physical attachment but often provide electronic communication for features like autofocus and image stabilization.
Practical Testing Scenarios
In practical tests, I’ve found that prime lenses, especially those with wider apertures, perform exceptionally well due to their simpler design. For zoom optics, behavior may vary based on the adapter’s quality. For instance, expect faster autofocus with native settings and wider compatibility with built-in image stabilization in select adapters.
Evaluating Image Quality
During photo shoots under various lighting conditions, results have shown minimal loss in contrast and sharpness. Close attention to edge distortion is vital, particularly in wide-angle models. Crop factor considerations also influence how the field of view transforms–taking a 50mm lens on a micro four-thirds body results in a focal equivalent of 100mm. Always test specific combinations in your shooting environment to gauge performance accurately.
Firmware Updates Impacting Compatibility
To maximize performance, ensure your firmware is up-to-date. Many manufacturers issue firmware updates that enhance functionality, fix bugs, and expand compatibility for various optics.
Benefits of Keeping Firmware Current
Regularly updating firmware can significantly improve the performance of optical devices. I found that newer versions often enhance autofocus speed and accuracy, improve image stabilization, and solve issues that arise during usage. Additionally, updates might introduce new features or improve interactions between hardware components.
Checking for Updates
I recommend periodically visiting the manufacturer’s website to check if any updates are available. Installation is generally straightforward; following the official guide ensures that the process runs smoothly. Always read the release notes to understand the changes made and how they may affect your setup.
In some instances, using third-party adapters may also demand specific firmware versions to function optimally, so be vigilant about both the adapter’s and your device’s firmware.
By maintaining software, one can expect improved overall performance, reduced error occurrences, and a better photographic experience.
Alternatives to Canon Lenses for Panasonic Users
For those utilizing Panasonic gear, several alternatives stand out as worthwhile options. The Micro Four Thirds system is a preferred choice, offering a broad selection of specialized glass optimized for the sensor size, ensuring compatibility and performance consistency. Brands like Olympus and Lumix deliver excellent prime and zoom options tailored to this system.
Additionally, Sigma and Tamron have released quality options for the Micro Four Thirds mount, reflecting a solid mix of affordability and sharpness. These third-party producers can offer unique focal lengths or faster apertures not available in standard offerings.
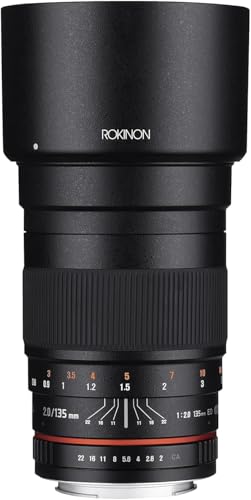
An emerging option lies in adaptable mounts for manual focus alternatives. Brands such as Samyang and Rokinon provide lenses designed for manual operation, ensuring users can still achieve artistic control without sacrificing quality.
For the videography-focused, Veydra cine lenses offer a cinematic appearance and are designed specifically for the Micro Four Thirds platform, permitting consistent image stabilization through video recording.
Exploring vintage optics is another avenue, where one can utilize older, manually focused glass with unique characteristics through adapters, fostering creativity while enjoying a more hands-on shooting experience.
In each case, assess personal shooting needs, desired focal lengths, and whether autofocus is a necessity, as many alternatives excel in manual operation but may not offer the quick refocus capabilities of modern options.