

If you’re seeking to elevate your close-up photography skills, I’ve found some incredible attachments that can significantly enhance the detail and clarity of your shots. These accessories make it easy to capture intricate textures, small objects, and even the delicate beauty of nature, all through the lens of your smartphone.
This article will provide a detailed overview of the finest attachments available, highlighting their specifications, compatibility, and the unique advantages they bring to your mobile photography. Whether you are a hobbyist wanting to explore the world of close-ups or a seasoned enthusiast aiming to expand your toolkit, this guide will serve as a valuable resource.

I will discuss various options, comparing their features, portability, and user experiences. By the end, you’ll be equipped with the knowledge to choose the most suitable accessory that fits your needs and elevates your photography game.
Best Macro Lens for Phone Camera Pixel
I highly recommend choosing an attachment with high optical quality to capture stunning close-up images. Look for options that provide a minimal distortion level and exceptional sharpness across the frame to ensure clarity in your photos. Glass construction is preferable over plastic, as it retains image quality better and reduces lens flare.
Consider a lens that offers compatibility with multiple smartphone models. Universal clip-on designs are particularly useful, allowing you to easily switch between devices without hassle. This versatility enables a broader range of photographic opportunities, from intricate textures and patterns to captivating details in natural subjects.
Features to Consider
- Magnification: Higher magnification ratios enable capturing finer details.
- Focus Distance: Shorter working distances help in photographing small subjects closely.
- Field of View: Ensure the lens allows a wide field to capture entire scenes with close-ups.
- Coating: Anti-reflective coatings enhance image quality by minimizing glare.
Overall, pairing your smartphone with a quality lens attachment can elevate your photography experience significantly. Capturing intricate details can transform everyday subjects into extraordinary images, opening a new dimension for artistic exploration.
Understanding Macro Photography for Smartphones
When capturing intricate details, especially close-up shots, selecting the right equipment becomes paramount. I find that a high-quality alternative attachment can significantly enhance my ability to shoot detailed images, revealing textures and colors that often go unnoticed in broader frames.
Techniques play a critical role in this genre of photography. I recommend getting familiar with a few key practices that can instantly elevate your results. Utilizing natural lighting can create pleasing effects without the harshness of artificial sources. Stability is also crucial; I often use a tripod or stabilize my hands against a solid surface to avoid blurriness.
The Art of Close-Up Photography
Several aspects contribute to capturing stunning close-up images:
- Distance: The closer I get to the subject, the more details I can capture. However, I must maintain an adequate distance to avoid blurring the surface.
- Lighting: Bright, soft light emphasizes details without casting harsh shadows. I often prefer shooting during golden hour for the best effect.
- Focus: Using manual focus allows me to choose the specific point I want to highlight, enhancing depth and clarity.
Experimenting with angles can also lead to unique perspectives and compositions. It’s amazing how a slight shift can make a significant difference in the outcome of an image.
In summary, approaching close-up photography with the right tools and techniques allows for stunning results. Emphasis on lighting, distance, and angles creates the potential for remarkable visual storytelling.
Recommendations for Close-Up Attachments Compatible with Google Pixel
For those seeking to enhance their photographic experience with extreme close-ups, certain attachments have proven to be exceptional companions. These add-ons can transform your standard setup into a powerful tool for capturing intricate details and textures that are often missed by the naked eye.
When selecting an accessory for close-range photography, compatibility with Google Pixel devices is key. I found that several options stand out due to their optical quality, ease of use, and portability.
What to Look For
- Optical Quality: Ensure the attachment offers clear, sharp images without distortion.
- Light Compatibility: Look for options that support natural lighting or integrate well with external light sources.
- Ease of Use: A user-friendly design enables smooth attachment and detachment without hassle.
- Portability: Select lightweight and compact options for convenient travel and on-the-go photography.
One excellent choice features a clip-on design, making it functional and easy to store. I appreciate how it can be paired with different Pixel models, ensuring versatility across various settings. Another well-regarded version incorporates multiple magnification levels, allowing for a range of detailed shots, perfect for those who enjoy experimenting.
| Feature | Notes |
|---|---|
| Compatibility | Designed to fit various Pixel models seamlessly. |
| Material | Durable construction ensures longevity and performance. |
| Lens Coating | Anti-reflective coating reduces glare and enhances clarity. |
In conclusion, investing in a quality close-up attachment can significantly elevate your Pixel photography, providing stunning detail in your images. By choosing thoughtfully, you can capture perspectives that tell a compelling story through your lens.
Comparative Analysis of Macro Lens Features and Pricing
Investing in an attachment to enhance close-up functionality can significantly elevate the photographic experience. Different options vary in quality, features, and affordability. A thorough evaluation of these characteristics reveals their impact on final images and overall usability.
I noticed that some attachments offer higher magnification, which is crucial for capturing intricate details. Features like multi-layer coatings reduce glare and reflections, ensuring clearer images. The build quality is also a key factor; materials ranging from high-grade plastic to metal housing affect durability. However, the pricing often reflects these features, making cheaper alternatives tempting but sometimes subpar.
Feature Comparison
| Feature | Description |
|---|---|
| Magnification | Higher ratios allow closer proximity for detailed shots. |
| Coating | Anti-reflective layers optimize light transmission and reduce glare. |
| Build Material | Materials influence durability and weight, affecting handling. |
| Compatibility | Ensures fitting with various models for versatile use. |
Regarding pricing, more advanced versions often come with a higher cost due to superior features. However, there are cost-effective options that still provide decent quality for casual usage. Conducting a market research can reveal various price points based on brand reputation and specific functionalities.
In summary, assessing both features and pricing allows for informed decisions tailored to personal photography needs. This approach ensures that the right attachment can enhance creativity and the quality of close-up images.
Step-by-Step Guide to Using Macro Lenses Effectively
To achieve stunning close-up photographs, I focus on several key techniques that enhance the quality and detail of my images. Understanding the proper positioning and lighting is fundamental to capturing sharp and vivid shots.
I make sure to clean the attachment area before placing the optical accessory on my device. Any smudges or dirt can affect the quality of the images. Once attached, I select a well-lit environment or use an external light source to illuminate the subject effectively.
Positioning and Stability
Getting the right distance from the subject is critical. I usually start by moving in closer until the details come into focus, then adjust to find the sharpest point. Using a sturdy surface or a tripod helps reduce camera shake, allowing for clearer shots.
I also pay attention to my breathing and try to hold my body steady while taking the picture. This small adjustment makes a significant difference in the outcome.
Focusing Techniques
Utilizing the focus feature on my device allows me to control the clarity of the minute details. I often tap on the screen to indicate the area I want to highlight. This direct interaction ensures that my subject is in sharp focus and draws the viewer’s eye to the intended details.
Lighting Considerations
Natural light usually yields the best results. However, I sometimes incorporate additional lighting to eliminate shadows that can obscure details. I recommend experimenting with angles to see how different light sources interact with the subject.

Post-Processing
After capturing my images, I use photo editing software to enhance contrast, adjust brightness, and sharpen details further. This post-processing stage is essential for realizing the full potential of the close-up shots.
By following these strategies, I consistently achieve impressive close-up photography results that showcase intricate details and textures effectively.
Common Mistakes to Avoid When Shooting with Macro Lenses
One of the most common errors is neglecting to stabilize the device. The high magnification levels can exaggerate even the slightest movements, leading to blurred images. I recommend using a tripod or resting the device on a stable surface to achieve sharp focus.
Another frequent mistake is improper lighting. When dealing with close-up shots, natural light can create harsh shadows or overly bright spots. I suggest using diffused lighting sources or reflectors to evenly illuminate the subject, ensuring consistent exposure without compromising detail.
Focus Issues
Achieving the right focus is critical in close-up photography. Often, users try to focus on the entire subject, which can be counterproductive. I emphasize focusing on a specific detail or point of interest within the frame, leading to more impactful and engaging images.
Depth of Field Considerations
Many overlook the depth of field while capturing intricate details. A shallow depth can isolate the subject beautifully, but it requires precise control. Experimenting with aperture settings can help achieve the desired blur and sharpness balance.

Composition Missteps
Composition is equally important, yet many fail to apply fundamental principles. Place subjects off-center, consider leading lines, and make use of negative space to create more visually appealing frames. A well-composed image draws the viewer’s eye and enhances the overall impact.
Experimentation and Practice
Avoid hesitation to try new techniques. The beauty of close-up shooting lies in its potential for creativity. Changing angles, using different backgrounds, or incorporating unexpected elements can lead to unique results. I always encourage continuous experimentation and practice to refine skills.
Enhancing Your Macro Photography with Editing Tips
To elevate your close-up shots, focus on adjusting brightness and contrast. A simple increase in brightness can highlight intricate details while adjusting contrast brings out textures, making the subject pop. Using editing apps available on smartphones makes these adjustments quick and straightforward.
Crop judiciously to eliminate distractions surrounding the main subject. This refinement draws the viewer’s eye directly to essential elements, enhancing the overall composition. Try different crop ratios to find what best accentuates your subject.
Key Editing Techniques
- Sharpening: Apply a slight sharpening effect to enhance details. Be careful not to overdo it, as this can create an unnatural appearance.
- Saturation: Increasing saturation brings life to colors but use sparingly to avoid oversaturation.
- Filters: Use filters cautiously. They can add mood but sometimes detract from the subject’s natural beauty.
- Noise Reduction: If photos appear grainy, apply noise reduction tools to create a smoother finish.
Experiment with various apps to discover your personal editing style. Each app offers unique features that can enhance editing processes. Popular choices include Snapseed, Lightroom, and VSCO.
In conclusion, refining your images through thoughtful editing techniques can dramatically improve your photographs. Combining these strategic adjustments with your creativity will result in stunning, immersive visuals that showcase the beauty and intricacy of your subjects.
Best macro lense for phone camera pixel
Professional Macro Lens with Ring Light
Features
| Part Number | APL-FL26 |
| Model | HB100UFL26 |
| Warranty | 1 Year Manufacturer |
| Color | Black |
| Size | HB100UFL26 |
Enhanced 100Ultra Macro Lens for Smartphones
Features
| Part Number | HB100U-US |
| Warranty | 1 year |
Upgraded Macro Photography Lens for Smartphones
Features
| Part Number | SH-HB100U-US |
| Warranty | 1 Year Manufacturer |
Kase HD Master Macro Lens for Smartphones
Features
| Part Number | Kase Master Macro Lens Pro |
| Model | Kase Master Macro Lens Pro |
| Warranty | 1 year warranty |
| Color | Silver |
| Size | Master Macro Lens Pro |
Evil Eye Telephoto and Macro Lens Kit
Features
| Part Number | APL-TM6 |
| Model | APL-TM6 |
| Warranty | 1 Year Manufacturer |
ULANZI CL-003 HD Phone Macro Lens
Features
| Part Number | ULANZI Phone Macro Lens |
| Model | ULANZI Phone Macro Lens |
| Warranty | 12 Months |
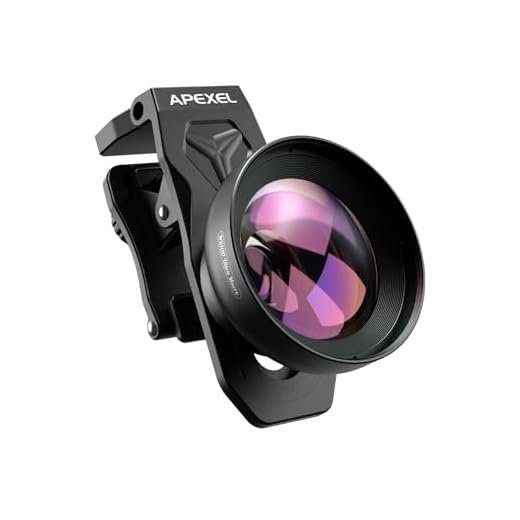
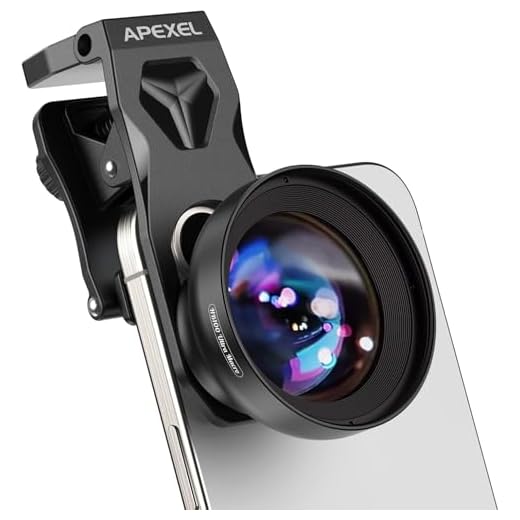
APEXEL 10-20X Macro Lens for Close-Ups
Features
| Part Number | APL_36XJJ020 |
| Warranty | 1 year |
| Size | ZM100FL26 |
FAQ:
What are the best macro lenses for phone cameras available on the market?
Currently, some of the top macro lenses for phone cameras include the Moment Macro Lens, Olloclip Macro 3-in-1 Lens, and the Apexel 4-in-1 Lens. These lenses offer excellent magnification and clarity, allowing photographers to capture intricate details in their shots. Each lens has its own unique features, such as compatibility with different phone models and varying levels of zoom, providing options for different photography needs.
How does a macro lens improve smartphone photography?
A macro lens enhances smartphone photography by allowing users to capture close-up images with impressive detail. Unlike standard phone cameras, which have limitations on focusing distance, macro lenses enable users to take photos of subjects as close as a few centimeters away. This is particularly useful for photographing small subjects like insects, flowers, or intricate textures, resulting in images that are sharp and rich in detail.
Are macro lenses for phone cameras easy to use for beginners?
Yes, macro lenses designed for phone cameras are typically user-friendly, making them accessible for beginners. Most macro lenses attach easily to the phone’s camera, often requiring no additional equipment or technical knowledge. Users can simply clip the lens onto the phone camera, launch the camera app, and begin capturing photos. However, it may take some practice to properly focus and compose shots, as macro photography often requires careful attention to detail.
Can I use a macro lens in low light conditions?
Using a macro lens in low-light conditions can be challenging, as macro photography generally requires adequate lighting to capture sharp details. Many macro lenses do not come with built-in lighting, so using an external light source or ensuring natural light is available is advisable. Additionally, using a tripod can help stabilize the camera for clearer shots in low-light situations, minimizing blurriness caused by camera shake.
What should I consider when choosing a macro lens for my smartphone?
When selecting a macro lens for your smartphone, consider compatibility with your device, the type of attachment (clip-on or magnetic), and magnification level. It’s also important to look into build quality and whether the lens comes with additional features, such as a carrying case or extra filters. Reading reviews and looking at sample images can also help you understand the performance of the lens before making a purchase.