
If you’re looking to elevate your portfolio with stunning representations of the human form, I recommend a few standout tools that truly excel in this specific genre. Understanding which devices and optics to utilize can dramatically enhance the quality of your work, ensuring that each shot resonates with your vision.
This article explores a selection of devices and optics that cater specifically to this artistic expression. It’s tailored for photographers, whether you’re just starting out or already experienced, who seek to improve their craft without sacrificing integrity or artistry. By focusing on certain features, you’ll discover how to achieve striking clarity, depth, and mood in your imagery.
Within these recommendations, I’ll highlight specific models known for their performance in low light, excellent color rendition, and overall versatility. You’ll gain insights into how different focal lengths can affect composition and how to seamlessly pair these devices with specific optics to create compelling artwork. This should provide a solid foundation for any photographer eager to explore or refine their approach to this beautiful aspect of visual storytelling.
Optimal Equipment for Capturing Artistic Expression
For those looking to create compelling visual narratives, choosing the right equipment is paramount. High-resolution options increase detail and clarity, which is particularly important in sensitive subjects. I find that a full-frame setup often yields superior results because it captures more light, enhancing the overall quality of images taken in varied lighting conditions.
A fast prime optic is often a favorite among photographers focused on intimate themes due to its ability to produce beautiful bokeh and draw attention to the subject. A wide aperture allows for soft backgrounds, making the subject stand out. This adds a layer of artistry to each frame, accentuating the form and lines of the human figure.
Key Features to Consider
- Sensor Quality: Full-frame sensors typically offer better low-light performance, which can be crucial for mood and atmosphere.
- Lens Aperture: A wide maximum aperture contributes to depth of field control and allows for more creative expression.
- Image Stabilization: Stabilization helps minimize blur from camera shake, which is beneficial in natural light settings.
- Dynamic Range: A higher dynamic range captures more detail in both shadows and highlights, enhancing the final image.
The choice of equipment ultimately reflects personal style and vision. Each click of the shutter should speak volumes about the subject’s essence while maintaining artistic integrity, requiring a thoughtful approach to both selection and usage of tools. The synergy between the camera and lens can significantly alter the outcome of each session, allowing for expressive storytelling through visuals.
Mirrorless Options for Artful Skin Photography
When selecting a mirrorless system for fine art photography featuring the human form, I prioritize cameras that provide exceptional image quality, flexibility in low light, and intuitive controls. High-resolution sensors ensure that every detail is captured, making skin tones appear natural and smooth. This aspect is crucial when portraying the subtleties of light and shadow on the body.
The ability to swap out lenses enhances creative possibilities. Wide apertures in prime options allow for beautiful background blur, emphasizing the subject. Additionally, focal lengths play a vital role; a variety of perspectives can be achieved, from intimate portraits to full-body compositions. The ergonomic design of mirrorless models facilitates prolonged shooting sessions without discomfort.
Key Features to Consider
- Sensor Size: Larger sensors capture more light, providing better detail and dynamic range.
- Low Light Performance: Cameras that excel in dim environments help maintain image integrity.
- Autofocus System: Fast and accurate autofocus ensures sharp images, particularly with moving subjects.
- Interchangeable Lenses: Versatile lens options allow for creativity and adaptability in various settings.
- Intuitive Menu Systems: A user-friendly interface saves time and helps maintain focus during shoots.
For low-light setups, I recommend pairing a camera with a lens featuring a wide maximum aperture. This combination permits more light to enter the sensor, enhancing the overall clarity of the images. Additionally, mirrorless setups generally offer in-body stabilization, reducing the chances of blurry shots in challenging conditions.
- Consider your preferred shooting style and environment.
- Test the camera in person if possible; ergonomics can make a difference.
- Research lens compatibility to meet artistic goals.
A strong understanding of these elements will lead to successful captures that convey beauty and artistry in the human form.
DSLR Options That Excel in Portraits
When selecting a digital single-lens reflex option for capturing portraits, I prioritize sensors with high resolution and dynamic range. This setup allows for vivid detail and smooth gradations in skin tones, which are critical for any intimate portrait work. Pairing this with an appropriate optic elevates the image quality significantly.
The autofocus system plays a substantial role as well. A responsive and accurate focus mechanism is vital, especially in low-light conditions or when working with subjects that are in motion. This ensures that the sharpness is always on point, highlighting the elegance of the subject.
Key Features to Consider
- Image Sensor: Larger sensors generally provide better low-light performance and depth of field control.
- Optical Viewfinder: This feature gives a real-time glimpse of the composition, improving framing accuracy.
- ISO Range: A broad ISO range permits flexibility in various lighting scenarios, allowing for creativity.
- Ergonomics: Comfortable handling can reduce fatigue during long shooting sessions, making the process smoother.
- Interchangeable Lenses: Compatibility with a wide range of optics enables adaptable shooting styles.
I favor lenses with wide maximum apertures to achieve a shallow depth of field, allowing for intricate backgrounds that complement the subject. Additionally, the focal length should be chosen wisely to flatter body proportions while maintaining intimacy in the shots.
Experimentation with various settings and styles will enhance one’s ability to capture the essence of the moment effectively. Each portrait session can yield different textures and emotions, creating unique art pieces that resonate deeply with the viewer.
Prime Lenses Perfect for Skin Tones
Choosing the right fixed focal length optics dramatically influences the portrayal of skin tones in portrait work. A well-suited lens can render hues accurately, ensuring a natural appearance in images. Such tools are particularly valuable for intimate settings, where the subtleties of complexion are paramount.
It’s crucial to consider the aperture when selecting these optical elements. A wide opening allows for better control over depth of field, helping to create a pleasing bokeh that accentuates the subject. This technique can reduce distractions in the background, putting emphasis where it belongs.
Key Considerations
- Focal Length: A range between 85mm to 135mm often provides flattering perspectives, allowing for closer interaction without distortion.
- Aperture: Opt for an aperture of f/1.4 to f/2.8 for superior light gathering, enhancing skin textures.
- Color Rendering: Test how different optics handle skin tones under various lighting conditions, as some lenses may produce warmer or cooler hues.
| Factor | Impact on Skin Tones |
|---|---|
| Lens Coating | Affects contrast and color accuracy |
| Minimum Focus Distance | Allows for close-up shots while maintaining exquisite detail |
| Build Quality | Durable construction ensures consistent performance |
Ultimately, the choice of fixed focal length glass can enhance the artistry of your photography. Observing how various optics translate skin tones in distinct lighting helps refine the visual voice in portraiture.
Choosing the Right Zoom Lens for Diverse Shots
A zoom optic offers remarkable flexibility, allowing me to capture a wide range of compositions without the need to constantly switch equipment. I find that a versatile focal length is essential for adapting to varying settings and the specific moods I want to evoke in my work.

When selecting a zoom optic, I consider the maximum aperture, as this impacts low-light performance and depth of field control. A lens with a larger aperture provides the advantage of isolating subjects from the background, enhancing the overall aesthetic quality. Consistent aperture throughout the zoom range is equally important, as it allows for uninterrupted exposure settings during focus adjustments.
Key Features to Evaluate
- Focal Length Range: A range that covers both wide and moderate telephoto lengths facilitates diverse perspectives, from intimate close-ups to broader contextual shots.
- Image Stabilization: This feature is vital when shooting handheld, minimizing blur caused by camera shake and ensuring sharper images.
- Build Quality: A robust construction can be beneficial for outdoor shoots, as it adds durability against environmental factors.
- Autofocus Performance: Fast and accurate focusing is essential to capture fleeting moments without missing the perfect expression or pose.
In practice, I appreciate zoom optics that allow for easy adjustments while shooting, enabling me to creatively frame my subject on-the-fly. This capability leads to a fluid workflow, where inspiration can be captured spontaneously. Recognizing the importance of diverse focal lengths within a single lens empowers me to adapt swiftly in various shooting environments.
Ultimately, my goal is to produce images that resonate with the viewer, and the choice of zoom optics plays a pivotal role in achieving that vision. Thoughtful consideration of the features outlined above will guide anyone in making a purchase that enhances their capabilities.
Essential Lighting Equipment for Nude Sessions
For achieving stunning results in intimate photography, quality illumination plays a pivotal role. I prioritize soft and diffused lighting, as it accentuates the human form gracefully. Softboxes are excellent for this purpose, offering controlled and even light distribution. They reduce harsh shadows, which can be unflattering. Alternatively, using large reflectors can bounce natural sunlight, creating a gentle glow that highlights the subject’s curves.
Another worthy consideration is continuous lighting. Unlike flash systems, continuous lights allow me to see how the light interacts with the model in real time. This transparency empowers me to adjust my positions and modify the angles swiftly, ensuring a natural feel during the shoot. These kinds of lights are particularly useful in creating mood and atmosphere, which are vital for intimate compositions.
Further Recommendations
- Light Modifiers: Incorporating modifiers like grids and diffusers enhances control over the light’s direction and softness.
- Color Temperature: I always keep an eye on color temperature to ensure skin tones appear natural and flattering.
- Portable Options: Battery-operated lights offer flexibility, especially in locations without power sources.
In addition, understanding the distance and angle of the light source helps in sculpting the model’s body. This knowledge can elevate the art of intimacy in the frame. Experimenting with backlighting can also create a beautiful halo effect, which adds depth to the images.

- Evaluate the natural light in the environment.
- Test different setups prior to the session.
- Communicate with the model about desired poses and angles.
Conclusively, the choice of lighting tools greatly influences the outcome of the shoot. I continually experiment with various setups, ensuring each session is unique and resonates with the desired artistic vision.
Considerations for Backgrounds: What to Use
Choosing the right backdrop is key to enhancing the subject’s presence in a photograph. I prefer simple, uncluttered backgrounds that do not draw attention away from the figure. Solid colors work particularly well, as they provide a clean contrast and emphasize the shape and form of the body. Neutral tones like white, black, and gray are timeless. However, soft pastels can create a gentle, ethereal feel.
Textures can add depth and interest without being distracting. Fabric drapes or natural materials such as wood or stone can enhance the overall composition. When using textured backgrounds, I ensure they echo the subject’s mood or emotion, harmonizing the entire scene. Additionally, seamless paper rolls are convenient for maintaining a clean look and can be easily swapped out to suit different aesthetics.
Natural Elements
Incorporating nature can create a serene atmosphere. I often consider shooting outdoors, where foliage, water, or sand can add dynamic elements. However, it’s crucial to ensure that the background complements rather than competes with the subject. Bright or busy surroundings can lead to distractions, so I look for secluded spots or areas with soft light and muted colors.
- Use natural settings for organic looks.
- Avoid harsh patterns or busy scenes.
I also recommend scouting locations beforehand, allowing time to assess how shadows and highlights may play on the backdrop at different times of the day. This pre-visualization aids in determining the right environment for the concept I wish to capture.
- Scout locations beforehand.
- Consider time of day for optimal lighting.
Finally, props and accessories can enhance the scene, offering additional layers without overwhelming the overall composition. Simple elements like fabric throws or flowers can add color and texture, enriching the visual narrative.
| Type of Background | Effect on Subject |
|---|---|
| Solid Color | Focus on form |
| Textured Surface | Adds depth |
| Natural Elements | Creates serenity |
Camera Settings for Optimal Results in Boudoir Photography
Choosing the right exposure settings is fundamental for capturing intimate portraits. A wide aperture not only blurs the background, but also adds a soft, dreamy quality to the image. I typically start with an aperture around f/2.8 to f/4, allowing for enough depth of field to keep the subject sharp while creating a pleasing bokeh effect.
Managing ISO levels is equally important. In low-light situations, I aim to keep the ISO as low as possible, ideally between 100 and 400, to avoid noise. However, if the setting requires a higher ISO, I ensure the camera can handle it without introducing too much grain.
Shutter Speed and Lighting
Shutter speed is another critical parameter. I usually set it to at least 1/125 seconds to prevent motion blur, particularly if there’s any movement involved. If I’m working with natural light, I often take advantage of golden hour for softer, more flattering illumination.
- Using reflectors can significantly enhance lighting by bouncing light back onto the subject.
- Experiment with various lighting conditions to find what complements the theme.
White balance is essential in maintaining skin tones. I prefer to set it manually instead of relying on auto modes, as they can sometimes misinterpret the lighting. By correctly setting white balance, I can achieve true-to-life colors.
| Setting | Recommended Value |
|---|---|
| Aperture | f/2.8 – f/4 |
| ISO | 100 – 400 |
| Shutter Speed | 1/125 seconds or higher |
Finally, don’t forget to experiment with various angles and compositions. The right perspective can elevate an image, making it feel uniquely artistic. Try different framing techniques, including leading lines or negative space, to enhance the overall impact of your shots.
Post-Processing Tips to Enhance Skin Textures
Utilize frequency separation to effectively manipulate skin textures. This technique allows you to separate color from texture in your images, enabling precise adjustments of each without affecting the other. Begin by duplicating your base layer and applying Gaussian blur to one layer for the colors, while retaining details on the other.
Pay attention to color correction for realistic skin tones. Use tools like curves and selective color adjustments to fine-tune hues and brightness. This is essential to ensure that skin appears natural in various lighting conditions.
Techniques for Skin Enhancement
- Smoothing: Use a light touch when applying skin smoothing filters. I prefer methods where I can maintain subtle imperfections to avoid an overly airbrushed look.
- Dodging and burning: Enhance contours with dodging and burning. This adds depth and dimension, making the subject appear more three-dimensional.
- Retouching: Make selective retouches for blemishes and distractions. Keeping alterations minimal helps maintain authenticity.
- Sharpening: Sharpen key areas like eyes and lips to draw focus, while keeping skin softness intact.
- Color Grading: Experiment with split toning to infuse images with mood. Warmer tones often enhance skin, while cooler hues can create an artistic effect.
Examine your results on different screens to ensure consistency across devices. Adjustments that look great on one display may differ on another. Always save high-resolution files for optimum quality in prints.
Combining these techniques will enhance skin textures without compromising authenticity. It’s about finding a balance that resonates with the subject’s natural beauty.
Best cameras and lenses for nudes
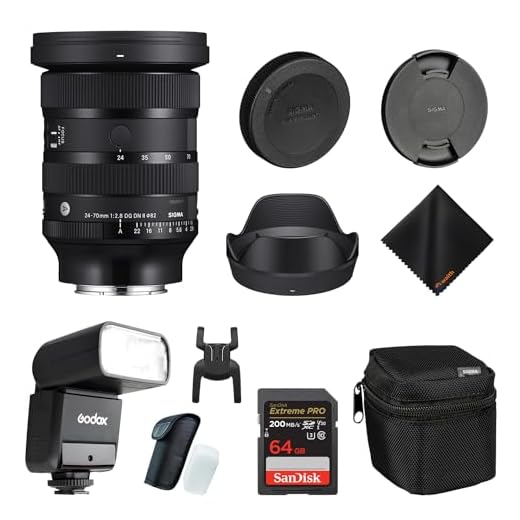
Sigma 24-70mm F2.8 DG DN II Art Lens Bundle
Features
| Part Number | SIG57A965 |
| Model | SIG57A965-KIT1 |
Canon RF 50mm F1.8 STM Lens for EOS Cameras
Features
| Part Number | 4515C002 |
| Model | 4515C002 |
| Warranty | 1 year manufacturer |
| Color | Black |
| Release Date | 2020-12-03T00:00:01Z |
| Size | 50mm |
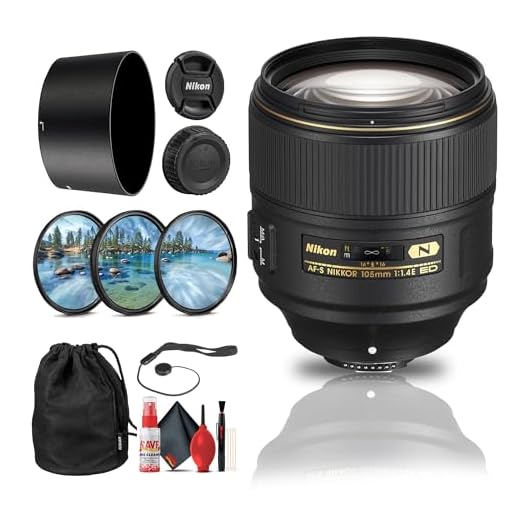
Nikon AF-S 105mm f/1.4E ED Portrait Lens Set
Features
| Part Number | 20064_EDIRE6_1 |
| Model | 20064_EDIRE6_1 |
| Warranty | 90 days limited warranty |
Meike 85mm F1.8 Portrait Lens for Canon
Features
| Part Number | MK8518 |
| Model | MK-8518-C |
| Color | Black |
| Size | 80*77mm |
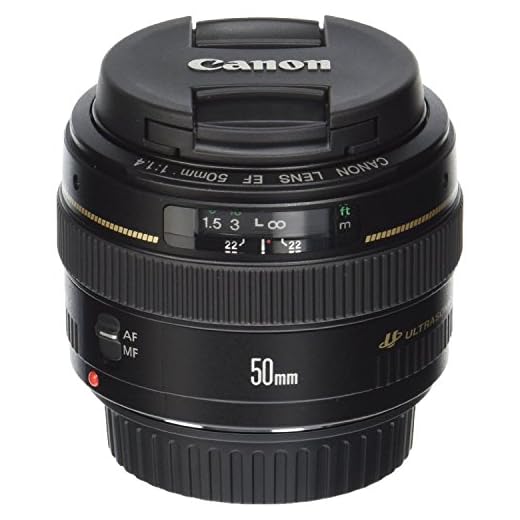
Canon EF 50mm f/1.4 USM Medium Telephoto Lens
Features
| Part Number | 2515A003 |
| Model | 50mm f/1.4 CR |
| Warranty | 90 days limited warranty |
| Color | Black |
| Is Adult Product | |
| Language | Italian |
Canon RF-S 55-210mm Telephoto Zoom Lens
Features
| Part Number | 5824C002 |
| Model | 5824C002 |
| Warranty | 1 year manufacturer |
| Color | Black |
| Release Date | 2023-03-16T00:00:01Z |
LED Video Light Panel Kit with Tripod
Features
| Part Number | U-VL13 |
| Model | U-VL13 |
| Warranty | 1 |
| Size | 63'' Stand |
FAQ:
What are the best camera types for shooting nudes?
When it comes to capturing nude photography, DSLRs and mirrorless cameras are often recommended. DSLR cameras offer excellent image quality and a wide range of lens options, while mirrorless cameras are typically lighter and more compact, which can be beneficial for mobility during a shoot. Both types allow for interchangeable lenses, which means photographers can choose a lens that best suits their creative vision, whether it’s a prime lens for sharp detail or a zoom lens for versatile framing.
Which lenses are suitable for nude photography?
Prime lenses with wide apertures are often favored in nude photography for their ability to create beautiful bokeh and isolate subjects. A 50mm f/1.8 lens is an affordable option that delivers excellent sharpness and depth of field. For wider shots, a 35mm lens can provide context while still focusing on the subject. Additionally, an 85mm or 135mm lens is ideal for capturing more intimate portraits from a distance, allowing for flattering perspectives without compromising the subject’s comfort.
How to choose a lens based on the shooting environment for nudes?
Choosing a lens often depends on the shooting environment. In a studio setting with controlled lighting, a prime lens with a wide aperture can create stunning results, allowing for artistic blurs and focused details. In outdoor or natural light settings, you might opt for a lens that offers versatility, such as a 24-70mm zoom lens. This gives you the flexibility to frame wide shots or close-ups depending on the surroundings and the scene you’re aiming to create.
What camera settings are typically used for nude photography?
Effective camera settings can greatly affect the outcome of nude photography. Using a low ISO (100-400) helps maintain image clarity and reduce noise. A wide aperture (like f/1.8 or f/2.8) allows for a shallow depth of field, beautifully blurring the background and emphasizing the subject. A shutter speed of at least 1/125 seconds is recommended to capture sharp images, especially if the model is moving. It’s also crucial to adjust the white balance based on the lighting conditions to ensure accurate skin tones.
Are there any specific brands recommended for cameras and lenses in nude photography?
Several brands are highly regarded for their cameras and lenses suitable for nude photography. Canon and Nikon are both excellent choices for DSLRs, offering a wide selection of lenses. For mirrorless options, Sony is known for its high-performance cameras, especially the A7 series, which are favored by many photographers for their image quality and effective autofocus. Fujifilm is also a solid choice for those who prefer unique color profiles and retro design, making it popular in portrait and lifestyle photography scenarios.