If you want to capture stunning details of gemstones, a macro attachment is your go-to solution. In this article, I will guide you through the finest options available on the market that are perfectly suited for this genre of photography. Knowing the right gear can significantly enhance the clarity and brilliance of your shots.
This write-up will benefit amateur photographers, gemstone enthusiasts, and experienced shooters looking to refine their macro techniques. I will cover a range of products–discussing their specifications, compatibility with various equipment, and practical use cases to help you choose the right one for your needs.
From premium macro optics to budget-friendly alternatives, you’ll discover the advantages of using dedicated attachments versus using standard equipment. Whether you’re shooting for personal pleasure or preparing images for professional sales, this information will equip you with the insights necessary to elevate your photography of exquisite natural formations.
Best Camera Lens for Up Close Crystals
When capturing the intricate details of gems, I find that a macro lens performs exceptionally well. This type of optic allows for stunning close-up shots, revealing textures and colors that might go unnoticed with standard lenses.
I recommend looking for a lens with a high magnification ratio. This feature is crucial, as it means you can get very close to the subject without losing detail. Additionally, consider a lens with a wide aperture to create a lovely background blur, which makes the crystal stand out even more.
Recommendations
- Magnification Ratio: A ratio of at least 1:1 is ideal for capturing the finest details.
- Aperture: A larger maximum aperture (like f/2.8 or wider) helps in achieving bokeh effects.
- Lens Construction: Look for high-quality glass elements to reduce aberrations and enhance clarity.
Keeping in mind lighting conditions can also enhance your results. Using a ring light or softbox can illuminate the facets of your subject effectively. I prefer working in natural light, but additional lighting may be necessary during indoor shoots.
Experimenting with different angles and distances can yield various artistic effects. I often try to shoot from slightly above or at an angle to showcase the crystal’s depth and facets.
Essential Features for Macro Photography
When I approach macro photography, clarity and detail are my main priorities. Achieving stunning close-up images demands a setup that caters specifically to the nuances and intricacies of subjects. High resolution and sharpness are fundamental attributes that I always seek in my equipment.
Another critical feature I find invaluable is a fast and precise autofocus system. This becomes exceptionally important when working with small objects to ensure that the area of interest is sharply defined. Manual focus override also allows me to refine my focus for the perfect shot. Beyond that, working with a lens that has a good degree of magnification capability enables me to capture the finer details that might otherwise be missed.
Additional Considerations
- Minimum Focusing Distance: I always opt for a lens with a short minimum focusing distance, as it allows me to get closer to my subjects without losing focus.
- Aperture Range: A wider aperture aids in achieving a better depth of field, helping to isolate the subject beautifully against the background.
- Stabilization: Image stabilization technology proves beneficial in minimizing shake and blurriness, especially in challenging lighting conditions.
- Durability: A well-built lens can withstand various environments, essential for outdoor macro photography.
I also value features like compatibility with extension tubes and diopters, which can further enhance my macro capabilities. Ultimately, each component plays a role in defining the quality and success of my macro photography experience.
Capturing Crystal Details
To highlight the intricate beauty of transparent materials, I recommend using a macro setup with a wide aperture. This approach allows for detailed close-ups, bringing out the sparkle and unique formations that often go unnoticed.
Macro photography enables a closer perspective, rendering the delicate facets and internal structures of the stones sharply. My preference is for a lens that supports high magnification and has a fast aperture to effectively manage the lighting conditions and create beautiful bokeh.
Key Features to Consider
- Magnification Ratio: A lens with at least 1:1 magnification will allow you to capture the smallest details.
- Aperture: A wider aperture, such as f/2.8 or lower, helps achieve soft backgrounds and enhance focus on the subject.
- Stability: An image stabilization feature can significantly reduce the impact of hand shake, ensuring sharp images.
- Compatibility: Ensure that your choice works with your existing setup, including mounts and adapters if necessary.
Experimenting with lighting techniques is equally crucial. Natural light can create stunning effects, while a softbox or a ring light may help to illuminate shadows effectively.
Practicing various angles and perspectives enhances the composition and can reveal hidden features within each stone. Incorporating reflectors might also assist in achieving an alluring shine on the surfaces.
Comparing Macro and Close-Up Lenses
Choosing between macro and close-up optics depends on the specific details you want to capture. Macro optics excel at revealing minute textures and intricate patterns, offering high levels of magnification, while close-up filters or attachments are convenient accessories that can enhance standard optics.
Macro setups typically provide greater reproduction ratios, allowing for life-size or even larger images of subjects. This feature is particularly valuable when focusing on small features, such as the facets of a mineral sample, ensuring that details remain sharp and in focus.
Key Differences
- Magnification: Macro optics offer higher magnification capabilities, ideal for extreme detail capture.
- Working Distance: With macro options, the distance between the lens and the subject is usually closer, requiring precise positioning.
- Image Quality: Dedicated macro optics often produce superior image quality with better sharpness and contrast.
- Convenience: Close-up filters are lightweight and easy to use, making them accessible for spontaneous shooting.
Another consideration is the depth of field. Macro optics typically have a shallower depth of field, which can create stunning bokeh effects. In contrast, close-up attachments allow for a wider depth of field, making it easier to keep more of the subject in focus.
Ultimately, the choice hinges on the intended photographic outcome. If intricate detail and professional image quality are priorities, investing in quality macro optics may be the best path. However, for casual photography or quick captures of smaller subjects, close-up attachments present a practical and versatile solution.
How Focal Length Affects Crystal Imaging
Choosing the appropriate focal length is pivotal for capturing stunning detail in crystal photography. Shorter focal lengths provide a wider field of view, allowing me to include more context in the frame, while longer focal lengths excel in isolating specific features and achieving greater magnification.

When working with crystals, the choice of focal length impacts not just the level of detail, but also the perspective and depth of field. With a macro lens, I can achieve sharpness and clarity at close distances, revealing intricate patterns and structures that are otherwise unnoticed.
Understanding Focal Length Variations
- Wide Angle (Short Focal Length): This option can capture more of the surrounding environment, which is beneficial for showcasing crystals in their natural settings. However, distortion may occur, affecting the perception of crystal shapes.
- Standard (Medium Focal Length): A balanced choice for versatility. It offers a decent amount of detail while minimizing distortion, making it great for general crystal photography.
- Telephoto (Long Focal Length): Ideal for tight compositions. It enables me to focus on specific areas of the crystal, providing incredible detail while compressing the background, which adds a pleasing aesthetic.
The distance from the subject also significantly influences the image quality. At closer distances, I must consider lighting conditions and depth of field. Using longer focal lengths can help in achieving a more pronounced bokeh effect, isolating the crystal beautifully from its background.
| Focal Length Type | Field of View | Detail Capture | Use Case |
|---|---|---|---|
| Wide Angle | Broad | Moderate | Contextual Shots |
| Standard | Balanced | Good | General Photography |
| Telephoto | Narrow | Excellent | Detail-Focused Shots |
Understanding the interplay between focal length, distance, and lighting conditions enables me to create exceptional imagery of crystals, showcasing their unique beauty and complexity.
Lighting Techniques for Stunning Crystal Shots
Utilizing natural light can create mesmerizing effects when photographing gems. Shooting near a window during the golden hour enhances color and detail. I recommend positioning the gem close to the light source, allowing natural reflections to illuminate its facets.
Reflectors are my go-to tools for enhancing lighting in my shots. A simple white card can bounce light effectively, filling in shadows without creating harsh contrasts. I often use multiple reflectors to achieve balanced illumination around the gem.
Artificial Lighting Strategies
In low-light situations, softbox lights offer consistent, diffused illumination. Positioning the softbox at a slight angle helps to minimize glare. This technique accentuates the clarity and details of the object’s surface.
Combining multiple light sources can create depth. I often use a key light for direct illumination and a fill light to soften shadows. Adjusting the brightness of each source allows for fine-tuning the mood of the photograph.
- Experiment with color gels: These can change the hue of the light, resulting in unique backdrops and effects.
- Use a flashlight: Moving it around the gem can create intriguing highlights and reveal textures.
Backlighting can create breathtaking effects on transparent or translucent stones. This technique involves placing a light source behind the gem, making it glow and highlight its internal features.
Finally, always consider the angle of the light. I often find that slight adjustments can lead to significant changes in the resulting image. Keeping a keen eye on reflections and highlights allows me to capture the true essence of every gem.
Post-Processing Tips for Crystal Photography
Utilize software like Adobe Lightroom or Photoshop to enhance clarity and detail in your images. Begin by adjusting the exposure and contrast to ensure the sparkle and facets of the gems stand out distinctly in your shots.
Consider enhancing color saturation selectively to emphasize the vibrancy of the stones, while being cautious not to oversaturate, which can result in unnatural appearances. Use the clarity slider to add depth without compromising the texture.
- Crop for Composition: Trim excess space to focus on key elements.
- Sharpening: Apply light sharpening to emphasize details, particularly around edges.
- Noise Reduction: Reduce any noise, especially in higher ISO images, ensuring a clean look.
- Color Balance: Adjust white balance to enhance the natural hues of the gems.
- Vignette Effect: Consider adding a subtle vignette to draw attention to the center of the image.
Experimenting with these techniques can significantly elevate the visual appeal of your compositions. Prioritize subtlety to maintain the natural beauty of your subjects.
Best camera lense for up close crystals
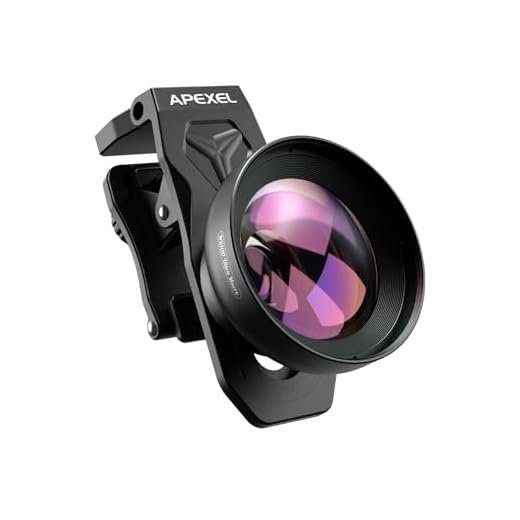
APEXEL Macro Lens for Mobile Photography
Features
| Part Number | HB100U-US |
| Warranty | 1 year |
Canon RF35mm F1.8 Macro Lens
Features
| Part Number | 2973C002 |
| Model | 2973C002 |
| Warranty | 1 Year Manufacturer Limited Warranty |
| Color | Black |
| Release Date | 2018-11-15T00:00:01Z |
| Size | 35mm |
NiSi 77mm Close-Up Lens Kit
Features
| Part Number | NIR-CLOSEUP-77II |
| Model | 112565 |
| Warranty | 12 Month Warranty |
| Color | 77mm Close-up |
| Size | 77mm |
Versatile NiSi 58mm Close-Up Lens Kit
Features
| Part Number | BE-58-Close-Up |
| Model | NIR-CLOSEUP-58 |
| Warranty | 12 Month Warranty |
| Size | 58mm |
Neewer 67MM Lens Filter Accessory Kit
Features
| Part Number | B01ID957CK |
| Model | 10087418 |
| Color | Black |
| Is Adult Product | |
| Size | 67mm |
Lightdow 420-800mm Telephoto Zoom Lens
Features
| Part Number | KD-420800-T-N |
| Model | KD-420800-T-N |
| Warranty | 1 |
| Color | Black |
| Size | 9.45×2.64×2.64 inch |
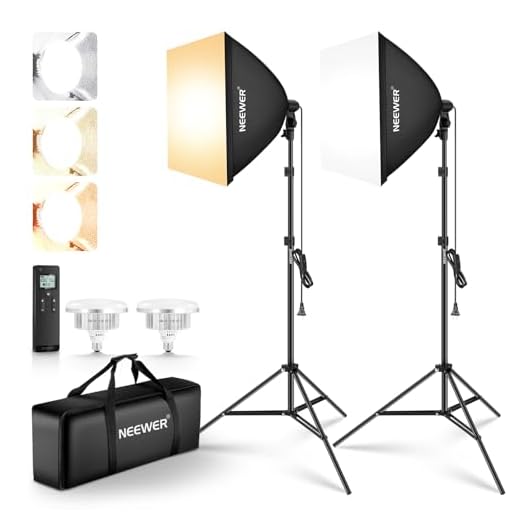
NEEWER 24"x24" Softbox Lighting Kit
Features
| Part Number | 10105312 |
| Model | NK103 |
| Warranty | 1 Year Manufacturer |
| Release Date | 2025-02-15T00:00:01Z |
FAQ:
What type of lens is recommended for photographing crystals up close?
For taking close-up photographs of crystals, a macro lens is highly recommended. Macro lenses are specifically designed for extreme close-ups, allowing you to capture fine details and textures that are often missed with standard lenses. Depending on your camera system, popular options include 100mm macro lenses or 60mm macro lenses. The choice between them may depend on your desired working distance and the size of the crystals you are photographing.
Can I use a zoom lens for close-up photography of crystals?
Yes, you can use a zoom lens for photographing crystals, but it’s important to select a zoom lens that has macro capabilities. Some zoom lenses offer a close-focusing feature that allows you to capture detailed shots at a relatively close distance. However, a dedicated macro lens generally provides better image quality and detail for close-up work. If you primarily want to photograph crystals, investing in a macro lens might be a better choice in the long run.
What aperture settings are best for shooting crystals with a macro lens?
When photographing crystals with a macro lens, choosing the right aperture can greatly affect your results. A wider aperture (like f/2.8 or f/4) can create a beautiful shallow depth of field, highlighting the crystal while softly blurring the background. However, if you want to ensure more of the crystal is in focus, using a smaller aperture (like f/8 or f/11) is advisable. Keep in mind that smaller apertures will require longer exposure times, so consider using a tripod to minimize any camera shake.
Are there any accessories that can enhance crystal photography?
Yes, several accessories can enhance your crystal photography. A tripod is essential for stabilizing your camera, especially in low-light conditions or when using slower shutter speeds. Additionally, using a diffused light source can help manage reflections and highlights on the crystal’s surface. A polarizing filter can also be beneficial, as it reduces glare and enhances colors, making the crystal’s unique features pop in your images. Lastly, consider using extension tubes to increase your working distance and get even closer to your subjects without losing focus.