If you’re looking to enhance your photography, selecting the right accessories is key. I recommend considering high-quality lens accessories that can drastically improve your shots. This article highlights some of my preferred choices that elevate image quality, provide protection, and offer creative options for various styles.
This guide is designed for anyone from beginners to seasoned photographers. Whether you aim to reduce glare, enhance colors, or protect your gear, you’ll find valuable insights here. I’ve compiled a list of standout options based on performance, durability, and practicality.
I cover a mix of options, discussing the benefits and unique features of each. You’ll discover accessories that can help you achieve desired effects and protect your lenses from scratches and dust. Additionally, I’ll share tips on how to choose the right ones based on your photography goals and equipment.
Best Buy Camera Lens Filters
When considering enhancements for photography, choosing the right accessories can make a significant difference. Among various options, specialized attachments can elevate the quality of your images, providing creative control over exposure, colors, and reflections.
I’ve found that selecting high-quality optical accessories is essential for achieving desired results. The right choices can protect the front element of your gear while also benefiting your shooting style in specific situations.
Key Features to Consider
- Material Quality: Look for optical glass over cheaper plastics to avoid distortion.
- Coating: Multi-coated variations help reduce flare and improve light transmission.
- Size and Compatibility: Be sure to account for the diameter of your lens to ensure a proper fit.
- Type: Select filters based on the effect you want, such as polarizing for reducing reflections or neutral density for controlling light intake.
Experimenting with these tools can yield unique effects and improve your photographic outcomes. Investing in quality accessories pays off in both durability and the enhancement of your work.
Usage Tips
- Always check for fingerprints or dust before attaching to avoid blemishes in your images.
- Experiment with different conditions to see how each filter changes the outcome.
- Store them in protective cases to prevent scratches and damage.
In conclusion, carefully curated enhancements not only protect your gear but also expand your creative possibilities. With the right combinations, you can achieve stunning results that reflect your artistic vision.
Choosing the Right Filter for Your Photography Style
Understanding the specific needs of my photographic approach is fundamental in selecting the most suitable accessory for my equipment. Each type serves unique purposes, and I must identify which aligns with my vision.
I prefer to categorize options based on their functions. The choice often reflects the conditions I frequently encounter, and knowing the effects I wish to achieve significantly narrows down my options.
Identifying Needs
For instance, if I often shoot in bright environments, a polarizing option becomes critical. This accessory reduces glare, enhancing the colors and contrast in my images. It’s particularly beneficial for capturing reflections on water surfaces or when photographing subjects through glass.
In low-light settings, a neutral density accessory allows me to reduce the amount of light entering my device, enabling longer exposure times without overexposing my images. This feature is great for achieving motion blur in action shots or creating a dreamy effect in waterfalls.
Wavelength Control
Color correction options are invaluable when I want consistent tones across various lighting situations. Using a warming or cooling accessory helps me manage the color temperature so that my images maintain the desired mood and ambiance.
Protection and Maintenance
Lastly, the protective features of a clear option cannot be overlooked. It shields the lens from scratches, dust, and moisture, ensuring the longevity of my gear without affecting image quality. This basic step in maintenance can save on extensive repairs.
Ultimately, my selection process hinges on understanding my style and the environments I frequent. By identifying specific needs and desired effects, I can make informed decisions that enhance my photography experience.
Polarizing Filters to Eliminate Reflections
I recommend utilizing polarizing optics to effectively manage reflections, particularly when shooting in bright conditions or near water. These accessories enhance color saturation and contrast, providing a clearer view of your subject. They allow you to see beneath the surface of water or glass, revealing details that are otherwise hidden.
Applying this type of accessory is straightforward. Typically, you can rotate the filter to find the ideal angle for reducing glare. When positioned correctly, the result is a significant improvement in image quality, especially during outdoor sessions. Keeping one of these on hand can transform ordinary shots into visually compelling photographs.
Benefits of Using Polarizing Optics
- Reduces Glare: Minimizes reflections from surfaces like water, glass, and wet roads.
- Enhances Colors: Increases saturation of blue skies and green foliage, making them more vibrant.
- Improves Contrast: Heightens the distinction between elements in your images, creating a more dynamic composition.
- Sky and Cloud Detail: Helps to emphasize cloud patterns in your sky shots, adding drama to landscapes.
When selecting polarizing optics, consider the diameter that fits your equipment and ensure compatibility for easy attachment. You may also want to evaluate the optical quality to avoid any degradation of image sharpness. Testing different options can lead to finding the one that complements your shooting style.
- Begin with basic tests to observe the difference in reflections.
- Experiment in various lighting conditions to see its full potential.
- Check results after a few outings to identify which settings yield the best outcomes.
Essential ND Filters for Long Exposure Shots
I find that neutral density filters are indispensable for achieving stunning long exposure captures. These tools reduce the amount of light entering the lens, allowing for longer shutter speeds without overexposing the image. This capability is particularly advantageous when photographing flowing water, clouds, or urban scenes with moving elements.
Selecting the right density level can dramatically influence the outcome. A 6-stop ND filter works well for moderately lit environments, while a 10-stop variant is ideal for bright daylight conditions. My experiences led me to appreciate how these filters not only allow for motion blur but also help in maintaining color accuracy, which can be pivotal for professional quality in the final image.
Benefits of Using ND Filters
- Motion Blur: Create smooth, flowing effects in water and clouds.
- Wide Aperture: Use larger apertures in bright settings for artistic depth of field.
- Exposure Control: Fine-tune exposure settings on bright days without sacrificing shutter speed.
- Color Consistency: Maintain color fidelity when shooting in varying lighting conditions.
In my workflow, experimenting with various filter densities has proven beneficial for mastering long exposure techniques. The experience of capturing a serene sunrise or the hustle of city life with controlled exposure is truly gratifying. Each shot tells a story, where the choice of a filter becomes integral to the narrative I wish to convey.
UV Filters: Are They Still Necessary in Digital Photography?
In my experience, UV filters have lost some of their traditional appeal in the age of digital photography. The main reason for this shift is the advancements in imaging technology that allow cameras to manage UV light effectively. Modern sensors are designed with coatings that naturally filter out UV rays, making the inclusion of an additional filter less critical.
That said, I still keep a UV filter in my kit for a few specific reasons. Primarily, it serves as a protective layer for the front element of the lens. Despite improved durability in lens construction, protecting the glass from dirt, scratches, and moisture is always a smart move. This is particularly relevant for outdoor photography, where conditions can change rapidly.
Performance Considerations
While UV filters may not significantly enhance image quality in most scenarios, there are cases where I find them useful. Here are a few aspects to consider:
- Lens Protection: A filter can act as a shield against potential damage during shoots.
- Reduced Glare: In some conditions, these filters can help minimize glare and reflections.
- Ease of Cleaning: It’s often easier to clean a filter than an expensive lens element.
However, adding any optical element to the front of your lens can have consequences. Minor degradation in image quality or loss of sharpness can occur. It’s advisable to choose high-quality filters to avoid introducing undesirable effects.
In conclusion, while UV filters may not be necessary for controlling UV light, they still play a role in protecting your investment and possibly enhancing practicality in specific situations. My recommendation is to weigh their pros and cons based on your shooting style and environment.
Color Correction Filters for Perfecting White Balance
Utilizing color correction options dramatically improves the accuracy of white balance in imaging. By incorporating these accessories, I can neutralize color casts and achieve true-to-life reproductions of the scene before me.
These tools come in various hues and saturations, allowing for precise adjustments based on the lighting conditions. For example, when shooting under incandescent bulbs, applying a warming filter compensates for the cooler color temperature, enhancing the overall aesthetic of the image.
Types of Color Correction Options
- Neutral Density Filters: These help balance light intensity, essential for bringing out the true colors in bright environments.
- Blue Filters: Perfect for correcting warm tones in overexposed daylight settings.
- Orange Filters: Adjustments for cooler light sources, making them warmer and more natural.
- Green Filters: Particularly useful in scenes dominated by pink or red hues, helping to achieve a balanced palette.
Implementing these accessories not only enhances the color quality but also saves time in post-production, as I can minimize edits related to color correction. Each filter serves a unique purpose and, depending on my shooting environment, helps me master the art of true color representation.
- Evaluate the lighting conditions of the scene.
- Choose the appropriate color correction tool to match the requirements.
- Attach the filter securely to my setup.
- Shoot with confidence, knowing that color accuracy will be maintained.
By adopting color correction accessories, I can elevate my photography, ensuring that the mood and atmosphere of each shot is captured authentically.
Final Insights on Leading Lens Filter Brands
After an extensive comparison of various manufacturers, I recommend considering Hoya and B+W for high-end options, while Tiffen offers great value for enthusiasts. Each brand excels in specific areas, catering to different photographic styles and budgets.
Hoya is known for its exceptional optical clarity and durability, making it suitable for professional use. B+W, with its superior construction, provides reliable performance under challenging conditions. Tiffen stands out for its affordability and solid quality, ideal for beginners and hobbyists.
Comparison Summary
| Brand | Optical Quality | Durability | Price Range | Best For |
|---|---|---|---|---|
| Hoya | Excellent | High | $$$ | Professionals |
| B+W | Outstanding | Very High | $$$$ | Serious Enthusiasts |
| Tiffen | Good | Moderate | $$ | Beginners |
- Select based on your needs: Choose Hoya or B+W for advanced photography, while Tiffen suits those exploring the craft.
- Consider optical factors: Each brand provides unique lens coating technologies that affect light transmission and flare.
- Account for your environment: If you often shoot in harsh conditions, prioritize durability in your selection.
Making an informed choice among these brands will enhance your photographic results significantly. Evaluate your requirements and budget to ensure the perfect match for your creative pursuits.
Best buy camera lense filters
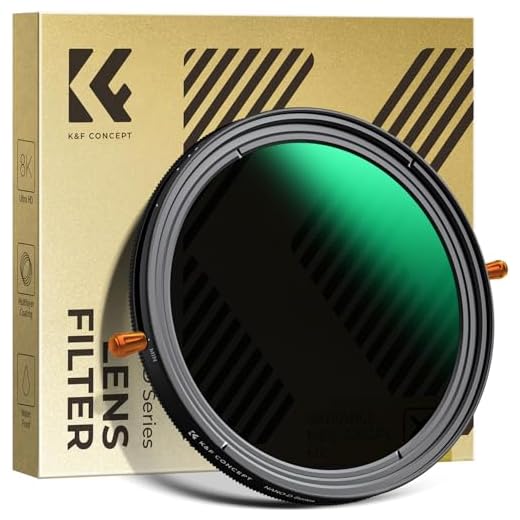
K&F CONCEPT 67mm ND and CPL Filter
Features
| Part Number | AU-KF01.2405 |
| Model | AU-KF01.2405 |
| Size | 67mm |
K&F CONCEPT 77mm CPL Filter
Features
| Part Number | KF01.2895 |
| Size | 77mm |
K&F CONCEPT 86mm ND1000 Filter
Features
| Part Number | au-KF01.1364 |
| Model | KF01.1364 |
| Color | Grey |
| Size | 86mm |
Hoya NXT Plus 77mm UV Filter
Features
| Part Number | A-NXTPL77UV |
| Model | A-NXTPL77UV |
| Color | UV |
| Size | 77 mm |
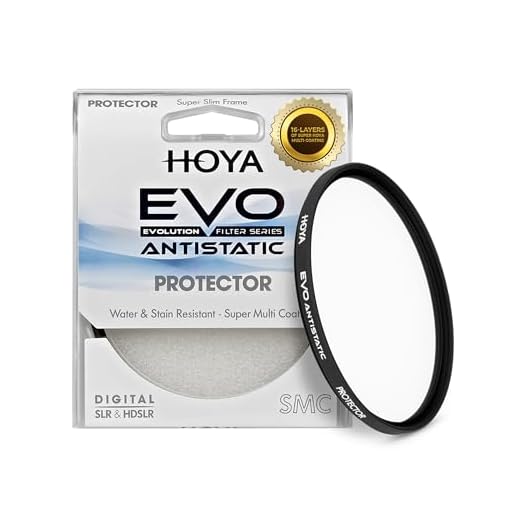
Hoya EVO Antistatic 95mm Lens Filter
Features
| Part Number | XEVA-95UV |
| Model | XEVA-95UV |
| Size | 95 mm |
FAQ:
What types of camera lens filters are recommended for beginners?
For beginners, there are a few key types of camera lens filters that are often recommended. First, a UV filter can help protect the lens from scratches and dust while also reducing UV light, which can cause haziness in images. Second, a polarizing filter is useful for reducing glare from reflective surfaces like water and enhancing colors, especially in outdoor photography. Lastly, a neutral density (ND) filter allows photographers to use longer exposure times in bright conditions, which can be helpful for achieving motion blur in waterfalls or clouds. These filters are relatively easy to use and can significantly improve image quality without requiring extensive technical knowledge.
How do I choose the right filter size for my camera lens?
Choosing the right filter size is essential for ensuring a proper fit on your camera lens. To find the correct size, you should check the diameter of your lens, which is usually indicated on the front of the lens barrel with a “ø” symbol followed by a number (in millimeters). If your lens is 77mm, for example, you will need a 77mm filter. It’s also important to note that if you own multiple lenses with different diameters, you may want to consider a step-up ring adapter. This allows you to use a single filter on various lenses by adapting the size, saving you money and space. Always ensure that the filter is compatible with your lens type, especially if it has any additional features like a hood or a lens cap.