Using specific attachments can dramatically improve your photographic output. By incorporating these accessories, I can address various challenges that arise during shooting, whether concerning light conditions or achieving a particular creative effect.
One accessory I often recommend is a polarizing component, which effectively reduces glare and reflections from surfaces like water and glass. This addition can significantly boost color saturation and contrast, particularly in outdoor environments. I always carry one when photographing landscapes or seascapes, as it enhances detail and clarity in the resulting images.
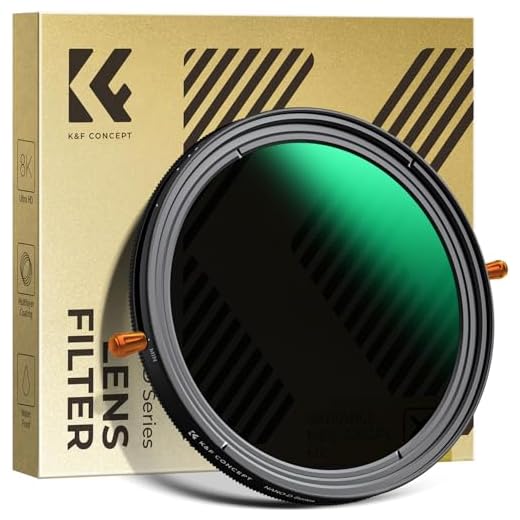
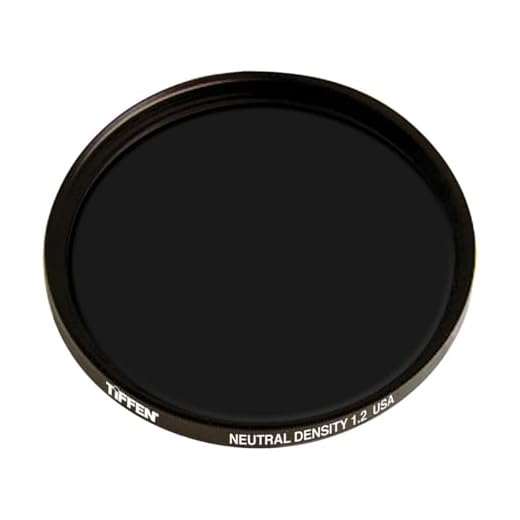
Another option includes neutral density components that allow for longer exposure times by limiting the amount of light entering the device. This is particularly useful for capturing movement, such as flowing water or bustling urban scenes, enabling me to achieve that smooth, dreamy effect while maintaining an appropriately balanced exposure.
Color temperature modifiers also play a key role. They enable precise adjustment of color cast in varied lighting environments, ensuring that my photographs accurately reflect the intended mood and atmosphere. I find that using these tools allows me to have greater control over how the final image feels and looks.
Lens Enhancements for Imaging Devices
I recommend incorporating specific accessories to improve image quality and creativity. These accessories can significantly alter the captured photo’s appearance and characteristics.
Types of Enhancements and Their Benefits
Various accessories serve distinct purposes. Here’s a breakdown of common types and their advantages:
| Type | Function | Benefit |
|---|---|---|
| UV | Reduces haziness caused by UV light. | Enhances clarity, particularly in outdoor shots. |
| Polarizing | Minimizes reflections and increases color saturation. | Creates deeper skies and better water reflections. |
| ND (Neutral Density) | Reduces light entering the lens. | Allows for slower shutter speeds or wider apertures in bright conditions. |
| Close-up | Allows for shooting at closer distances. | Increases detail in macro photography. |
Practical Considerations
When selecting an accessory, consider the specific requirements of each shoot. Quality is paramount; investing in high-grade options can prevent unwanted artifacts and ensure durability. Additionally, certain models can introduce variable effects like graduated tones, enhancing specific parts of the image while keeping others untouched.
I’ve found that having a versatile selection readily available streamlines the creative process. Planning the intended outcome helps in choosing the appropriate accessory to match the photographic vision.
Understanding the Basics of Lens Filters
To enhance the photographic experience, I recommend familiarizing yourself with various types of optical accessories designed to modify the incoming light.
Types of Optical Accessories
- UV Accessory: Primarily used to reduce haze and increase clarity in outdoor scenes.
- Polarizing Accessory: Effective for reducing reflections from surfaces like water and glass, while also enhancing color saturation.
- Neutral Density Accessory: Allows for longer exposure times without overexposure, beneficial for capturing motion blur in flowing water or clouds.
- Color Correction Accessory: Adjusts color balance in different lighting conditions to maintain accurate color representation.
Choosing the Right Optical Accessory
When selecting the right tool, consider the following:
- Assess the lighting conditions you typically encounter.
- Determine your creative goals–different accessories cater to various effects.
- Ensure compatibility with your specific lens diameter to avoid vignetting.
By incorporating the appropriate gear into my toolkit, I significantly improve image quality and versatility in various shooting scenarios.
Different Types of Lens Filters Available
Choosing the right optical accessory can significantly impact your photography. Here’s a breakdown of various types you might consider:
UV Filters
These are typically used to protect the front element of the lens from scratches, dust, and moisture. While their effect on image quality is minimal, they can be a practical addition for outdoor photographers.
Polarizing Filters
Ideal for reducing glare from reflective surfaces like water or glass, polarizing glass enhances color saturation. This type can also deepen skies, making clouds stand out more prominently. Rotation allows you to adjust the effect based on the angle of the light.
Neutral Density Filters
Used to decrease the amount of light entering the lens without affecting color balance, ND glass is perfect for achieving longer exposures during bright conditions. This is particularly beneficial for creating smooth water effects in seascapes.
Graduated Filters
These possess a gradient, transitioning from clear to one color or density. They’re especially useful for balancing exposure between the sky and the ground in landscapes, allowing for a more harmonious image.
Macro Filters
These accessories allow for closer focusing, expanding your ability to capture detailed images of small subjects like insects or flowers. They act as magnifying glasses that attach to the lens, suitable for those without macro capabilities.
Color Filters
Common in film photography and occasionally used in digital, these modify color balance. From warming up skin tones to enhancing the blues in a seascape, they can add a creative touch to photographic endeavors.
Understanding these different types can help tailor your approach to specific photographic goals. Selecting the right equipment can truly complement your style and subject matter.
How UV Filters Protect Your Lens
Using a UV filter is a straightforward way to safeguard your glass. These devices offer a first line of defense against scratches, dust, and moisture while shooting outdoors. They act as a protective shield, so any damage affects the filter instead of the expensive lens.
In bright conditions, these accessories also reduce the haziness caused by ultraviolet light. Although many modern sensors are less sensitive to UV light, these attachments still help to improve clarity and contrast in certain situations, such as high-altitude photography or coastal shots.
Moreover, I find that leaving a UV filter on can simplify maintenance. It’s much easier to clean or replace a filter than to deal with potential damage to the lens itself. Over time, this small investment can save both money and hassle.
Always ensure the filter is of good quality to avoid introducing unwanted artifacts or degradation of image quality. A reputable manufacturer’s product will maintain optical clarity and performance. I recommend regularly checking for scratches or dirt on the filter to ensure it’s working effectively.
Enhancing Colors with Polarizing Filters
Utilizing polarizing tools allows me to heighten color saturation and detail in outdoor shots. By reducing reflections and glare, these attachments can enrich the hues of the sky, making it appear deeper and more vibrant. Vegetation also benefits significantly, showcasing lush greens that stand out against the background.
Functionality and Technique
To maximize the advantages of a polarizing accessory, I rotate it while observing the effects through the viewfinder or LCD screen. The optimal angle often varies based on the light source and the subject’s orientation. By adjusting the degree of polarization, I can control the intensity of colors, enhancing the overall aesthetics of the photograph.
Applications and Best Practices
These tools excel in situations involving bright sunlight or reflective surfaces, such as water or glass. I find them especially useful during midday when light is harsh. Additionally, using this attachment in landscapes can help differentiate between elements in the frame, offering a clearer and more dynamic image. Always ensure proper mounting to avoid vignetting at the corners of the frame.
Experimentation is key; testing various settings will deepen my understanding of how this gear impacts color rendition and overall image quality.
Functions of Neutral Density Filters Explained
I often utilize neutral density glass to control exposure without impacting color balance. These tools enable longer shutter speeds or wider apertures, ideal for achieving desired effects in various lighting conditions. The versatility allows me to maintain image quality while manipulating depth of field or motion blur.
For instance, in bright sunlight, I can reduce light entering the lens, facilitating slower shutter speeds. This technique is particularly advantageous in capturing motion, such as flowing water, rendering a smooth and soft appearance.

The use of ND materials simplifies achieving specific artistic outcomes. I can blur motion while retaining sharp details in other areas, creating a balanced image that draws attention to key subjects. This blend of control is essential in both landscape and portrait preservation.
| Filter Type | Light Reduction | Typical Use |
|---|---|---|
| ND2 | 1 stop | Basic exposure adjustment |
| ND4 | 2 stops | Moderate bright conditions |
| ND8 | 3 stops | High sunny environments |
| ND16 | 4 stops | Extremely bright scenarios |
Embracing these products allows me to remain creative, providing the flexibility needed in varying situations. Their function becomes evident during long exposures at twilight, capturing the ethereal glow while eliminating harsh sunlight interference.
Choosing high-quality variants also mitigates risks of introducing color casts, ensuring that image integrity remains uncompromised. I find that investing in reputable brands yields superior results, vital for professional applications.
Integrating neutral density solutions consistently advances my photographic skills, enhancing both technical and creative outputs. Every click becomes an opportunity to experiment with exposure and artistic vision.
How to Use a Graduated ND Filter
Position the graduated ND filter over your lens so the darker section aligns with the horizon line or the brightest part of your scene. This dramatically balances the exposure between the sky and foreground. I typically hold the filter in place by using a filter holder or by screwing it directly onto the lens thread.
Adjust the filter’s position, moving it up or down to find the ideal spot, ensuring the transition blends seamlessly with the rest of the composition. Assess through the viewfinder or on the LCD screen to confirm that the graduation meets your artistic vision.

When shooting, it’s advisable to use manual mode. Set the exposure for the foreground first, then check the sky’s brightness. Modify the shutter speed as needed to achieve the desired effect. I often experiment with exposure values–slight adjustments can yield varying results.
Utilize a circular polarizer in conjunction with the graduated ND filter to enhance colors and reduce glare. This combination is particularly useful during sunrise or sunset, making the colors pop while maintaining detail in both shadows and highlights.
Post-processing can be minimized by achieving a balanced exposure in-camera; however, I still recommend shooting in RAW to allow for more flexibility in adjustments later on. This can help maintain image quality, especially in the highlights.
Finally, regularly clean your filter to avoid any unwanted lens flare or haziness in your shots. A well-maintained graduated ND filter can significantly boost the quality of your images.
Creating Depth with Soft Focus Filters
Incorporating a soft focus accessory into my shooting toolkit allows me to achieve a dreamy aesthetic, enhancing the feeling of depth in my images. This technique softens the overall sharpness, creating a gentle blend of colors and tones while maintaining a clear focal point.
Choosing the Right Soft Focus Lens Accessory
When selecting a soft focus lens accessory, I look for options that offer varying levels of diffusion. Some provide a subtle effect, while others can create a more pronounced blur. Removable diffusion elements also allow me to control how much softness I want in my shots, giving me flexibility based on the scene or subject.

Application Tips for Maximum Impact
To achieve a balanced depth, I often focus on subjects in the foreground while allowing the background to soften naturally. Experimenting with aperture settings can enhance the effect–wider openings deliver more separation from the background. Additionally, shooting during golden hour or with soft ambient lighting amplifies the enchanting quality of the diffusion, resulting in visually captivating photographs.
Using Infrared Filters for Unique Effects
Infrared filters open up creative avenues that traditional optics can’t match. I recommend experimenting with these components to transform how you perceive scenes and subjects.
Key Considerations
- Choose a specific infrared wavelength. Most models block visible light while allowing infrared light to pass through.
- Test different exposure settings, as infrared light behaves differently, often requiring longer exposures or higher ISO settings.
- Use a tripod to stabilize the camera during extended exposures, ensuring clarity and detail in the final image.
Captivating Outcomes
Images can yield striking results characterized by unusual colors and contrasts. Vegetation, typically rendered in shades of green, often appears white, while structures gain dramatic silhouettes. This inversion of familiar color palettes can evoke emotions and create a surreal atmosphere.
- Landscapes transform into ethereal scenes, capturing elements in a way that feels otherworldly.
- Portraits take on a unique quality, with skin tones rendered soft and luminous, enhancing the subject’s features.
Develop a consistent approach to processing your shots post-capture. Software tools can help refine unique tones and contrast levels, making the infrared effect even more pronounced.
Through experimentation and practice, these optical modifications enhance creativity, providing a fresh perspective on familiar subjects. Enjoy exploring what infrared can offer!
Benefits of Using Circular Polarizers
Utilizing circular polarizers significantly enhances image quality by reducing glare, increasing color saturation, and improving contrast. They are indispensable tools for capturing vibrant images in reflective environments such as water, glass, and foliage.
Reduction of Glare
One notable advantage is the polarizer’s ability to diminish unwanted reflections. Positioning the polarizer correctly while rotating it allows me to adjust the angle of polarization, effectively controlling reflections and ensuring that the subject remains clear and vivid.
Enhanced Color Saturation
Alongside glare reduction, these accessories amplify color intensity. By removing scattered light, landscapes become richer, and skies appear bluer. I often apply a polarizer when photographing nature, as it helps to create depth and brings out the tones that might otherwise be muted.
| Benefit | Description |
|---|---|
| Glare Reduction | Eliminates reflections from water surfaces and glass. |
| Color Saturation | Intensifies blues, greens, and overall image vibrancy. |
| Improved Contrast | Enhances distinction between the subject and background. |
In practical usage, I always keep a circular polarizer in my gear for outdoor shoots. It transforms mundane scenes into striking visuals without the need for excessive post-processing. A small adjustment can yield spectacular results, making it a valuable addition to my toolkit.
Understanding Color Balance with Colored Filters
To achieve accurate color reproduction, I often utilize colored glass or gels. These tools adjust the light spectrum entering the lens, thereby correcting or enhancing the overall color balance in my images.
For instance, using a warming filter can add a touch of warmth to a scene, ideal for sunsets or skin tones. Conversely, cooling filters can impart a bluish hue, useful in scenes requiring a cooler ambiance.
When I aim to capture landscapes, applying green filters will make foliage appear richer. Similarly, red filters can enhance the contrast of clouds against a blue sky, accentuating drama in the composition.
It’s crucial to be aware of the color temperature setting on my device. Adjusting it appropriately allows me to compensate for any shifts caused by the applied colored media. Each choice can significantly impact the mood and feel of the photograph, so experimentation can yield exciting outcomes.
Additionally, I pay attention to the situation’s lighting conditions. Certain filters work more effectively under specific types of lighting. For instance, a specific color may not produce the desired effect in harsh midday sunlight but can turn captivating during the golden hour.
In practice, I find that combining different colored gels can produce unique effects, offering more control over the final image. This versatility enables creative exploration and better visual storytelling.
How to Clean and Maintain Lens Filters
Regular upkeep of protective optics is key to preserving image quality. Utilize a microfiber cloth specifically designed for optics, as it minimizes scratches and dust transfer. I recommend starting by gently removing loose dust with a blower or soft brush.
Cleaning Steps
- Lightly blow off any loose particles before contact.
- Dampen a microfiber cloth with a small amount of lens cleaning solution. Avoid household cleaners as they can leave residues.
- Wipe the surface in a circular motion, applying minimal pressure to prevent streaking.
- For stubborn spots, use a clean section of the cloth or a dedicated cleaning pad.
Storage and Handling Tips
- Always keep in a padded case to avoid scratches and impacts.
- Store upright to prevent dust settling inside the edges.
- Avoid touching the surface with fingers; if touch occurs, clean immediately to prevent oils from setting.
- Regularly inspect for damage, such as scratches or cracks, and replace if compromised.
Careful attention to these practices extends longevity and maintains performance, ensuring optimal clarity in every shot.
Effects of Lens Filters on Exposure Settings
Using accessories can significantly influence exposure settings, allowing for creative and technical adjustments. For example, applying a neutral density type enables me to extend shutter speeds while maintaining aperture settings, perfect for capturing silky water effects in bright conditions.
Shutter Speed Modulation
I often utilize these accessories to create motion blur. With faster shutter speeds, capturing sharp images of a moving subject becomes possible. Conversely, slowing it down allows for artistic effects, especially in water scenes or during low-light conditions.
Aperture Flexibility
Using specific types enables the use of wider apertures in bright light, facilitating a shallow depth of field. This approach maintains excellent focus on subjects while creating a pleasing bokeh. It’s crucial to evaluate the available light and adjust settings accordingly to achieve the desired exposure without clipping highlights.
Best Practices for Combining Multiple Filters
To achieve the desired effects while using several accessories simultaneously, I follow these guidelines:
1. Choose Lightweight Options
Using lighter add-ons reduces the likelihood of vignetting, which can occur with stacking heavier accessories. Evaluate each attachment’s weight before combining them on your lens.
2. Prioritize Optical Quality
Ensure each accessory is of high optical quality. Using inferior products can degrade image clarity. I invest in reputable brands to maintain visual fidelity.
3. Maintain Proper Order
- Attach the polarizer first to manage reflections effectively before light hits other tools.
- Put neutral density options last to control exposure without affecting color.
4. Test for Specific Situations
With various conditions–from bright sunlight to low-light scenarios–I experiment with different combinations. I find that trial and error leads to optimal settings for unique challenges.
5. Be Mindful of Light Loss
Stacking multiple add-ons can result in significant light loss, impacting exposure. Adjust shutter speed or ISO accordingly to compensate for this reduction.
6. Avoid Flare and Ghosting
Using too many attachments can increase the risk of flare. Whenever possible, I limit the number of add-ons and position them carefully to minimize unwanted reflections.
7. Use a Lens Hood
Add a hood for added protection and glare reduction. This accessory becomes crucial when multiple add-ons are in use, maintaining contrast and color integrity.
8. Regularly Clean and Check
- Clean each accessory to prevent dust buildup that can affect image sharpness.
- Regularly inspect for scratches or marks that could hinder performance.
9. Consider a Circular Polarizer
If combining with other tools, a circular polarizer often offers the best versatility, enhancing colors and contrast without losing flexibility.
10. Know the Limitations
Understand that there is a point where combining accessories may yield diminishing returns. I stay within two to three attachments to avoid complications.
Choosing the Right Filter Size for Your Lens
Measure the diameter of your lens to determine the appropriate size accessory. This dimension is commonly indicated on the front of the lens and marked with a “ø” symbol, followed by a number (e.g., 58mm). Ensure the selected size matches this measurement.
Here are specific steps to help you choose:
- Check the lens barrel for the diameter marking, usually near the front element.
- Refer to the lens specifications in user manuals or manufacturer websites if unclear.
- Consider using step-up or step-down rings if you have different sizes in your collection, allowing more flexibility.
When using multiple lenses with varying diameters, prioritize purchasing larger accessories, as they fit a wider range of lenses using step rings. This approach minimizes vignetting and maintains image quality.
Always double-check compatibility before purchase. Some brands may have design variations or unique features that affect fit. If necessary, test the accessory in-store if possible.
Adequate storage and protection of these attachments is crucial; consider investing in a dedicated case to prevent scratches and damage during transport.
Impact of Filters on Image Sharpness
To enhance sharpness while capturing an image, it’s crucial to be mindful of the additional glass elements introduced by optical accessories. Using an accessory can result in a subtle loss of detail, primarily due to light refraction and reflection. To mitigate this, I ensure I use high-quality options that feature multi-coating to reduce flare and improve clarity.
Quality and Its Role
- Higher-quality options maintain sharpness better than lower-end variants.
- Multi-coated options reduce glare, improving overall image integrity.
- Check reviews to identify products known for maintaining clarity.
Proper Usage Techniques
- Use the lowest possible exposure settings to reduce potential loss of detail.
- Avoid stacking multiple accessories unless necessary; each added layer can complicate light transmission.
- Conduct tests to determine how specific options affect your gear.
Ultimately, I find that being selective and strategic in my choice of optical accessories greatly aids in preserving the sharpness of my captures.
Using Filters for Landscape Photography
For capturing breathtaking scenes, I rely heavily on specific enhancements that elevate the quality of my shots. Incorporating circular polarizers dramatically boosts color saturation and contrast, especially in lush environments. This tool is supreme when photographing bodies of water or foliage, eliminating glare and providing clarity.
Neutral Density Techniques
Utilizing neutral density options allows me to slow down shutter speeds significantly. By extending exposure times, I can create smooth, ethereal effects in flowing water or clouds. It’s crucial to select the right density level based on the available light; I often carry a set ranging from 3-stop to 10-stop options for versatility.
Graduated Filters in Action
When addressing the challenge of high-contrast scenes, graduated choices become invaluable. I position these to transition smoothly between the brilliant sky and the darker foreground. This strategy helps me maintain detail and avoid a washed-out look in bright environments. I recommend experimenting with both hard and soft transitions to find the perfect fit for varying conditions.
Incorporating these enhancements proficiently transforms ordinary captures into visually compelling compositions. Remember to adjust settings accordingly, as each addition modifies light entry and exposure. With practice, these techniques can define a unique style in my photographic work.
How to Use Filters for Portrait Photography
Utilizing specific accessories can dramatically enhance portrait shots. I recommend a few key techniques for achieving stunning results.
Choose the Right Accessory
Select a circular polarizer to reduce glare and reflections, ensuring skin tones appear more natural. This tool can also intensify colors in backgrounds, creating a pleasing contrast with your subject.
Soft Focus Techniques
- Using a soft focus attachment softens edges, imparting a dreamlike quality to portraits.
- Position the accessory close to the lens for a more pronounced effect.
- Be mindful of the angle; adjusting can yield varied softness that complements facial features.
Experiment with Colored Tools
Incorporate colored items to manipulate the mood of your shots. For instance, a warm filter can enhance skin tones, while cooler hues can evoke a more dramatic feel. Test different colors to find the right match for your subject’s complexion.
Lighting Considerations
Always consider lighting conditions. A neutral density option will allow for wider apertures in bright settings, enabling beautiful background blur and keeping the subject sharply in focus.
Protecting Your Gear
Adding a UV type can safeguard your lens from scratches and harmful UV rays, preserving image clarity. Always have a protective accessory on your lens, ensuring it stays in optimal condition.
Final Thoughts
Experimenting with different accessories can lead to unique artistic expressions. Adjust settings accordingly and observe how each option interacts with light and your subject. The right choice can elevate your portraits significantly.
Tips for Using Filters in Low Light Conditions
I recommend using a tripod to stabilize your setup, ensuring sharp images without introducing camera shake. Longer exposure times are often necessary, so this technique is particularly useful.
Neutral Density Filters
When shooting in dim environments, neutral density options can be your ally. They lower the light intake without distorting colors, allowing for smooth motion blur effects even at slow shutter speeds. Adjust your aperture and ISO accordingly to maintain the desired exposure.
Polarizing Options
A polarizing choice can enhance contrast and saturation even with lower light levels. By reducing reflections and glare, these accessories can make colors pop, especially in scenes with water or wet surfaces. Keep an eye on your angles for optimal results.
Consider using warm-colored selections to create a cozy atmosphere. In shadowy settings, these can add vibrance and life to your images.
Regularly check for flare and ghosting with these accessories. Remove any sources of light that may be creeping into your frame, which can distract from the overall effect you aim to achieve.
Understanding Filter Compatibility with Different Lenses
Before purchasing a filter, I always check the thread size of my lens. This measurement is crucial as it dictates which accessories can fit. Many manufacturers specify this in millimeters, often marked directly on the lens barrel. Choosing a filter with the same diameter is essential to ensure a secure fit.
Additionally, I consider the type of lens I’m working with. Wide-angle lenses may experience vignetting when paired with thicker filters, so opting for low-profile versions can prevent unwanted dark corners in my images. If I’m using a zoom lens, I often search for filters that can accommodate the entire zoom range without affecting image quality.
For lenses with specialized coatings or designs, like macro or fisheye optics, verifying compatibility is key. Some might have unique threads or require specific filters tailored for their characteristics. Always refer to the manufacturer’s guidelines.
In instances where I want to use a filter on multiple lenses, investing in step-up rings can be a smart move. These allow me to attach larger diameter filters to smaller threaded lenses, ultimately saving money while maximizing utility.
If I’m switching between camera systems, it’s crucial to note that not all filters are cross-compatible. Adapters might be necessary, but they can lead to additional complications like light leaks or reduced image quality. Hence, I weigh the benefits of each setup carefully.
Lastly, I prioritize high-quality brands when selecting filters. Quality materials enhance durability and reduce the chances of optical distortion, which is vital for achieving the best possible results in my photography endeavors.
Exploring Magnetic Lens Filters
Magnetic optics provide an innovative way to attach and swap optical elements quickly. This design leverages magnets for swift changes, making it ideal for dynamic shooting scenarios.
This system utilizes a circular frame that attaches to the lens, allowing various glass or resin components to snap on with ease. The robust hold of magnets ensures stability while preventing accidental dislodgement during active use.
With magnetic setups, I can transition between effects without the hassle of threading or screwing attachments. This feature proves invaluable when capturing fleeting moments in fast-paced environments.
Another key benefit is the reduction in lens flare and lens ghosting. Since these assemblies provide optimal alignment, the risk of stray light entering the scene is minimized, resulting in cleaner images.
For those looking to modify contrast and saturation, magnetic options also include variances like ND (neutral density) designs, allowing for control over exposure while maintaining image quality. I find that using these components enhances my visual storytelling by facilitating creative choices without compromising detail.
To get the most from these systems, ensure compatibility with your gear. Magnetic assemblies typically come in standard sizes, yet checking specifications is crucial to avoid mishaps.
| Advantages | Considerations |
|---|---|
| Quick attachment and removal | Device compatibility is necessary |
| Reduced lens flare | Magnetic strength varies |
| Maintain image quality | Accessory cost may increase |
In conclusion, experimenting with magnetic optics can significantly enhance my photographic capabilities, providing both convenience and creative freedom when capturing scenes. Adopting this approach might just simplify the process of image creation in a myriad of environments.
How to Use Filters for Video Production
Begin with a clear purpose for each accessory–tailor your choice to the desired effect on-screen. For example, implementing a polarizing option can diminish reflections from surfaces while enhancing contrast in skies. This becomes particularly beneficial during outdoor shoots. Adjusting the angle of the polarizer allows me to filter reflections significantly, altering the scene’s overall ambiance.
Balancing Exposure
Utilizing neutral density components helps me control exposure without sacrificing aperture or shutter speed. This is particularly useful in bright conditions or when achieving that cinematic motion blur. By using different density levels, I can find the perfect compromise between light intake and the artistic intent.
| Filter Type | Effect | Recommended Use |
|---|---|---|
| Polarizing | Reduces glare, enhances colors | Outdoor, reflective surfaces |
| ND | Allows for wider apertures in bright light | Maintaining motion blur |
| Graduated ND | Balances bright skies with darker landscapes | Sunrise/sunset scenes |
| Color | Adds color casts | Artistic scenes, special effects |
Composition and Artistic Effects
Incorporating specialty add-ons like soft focus changes the depth of field in a scene. This creates a dreamlike quality, perfect for romantic or nostalgic visuals. Experiment with various levels of diffusion to determine what resonates best with the project’s narrative.
Implementing an infrared variant can unlock striking and surreal visuals, diverging from typical color palettes. This approach requires testing to achieve familiarity with its unique characteristics and outputs.
Combine various elements judiciously; compatibility is key in achieving desired outcomes without compromising the image quality. Always ensure the threads on both the accessory and the lens match to avoid unintended artifacts.
Choosing Between Screw-On and Slide-In Filters
For versatility and ease of use, I often recommend screw-on options for most photographers. They are straightforward to attach and remove, making them ideal for quick adjustments during shoots. Sizes match the lens thread, which simplifies the selection process. Common options include UV and polarizing variations, easily found with standard diameters.
Considerations for Screw-On Filters
Screw-on types provide excellent convenience but can impact the overall thickness of the lens assembly. This increase can lead to vignetting, especially on wide-angle setups. Evaluating the filter thickness against your shooting needs is wise. Also, be mindful of choosing quality glass, as lower-quality materials could introduce unwanted distortions.
Advantages of Slide-In Filters
Slide-in alternatives shine in situations requiring multiple filters simultaneously. Utilizing a filter holder allows me to stack filters without worrying about lens damage or light loss due to stacking thicker options. Commonly used in landscape scenarios, these types also tend to be easier to clean given their design. However, slide-in tools typically require additional gear, increasing carry weight.
| Feature | Screw-On Filters | Slide-In Filters |
|---|---|---|
| Mounting Ease | Simple attachment | Requires holder |
| Thickness Impact | Can cause vignetting | Minimal increase |
| Versatility | Fit specific threads | Stack multiple options |
| Cleaning | Direct surface cleaning | Easy removal for cleaning |
In choosing between these options, weigh your shooting style against the added convenience of quick changes versus the versatility of multiple filter use. Each type has unique benefits to enhance specific photographic needs.
When to Use a Filter in Macro Photography
Utilizing a circular polarizer in macro shots significantly reduces reflections, enhancing color saturation and contrast. This is particularly helpful when capturing subjects like flowers or insects, as it minimizes glare and highlights vibrant details.
Employing a neutral density option can be beneficial in controlling exposure while maintaining depth of field. This allows for creative flexibility when aiming to achieve that buttery bokeh effect, giving a more pronounced focus on your subject.
Soft focus glass not only brings a dreamlike quality but also smooths out hard edges, making it a fantastic choice when working on close-up portraits, offering a pleasing aesthetic that softens imperfections.
Keep in mind the importance of lighting. Using a warm-colored filter can enhance the warmth of your scene, emphasizing the golden tones often present in macro images of nature.
For nighttime macro photography, it’s wise to consider infrared options, which can reveal unique details and textures that are invisible to the naked eye, adding an unusual twist to your captures.
Regularly assess your commitment to using filters. Test various combinations and determine which ones elevate your work and best suit your style in close-up photography.
Evaluating the Cost of High-Quality Filters
Investing in premium optical accessories often means a higher initial expenditure, but the benefits can justify the cost. It’s essential to assess how a well-made filter enhances image quality and provides durability compared to lower-priced alternatives.
Factors Influencing Price
Manufacturing processes, materials used, and optical precision heavily influence the pricing of these accessories. High-grade glass elements and advanced coatings can significantly reduce glare, reflections, and color casts, ensuring images retain clarity and color accuracy.
Additionally, the brand reputation plays a role in establishing market value. Established manufacturers invest in research and development, often leading to innovative designs that enhance user experience and results.
Long-term Investment Returns
Although the initial cost may be higher, quality accessories typically have a longer lifespan. They resist scratches better and are less prone to damage, saving money in the long run on replacements. Furthermore, superior optics can elevate the overall quality of photographs, ultimately enhancing one’s portfolio and potential earnings.
In summary, investing in high-quality optical accessories can prove beneficial over time, both in terms of durability and the quality of the captured images.
The Role of Filters in Astrophotography
Using the right optical accessories can significantly enhance the night sky imagery. I often opt for specific tools that help in capturing clearer and more vibrant celestial scenes. Here are some key utilities I rely on:
Light Pollution Reduction
Light pollution is a major challenge in astrophotography. Utilizing a light pollution suppression accessory can greatly improve the contrast and details of stars. These tools filter out unwanted artificial light, allowing the natural beauty of celestial objects to shine through.
H-alpha Filters for Nebulae
For those focusing on emission nebulae, H-alpha accessories are invaluable. They isolate the specific red wavelengths emitted by hydrogen gases, enabling the capture of stunning details and deep colors in these celestial wonders.
- Enhances visibility of red-shifted objects
- Boosts image contrast within nebulae
- Useful in capturing faint objects
Color Filters for Planetary Imaging
Implementing color-based tools can yield extraordinary results in planetary photography. By selecting particular wavelengths, I can reveal fine details in the atmospheres of planets and adjust color representation for a more striking final image.
- Red filters enhance details on Mars
- Green filters improve contrast on Jupiter
- Blue filters capture details on Uranus and Neptune
Positioning these devices effectively and ensuring compatibility with my setup results in images that are more vivid and true to the majestic beauty scattered across our universe.
Real-World Case Studies of Filter Use
During a recent trip to the Rocky Mountains, I utilized a polarizing filter while capturing the vivid colors of the autumn foliage. This choice enhanced the contrast between the leaves and the sky, making the blues more pronounced and the reds more vibrant. The resulting images had a depth that purely natural lighting could not achieve, showcasing the beauty of nature in a striking way.
At a beach photoshoot, a neutral density (ND) filter proved invaluable. I aimed to create a smooth, ethereal effect on the water by using a long exposure during midday. By blocking out excess light, the ND allowed me to experiment with exposure settings, resulting in beautifully blurred waves while maintaining a sharp foreground with well-defined details on the rocks. This technique made the scene more captivating and surreal.
In a portrait session at sunset, I reached for a soft-focus filter. This particular choice added a dreamlike quality to the images, softening the subject’s features while retaining enough detail to be flattering. The warm light of the setting sun combined with the filter created a romantic and artistic ambiance that was well received by my client.
Experimenting with an infrared filter revealed another layer of creativity. While photographing a local park, this filter transformed the green foliage into an almost white appearance, while the sky turned a dark, moody hue. The results were unexpected, evoking a sense of otherworldliness and allowing for unique compositions I had not envisioned prior to using the infrared effect.
While shooting a wedding, I opted for a graduated ND filter to even out the exposure between the bright sky and the darker foreground. This allowed me to retain detail in both areas without sacrificing image quality. The couple’s outdoor ceremony was beautifully lit, and the final images captured the moment without harsh glare or shadows.
These real-world experiences illustrate how specific accessories not only enhance the quality of photographs but also open up creative paths I could explore, ultimately enriching my portfolio with diverse imagery.
Potential Drawbacks of Using Filters
When incorporating additional elements onto my camera setup, I’ve encountered several limitations that are important to consider. One significant issue is the risk of decreased image sharpness. Adding extra glass can introduce optical aberrations, especially if the accessory isn’t of high quality, leading to softer images.
An increase in lens flare and ghosting effects can also occur. Light can bounce off the surfaces of these added components, producing unwanted artifacts that detract from image quality.
Another factor is the impact on exposure. Certain types add density, requiring adjustments in settings like shutter speed or aperture to maintain ideal lighting conditions. This might complicate shooting in dynamic environments where rapid changes in light occur.
Furthermore, the more I stack components, the greater the chance of vignetting, especially at wider apertures. This darkening around the corners limits my creative choices in framing.
Finally, physical handling must be considered. Each accessory requires additional care and maintenance, increasing the likelihood of scratches or smudges if not properly kept, which directly affects image presentation.
How to Avoid Vignetting with Filters
Choosing the right diameter for the accessory is key. Use filters that match the size of your lens to minimize chances of darkening at the edges.
The thickness of these accessories can also influence light distribution. Opt for slim profiles when possible, as they reduce the risk of creating shade around the corners of your images.
Always ensure that your filter is clean. Dust and smudges can exacerbate vignetting effects by obstructing light entering the lens. Prioritize keeping the surface pristine.
Another technique involves adjusting your aperture settings. Closing down the aperture can help lessen dark corners and achieve a more balanced exposure throughout the frame.
Be mindful of the stacking; overly combining multiple elements can lead to unwanted side effects including vignetting. Limit yourself to one to two pieces to maintain image integrity.
Using lens hoods can also assist in controlling light and minimizing vignetting. These accessories direct light properly into the lens, reducing the chances of edge darkness.
Finally, consider post-processing methods to correct any remaining issues. Software solutions can effectively amend small amounts of vignetting during editing, restoring overall image quality.
| Tip | Description |
|---|---|
| Match Filter Size | Using the correct diameter prevents edge darkening. |
| Opt for Slim Filters | Thinner profiles reduce shading around corners. |
| Keep Filters Clean | Dust and smudges can increase vignetting effects. |
| Adjust Aperture Settings | Narrowing aperture can help even out exposure. |
| Limit Stacking | Minimize the use of multiple accessories. |
| Use Lens Hoods | Hoods help control light entering the lens. |
| Post-Processing Corrections | Edit images to fix any residual vignetting. |
Understanding Filter Ratings and Specifications
Filter ratings and specifications are crucial when selecting the right accessory to enhance imaging. Here’s what I consider essential:
- Optical Coating: Check for multi-coating, which minimizes reflections and enhances light transmission. A high-quality coating reduces glare and ghosting in images.
- Material Quality: Look for high-index glass or optical resin. This affects clarity and scratching resistance. Glass typically offers superior quality.
- Filter Factor: This indicates the amount of light loss. A filter factor of 2 means a one-stop reduction in light. It’s crucial for adjusting exposure settings accurately.
- Thickness: Thinner models reduce vignetting, especially on wide-angle lenses. Choosing the right thickness can preserve image quality at the extreme edges.
- Measurement Standards: Familiarize yourself with the different standards like the T-stop or f-stop ratios to understand how filters affect exposure and aperture settings.
I always analyze these specifications before purchasing a filter. Knowing the exact ratings can significantly influence the quality of my shots, allowing for better control over the final output.
Using Multi-Coated Filters for Better Results
Opting for multi-coated options significantly enhances image quality by reducing reflections and flare. These specialized accessories feature several layers of coating that improve light transmission and minimize ghosting, resulting in clearer and more vibrant images.
Advantages of Multi-Coated Options
- Greater Light Transmission: Higher percentage of light reaches the sensor, enhancing exposure accuracy.
- Reduced Flare: Reflection on the glass surface is minimized, which is particularly beneficial in high-contrast scenes.
- Improved Color Fidelity: Less color distortion allows for more accurate color representation, essential for professional work.
Investing in multi-coated variants can prove beneficial in various scenarios, especially under bright sunlight or when shooting towards a light source.
Application Tips
- Keep your lens clean: Regular cleaning helps maintain the effectiveness of coatings.
- Utilize for specific settings: Use them for landscapes, architecture, and any scene with high dynamic range.
- Combine with other tools: Pairing with other accessories like polarizers can enhance results even further.
In my experience, using these types not only elevates the overall quality of my images but also minimizes post-processing efforts by offering a clearer starting point. Consider multi-coated options to take image quality to the next level.
Comparison of Popular Filter Brands
After extensive personal experimentation, I’ve identified key brands that consistently deliver high-quality results. Below is a comparison table highlighting some of the most reputable options available.
Filter Brand Overview
| Brand | Key Features | Price Range | Best For |
|---|---|---|---|
| B+W | Multi-coated, durable construction, renowned for UV options | $$$ | Professional use and versatility |
| Hoya | Wide selection, affordable, great for beginners | $$ | Amateur photographers and casual users |
| Lee Filters | Modular systems, acclaimed ND options, high-quality resin | $$$$ | Landscape and studio photographers |
| Tiffen | Strong color correction, unique effects, solid reputation | $$ | Video and film production |
| NiSi | Advanced optical design, high international acclaim, innovative technology | $$$ | Advanced photographers seeking creativity |
Through my findings, I observed that B+W stands out for its reliability and build quality, while Hoya offers cost-effective solutions for newcomers. Lee Filters is my go-to for specialized projects, especially when using gradient options. Tiffen is unbeatable for cinematic endeavors, and NiSi introduces innovative tools that expand artistic possibilities. Make sure to align your choice with your specific photographic needs to maximize results.
Tips for Assessing Filter Quality
Examine the construction. A high-quality piece should feature robust materials resistant to scratches and impacts. Look for optical glass instead of lower-grade plastics.
Check for multi-coating. Effective models often have several layers that reduce glare and enhance light transmission while decreasing reflections.
Evaluate the color cast. Hold the filter up to a light source, and observe any tint. A neutral filter should not disrupt the color balance of your images.
Test the clarity. Look through the filter to ensure it doesn’t introduce distortion or image softness. A good unit will maintain image sharpness across the frame.
Review user feedback. Research reviews from fellow photographers. Experiences shared can reveal insights about performance that specifications might not reflect.
Consider brand reputation. Established manufacturers have a track record, which can be a reliable indicator of product quality and customer support.
Assess compatibility with your equipment. Ensure that the size and type of the accessory fit correctly with your current lens system.
Compare prices, but focus on value. A higher price doesn’t always ensure superior quality; invest wisely by balancing cost with performance attributes.
Look for warranties. Reliable manufacturers often provide guarantees, indicating confidence in their offerings and providing peace of mind for buyers.
Using Light Pollution Filters for City Photography
Light pollution filters are indispensable tools for capturing urban nocturnal scenes. Their primary function is to minimize the effects of artificial light, making night photography more effective.
In cities, excessive artificial illumination can wash out colors and details. By employing a light pollution filter, I can effectively enhance the clarity and contrast of my images. Here are some key points to consider:
- Color Balance: These filters target specific wavelengths emitted by streetlights, thereby improving the overall color accuracy in my shots.
- Increased Contrast: By reducing haze caused by light pollution, these accessories help bring out the details in shadows and highlights.
- Vibrant Skies: In urban environments, capturing the brilliance of the night sky becomes achievable, as filters can suppress unwanted city lights that obscure celestial features.
- Exposure Adjustments: Using these filters often requires some adjustments to exposure settings, such as increasing the ISO or prolonging the shutter speed to achieve well-exposed images.
- Compatibility: Ensuring that the selected filter fits my lens properly is crucial; I always double-check the diameter before purchasing.
During my urban photography excursions, I typically pair light pollution filters with a sturdy tripod. This combination allows me to take longer exposures without losing image quality, providing sharp, vibrant nighttime photographs.
Experimenting with these tools not only enhances my creative options but also helps in capturing the essence of city life against the backdrop of a stunning night sky.