


I recommend verifying the mount type before attempting to swap optical devices between older film setups and the latest electronic models. Each manufacturer has distinct attachment systems designed for their specific range of devices, which can limit interchangeability. Consult your device manual or the manufacturer’s website to confirm compatibility.
Often, an adapter can bridge the gap between different mount types, allowing use of specific optics on varied models. However, keep in mind that such adapters may impact performance, particularly in terms of autofocus and optical quality. I suggest conducting thorough research on available adapters and user reviews.

Additionally, pay attention to focal lengths. While some attachments may fit physically, they may not provide the expected field of view or depth of field due to differences in sensor sizes. Testing with various configurations is advisable to determine the best setup for your photographic goals.
Is Lenses Interchangeable on SLR 9mm to Digital Cameras
The compatibility of optics across various systems greatly depends on the specific mounts used by each apparatus. For those with a keen interest in using a specific 9mm optical attachment with modern imaging devices, it’s critical to confirm the mount type.
If the attachment is designed for a certain brand’s mirror mechanism, it might not seamlessly fit onto another brand or model without an adapter. However, using an adapter can sometimes allow you to utilize the older gear on newer bodies, though this may result in limitations regarding functionalities such as autofocus or image stabilization.
Adapter Recommendations
When considering an adapter, it’s wise to research quality options that offer both mechanical stability and electrical connectivity. For example, brands like Fotodiox or Metabones may provide reliable solutions that uphold image quality, but thorough reviews of individual products are advisable.
Performance Considerations
Be aware that even with a proper adapter, the resulting image quality may vary. The optical formula of the 9mm may not translate perfectly to a different sensor format, thus affecting depth of field and aberrations. Conduct tests to understand how your combination performs in real conditions.
Understanding Lens Compatibility
To achieve optimal results when swapping optical attachments between different systems, research the specific mount types and compatibility requirements of each device. Every manufacturer has its unique alignment and design features that can affect how components work together.
Manufacturer Compatibility
Consider sticking to products from the same manufacturer whenever possible, as these combinations are tested for performance and reliability. Adapters are available, but they can introduce limitations such as loss of autofocus and reduced image quality.
Crop Factor Consideration
Be aware of how the crop factor of a sensor influences the effective focal length. This aspect is crucial when transitioning an optic designed for one type of body onto another; the field of view can vary significantly. Always calculate the effective range to avoid misjudgment in framing your shots.
Lastly, consult user forums and resources that focus on your specific models. Knowledge shared by other users can provide valuable insights and tips tailored to your needs.
Differences Between Traditional and Modern Imaging Devices
Understanding the distinctions between traditional and modern imaging devices is key to making informed choices. Traditional devices typically utilize a mechanical system with mirrors that reflect light through an optical viewfinder, while modern gadgets rely on sensors to capture images directly. This fundamental difference impacts how images are composed and viewed.
In traditional models, the viewfinder shows an optical image as seen through the lens, providing an accurate representation of the scene. Conversely, many modern devices display a digital snapshot on an LCD or electronic viewfinder, which can sometimes lag or show a processed version of the image rather than the pure light passing through the optics.
Feature sets vary significantly. Traditional tools often require manual settings for exposure, focus, and aperture, allowing photographers to have complete control over their shots. Meanwhile, modern units typically come equipped with automatic modes and advanced computational features that assist with focus, exposure, and scene selection, making the device accessible to a wider range of users.
The sensor size also plays a crucial role in image quality. Many traditional devices have larger sensors that capture more light and detail, resulting in richer images, especially in low-light conditions. Modern counterparts, while improving constantly, often come with smaller sensors that can influence depth of field and low-light performance.
Battery life can differ, as traditional systems often have longer-lasting batteries due to fewer electronic components. However, contemporary gadgets may compensate for their shorter battery life with features like power-saving modes and rechargeable batteries, offering convenience but requiring more frequent charging.
Lastly, the ergonomics and build can vary greatly. Traditional systems tend to emphasize durability and a classic feel with heavier constructions, while modern devices often focus on lightweight designs for portability. This divergence shapes user experience and choice, influencing which system suits particular photographic needs.
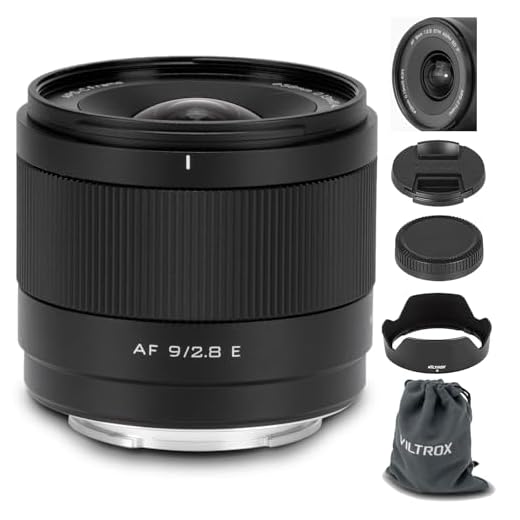
9mm Lens Overview and Features
When considering a 9mm optical attachment, it’s vital to note its characteristics tailored for specific photography purposes. This particular focal length excels in capturing expansive scenes, making it a go-to for interior shots, architecture, and landscapes.
The large field of view typically associated with a 9mm piece provides an impressive perspective, allowing for creative compositions that infuse depth into images. This feature is especially beneficial for showcasing tight spaces or dramatic angles that standard fittings might miss.
A notable aspect of such an optical tool is its depth of field. The shorter focal length generally facilitates a greater depth of field, resulting in more of the scene being in focus. This is advantageous for users desiring sharpness throughout their images, ideal for both amateur and skilled practitioners alike.
Due to its design, this type can often produce pronounced distortion, particularly at the edges. While this can be undesirable in traditional shots, some photographers leverage this distortion for artistic effects, providing unique perspectives that captivate viewers.
Compatibility with various mounting systems can vary significantly. Those interested in functionality should ensure their attachment aligns with the specific configurations of their photographic equipment to avoid mismatches.
Lastly, build quality plays a vital role in the performance and durability of a 9mm optical fitting. Opt for units with robust construction and high-grade glass to guarantee clarity and longevity, enhancing the overall photographic experience.
How Lens Mounts Affect Interchangeability
Understanding how lens mounts influence the ability to swap optics between different kinds of equipment is crucial. Each mounting system is designed with specific dimensions and locking mechanisms, affecting compatibility.
- Flange Distance: The distance from the mount to the sensor plane varies significantly between systems. For example, a shorter flange distance may allow for more adaptability with adapters, while a longer distance may limit options.
- Mount Diameter: The size of the mount impacts which types of optics can be used. Larger mounts generally support a wider range of lenses, including those designed for different sensor sizes.
- Locking Mechanisms: Different systems might employ various methods for securing the optic. Understanding these will help determine what adapters are necessary for making a successful match.
When considering the use of adapters, take into account that they might introduce additional factors, such as reduced performance or loss of electronic communication between the body and the lens. Therefore, always research adapter quality and compatibility before proceeding.
- Identify your current mount type.
- Research available adapters for your desired optic.
- Check for user reviews regarding performance and stability.
By focusing on mount specifications and available adaptations, you can expand your creative options and enhance your shooting capabilities effectively.
Popular Mount Types for SLR Cameras
When selecting equipment, understanding the prevalent mount types plays a vital role in your photography experience. Major systems include Canon EF, Nikon F, Sony E, and Micro Four Thirds. Each has unique characteristics that cater to different styles and preferences.
Canon EF is renowned for its compatibility with a vast range of optical units, making it a favorite for both amateur and seasoned photographers. This system supports full-frame sensors, providing excellent low-light performance and sharp images.
Nikon F mount is another significant player, known for its rich history and broad selection of compatible optics. The F mount has evolved, allowing for advanced features and enhanced functionality, which is highly valued among photographers.
Sony E mount, on the other hand, has surged in popularity due to the lightweight design of its mirrorless models. This mount allows access to a growing library of high-quality optics while ensuring compactness and portability.
Micro Four Thirds offers a unique approach with its smaller sensor size, which influences the focal length characteristics of optics. This system provides greater depth of field and increased shooting versatility, ideal for travel and street photography.
Understanding these types can help tailor your gear selection to fit specific needs, ensuring optimal performance and satisfaction in your photographic pursuits.
Popular Mount Types for Digital Cameras
Each type of system has its unique mounts that dictate compatibility with various optics. For example, Canon EOS mounts are widely used, allowing flexibility across Canon’s extensive lens lineup. Nikon’s F-mount has remained a staple for years, providing access to numerous high-quality options, particularly for users of Nikon gear.

Sony’s E-mount has gained popularity thanks to its compact size and adaptability for both full-frame and APS-C formats. This versatility caters to a growing community of photographers. Fujifilm uses the X-mount, which is tailored for their APS-C models, offering premium optics designed specifically for that sensor size.
Micro Four Thirds utilizes a standardized mount adopted by Olympus and Panasonic, making it easier to switch between their offerings without compatibility concerns. Leica’s L-mount represents a collaboration among several brands, widening the selection for enthusiasts focusing on a premium experience.
Each mount type has distinct characteristics affecting the performance and image quality. Knowing the specifics of these connections is crucial when considering additional gear, as it influences potential upgrades and overall photographic capabilities.
Common Sensor Sizes in Digital Cameras
When evaluating imaging devices, understanding sensor dimensions is crucial, as they significantly impact image quality and performance. Here are the most prevalent sensor sizes you will encounter:
Full Frame
The full frame sensor measures 35mm diagonally, being equivalent to traditional film size. This format excels in low light conditions and offers a vast range of depth of field options.
APS-C
Typically around 22mm x 15mm, the APS-C sensor is smaller than full frame. It’s widely utilized in many devices, delivering good image quality while allowing for lighter and more compact hardware.
- Commonly found in mid-range to entry-level options.
- Provides a crop factor of approximately 1.5x, affecting focal length perception.
Micro Four Thirds
Measuring 17.3mm x 13mm, the Micro Four Thirds format has gained popularity for its versatility and compact nature. It’s used in various mirrorless devices.
- Offers a crop factor of 2x, useful for making telephoto effects.
- Allows for a range of compact lenses without compromising quality.
1-inch Sensors
These sensors, measuring approximately 13.2mm x 8.8mm, appear predominantly in premium compacts and some advanced mirrorless options. They balance portability and quality nicely.
Smartphone Sensors
Smartphone sensors vary widely but often measure 1/2.3 inches or smaller. While traditionally less capable in low light, recent advancements have improved their performance significantly.

When selecting a capturing device, consider how the sensor size aligns with your photography needs, balancing between quality and convenience while being mindful of possible limitations in various lighting situations.
Crop Factor and Its Impact on Lens Usage
The crop factor significantly alters how I perceive focal lengths. It determines the effective field of view based on sensor size, which can influence the choice of optics for any imaging system. For example, cameras with smaller sensors result in a crop factor, effectively multiplying the focal length of mounted optics. This is particularly noticeable when using wide-angle attachments.
When I mount a 24mm optic on a camera with a crop factor of 1.5, the effective focal length becomes 36mm. This is essential to grasp, especially for those seeking to achieve specific compositions or creative angles. Knowing this allows me to select appropriate attachments according to the intended photographic outcome.
The difference in crop factors across models means I have to adjust my approach. For instance, a setup designed for an APS-C sensor might lead to a different outcome on a Micro Four Thirds system. Hence, understanding the application of crop factors is indispensable for maximizing performance.
In practice, I frequently consider the crop factor when aiming for certain shots. If I want a true wide perspective, I must opt for attachments with shorter actual focal lengths. On the contrary, if I’m capturing portraits, I can use longer focal equivalents without compromise.
This awareness not only guides my selections but also deepens my technical insight into how I can manipulate depth of field and perspective. The crop factor isn’t just a measurement; it’s a valuable tool in shaping my photographic vision.
Manual vs Autofocus Options: What to Consider
I prefer to spend time weighing the benefits of manual and autofocus options before settling on the right choice for my needs. Manual focus offers the advantage of complete control over the focal point, which can be critical in situations where precision matters, such as macro photography or low-light environments. The tactile experience of adjusting focus rings can enhance my artistic input, allowing for creative adjustments that can elevate my work.
On the other hand, autofocus systems can greatly speed up the shooting process, especially in dynamic settings where subjects are moving. Modern autofocus technology is remarkably advanced, with features like face detection and continuous tracking that can make capturing fleeting moments much easier. It’s particularly useful in sports or wildlife photography, where quick adjustments are often essential.

When considering what’s best for a particular project, I take into account various factors including the type of photography I’ll be engaging in, lighting conditions, and the required speed of adjustments. For portraits, I often prefer autofocus for its accuracy with subjects’ eyes, while for landscapes, I lean towards manual settings to ensure I achieve the desired depth of field.
Battery life is another aspect to consider. Autofocus systems can drain power more quickly than manual setups, so if I’m going on an extended shoot, I make sure to account for this in my planning.
Ultimately, I find that having both options available allows me to adapt to varying situations, combining the strengths of each method. This versatility enhances my overall shooting experience and outcomes.
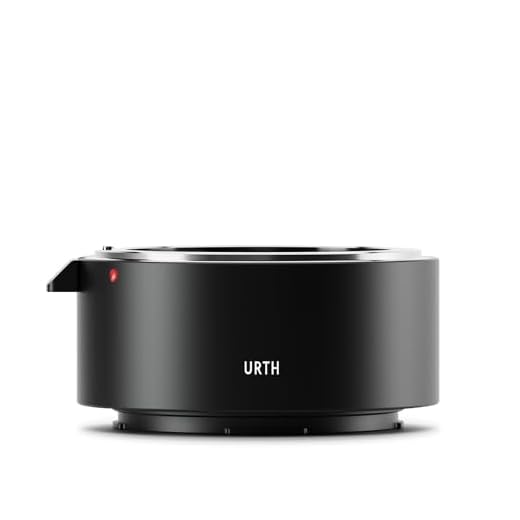
Adapter Solutions for Interchangeability
For those seeking to use a specific type of glass on another body, adapter options are available that can bridge the gap between varying mount systems. Adapters can be found for various configurations, allowing legacy optics to function on modern devices. Before purchasing an adapter, ensure it supports the necessary features such as electronic communication, if autofocus or aperture control is desired.

When looking for a suitable solution, consider brands renowned for their quality, as cheaper alternatives may lead to a compromise in performance and functionality. Popular options include Fotodiox, Metabones, and Viltrox, known for creating reliable connecting mechanisms.
Compatibility extends beyond physical fit; ensure that the adapter maintains the correct registration distance. This is critical for achieving appropriate focus. Some adapters maintain electronic contacts, facilitating autofocus and automatic aperture adjustments. However, some may require manual adjustments; thus, clarity on operational preferences is essential.
Be aware that using an adapter could affect the effective field of view and image quality. It’s advisable to research user experiences and sample images taken with specific combinations prior to finalizing an adapter choice. Additionally, testing the setup before significant projects is beneficial to avoid unexpected outcomes.
In summary, intelligent selection and thorough testing can greatly enhance the use of different optics across systems, achieving desirable creative results. A strategic approach to adapters enables flexibility in equipment and potentially expands one’s creative opportunities.
Potential Issues with Using Adapters
Utilizing adapters to connect different optical devices can lead to numerous complications. First, there’s the risk of losing functionality such as autofocus or image stabilization, which may only work with specific mounts. Furthermore, the thickness of the adapter may alter the effective focal length, impacting your composition and exposure settings.
Mechanical alignment is another concern; if the adapter is not precisely manufactured, it could result in misalignment, leading to poor image quality or vignette effects on the edges of the frame. Additionally, the increased distance between the sensor and the optical element might introduce issues such as focus shift or reduced sharpness.
Another potential drawback is the lack of electronic communication between the adapter and the optical system, which may hinder your ability to control aperture settings or set exposure accurately. This can limit the versatility of the apparatus, particularly in varying lighting conditions.
| Issue | Description |
|---|---|
| Loss of Autofocus | Many adapters do not support autofocus features. |
| Image Quality | Adapters can introduce optical aberrations or reduce sharpness. |
| Focal Length Changes | The adapter’s thickness can affect the effective focal length. |
| Mechanical Alignment | Poor fit can cause misalignment leading to distortion or vignetting. |
| Lack of Communication | Inability to control exposure settings electronically can limit usage. |
Testing different adapters beforehand can help identify compatibility issues and ensure optimal performance. Always read reviews and try to obtain feedback from others who have used specific combinations.
Full-frame vs Crop Sensor Cameras: Implications
Choosing between full-frame and crop sensor systems significantly impacts imaging characteristics and usability. A full-frame setup provides a broader field of view, capturing more light and detail, which is vital for low-light situations and wide-angle photography. I recommend full-frame systems for landscape photography and professional projects where image quality is paramount.
On the other hand, crop sensor units offer a magnification effect due to their smaller sensor size, making them suitable for wildlife and sports photography, where reaching distant subjects is necessary. This factor should guide your selection based on the types of photography you pursue.
When using different mounts, it’s essential to understand that full-frame and crop sensor configurations may not seamlessly translate due to varying crop factors. This discrepancy influences framing and composition, ultimately affecting your creative approach.
Another critical aspect is the depth of field; full-frame assets typically yield a shallower depth at equivalent settings, enhancing subject isolation. If you aim for a pronounced background blur, this might be the defining reason to opt for a full-frame option.
Bear in mind that lens options differ significantly among sensor types. Full-frame variants often have a wider array of high-performance choices, while crop sensor models might offer budget-friendly alternatives that can still produce excellent results for casual or hobbyist use.
With adapters available, there’s potential to utilize diverse lenses across systems, though compatibility, autofocus functionality, and image quality must be taken into account when considering such solutions. I advise thorough research to avoid potential pitfalls and ensure a seamless experience.
Auto Iris and Aperture Control with Adapted Lenses
For optimal results, I recommend checking for compatibility with auto iris and aperture control when adapting older optics. Various adapters may offer electronic connections to facilitate this functionality, but not all do. Using manual control may become necessary if electronic communication is not supported.
Understanding Control Mechanisms
Many adapted optics lack native electronic control systems. This often leads to using the lens with manual aperture settings. I find it essential to be aware of the differences in how aperture control is implemented across different mounts, as this can directly affect exposure settings during shooting. Some mount adapters provide limited electronic control, allowing for adjustments via the camera body’s interface.
Recommendations for Effective Use
When utilizing adapted optics, especially those made for older film systems, I suggest investing in high-quality adapters that maintain as much electronic communication as possible. Additionally, testing various settings in different lighting conditions can help optimize performance. Keep in mind that some combinations may result in limited functionality, requiring a deeper understanding of manual exposure settings to achieve the desired outcome.
Image Quality: Effects of Using Adapted Lenses
Using modified optics can significantly impact the output quality. I usually see a variation in sharpness, contrast, and color fidelity compared to native equipment. Often, these alterations can stem from optical design mismatches that arise when combining different systems.
One important aspect to consider is the aperture performance. Adapters might restrict maximum aperture, resulting in decreased light transmission. This can lead to softer images, particularly in low-light settings. I recommend testing various f-stop settings to gauge how each adjustment affects clarity and brightness.
| Factor | Impact on Image Quality |
|---|---|
| Sharpness | Possible reduction due to optical misalignments |
| Contrast | May decrease, causing flat-looking images |
| Color Accuracy | Misalignment could skew color representation |
| Aperture Functionality | Limited adjustment may affect exposure and depth of field |
I’ve noticed that some older optics, when adapted, can introduce flare or ghosting due to coatings not optimized for modern sensors. Investing time in researching individual optics paired with specific adapters can lead to surprising results. Testing each combination can provide a valuable understanding of how best to utilize them while preserving quality.
In my experience, manual focusing becomes necessary with many adapted options, influencing compositional speed, especially during dynamic shoots. While frustrating, this often encourages more thoughtful framing, which can lead to unexpectedly rewarding results. Exploring unique combinations can transform standard shooting into an experimental approach, revealing new creative possibilities.
Focusing Techniques with Interchangeable Optics
To achieve sharp images, understanding focus techniques is paramount. Here are some effective methods:
Manual Focus Precision
Manual adjustment is often preferred for artistic control. Follow these steps:
- Set your camera to manual mode for a clearer view.
- Utilize focus peaking or magnification on your display for accuracy.
- Engage the focus ring slowly to avoid overshooting the desired point.
Autofocus Advantages
While manual focus permits creative freedom, modern autofocus provides speed. To maximize its effectiveness:
- Choose a single autofocus point for precise targeting.
- Use continuous autofocus for moving subjects to maintain sharpness.
- Check compatibility settings to ensure smooth operation with adapted optics.
Experimenting with these techniques can lead to enhanced clarity and overall image appeal. Each method has its merits, depending on the shooting conditions and personal style preferences.
Economic Considerations for Lens Adaptation
Investing in adapters for using various optics on different photographic equipment often serves as a cost-efficient solution for enthusiasts and professionals alike. The initial purchase of high-quality optics remains a significant expense, so finding a way to maximize their utility across multiple formats can yield substantial savings.
Budgeting for Adaptation
When considering the financial aspect of employing adapters, I analyze the cost of adapters versus the price of equivalent optics made for my specific setup. Sometimes, an adapter can be an economic alternative, especially if the optics I own are premium or brand specific. Additionally, rental or second-hand options may provide a further layer of affordability.
Potential Long-term Savings
Utilizing the same set of glass across different bodies not only reduces initial outlays but also minimizes future expenditures on new optics tailored for distinct formats. This method can be particularly advantageous for hobbyists, who may change systems frequently. Alongside reducing direct spending, employing adapters allows me to maintain a diverse range of creative choices without constantly reinvesting in new equipment.
Exploring Vintage Glass for Modern Equipment
Using old optical equipment with contemporary setups can yield remarkable results. I’ve found that certain vintage optics not only provide unique character but also excel in specific situations. A prime example includes the Helios 44 series, known for its distinctive bokeh and sharpness.
Key Benefits of Vintage Optics
The advantages of utilizing older optical devices include:
| Benefit | Description |
|---|---|
| Character | Many old models impart a unique rendering that modern designs may lack. |
| Build Quality | Vintage equipment often boasts robust materials and construction. |
| Affordability | Older models are typically less expensive than new counterparts. |
| Manual Focus Control | Precision in focusing offers a tactile advantage in creative scenarios. |
Practical Considerations
When opting for older glass, compatibility is essential. Some optical systems may need an adapter to fit modern mounts. I recommend researching specific mounts to ensure proper interfacing with your current setup. It’s worth noting that optical performance might differ across sensor sizes, particularly on crop sensors where focal length adjustments apply.
Be aware of potential limitations like manual aperture control; automatic settings typically won’t function with vintage equipment. Experimenting with such tools not only broadens my visual storytelling but also adds a historical element to each frame I capture.
Stability and Mounting Concerns with Adapters
Using adapters for attaching lenses from one system to another introduces specific stability and mounting challenges. Ensuring a secure fit is paramount; otherwise, the risk of misalignment or wobbling increases, potentially affecting image quality. A well-designed adapter should replicate the flange distance, maintaining the necessary spacing between the optic and the sensor.
Mounting Precision
Precision in mounting is not just about fit; it also relates to how the adapter interfaces with both the lens and the camera body. This includes ensuring that any electronic contacts for autofocus or aperture control function effectively. A less-than-perfect adapter can lead to inconsistent performance, particularly in autofocus scenarios where timing is critical.
Weight Distribution and Balance
The weight distribution can change significantly when using an adapter, particularly with larger or heavier optics. This shift can affect the overall balance of the setup, making handling cumbersome and potentially leading to fatigue during prolonged use. It’s advisable to assess how the combination feels in hand before committing to extended shooting sessions.
Weight and Balance of Adapted Lenses on DSLRs
When attaching adapted optics to your mirror reflex system, it’s critical to evaluate the overall weight and balance. Variability in the mass of the lenses can affect handling, stability, and user experience. Always take the following parameters into account:
Key Factors in Weight and Balance
The first factor to consider is the weight of the attachment compared to the body of the photography equipment. Heavier attachments can lead to imbalances, making it challenging to stabilize and maneuver. For instance, a lightweight body with a bulky lens can become cumbersome, leading to fatigue during shooting sessions.
Furthermore, the center of gravity shifts depending on the attachment. Ideally, the weight should be distributed evenly to avoid strain on your wrists. Pay attention to the mounting point of the adapter; if the connection point is not solid, it can amplify wobbling effects. Selecting an adapter with a robust construction minimizes these drawbacks.
Weight Comparison of Common Attachments
| Adapter Type | Lens Weight (grams) | Body Type |
|---|---|---|
| Standard Adapter | 250 | Lightweight |
| Heavy-Duty Adapter | 350 | Mid-weight |
| Teleconverter | 300 | Heavyweight |
Testing different combinations and keeping note of performance is advisable. Engage in practical exercises with various adapters and optics in different lighting conditions. This will help establish which setup offers the best handling and results for your photogenic needs. Adjustments might be necessary to improve comfort during prolonged usage, ensuring optimal balance without compromising image quality.
Compatibility Between Brands: Canon, Nikon, Sony
When considering optical accessories, the capabilities among Canon, Nikon, and Sony vary significantly.
Canon
Canon offers a robust EC system with its EF and RF mounts. These mounts are not interchangeable with Nikon or Sony systems without adapters. Canon’s EF series has been around since 1987, ensuring a wide selection of options. If you own a Canon EOS R system, you’re limited to RF glasses unless you opt for an adapter. Keep in mind the potential for autofocus limitations when using third-party or adapted optics.
Nikon
Nikon’s F mount is compatible with a vast collection of Nikkor optics. The Z series employs a new mount, enhancing image quality, but this also creates a divide with older F mount options. Using an adapter may allow bridging this gap, yet it could introduce varying degrees of autofocus compatibility. Nikon’s recent retrofits improve versatility, but original optics yield the best results for newer Z models.
Sony
Sony’s E mount supports a diverse range of glass from third-party manufacturers. Compatibility with Alpha series DSLRs and mirrorless systems allows for extensive choices. However, older A mount lenses require an adapter to work on newer E mount models. While adapters exist, expect limitations in autofocus speed and precision.
- Canon: EF and RF mounts, potential autofocus issues with adapters.
- Nikon: F mount offers extensive options, Z series introduces new tech; adapters may affect autofocus.
- Sony: E mount flexibility, A mount needs adapters, some autofocus limitations may arise.
Prioritize testing optics before making significant investments, especially in adapters. Each manufacturer has their nuances, and understanding specific mount capabilities can save time and enhance shooting experiences.
Understanding Electronic Contacts in Adapted Lenses
When adapting optics, attention to electronic contacts plays a vital role. These contacts facilitate communication between the optical attachment and the host body, influencing functionality such as autofocus and aperture control. Not all retrofitted optics have electronic contacts. For maximum effectiveness, verify compatibility between the lens and the receiving unit.
Benefits of Electronic Contacts
Utilizing attachments with electronic interfaces can enhance the shooting experience. Autofocus becomes operational, along with automatic exposure adjustments. This capability allows the photographer to concentrate on composition rather than technical settings, leading to increased productivity.
Compatibility Check
Before purchasing an adapter or connecting optics, confirm whether electronic contacts align with the pairing unit’s specifications. Different brands often implement proprietary technologies, making it crucial to ensure seamless functionality.
| Feature | Benefit |
|---|---|
| Autofocus | Simplifies focusing tasks |
| Aperture Control | Enables automatic exposure adjustments |
| Communication | Enhances overall shooting experience |
In cases where electronic aspects are absent, manual adjustments might be necessary. These can be more challenging but also provide full control over the settings. Always weigh the pros and cons based on photographic needs and preferences.
Vignetting Issues with 9mm Lenses
When using a wide-angle optic, I often encounter vignetting, especially when adapting to different mounts. This phenomenon results in a gradual darkening of the image corners compared to the center. It’s crucial to understand the factors contributing to vignetting with a 9mm optic and how it affects image quality.
Key aspects influencing vignetting include:
- Sensor Size: A larger sensor can exacerbate the vignetting issue as the light continues to diminish towards the edges.
- Aperture Settings: Wide apertures typically enhance vignetting. Stopping down the aperture can help mitigate this effect.
- Lens Design: The optical construction of the lens plays a significant role in how light is projected onto the sensor. Poor lens design may lead to pronounced vignetting.
- Adapter Quality: The use of an inexpensive or poorly built adapter can introduce additional vignetting due to misalignment or restrictions in light transmission.
- Crop Factor: Understanding the crop factor of the camera being used can help predict how vignetting will manifest. Using a camera with a crop sensor often reduces the visible effects.
To minimize vignetting, I recommend the following:
- Use a higher-quality adapter to ensure proper alignment and light transmission.
- Experiment with aperture settings, shooting at narrower openings to observe if the corners improve.
- Consider post-processing techniques to correct vignetting in editing software, although starting with a well-corrected image is always preferable.
- Be aware of the optical characteristics of the specific optic in use. Research online forums and reviews for insights on expected performance.
Addressing vignetting can greatly enhance the quality of the images captured, making awareness of this issue essential when utilizing a 9mm setup across multiple platforms.
Recommended Lenses for Specific Digital Cameras
For Canon APS-C models like the EOS 90D, I recommend the Sigma 18-50mm f/2.8 DC DN for its versatility and sharpness across the zoom range. This lens performs exceptionally well in various lighting conditions.
If you own a Nikon DX camera such as the D7500, consider the NIKKOR 10-20mm f/4.5-5.6G VR. Its wide-angle capability is perfect for landscapes, making it a great addition to your kit.
Sony users with an alpha series, specifically those with E-mount, should opt for the Sony E 16-55mm f/2.8 G. This option provides fantastic image quality and fast autofocus, ideal for both stills and video.
For Micro Four Thirds system enthusiasts, the Olympus M.Zuiko Digital ED 12-40mm f/2.8 PRO offers weather sealing and impressive optics, making it suitable for a range of scenarios.
In the Fujifilm X series, the Fujinon XF 16-55mm f/2.8 R LM WR is a solid choice, known for its build quality and performance, especially in portrait and event photography.
If you have a Pentax K mount, the HD PENTAX-D FA 15-30mm f/2.8 is an excellent choice. It’s versatile for both wide-angle and standard shots, ideal for architectural photography.
Finally, for users of Hasselblad’s X System, the XCD 45mm f/3.5 balances compactness with exceptional image quality, making it a staple for street photography.
Testing Interchangeable Optics in Real-world Scenarios
I highly recommend conducting tests in diverse shooting situations to evaluate performance. Start with evaluating adaptability on various frames, such as full-frame and APS-C sensors. Using a 9mm optic, I found that the crop factor significantly influences the field of view, affecting compositions and coverage in urban environments.
Field Testing with Various Setups
When experimenting, incorporate both manual and automatic focuses in your trials. I encountered smoother results with autofocus driven by modern gear, while manual options often provided unique creative control, especially in low light. Be mindful of how each setup balances–this can greatly impact handheld shooting stability.
Evaluating Image Quality
Pay close attention to image attributes, such as sharpness, distortion, and vignetting. Using adapted optics can introduce soft corners in certain lighting conditions, which I noticed particularly when capturing landscapes. To assess true capabilities, I recommend comparing results against native options. Prioritizing standard tests, like barrel distortion on straight lines, will give an insightful understanding of performance.
Adjusting Settings for Non-native Lenses
When attaching lenses from different platforms, I always check the camera’s settings to ensure optimal performance. First, I manually adjust the aperture if the lens lacks electronic contacts. Many times, looking for the appropriate manual setting can lead to improved image quality.
Next, I calibrate focus manually. Autofocusing features may not function correctly with some adapted optics. I find that switching to live view mode enhances precision when focusing on subjects, particularly in low light.
Image stabilization is another parameter I consider. If the adapted optic has this feature, I make sure to activate it through the camera controls. On the other hand, compatibility issues might arise with stabilization, which necessitates testing to confirm effectiveness.
Additionally, I pay attention to the exposure settings. Since exposure metering varies between systems, I often utilize exposure compensation to rectify potential overexposure or underexposure. This adjustment allows me to obtain a balanced image.
Lastly, I analyze the lens characteristics, such as distortion and vignetting. Using software for post-processing might be necessary to correct these issues, ensuring that the final images meet my standards.
| Setting Adjustment | Action Required |
|---|---|
| Aperture Control | Manual adjustment based on the lens type |
| Focus | Switch to manual focus, use live view if possible |
| Image Stabilization | Activate if available, test for optimal results |
| Exposure Settings | Utilize exposure compensation for accurate exposure |
| Post-Processing | Correct distortion and vignetting with software |
Pros and Cons of Using Interchangeable Optics
When considering the switch between various optic systems, several key factors come into play. Here’s what I’ve found regarding the advantages and disadvantages.
- Flexibility: The ability to adapt different optical elements allows for creative exploration. This makes it easier to capture unique perspectives across diverse situations.
- Specialization: Access to specialized components–for instance, macro or telephoto options–enhances photographic capabilities suited to specific subjects.
- Cost-Effectiveness: Instead of purchasing a new setup, one can invest in high-quality optical elements that can fit multiple bodies, saving money in the long run.
However, there are some drawbacks to keep in mind:
- Compatibility Issues: Not all components fit all bodies without adapters, and these can introduce limitations or require additional investment.
- Image Quality Variations: The performance might not match expectations when using adapters, especially with regards to sharpness and contrast.
- Weight Distribution: Attaching heavier optics can lead to balance issues, affecting handling and stability during shoots.
In summary, weighing these factors is crucial for making informed decisions about adapting optical systems in photography.
Maintaining Lens and Adapter for Longevity
First and foremost, regular cleaning is crucial. Use a microfiber cloth to wipe off dust and smudges from both the front and rear elements of the lens. A blower can help remove debris without touching the glass surfaces. For the adapter, ensure that the contacts are clean, as dirt can impede electronic communication.
Next, ensure proper storage. Keep your equipment in a dry, controlled environment to prevent moisture buildup. Utilizing desiccant packs in storage cases can help absorb humidity, protecting both the glass components and the adapter mechanisms.
When attaching or detaching the lens and adapter, do so gently to avoid damage to the mounts. Align the markings correctly to ensure a snug fit. Avoid forcing the components together, as this could lead to misalignment or physical damage.
Periodically check for wear and tear. Inspect the bayonet mounts on both the lens and the adapter for any signs of degradation. Should you notice any irregularities, consider seeking professional maintenance to avoid compromising image quality.
Keep firmware up to date whenever applicable, especially for adapters with electronic contacts. Manufacturers might release updates that enhance compatibility or address specific issues.
Finally, consider using the equipment regularly. Inactive tools may develop issues over time due to lack of use. A consistent routine helps in identifying any problems early and keeps everything in good working condition.
Buyer’s Guide for Adapting 9mm Lenses
If you’re looking to adapt a 9mm optic for your setup, focus on compatibility and functionality. The first step is understanding the mount types; different brands often use varying systems for attachment. Ensure that the adapter you choose is specifically designed for the respective mounts of both your optic and your body.
Choosing the Right Adapter
Select an adapter that maintains electronic communication if possible. This allows for features such as autofocus, stabilization, and metering to function correctly. Some adapters may lack electronic contacts, which limits functionality and may require manual adjustments for aperture control.
Test Compatibility
Before committing to a specific setup, evaluate how the adapted component performs with your camera. Conduct some practical tests in different lighting conditions to assess image quality, sharpness, and overall usability. Check for vignetting or distortion, as these issues often arise when mismatched optics are used. Inspect sample images for clarity and detail, paying attention to focus accuracy.
Finally, keep in mind the weight distribution when mounting adapted optics. A heavier optic may imbalance your rig, making it cumbersome for handheld use. Understanding these key elements will enhance your experience with adapted kit.
Professional Opinions on Lens Interchangeability
When considering adapting one type of optic system to another, insights from field experts reveal crucial aspects to be aware of. It’s essential to consult with seasoned photographers and technicians who understand the nuances of different optical units and their respective systems.
Expert Recommendations
- Seek out manufacturers’ specifications regarding mounting systems to ensure compatibility.
- Pay attention to the type of connection–whether it’s bayonet or screw mount can significantly influence usability.
- Consider the use of quality adapters from reputable brands to minimize optical degradation.
- Experiment with various focal lengths to gauge their performance on different sensor formats.
Advantages of Adaptation
- Ability to utilize older optics with unique characteristics that modern options may lack.
- Access to a broader range of creative tools by combining different systems.
- Potential cost savings by using existing optical investments instead of purchasing new equipment.
By following these insights, individuals can significantly improve their photographic experiences and outcomes while navigating cross-system adaptations effectively.
Future Trends in Lens Adaptation Technology
Advancements in lens adaptation technology are on the horizon, driven by the increasing demand for versatility in photography systems. Here are some notable trends to watch:
1. Smart Adapters
Emerging smart adapters will incorporate electronic contacts, enabling communication between adapted optics and camera bodies. This functionality will enhance autofocus capabilities and aperture control, mimicking the performance of native attachments.
2. Increased Compatibility
Manufacturers are focusing on creating universal mounts that accommodate a wider range of optics. This shift aims to reduce barriers and expand creative possibilities across brands.
3. Improvement in Optical Performance
- Optical designs will evolve to minimize vignetting and chromatic aberrations in adapted setups.
- New coding methods will help retain lens characteristics, ensuring image quality remains uncompromised.
4. Enhanced Digital Interfaces
Integration with software will allow users to calibrate their devices for optimized performance with non-native optics. Future innovations may include companion apps that provide detailed settings adjustments.
5. Focus on Sustainability
- Manufacturers may prioritize eco-friendly materials in the production of adapters, catering to an environmentally conscious market.
- Long-term durability and repairability will be key selling points.
These trends indicate a dynamic future for adapting optics, promising greater flexibility and functionality for photographers and enthusiasts alike.
Case Studies: Successful Lens Adaptations
In my experience, adapting various optical instruments has proven fruitful in many scenarios. A prime example is the successful integration of older manual focus units onto contemporary autofocus mounts. With the right adapters, I’ve utilized vintage optics, such as those made for film systems, to achieve striking results on modern imaging devices.
One case involved a renowned 28mm prime lens designed for a classic film format. By employing a well-engineered adapter, I was able to mount it on a new model equipped with a smaller sensor. The outcome was impressive, with sharp details and unique color rendering that highlighted the character of the vintage glass. I found that the images retained a distinctive quality that differed significantly from standard contemporary options.
Another instance occurred when I tested a range of portrait-length optics made for different brands. Using a third-party adapter allowed me to connect a highly regarded 85mm lens from one manufacturer to another brand’s body. The resulting photographs displayed beautiful bokeh and accurate color reproduction, proving that cross-brand utilization can yield excellent outcomes when approached thoughtfully.
In a more technical scenario, I explored a wide-angle zoom originally crafted for a mechanical platform. After acquiring an appropriate adapter, I noticed a slight vignetting effect when using it on a sensor with a larger diagonal dimension. However, careful post-processing managed to mitigate this issue, allowing the creative potential of the focal range to shine through while maintaining acceptable edge sharpness.
During numerous field tests, I consistently keep an eye on maintaining compatibility between the focusing mechanisms and the selected adapters. In one situation, utilizing an adapter lacking electronic contacts resulted in loss of autofocus convenience. Switching to a model featuring this functionality allowed for seamless operation, enhancing the shooting experience significantly.
Overall, these instances illustrate that many enthusiasts can successfully adopt historical and diverse optics with modern devices, given the right equipment and understanding of the nuances involved. Embracing this concept has expanded my toolkit and fostered creativity in my photographic journey.
Tips for Troubleshooting Lens Compatibility Issues
First, ensure that the mount type on the optical device matches the body you intend to pair it with. Checking manufacturer specifications online can save time and effort.
If there are communication errors between the body and the unit, some functions may be limited. It’s wise to test manually, using the settings on the device that you’re familiar with. This includes checking aperture control if it’s electronic.
Compatibility problems can manifest as incorrect focusing or vignetting. Use a test chart to assess sharpness across the frame and make adjustments as necessary. Sometimes, recalibrating the autofocus settings can resolve discrepancies, especially with non-native combinations.
Adapter settings can also play a significant role. Keep an eye on the quality of the adapter–opt for reputable brands that guarantee minimal light loss and distortion. Remember, some adapters may allow for full functionality while others only allow for basic operations.
For vintage pieces, check for any optical abnormalities like fungus or dust, which can affect image quality. Cleaning the glass elements properly can make a substantial difference in a photograph’s clarity.
Weight distribution becomes vital, particularly if the adapted apparatus is significantly heavier than the native version. While shooting, ensure balance to avoid fatigue or instability effects when capturing images.
Finally, experiment with different settings and shooting scenarios. This hands-on approach helps to identify unique quirks of the specific combination you’re working with, leading to improved outcomes.
Understanding the Importance of Lens Calibration
Calibration of optics is paramount for achieving optimal image quality. When adapting optics from one system to another, precision in alignment and functionality directly affects results. A well-calibrated setup ensures sharpness, accurate colors, and overall image fidelity.
Key Aspects of Calibration
- Focus Accuracy: Misalignment during adaptation can lead to front or back focusing issues. Testing the focus on a flat target can assist in fine-tuning.
- Aperture Consistency: Verify that the aperture settings correspond correctly to what is displayed on the viewfinder or screen, ensuring exposure accuracy.
- Image Quality: Check for chromatic aberration, distortion, and vignetting. These parameters can shift when using optics not originally designed for the camera body.
Practical Steps for Calibration
- Use a focus chart to identify any misalignment.
- Adjust settings through the camera’s firmware if available.
- Test various aperture settings to examine performance across the range.
- Seek professional calibration services for highly specialized setups.
Consistent calibration is what truly harmonizes my setup, ensuring that every photograph fulfills its potential in clarity and detail.
Practical Applications for Adapted 9mm Lenses
For anyone looking to use adapted wide-angle optics, I’ve found these practical scenarios to be particularly beneficial. First, achieving unique perspectives in landscape photography is invaluable. The wide field of view allows for stunning compositions, capturing vast scenes with remarkable detail.
Creative Projects and Experimentation
Engaging in creative photography projects becomes a breeze. I often incorporate these optics into artistic endeavors, whether it be urban exploration, architectural shots, or abstract close-ups. The ability to attach older models to modern units fosters a blend of vintage charm and current technology.
Videography and Film Making
In videography, these adapted wide optics provide distinct visual qualities. The characteristic depth of field and unique bokeh can enhance storytelling, adding an element of artistry. I’ve utilized these tools for independent films, where character-driven narratives benefit from visually striking wide-angle shots.
Utilizing vintage equipment not only enriches my toolkit but also introduces a fun aspect of experimentation. These unique setups often evoke interest and discussion among peers and can lead to unexpected photographic results.
Community Resources and Forums for Lens Users
I recommend visiting specialized forums and platforms where enthusiasts share their insights about adapting various optical attachments. Consider checking out sites like DPReview and Photo.net, which host extensive discussions on compatibility and personal experiences with different setups.
Popular Online Communities
Engaging with communities on Reddit, such as r/photography or r/AskPhotography, provides a wealth of knowledge from a diverse group of users. Here, you can post specific questions or read through threads about experiences and recommendations related to converting earlier gear for use with newer technology.
Helpful Resources
Websites like Flickr allow users to showcase their work, providing insight into the practical application of various mounts and modifications. Additionally, YouTube channels dedicated to photography often provide hands-on tutorials regarding different equipment and adaptations.
| Platform | Focus Areas |
|---|---|
| DPReview | Equipment comparisons, detailed reviews |
| Photo.net | General photography discussions, adaptation experiences |
| Reddit (r/photography) | User advice, tips & tricks |
| Flickr | Showcase work, gear discussions |
Be proactive in learning from both the challenges and successes shared by others. Many users post real-world examples of their setups, which can be incredibly insightful for those looking to maximize their photographic potential.
Analyzing Lens Brands and Their Compatibility
To ensure seamless integration with your camera system, pay close attention to the brand and model of the optical attachment you’re considering. Various manufacturers produce equipment that may not fit interchangeably with others due to design differences.
Here are essential points to bear in mind:
- Mount Types: Each company has distinct mount specifications. Canon, Nikon, Sony, and others have exclusive systems that affect overall fitting.
- Compatibility Charts: Look for compatibility tables provided by manufacturers. They often offer insight into what works with which setups.
- Personal Experience: I found that using brands within the same ecosystem (for example, using Canon lenses on Canon bodies) yields better results than mixing brands.
- Adapter Influence: Adapters can bridge gaps but may introduce limitations, such as loss of autofocus or aperture control. I highly recommend checking user reviews for specific adapter performance.
A standout feature of modern brands is their effort to develop multi-compatibility systems. For instance, while a high-end lens from one maker may excel on a dedicated body, many third-party options are available to enhance versatility.
Pay attention to electronic contacts, as these facilitate communication between the optic and the body for functions like stabilization, focus, and exposure settings. A lack of proper contacts can hinder performance.
For high-quality outputs, I suggest matching optical devices from the same brand wherever possible. This practice minimizes surprises during usage, especially regarding focus speeds and color profiles.
Finally, participating in forums and communities focused on your brand can illuminate experiences others have had with specific lenses and cameras. These insights can guide your purchasing decisions.


