


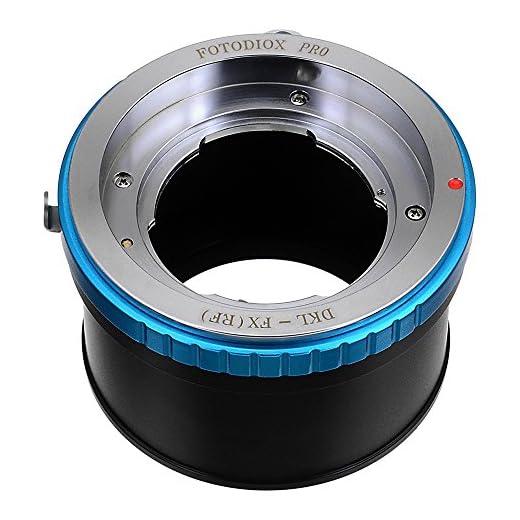
To achieve stunning results by attaching classic optical elements to contemporary photographic equipment, first, invest in an appropriate adapter. Each combination of optics and body may require a specific mount, ensuring compatibility without sacrificing image quality. Resources such as online communities or specialized retailers can guide you in selecting the right accessory.
Next, familiarize yourself with manual focusing techniques. Unlike autofocus systems, vintage optics often rely on precise adjustments. Spending time practicing your focus using live view on the LCD can lead to improved accuracy, especially in low-light situations.
Additionally, consider experimenting with various apertures. Many classic glass units produce beautiful bokeh and unique characteristics at different f-stop settings. Trying different exposures allows you to discover their artistic flair, whether it’s a soft background or sharp subject isolation.

Lastly, keep in mind the importance of image stabilization. When using legacy optics, apply stabilizing techniques such as bracing against solid surfaces or using a tripod to counteract any potential motion blur. This simple step can significantly enhance the clarity of your captures.
Understanding Lens Mounts and Compatibility
Select the right mount adapter first. Different brands and models have specific mounts; for example, Canon EF and Nikon F differ significantly in compatibility. Check your camera’s specifications to confirm the supported mounts.
Types of Mounts
- DSLR Systems: Typically feature larger mounts, allowing for faster autofocus, but may require specialized adapters.
- Mirrorless Systems: Often have more flexibility with adapting various mounts due to shorter flange distances.
- Medium Format: Generally less adaptable, and using such glass requires careful consideration and specific adapters.
Checking Compatibility
- Flange Distance: Measure the distance from the mount to the sensor. Longer flange distances may hinder proper focusing.
- Electronic Contacts: Some adapters retain electronic functions like autofocus or aperture control, while others may be purely mechanical.
- Crop Factor: Be aware of the crop factor when adapting lenses, as it affects the effective focal length and field of view.
Research specific adapters that cater to the desired combination, ensuring to check online reviews or photography forums for user experiences. Some adapters may introduce issues such as light leaks or degraded optical performance, so choose quality options.
Lastly, embrace trial and error. Sometimes, the best way to learn about compatibility and performance is to test various setups yourself.
Identifying the Right Adapters for Your Setup
Begin by researching the specific mount types for both your vintage optics and the current device. Each manufacturer has unique specifications; for example, Canon, Nikon, and Sony all use different mounts. Familiarize yourself with the abbreviations such as M42, Leica, or Contax, as these will guide you in searching for suitable adapters.
Next, choose between a mechanical or electronic adapter. Mechanical options allow for basic attachment, while electronic ones offer features like autofocus and aperture control. Keep in mind that electronic adapters may only work with certain brands, so verify compatibility with your camera model. Read user reviews to gauge reliability and performance, as quality varies among manufacturers.
Compatibility Checks
Ensure that the focal length and maximum aperture of your antiquated glass align with your modern equipment’s capabilities. Sometimes, certain combinations can lead to vignetting or metering issues. Watch out for crop factor, particularly with APS-C sensors; assess how it impacts your desired field of view.
Additionally, I recommend visiting online forums or community groups dedicated to photography enthusiasts. Users often share their firsthand experiences with various adapters, which can help you avoid pitfalls. Don’t hesitate to ask questions; the community can provide invaluable insights about what works best.
Purchasing Guide
When considering where to purchase adapters, seek reputable retailers or specialized online stores focusing on camera gear. Authenticity is key, so avoid dubious listings to ensure you’re getting a quality product. If possible, choose adapters with a solid warranty or return policy for additional peace of mind.
By following these steps, you can effectively identify the right adapters to enhance your photographic pursuits using vintage glass, ensuring compatibility and optimal performance.
Steps to Attach Vintage Optics to Modern Bodies
First, I check the type of mount on my camera. It’s crucial to match this with the adapter that I plan to use. Researching compatibility is key; some mounts may require specific adapters to ensure a proper fit.
Next, I gather the necessary tools. A lens remover or wrench might come in handy for stubborn mounts. I always ensure my workspace is clean to avoid any dust or scratches on the elements.
Once I have everything ready, I carefully align the adapter with the camera body, making sure the locking mechanism is secure. I then take the vintage optic and align it with the adapter’s specifications; the markings on both should guide the placement.
I attach the optics to the adapter, rotating gently until it clicks into place. It’s essential to avoid excessive force as this can damage both components.
After securing the connection, I test it on the camera to ensure that it is mounted correctly. I check for stability and verify that all functions, such as focus and aperture adjustments, operate seamlessly.
Lastly, I always experiment with settings to understand how these classic optics perform in modern scenarios. This trial and error phase allows me to get creative and discover unique results.
Adjusting Settings for Manual Focus Optics
Set your camera to manual mode. This ensures full control over exposure settings without relying on automatic adjustments that may not suit vintage glass. Adjust the ISO according to lighting conditions, starting at a moderate level to reduce noise.
Switch the focusing mode to manual focus. This is crucial since legacy optics lack electronic integration for autofocus systems. Utilize focus peaking features if available; they highlight in-focus areas in real-time, making it easier to achieve sharp images.
Fine-Tuning Exposure Settings
Metering mode should be selected based on the shooting environment. I often opt for spot metering in high-contrast situations to achieve accurate exposure on the subject. Adjust the shutter speed accordingly to avoid motion blur and correctly balance the aperture for desired depth of field.
If your model lacks image stabilization, consider using a faster shutter speed to counter camera shake, especially with longer focal lengths. Use the aperture to control light entry and depth precision. A wider aperture can yield blurred backgrounds, emphasizing subjects effectively.
White Balance Adjustments
Manually set white balance based on lighting conditions. Legacy glass can render colors differently, so photographing a gray card helps achieve accurate hues. Adjust your settings based on specific light sources, such as daylight or tungsten, which may shift color casts.
Confirm settings through trial captures, making real-time adjustments as needed until achieving the desired results. Familiarize yourself with how these settings interact with each other for optimal performance in various scenarios.
Aperture Control Techniques with Vintage Optics
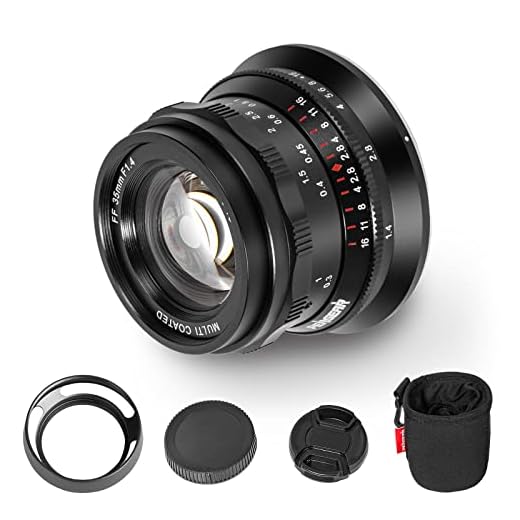
To adjust exposure effectively, familiarize yourself with the aperture settings on your adapted glass. Many vintage units feature manual rings, typically located near the base. Engage the ring to select your desired f-stop, often marked with numbers such as f/2, f/4, and so forth.
Exposure Compensation and Metering
Digital bodies generally have built-in metering options. Since legacy optics lack electronic communication, they may not reflect aperture settings in real-time. I rely on manual exposure modes like aperture priority for accurate exposure readings. This way, I can adjust the shutter speed and ISO to get the right balance based on my selected f-stop.
Depth of Field Preview
Many systems don’t support depth-of-field preview with mechanical elements. Instead, I check the viewfinder or live view screen after adjusting the aperture to visualize the depth of field more accurately. This is invaluable for composing shots, especially in creative photography.
For those adapting manual optics, being mindful of the light hitting the sensor is crucial. Engage the camera’s histogram function for better information about exposure; I find this especially helpful in high-contrast scenes. Calibration of exposure settings might take time, but with practice, I optimize my shooting experience significantly.
Exploring the pros and cons of using vintage glass
A significant advantage of vintage optics is the unique character they can add to images. Many older designs exhibit distinct optical traits–such as beautiful bokeh and unique color renditions–that may not be replicated by modern equivalents. This can provide a fresh perspective and artistic touch to photography, allowing creativity to flourish.

Advantages
Cost-effectiveness is another benefit. Affordable options can be easily sourced from various markets, enabling budget-conscious photographers to access quality glass that surpasses many contemporary choices in terms of aesthetics.
Durability is often another plus; many legacy models boast robust all-metal constructions, outlasting plastic counterparts. This could be particularly appealing for those focused on longevity and sustainability in equipment.
Disadvantages
Automation is a drawback when working with classic optics. Manual focus and aperture adjustments may slow down shooting, making it challenging to capture fleeting moments. Additionally, compatibility with modern devices may limit functionality–certain features might simply not be available.
Lastly, potential optical issues such as dust, fungus, or decentering in aged models can impact image quality. It’s vital to assess the condition of any glass before adding it to a toolkit to ensure that it meets personal standards for clarity and performance.
Cleaning and Maintaining Vintage Optics
I recommend using a soft microfiber cloth for regular cleaning. This helps in removing dust and fingerprints without scratching the glass surface. For more stubborn spots, slightly moisten the cloth with distilled water or a dedicated lens cleaner, avoiding spray directly on the optics.
Inspect the glass for fungus or haze. If present, use a dedicated lens cleaning solution with a lens tissue to gently wipe the affected areas. For severe cases, professional servicing may be necessary to prevent damage.

Check the seals and mount for any signs of wear. Damaged seals can allow dust and moisture to penetrate, so replacing them promptly can prolong the optic’s lifespan. I suggest using a lens wrench tool for precise attachment and detachment to prevent unintentional damage to the mount.
For storage, keep the equipment in a dry, cool location. Utilizing silica gel packets can help absorb excess moisture. A padded bag can prevent physical damage while stored. Avoid stacking lenses together, as this could lead to scratches.
Lastly, regularly check for mechanical functionality. Ensure aperture blades move smoothly and focus rings are not stiff. Lubricating moving parts with a specialized lens grease can preserve their fluid motion. I find that attention to these details enhances both performance and longevity.
Common issues with adapting vintage optics
One frequent concern involves focusing issues. Many adapted optics may not achieve infinity focus due to differences in flange distance. Verify the adapter’s specifications and perform tests to see if adjusted settings allow for sharp distant subjects.

Vignetting and light fall-off
Vignetting can occur with certain combinations of adaptors and optics, particularly wide-angle types. This results in darkened corners in images. To mitigate, crop during post-processing, or use software to correct these artifacts.
Electrical communication failure
Incompatibilities can lead to a loss of electronic functions, including autofocus and image stabilization. When dealing with purely mechanical adaptations, prepare for manual adjustments. This challenge entails mastering focus and exposure settings without digital indicators.
Another possible concern is sensor coverage. Full-frame optics used on crop sensor bodies might result in unexpected framing and field of view discrepancies. Always assess the crop factor before adapting.
Lastly, be cautious about potential lens damage. Older optics may have fragile glass or loose elements. Before attaching to a modern body, inspect for scratches and fogging. Regular maintenance can prolong the lifespan of any adapted glass.
Using Focus Peaking and Magnification Features
Activate focus peaking in the camera settings to easily identify sharp areas in your composition. This tool highlights in-focus details with color overlays, making manual focusing precise. Adjust the peaking settings to control sensitivity based on your needs–higher sensitivity may provide more highlighted areas, which can be beneficial in dim lighting or with shallow depth of field.
Steps to Enable Focus Peaking
- Navigate to the camera’s menu and select the ‘Focus’ settings.
- Find the option labeled ‘Focus Peaking’ and enable it.
- Choose a peaking color that contrasts well with your scene.
- Adjust the intensity to match your focusing conditions.
Utilizing Magnification
For enhanced accuracy, use the magnification feature. This provides a zoomed-in view of the focus area on the screen, allowing for meticulous adjustments. Activate this feature by pressing the designated button during shooting. This method is especially useful when working with fine details or low-light scenarios.
- Press the magnification button to zoom in on your subject.
- Fine-tune focus while observing the details closely.
- Return to normal view after achieving focus.
The combination of focus peaking and magnification elevates manual focusing precision, ensuring that every shot is sharp and well-composed. Regular practice with these features improves my efficiency and confidence in capturing images with vintage glass.
Understanding exposure settings with adapted lenses
To achieve optimal images, I adjust exposure settings appropriately. With manual focus glass, I rely heavily on my camera’s exposure metering. Many mirrorless bodies allow me to view the exposure changes in real-time through the electronic viewfinder, ensuring precise adjustments to shutter speed, ISO, and aperture. It simplifies the process of finding the right balance.
Setting my ISO is the first step. I choose a base ISO for the best quality, typically 100 or 200. Depending on lighting conditions, I can raise it when necessary, but I aim for the lowest setting to minimize noise. Next, I focus on shutter speed; I keep it at or above the reciprocal of the focal length to avoid motion blur.
For aperture control, I adjust the f-stop according to the desired depth of field. Many adapted optics feature manual aperture rings, which require my attention to ensure correct exposure. When shooting wide open, I expect a shallow depth of field; for landscapes, I close down the aperture for greater sharpness.
| Setting | Recommendation |
|---|---|
| ISO | Start at 100-200; increase if necessary |
| Shutter Speed | Minimum 1/focal length |
| Aperture | Adjust based on depth of field required |
Lastly, I keep histogram evaluation in mind. This aids in visually confirming exposure, ensuring highlights aren’t blown out, while shadows retain detail. Adjusting settings becomes more intuitive with practice, leading to better results consistently. Regular experimentation and experience cultivate confidence when working with adapted optics.
Tips for Achieving Desired Bokeh Effects
To create stunning bokeh, aperture plays a key role. Utilize the widest setting available on your equipment. A lower f-stop number results in a shallower depth of field, enhancing the out-of-focus areas. For instance, f/1.4 or f/2.0 will yield more pronounced bokeh compared to f/4.0.
Next, consider the shape of the aperture blades. Rounded blades contribute to smoother, more circular bokeh. Examine the vintage optic you’re working with and aim for models that feature a rounded aperture design for optimal results.
The distance between the subject and the background influences bokeh quality as well. Position your subject further from the background to blur distractions effectively. This depth will emphasize the subject while creating an aesthetically pleasing backdrop.
Background Elements
The nature of the background is crucial. Busy or textured backgrounds will yield harsher bokeh, while simpler, even hues create a more harmonious effect. Look for clean spaces to enhance the overall look.
Experiment with Focal Length
Longer focal lengths, such as 85mm or 135mm, can create more isolated subjects with creamy bokeh. When working with shorter focal lengths, like 35mm, get close to your subject to achieve a similar effect. This manipulation opens up various creative possibilities.
| Aperture Setting | Description |
|---|---|
| f/1.4 | Widest aperture; pronounced separation, soft backgrounds. |
| f/2.0 | Good balance; noticeable bokeh effects. |
| f/4.0 | Increased depth of field; bokeh less pronounced. |
Finally, invest time in understanding light. Positioning light sources behind or around the subject can create beautiful highlights, enhancing the bokeh effect even further. Knowing how to manage your setup will significantly impact the quality of your images.
Creating Unique Images with Vintage Lens Characteristics
To capture the charm of classic optics, focus on the distinct attributes that these relics offer. A prime advantage is the unique rendering of light and color that many vintage models produce. These elements can create images with a certain warmth and depth, enhancing the storytelling aspect of your photos.
Utilizing Characteristic Distortions
Embrace the inherent distortions that come with older glass. For instance, slight vignetting or soft corners can add character to your images, setting them apart from contemporary renditions. Experiment with different focal lengths to see how these distortions manifest and consider framing your subjects to incorporate these unique qualities.
Artful Bokeh and Backgrounds
The quality of out-of-focus areas from retro optics often surpasses many modern alternatives. Aim for lenses known for their iconic bokeh. Wide-open apertures can produce an ethereal quality, especially in portraits or macro photography. To modify bokeh characteristics further, evaluate the aperture blades’ shapes; rounded blades yield smoother backgrounds, while angular ones create distinct shapes that can contribute to visual interest.
Sharing Your Adapted Lens Experiences Online
Join dedicated online communities focused on vintage optical equipment. Platforms like Reddit, Facebook groups, and photography forums are excellent places to share insights and gain knowledge. Specifically look for groups that emphasize manual and adapted optics.
When posting, include detailed notes about your setup:
- Camera models you’ve paired.
- Specific adapters utilized.
- Focal lengths and aperture settings during shooting.
- Types of photography (portraits, landscapes, macro) where you’ve tested your setup.
Share sample images alongside your experiences. Annotate each photo with settings used and your impressions of the results. This not only enriches your post but also helps others grasp the characteristics of the optics you’re employing.
Engage actively with other members’ questions and feedback. Your perspective can provide valuable insight, and interactions often lead to deeper connections and shared learning. Be open about challenges encountered and solutions discovered; this can foster a supportive environment for those also exploring adapted optical systems.
Consider writing blog posts or articles. Platforms like Medium or personal websites allow for more extensive documentation. Break down your experiences into segments:
- Description of the lens and its history.
- Process of attachment to the camera body.
- Techniques for achieving desired images.
- Comparative analysis with digital optics.
Utilize hashtags on social media platforms like Instagram or Twitter to reach wider audiences. Tags like #vintageglass, #adaptedlensphotography, and #manualfocus can attract like-minded enthusiasts.
Don’t hesitate to create video content. Tutorials or walkthroughs demonstrating technique or the results of your adapted optical combinations can prove engaging and educational. Platforms such as YouTube or TikTok provide ideal venues for these types of content.
Remember to respect copyright and credit original sources if you reference others’ work or share their images. Building a community centered on respect and sharing knowledge enhances everyone’s experience and growth in this niche photography passion.
Resources for finding vintage glass and adapters
eBay is an excellent platform for locating a wide range of vintage optics at varying price points. You can filter searches by specific brands or styles and often find auctions that provide opportunities for great deals.
Facebook groups dedicated to photography gear can be invaluable. These communities frequently share listings or alert members about upcoming sales or swaps, often at reasonable prices.
Local thrift shops, garage sales, and flea markets should not be overlooked. These venues occasionally have hidden gems that can be purchased for a fraction of their value.
Dedicated photography websites and forums often include classified sections where users can buy, sell, or trade older glass. Engaging in these communities can provide additional insights on where to find sought-after pieces.
Online marketplaces like KEH and B&H also specialize in used equipment, offering a curated selection with guarantees, which adds an extra layer of security for buyers.
For specific adapter needs, checking specialty stores that focus on vintage gear can yield options that may not be available elsewhere. They often carry hard-to-find mounts that are compatible with various camera systems.
Lastly, don’t forget about social media. Platforms like Instagram and Pinterest can inspire future purchases as photographers often share their gear as well as tips on sourcing unique equipment.


