


For those looking to enhance the functionality of their handheld device, obtaining a replacement lens is a practical step to consider. This task can significantly improve photo quality, especially if the original lens has suffered from scratches or damage. The process is relatively straightforward, but requires attention to detail and the right tools to ensure a successful outcome.
First, gather the essential equipment: a small Philips screwdriver, a suction cup, a plastic opening tool, and a new lens compatible with your model. Carefully powering down the device is crucial before beginning disassembly. This prevents any accidental damage or electrical shorts during the procedure.
Next, using the suction cup, gently lift the screen to expose the internal components. The plastic opening tool will assist in safely prying apart the device without harming any internal parts. Once the casing is opened, locate the screws securing the broken lens. Remove them with the screwdriver, and then carefully detach the damaged component.
Installing the new lens involves aligning it precisely with the mounting area. After placement, reassemble the device by reversing the disassembly steps, ensuring each screw and part is secure. Finally, power on your device and test the new lens to confirm improved performance.
Camera Lens Replacement Guide
Begin by gathering the necessary tools: a heat gun or hairdryer, a suction cup, and a set of precision screwdrivers. Ensure all tools are clean and ready for use.
Firstly, use the heat source on the back of the device to soften the adhesive, which holds the back cover. Apply gentle heat for about 30 seconds, keeping the device at a safe distance to avoid overheating.
Next, attach the suction cup near the edge of the rear panel. Carefully pull to create a small gap. Insert a plastic opening tool into the gap to pry the back cover away from the frame.
Once the rear panel is removed, locate the camera assembly. You will find screws securing it in place; carefully remove these using the precision screwdriver.
Gently detach the faulty element from the assembly. Take care not to damage surrounding components during this process.
Prepare the new element for installation. Align it correctly with the existing assembly and secure it with the screws previously removed. Ensure everything is tightened appropriately to eliminate any looseness.
Before resealing the device, check that the new part is functioning properly. If it is, proceed to reattach the back cover. Apply pressure evenly around the edges to seal it securely.
Finally, use the heat source again briefly to reinforce the adhesive bond, ensuring durability. Allow it to cool down before testing the functionality of the device.
For further maintenance, regularly inspect the new element for any signs of damage or wear. Taking care of this part will enhance the longevity of the device’s performance.
Tools Required for Lens Replacement
For this task, I recommend gathering the following tools to ensure a smooth process:
Essential Tools
| Tool | Purpose |
|---|---|
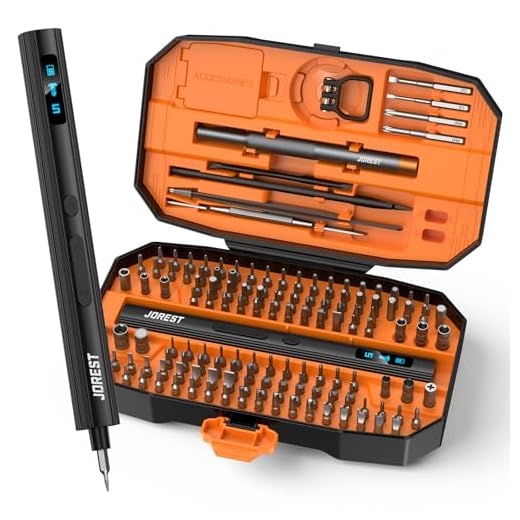
| Pentalobe screwdriver | To remove the exterior screws securely. |
| Tri-point screwdriver | Necessary for accessing internal components. |
| Plastic opening tools | To gently pry open the device without damaging the casing. |
| Tweezers | For handling small components with precision. |
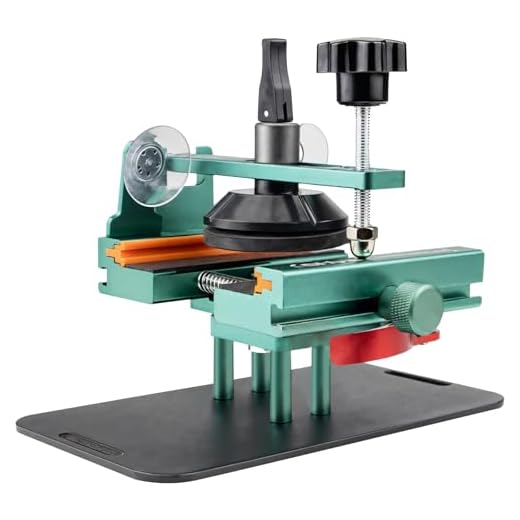
| Suctions cup | Helps to lift the screen or panel without risk of cracking. |
| Magnifying glass | Useful for inspecting the area thoroughly before applying changes. |
| New lens | Replacement part that fits your device model. |
Additional Recommendations
Consider using anti-static wrist straps to prevent static damage to sensitive components. A clean, organized workspace will aid in keeping all components accessible and reduce the risk of losing small screws or parts.
Choosing the Right Replacement Lens
Prioritize quality when selecting a new glass for your device. Opt for lenses made from high-quality materials such as sapphire or durable optical glass. These materials enhance image clarity and provide better protection against scratches.
Compatibility is key. Ensure the chosen lens is specifically designed for your model. Check product specifications and user reviews to verify fit and performance.
| Lens Type | Pros | Cons |
|---|---|---|
| Sapphire | Scratch-resistant, high clarity | More expensive |
| Optical Glass | Good clarity, reasonable cost | Less scratch-resistant than sapphire |
| Plastic | Inexpensive, lightweight | Prone to scratches, lower image quality |
Be wary of deals that appear too good to be true. Low-cost options may compromise on quality, leading to further issues down the line. Research reputable sellers and consider warranties for added peace of mind.
Lastly, consult with professionals or online forums for recommendations on trusted brands. User experiences can provide valuable insights into product reliability and performance.
Safety Precautions Before Starting
First, ensure the device is completely powered off. This prevents any potential electrical hazards during the process. Disconnect any accessories and remove the SIM card to avoid damage.
Use a clean workspace equipped with proper lighting to avoid losing small components. Placing a soft mat beneath the device will protect it from scratches and provide a cushion during disassembly.
Gather Protective Gear
Wear an anti-static wrist strap to eliminate static electricity buildup, which can harm internal components. Additionally, using safety glasses can protect your eyes from small parts that may spring free during the procedure.
Handle Tools With Care
Familiarize yourself with the tools you will use. Ensure that each tool is suited for the task to avoid slips or injuries. A spudger is useful for prying open parts gently, while tweezers can help manage tiny screws.
Keep all tools organized to prevent loss and ensure a smooth workflow. If at any point you feel uncertain about the process, seek assistance or consult a guide before proceeding further.
Turning Off Your Device
To power down your device, press and hold the side button along with the volume button until the slider appears on the screen. Slide it to the right to turn off the power.
If your model has a different button configuration, check the manufacturer’s guidelines for specific instructions. If your phone is unresponsive, perform a forced shutdown by pressing and quickly releasing the volume up button, then the volume down button, followed by pressing and holding the side button until the logo appears.
Before I begin any repairs, I ensure the device is completely powered down to prevent potential damage or electrical shock.
| Model | Power Off Method |
|---|---|
| iPhone X or later | Side + Volume Button |
| iPhone 8 | Side + Volume Button |
| iPhone 7 | Power + Volume Down |
| iPhone 6s and earlier | Power + Home Button |
Always double-check that the screen is off before proceeding with any technical work. This eliminates risks associated with sporadic power-on events during repairs, which can lead to complications.
Removing the Screws from the Device Case
Begin with a precision screwdriver, typically Phillips or Pentalobe, based on your device model. Position the device on a soft surface to prevent scratches. Make sure your workspace is well-lit for visibility.
Steps to Follow
- Identify the screw locations around the edge of the casing. They are generally found near the charging port, side buttons, and back panel.
- Carefully remove each screw, placing them in a small container to avoid losing them. Pay attention to the different sizes, as you will need to return them to their original spots.
- If your model includes adhesive, gently slide a plastic opening tool or a spudger between the case and the device’s body. Avoid using metal tools to prevent damage.
Additional Tips
- Always check the user manual for specific guidance on screw types and locations.
- Consider using a magnetic screwdriver to keep screws secure while working.
- If encountering resistance, do not force the screws; double-check for any additional screws or adhesive that may be holding components together.
Using a Suction Cup for Back Panel Removal
A suction cup is a practical tool for lifting the back panel without damaging it. Position the cup near the lower edge of the rear cover, ensuring that it’s properly sealed to the surface. Gently pull upward while keeping the device stable to create a gap. This initial lift is critical for proceeding with the separation process.
With a slightly opened gap, insert a plastic opening tool. Slide it carefully around the perimeter to release adhesive bonds. Aim for the corners and edges, as these areas often hold the adhesive most strongly. Be patient; excessive force could crack the casing.
| Step | Description |
|---|---|
| 1 | Attach the suction cup to the lower part of the back panel. |
| 2 | Gently pull the cup to create a small gap. |
| 3 | Insert a plastic opening tool into the gap. |
| 4 | Carefully slide the tool around to detach the adhesive. |
Continue working your way around the perimeter until the panel is free. Avoid rushing, as patience is key in this step. Ensuring a clean separation will facilitate easier access to the internal components.
Carefully Lifting the Back Cover
Using a plastic pick or a slim tool, I carefully insert it into the gap along the edge of the rear panel. My goal is to create just enough space to avoid damaging internal components. I gently twist or slide the pick, allowing the adhesive to break without applying excessive force.
Steps to Consider
- Identify any clips around the edges and be cautious while prying to avoid breaking them.
- Work my way around, moving the tool methodically to ensure an even release of the adhesive.
- Maintain a steady hand, avoiding sudden movements that might jar the device.
If resistance is met, I reassess the area and gently apply more pressure, ensuring not to rush the process. Once I’ve lifted the cover, I carefully place it aside, keeping it dust-free and protected.
After Removing the Back Panel
Upon successfully releasing the panel, I visually inspect for any damaged areas or loose connections. It’s important to make sure everything is intact before proceeding with further steps.
- Check for any visible adhesive remnants that might interfere with reassembly.
- Ensure that no internal parts are dislodged during the opening.
Maintaining a clean workspace is crucial, as it helps to manage the components and avoid losing any small parts that may be necessary later in the process.
Disconnecting the Battery for Safety
Before proceeding with any repairs, I disconnect the battery to eliminate the risk of short circuits or accidental power activation. First, locate the battery connector–typically found near the bottom edge of the device. Carefully use a spudger or plastic opening tool to gently lift the connector straight up from its socket. Ensuring that I do this without applying excessive force is crucial to avoid damaging any components.
Double-Check the Disconnection
After disconnecting, I always double-check to confirm that the battery is completely disengaged. I ensure that there’s no power running through the device by trying to turn it on. If the screen remains unresponsive, I know I’ve successfully cut off the power supply, allowing me to work safely on the internal parts without any risk of electric shock.

Precautions While Handling Internal Components
While I’m working, I maintain awareness of my environment, ensuring no static electricity can disrupt the components. Using an anti-static wrist strap helps greatly in preventing potential damage during the procedure. Following these steps prior to starting any further dismantling assures that I can focus on the task without concern for electrical hazards.
Identifying the Camera Assembly Location
Locate the specific area on the rear panel where the optical components are situated. This region typically resides near the top-left corner of the device’s back cover, depending on the model. Familiarize yourself with the layout by referencing a detailed disassembly guide tailored for your specific model.
To ensure precision in your next steps, take note of the following components nearby:
| Component | Location |
|---|---|
| Flash Module | Adjacent to the optical assembly |
| Microphone | Near the bottom edge of the casing |
| Volume Buttons | On the side, above the optical section |
A careful examination of the assembly will aid in accurately identifying protective seals and potential connection points for removal. Utilizing a flashlight may enhance visibility in this confined space. Ensuring you have a clear understanding of the layout will streamline the disassembly process.
Removing the Camera Module from the Housing
Disconnect the flex cable attached to the camera assembly before proceeding with the removal. Use a spudger to gently lift the connector from the mainboard, ensuring no damage occurs to the surrounding components.
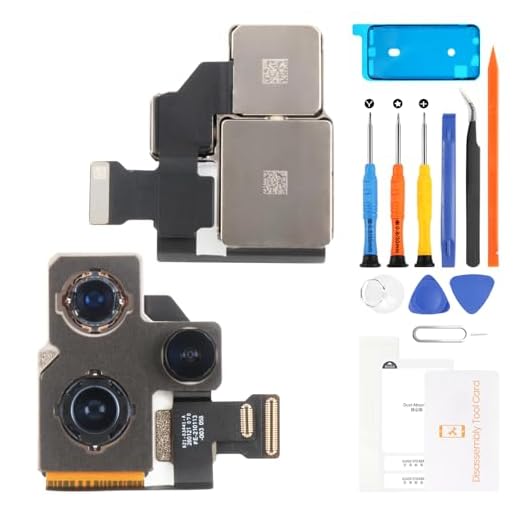
Next, locate the screws securing the camera module. Typically, there are two or three screws to remove. Use a precision screwdriver to carefully unscrew them and set them aside in a safe place to avoid loss.
With the screws removed, gently push the camera module from its housing. Use a plastic tool to avoid any scratches on the internal casing. Be cautious not to apply excessive force, as this may damage the module or adjacent parts.
Once the assembly is loose, pull it out from the housing gently. Make sure it is entirely detached from the connectors and the frame before setting it aside.
Inspect the area to ensure no debris or loose screws remain in the housing. This prevents any future complications when installing the new module.
Inspecting the Existing Camera Lens Damage
I carefully examine the current lens for any signs of cracks, scratches, or other visible impairments. A thorough inspection is crucial to assess the extent of the damage before proceeding with further actions.
Steps for Damage Inspection
- Start by cleaning the lens gently with a microfiber cloth to eliminate dust and smudges.
- Hold the device under a direct light source to observe reflections and identify imperfections.
- Check for any fogging that might indicate internal moisture, which can compromise functionality.
Evaluating Impact on Functionality
After identifying visible damage, I test the functionality. I activate the camera and take several pictures to assess quality. Observing issues like blurred images, dark spots, or color distortion can indicate significant concerns that verify the need for replacement.
Taking note of these observations guides the next steps in the lens replacement process. Accurate evaluation not only helps ensure a successful outcome but also saves time and effort in the long run.
Cleaning the Camera Housing Area
Before installing the new glass, I ensure that the camera housing area is free from dust and debris. This step is critical for preventing any particles from getting trapped between the new lens and the camera module. I use a microfiber cloth slightly dampened with isopropyl alcohol to gently clean the edges of the housing.
Recommended Cleaning Tools
Here’s a concise list of tools I find helpful for cleaning:
| Tool | Purpose |
|---|---|
| Microfiber Cloth | Removes dust without scratching surfaces |
| Isopropyl Alcohol | Dissolves grime and evaporates quickly |
| Compressed Air | Blows away loose particles |
| Soft Brush | Gently dislodges stubborn debris |
I take care to avoid using excessive liquids, as they can seep into the device and cause damage. After cleaning, I verify the area is completely dry before proceeding with the installation of the new lens. This meticulous approach helps maintain the integrity of the camera system and ensures optimal performance post-installation.
Applying Adhesive for New Lens Installation
For optimal adhesion of the new optical component, I select a high-quality, transparent adhesive designed for delicate electronics. I ensure the adhesive is not conductive to prevent any damage to internal circuits.
Preparation and Application
Before applying the adhesive, I clean the surfaces with isopropyl alcohol to remove any dust or residual debris. I use a small applicator, such as a toothpick or a precision syringe, to apply a thin, even layer of adhesive around the perimeter of the housing where the new lens will rest. Careful control is essential to avoid any excess which may seep into internal components.
Securing the Lens
Once the adhesive is applied, I place the new optical element precisely over the designated area, ensuring proper alignment. I gently press down, applying even pressure to form a secure bond. Maintaining this pressure for a moment allows the adhesive to begin curing effectively without shifting the position of the element.
Placing the New Camera Lens Precisely
Align the new lens over the camera assembly with the utmost precision. The edges of the lens should perfectly match the housing contours to ensure a secure fit. Avoid any tilting to prevent future image distortion.
Using a pair of tweezers, gently position the lens while keeping it centered. Avoid using your fingers directly, as oils or dirt can affect adhesion. Ensure the adhesive is adequately spread without excess, which might seep out when pressed down.
Once aligned, apply gentle pressure across the lens to secure it in place. This will help the adhesive to bond the lens effectively. Be cautious not to touch the lens surface with anything, including your fingers, as this can leave smudges.
| Step | Action |
|---|---|
| 1 | Align new lens with the housing |
| 2 | Use tweezers for precise placement |
| 3 | Apply gentle, even pressure |
| 4 | Avoid contact with the lens surface |
After placement, give the adhesive time to cure fully. Refer to the adhesive instructions for drying times, as this can vary. Reassemble the device only once the glue is completely hardened.
Allowing Adhesive to Set Properly
After applying the adhesive around the new optical component, it’s crucial to allow it to bond effectively. I usually recommend a minimum curing time of at least 30 minutes to ensure a solid hold. During this period, avoid any movement or pressure on the lens to prevent misalignment.
Environmental Considerations
Temperature and humidity can impact the adhesion process significantly. I find a controlled environment, ideally between 20°C to 25°C (68°F to 77°F) with low humidity, optimal for the adhesive to cure properly. If I’m working in a less-than-ideal setting, I allow extra time for the adhesive to set.
Final Inspection
Once the waiting period is over, I conduct a detailed examination of the lens installation. Ensuring there are no gaps or excess adhesive is important. If everything appears secure and aligned, I proceed with reassembling the device. Taking this time to confirm the integrity of the installation can save me from future issues.
Reconnecting the Camera Module
Ensure the ribbon cable is aligned properly before guiding it into the connector. I carefully insert the cable into the socket, applying light pressure until it clicks into place. This connection is crucial for the functionality of the replaced component.
Next, I secure the camera module with its screws, ensuring they are tight but not overtightened to prevent damage to the housing. Using the appropriate screwdriver helps maintain the integrity of the threads.
After the assembly is secure, I reconnect the battery. I make sure this connection is solid, as a loose connection can lead to power issues. I double-check all connections before proceeding to the next step.
I then perform a quick function test by powering on the device and accessing the photo application. Confirming that the new part is operational saves any potential reassembly effort later on.
Reinstalling the Battery Connection
To ensure the device operates smoothly after performing repairs, I prioritize reconnecting the battery. Begin by aligning the battery connector accurately with the mainboard socket. It’s crucial to apply gentle pressure until the connector is securely in place. If resistance is felt, double-check the alignment instead of forcing it.
Next, I suggest using a plastic spudger to assist in ensuring the connector is seated properly. This prevents any potential damage to the pins on the board or the connector itself. Ensure that no cables are pinched or obstructed during this process, as that could lead to power issues later.
Once the battery connection appears secure, I recommend double-checking the integrity of the connection before sealing the device back up. This step is essential for confirming that the unit will power on and function correctly after reassembly.
Testing the Camera Functionality
Upon completion of the lens installation, I conduct a series of tests to ensure everything operates correctly. First, I reboot the device and navigate to the camera application. I check if the app launches without any errors.
I capture several photos in different lighting conditions–bright daylight, dim environments, and indoors. This helps me assess the lens clarity and autofocus performance. I observe the images for any blurriness or distortion.
Next, I explore the video recording feature, paying attention to the smoothness of the capture and the audio quality. I switch between various modes, such as portrait and landscape, to confirm functionality across settings.
I also assess the zoom capability to verify that it operates seamlessly. While reviewing photos, I zoom in to check for pixelation or unexpected artifacts.
Finally, I perform a check on the flash feature by taking low-light photos both with and without the flash. A successful test indicates a job well done, allowing me to confidently use the device moving forward.
Reattaching the Back Cover Securely
Ensure that the back cover is aligned perfectly before securing it. Begin by placing the cover so that it fits snugly against the frame without any gaps. It’s crucial to apply even pressure on all sides to avoid misalignment.
Utilize a plastic spudger or similar tool to gently press the edges of the cover into place, ensuring that the adhesive adheres correctly. Work around the edges carefully, making sure not to damage any internal components.
Securing the Adhesive
If the adhesive has weakened, consider applying new double-sided tape to enhance the bond. Cut the tape to size and position it along the edges of the device before pressing the back cover down firmly to secure it.
Final Inspection
After securing the cover, check for any unevenness or loose areas. Make adjustments as necessary, ensuring everything is sealed tightly. Once satisfied, perform a brief test to confirm that all functions are operating smoothly.
Securing Screws on the Back Panel
After reinstalling the back panel, ensuring the screws are tightly secured is critical for the integrity of the device.
Follow these steps:
- Use the appropriate screwdriver size–usually a Pentalobe for the exterior screws and a Phillips for interior ones.
- Carefully position each screw back into its designated hole, avoiding cross-threading.
- Hand-tighten the screws before using the screwdriver to prevent over-tightening, which can damage the casing.
- Work in a crisscross pattern when tightening–tightening opposite screws can help ensure an even fit.
- Perform a quick visual inspection to confirm all screws are flush with the surface and secure.
Avoid using excessive force when securing screws to prevent potential casing damage or misalignment. This attention to detail will help maintain the device’s structural integrity.
Final Power On and Camera Check
After completing the assembly process, it’s crucial to power on the device to verify functionality. Begin by pressing the power button until the Apple logo appears.
Once the device is on, navigate to the camera application. Take a few test shots in various modes – regular, portrait, and video – to ensure that all features are operating correctly. Check for clarity, focus, and color accuracy in the images.
If the photos are clear and the application functions without glitches, the installation process was successful. In case of any issues, double-check connections made during installation.
Secure the back cover and finish by tightening any screws, ensuring the device remains intact and functional for further use.
Cleaning the New Lens Post-Installation
Once the new lens is installed, it’s crucial to ensure it’s clean to avoid any imperfections in your photos. Here are the recommended steps for cleaning the newly mounted lens:
Required Tools
- Lens cleaning solution
- Microfiber cloth
- Compressed air (optional)
Cleaning Steps
- Use a few drops of lens cleaning solution on a microfiber cloth. Never apply the solution directly to the lens.
- Gently wipe the surface of the lens in circular motions, starting from the center and moving outward. This method helps avoid streaks.
- If there are stubborn spots or dust, a few short bursts of compressed air can help eliminate debris without scratching the surface.
- Once cleaned, inspect the lens under a bright light to check for any remaining dust or smudges.
A clean lens enhances clarity and quality in images, making this step indispensable for optimal performance. Regular maintenance will keep the lens free from dirt and scratches, ensuring clear and vibrant photographs.
Troubleshooting Common Installation Issues
If the new ocular component isn’t fitting snugly, ensure it aligns perfectly with the assembly. Misalignment can result from the adhesive not being applied consistently or from debris in the housing. Clean the area again before attempting reinstallation.
If the lens is cloudy post-installation, check for smudges or dirt between the two surfaces. A gentle cleaning with a microfiber cloth might resolve this issue. Always handle the lens by the edges to avoid fingerprints.
Should the image quality not meet expectations, inspect the camera module connection. A loose connection might lead to poor performance. Reseat the cable and ensure all connections are firm before testing again.
If the device fails to power on after reassembling, verify the battery connection. Sometimes, the disconnection can occur during the installation. Ensure the battery is securely attached before trying to power the device.
In cases of overheating, examine that no components are being strained or pinched. Proper placement of the module and cables is vital to maintain optimal operation. Re-evaluate the positioning if you notice excess heat.
Finally, if screws do not align when reattaching the casing, it could indicate that the back cover is not seated correctly. Gently press the cover into place while securing the screws to avoid cross-threading.
Tools for Aligning Camera Lens Accurately
Precision is key when positioning the optical element to ensure optimal performance. Here are the tools I recommend:
- Alignment Jig: Consider using a dedicated alignment jig designed for smartphone lens installation. It ensures proper positioning and stability during the process.
- Calipers: Use digital calipers to measure the exact dimensions of the lens and the mounting area. This will help confirm correct fitment.
- Magnifying Glass or Loupe: A magnifier allows for detailed inspection of the alignment. This is especially useful for confirming that the lens sits flush with the surrounding housing.
- Tweezers: Precision tweezers enable careful handling of small components, reducing the risk of misalignment or damage during installation.
- Leveling Tool: A small bubble level can assist in ensuring the lens is horizontally aligned within the module, preventing tilt.
By utilizing these tools, I can enhance positioning accuracy and achieve a seamless installation. Each item plays a role in verifying alignment before securing the new optical component in place.
Always double-check measurements after application of adhesive, making any necessary adjustments before it sets. This attention to detail minimizes complications down the line.
Understanding iPhone Camera Lens Features
Choosing a new lens requires knowledge of various features that impact image quality and overall performance. Pay attention to aperture size, which affects light intake. A larger aperture allows for better low-light performance and depth of field effects.
Consider optical image stabilization (OIS). This feature minimizes blurriness caused by shaking hands, providing clearer shots, especially in challenging conditions. Ensure your replacement component has this technology if it’s crucial for your photography style.
Take into account the lens coating. High-quality lenses often employ anti-reflective coatings that enhance clarity and reduce glare, ensuring more vivid colors and detailed images. Verify that the replacement matches or exceeds the optical properties of the original.
Field of view is another variable that influences perspective. Wider angles are perfect for landscapes or group shots, while telephoto lenses excel in capturing distant subjects. Choose according to the scenarios you find yourself photographing most often.
Don’t overlook the importance of compatibility. Ensure your selected lens will fit your specific device model and integrates seamlessly with the existing hardware and software for optimal performance.
Differences Between OEM and Third-Party Lenses
OEM lenses are manufactured by the original device producer, ensuring compatibility and quality. These components typically come with warranties and are designed to fit seamlessly within the device’s specifications. Installation of OEM parts often results in a performance that mirrors the original functionalities.
On the other hand, third-party lenses can be a cost-effective alternative. However, they may vary in quality and compatibility. Some may enhance performance, while others could lead to issues such as poor image quality or misalignment. It’s essential to research and choose reputable brands when opting for non-original components.
In terms of materials, OEM lenses often use higher-grade glass and coatings, impacting clarity and durability. Third-party options might employ different materials that can compromise optical performance. Additionally, installation experiences may differ; third-party lenses might require adjustments or alterations, while OEM replacements tend to fit without additional modifications.
Before making a decision, consider the long-term implications of your choice, including possible future repairs and the overall investment in your device’s functionality. Selecting between OEM and third-party options demands careful evaluation of quality, price, and performance needs.
Evaluating Warranty Implications of DIY Repair
Before taking on the task of repairing your device, I suggest carefully reviewing the warranty agreement. Many manufacturers explicitly state that self-repair voids the warranty. Even if the damage is unrelated to the repair attempt, your warranty may still be compromised.
Consider contacting customer service to clarify whether certain repairs can be performed without affecting warranty coverage. In some cases, authorized service centers may offer repairs that keep the warranty intact.
If the warranty is already expired, weigh the costs of professional repair services against the benefits of tackling the job yourself. If there’s significant risk of damaging internal components, it may be wiser to consult with a technician.
Documenting the state of your device before starting repairs can be beneficial. Take photos of the original condition and any steps taken during the process. This evidence may be useful if you need to provide proof of care for any future claims.
Utilizing genuine parts from reputable suppliers also helps mitigate warranty issues, as it demonstrates an intent to maintain quality. Keep receipts and any documentation related to parts you purchase for your own records.
Reading iPhone Model Compatibility for Lenses
To ensure the optimal fit and functionality of the replacement glass, I always check the compatibility with specific iPhone models before making a purchase. Each model has unique specifications that directly affect lens dimensions and installation procedures. I verify part numbers and consult trusted suppliers who offer detailed compatibility charts.
Resource Links
I also make use of reliable online resources and forums where users share their experiences with replacement parts and any compatibility issues they faced. This firsthand information can reveal nuances in model variations that official documentation might overlook.
Comparing OEM and Aftermarket Options
When comparing original equipment manufacturer (OEM) components with aftermarket parts, I pay close attention to customer reviews regarding fit and performance. This ensures that my choice will not only align with my device but also uphold the quality of photos and videos post-installation.
Assessing Lens Quality and Specifications
Focus on evaluating several key aspects when examining the quality and technical details of a replacement optic component.
- Material Quality: Opt for glass lenses over plastic. Glass typically provides better clarity and durability.
- Optical Coating: Look for anti-reflective coatings that improve light transmission and reduce glare.
- Aperture Size: Larger apertures allow more light, enhancing low-light performance. Check specifications for f-stop ratings.
- Field of View: Consider the angle of view offered by the lens; a wider field enhances versatility for various shooting conditions.
- Compatibility: Ensure that the replacement component aligns with your specific device model to avoid fitting issues.
- Focal Length: Shorter focal lengths are ideal for wide shots, while longer ones are better for detailed captures. Review your requirements before making a choice.
Implement these assessments to guarantee optimal performance and clarity with your new optic replacement.
Where to Buy Replacement Lenses Safely
I recommend starting your search on reputable online marketplaces. Websites such as Amazon, eBay, and specialized electronics retailers often have a variety of replacement parts. Make sure to read customer reviews and check seller ratings to gauge reliability.
- Official Retailers: Consider purchasing from authorized dealers or the manufacturer’s own website. This ensures you receive genuine parts that match the original specifications.
- Consumer Electronics Stores: Local stores that specialize in electronics may carry quality replacement lenses. Direct interaction with staff allows you to ask questions and evaluate products in person.
- Repair Shops: Established repair shops often sell parts in addition to offering services. They can provide advice on the best options for your needs.
- Online Forums and Communities: Engaging with tech enthusiast forums may reveal recommendations for reliable online shops that focus on quality components.
Ensure you verify product compatibility with your device model. Check the specifications listed and compare them with your device’s requirements. Look for warranties or return policies, as these add a level of protection should the component fail to meet expectations.
Avoid purchasing from unfamiliar websites or sellers with limited feedback. Always prioritize safety by confirming the credibility of the source before placing an order.
Understanding Camera Functions
Knowing the features of your device’s imaging system can significantly enhance your photography skills. Each model may have unique specifications that impact performance and usability.
- Lens Aperture: The size of the lens opening directly influences light intake. Larger apertures provide better low-light performance.
- Optical Zoom: This feature allows for detailed close-ups without sacrificing image quality, as it uses physical lens adjustments rather than digital cropping.
- Image Stabilization: Built-in stabilization reduces blurriness caused by shaky hands, crucial for handheld shooting.
- Focus Mechanism: Autofocus systems can vary, with some models offering advanced options such as phase detection and contrast detection for sharper images.
- HDR Mode: High Dynamic Range enhances images by balancing light and shadow, ensuring that details in both bright and dark areas are captured.
Familiarizing yourself with these capabilities enables improved image composition and increases your overall satisfaction with photographic outcomes. Detailed specifications can usually be found on the manufacturer’s website or within the device manual.
For any updates or features specific to your model, consulting user communities or forums can provide additional insights that enhance your understanding of the image capturing attributes!
Recognizing Warning Signs of Camera Issues
I notice that images appear blurry or out of focus, which suggests lens misalignment or damage. Taking a closer look at photos, I spot unexpected distortions or artifacts, indicating further complications with the optical components.
Examining the lens closely, I often find visible cracks or scratches that compromise the quality of my shots. If colors appear washed out or overly muted, it signals potential issues with the lens coating or internal elements.
Sound disturbances during autofocus are another clue; any grinding or popping noises when trying to focus points to mechanical failures that require attention. If the camera fails to respond to commands or struggles to capture images entirely, this represents a significant malfunction that cannot be ignored.
Humidity or moisture inside the glass leads to cloudiness, affecting image clarity as well. Additionally, intermittent connectivity problems, where the app crashes or the shutter freezes, can hint at broader electronic or software issues associated with the photography system.
Occasional checking for any of these indicators can save time and enhance the overall photographic experience. Taking immediate action can prevent further complications and ensure better longevity for my device’s optical system.
Common Mistakes to Avoid During Replacement
Neglecting to power down the device can lead to short circuits. Ensuring the device is completely off before starting is non-negotiable.
Over-torquing screws is a frequent error. Too much pressure can strip the screw holes or damage the casing. Using the appropriate screwdriver and a gentle hand prevents this issue.
Ignoring the orientation of components can result in improper assembly. During disassembly, take notes or photos to maintain proper placement and alignment for reassembly.
Incorrect Adhesive Application
Applying excessive adhesive can lead to overflow, which may affect the lens’ performance. Use a minimal amount, ensuring even distribution for a secure fit without mess.
Rushing the adhesive setting time is another pitfall. Allowing adequate time for the adhesive to cure is critical to ensure the lens stays in place during use.
Inadequate Cleaning of the Housing
Failing to clean the housing before installation can trap dust and debris beneath the new component. Ensuring a clean surface allows for optimal adhesion and clarity.
Lastly, neglecting to test functionality after installation can leave one with unresolved issues. Performing a test of the new part ensures it operates as intended before sealing the device back up.


