To ensure smooth photography sessions, a dedicated lens pouch is my first recommendation. Brands like Lowepro and Peak Design offer robust solutions that not only protect the glass but also provide easy access during shoots.
Always opt for a padded case designed specifically for lens storage. These cases often feature dividers to prevent unwanted movement, ensuring that each element remains secure. I particularly appreciate those that can attach to a belt or a backpack for seamless transport.
Another approach is to use lens wraps. These versatile fabrics protect individual elements while allowing me the flexibility to fit multiple in a small space, perfect for minimalist gear setups. Investing in quality wraps like those from LensCoat can provide both protection and style.

Lastly, consider using a modular system that allows for customized configurations. Some camera bags come with removable compartments that can be adjusted based on your current equipment needs. This adaptability is invaluable for balancing space and safety.
Choosing the right lens bag
Opt for a bag that offers customized compartments. This ensures secure placement and minimal movement during transport, protecting sensitive equipment.
Key Features to Look For
- Padding: Ample cushioning is critical. Look for soft, protective materials that safeguard against impacts.
- Water Resistance: Choose a model designed to repel moisture. This is crucial for outdoor conditions and unexpected weather changes.
- Weight: Lightweight options reduce strain during long shoots. Prioritize comfort alongside protection.
- Accessibility: Rapid access systems let you switch between different optics quickly. Consider bags that allow easy opening and closing without disturbing organization.
Size Considerations
The selected bag should accommodate additional gear beyond the glass, like filters and hoods. A modular design allows for future expansions as your collection grows.
- Compact Models: Suited for short trips and minimal gear. Prioritize ease of mobility.
- Larger Variants: Ideal for extended sessions. Ensure enough space for all necessary components.
Ultimately, testing various options is vital. Select a bag that aligns with personal shooting style and equipment needs for the best outcome.
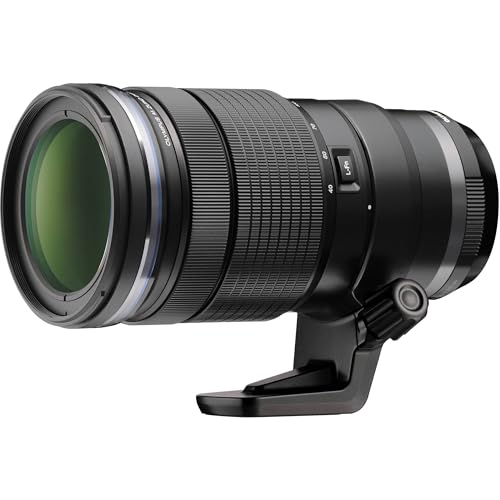
Understanding Lens Weight and Size
Prioritize a thorough understanding of the weight and dimensions of each optical accessory. Each piece impacts balance, portability, and the comfort of use during extended shoots. Consider the density of materials; heavier constructions often equate to durability, but can be cumbersome.
Assess the physical specifications of the glassware. Lenses with larger apertures, like f/1.4, generally weigh more compared to their f/4 counterparts due to additional glass elements. Smaller, lightweight options, although less versatile in low-light conditions, are easier to handle for long durations.
Factor in the added weight when pairing multiple units for different photographic scenarios. For versatility without excessive bulk, opt for a mid-range zoom if you’re aiming to minimize kit weight while still covering a variety of focal lengths. Alternatively, a prime offering might enhance quality but requires more frequent lens changes.
To manage weight, explore compact designs or those engineered with modern materials, such as carbon fiber or high-quality plastics. These alternatives reduce overall load while maintaining functionality. Always be mindful of your personal limits; fatigue can hinder creativity and performance, especially on demanding shoots.
Regularly reassess your collection to keep only the most practical selections that blend quality, functionality, and portability. This ensures that any travel or outdoor work remains manageable without sacrificing options essential for capturing the moment.
Utilizing Lens Pouches for Protection
Investing in quality pouches for my lenses has proven invaluable. These accessories provide essential cushioning and safeguard against scratches, dust, and impacts.
Choosing the Right Material
Opt for pouches made from durable fabric such as nylon or neoprene. These materials resist wear and tear, while also offering flexibility to adapt to different shapes and sizes of optical equipment. Waterproof options can further shield against unexpected exposure to moisture.
Size Matters
- Ensure the pouch snugly fits the objective diameter of the glass to prevent movement during transport.
- Consider padded dividers for larger pouches; they allow for organized storage and add an extra layer of protection.
- When selecting, prioritize lightweight designs. Bulky pouches can add unnecessary weight and reduce convenience.
For added practicality, opt for pouches with adjustable straps or belt loops. This feature allows easy access during shoots and minimizes the risk of misplacing any gear. Adopting this approach to lens protection not only enhances my efficiency but also maintains the integrity of my equipment in the long run.
Using Lens Caps and Covers
Always have the lens caps on hand to ensure the optics are protected from dust, scratches, and moisture. Each lens should come with its own cap; I always keep track of them to avoid any damage.
Types of Caps
- Front Lens Cap: Vital to prevent scratches on the front element. I ensure this stays on whenever the lens is not in use.
- Rear Lens Cap: Equally important for safeguarding the rear element. I attach it immediately when removing a lens from a body.
- Body Caps: These protect the camera body when no lens is attached. I always replace the cap promptly when switching lenses.
Additional Protective Measures
Consider using protective filters as an extra layer. I prefer UV or clear filters, which do not affect image quality and serve to shield the glass itself.
Using padded lens covers on longer journeys or during travel also adds a significant layer of protection from impacts. These covers can absorb shocks and keep your glass safe from the elements.
When storing multiple lenses or during transport, I place caps securely and check them regularly. Keeping a lens cap in each pouch or bag helps reduce the risk of losing these important accessories.
Selecting a Camera Backpack with Lens Compartments
Opt for a pack featuring customizable dividers that allow me to adjust spaces to fit my various optics snugly. Look for models with dedicated padded sections specifically designed for different sizes; this minimizes movement and potential damage during transport.
Consider backpacks that provide enhanced internal organization with multiple compartments. Some designs include separate pockets for filters, hoods, and adapters, ensuring I have everything organized and accessible without rummaging through the main section. This layout can save time when I need to swap glass quickly.
I prioritize lightweight materials to avoid adding unnecessary strain, yet durable construction is essential to withstand unpredictable weather and rough conditions. Water-resistant exteriors safeguard my gear against rain or spills, while added retention straps can secure objects during movement.
Ventilation is another aspect to consider. Breathable back panels and padded shoulder straps help me stay comfortable during extended adventures, especially in warmer climates. An ergonomic design distributes weight evenly, reducing fatigue over time.
Before finalizing a choice, I check for additional features like tripod holders or external attachment points for other accessories. A well-designed accessory system can enhance functionality, providing a cohesive and practical solution for all my photographic needs.
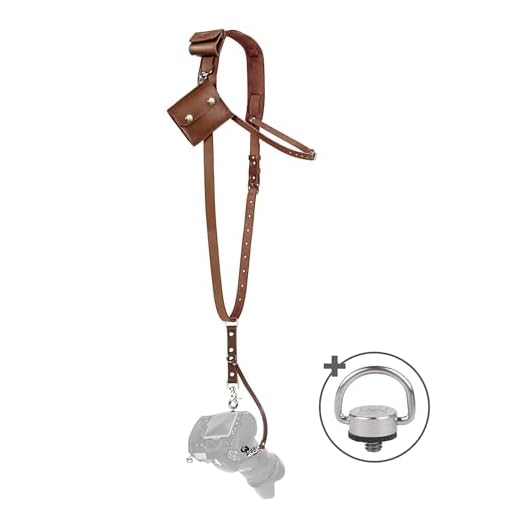
Strapping Lenses to Your Belt for Convenience
Utilizing your belt for lens attachment can significantly enhance accessibility. I recommend using specialized lens pouches or holsters that securely latch onto your belt, providing quick access and hands-free convenience.
Consider these pointers:

- Choose Quality Pouches: Select pouches made from durable materials with padding to protect the glass. Look for options that feature secure closures to prevent accidental drops.
- Proper Placement: Position the pouches on your hip for easy reach. This minimizes movement when accessing your gear, allowing swift lens changes.
- Weight Distribution: Ensure your pouches are evenly spaced on your belt to avoid discomfort. A balanced setup enhances mobility, especially during long shoots.
- Compatibility with Straps: Opt for pouches that can seamlessly integrate with other accessories, like a crossbody strap, for additional stability.
- Color Coordination: Use pouches matching your outfit or gear to maintain a professional appearance while on location.
Experiment with different setups to find the configuration that works best for your shooting style. The right combination can enhance efficiency during any shoot.
Using Lens Sleeves for Added Safety
Opt for padded lens sleeves designed to provide protection against impacts and scratching. I often choose sleeves that are made from soft, durable materials such as neoprene or microfiber. These cases not only cushion the optics but also shield against dust and moisture.
Selecting the Right Size
Ensure the sleeves fit snugly around my equipment. Too loose a fit may allow movement, risking damage during transport. I measure the diameter and length of each piece before purchase. Here’s a quick reference table for typical sizes:

| Lens Type | Diameter (mm) | Length (mm) |
|---|---|---|
| Standard Zoom | 70-80 | 100-120 |
| Prime Lens | 60-75 | 80-110 |
| Wide Angle | 70-85 | 80-100 |
| Telephoto | 80-100 | 200-300 |
Utilizing Sleeve Features
Many sleeves come with additional features such as zippers or Velcro closures for added security. I prefer those with a double-layer design for enhanced padding. A detachable strap can also be beneficial for quick access while keeping everything secure. These thoughtful designs make handling my gear much more manageable while minimizing risks.
Implementing Dividers in Your Bag
To maximize organization, opt for adjustable dividers within your bag. Customizable sections allow for tailored fit depending on the size and shape of each piece of gear. This ensures a snug and secure hold. Look for padded dividers that provide additional protection against bumps and shocks.
Using Velcro or similar fasteners can enhance flexibility, making it simple to shift the layout as your collection evolves. When installing dividers, consider the layout: place frequently used items at the top for quick access, and larger components in the bottom compartments for stability.

Here’s a reference table to help identify suitable divider placement:
| Lens Type | Recommended Divider Placement |
|---|---|
| Standard Zoom | Center compartment for easy accessibility |
| Prime Lens | Side pockets or padded sleeve for narrow fit |
| Telephoto Lens | Bottom for balance and stability |
| Macro Lens | Dedicated top section to prevent jostling |
Using dividers not only preserves integrity but also simplifies packing and unpacking, enhancing workflow on shoots. Regularly reassess your configurations to adapt to new gear. Adopting this strategy ensures that everything is precisely where it needs to be, cut down on retrieval time and maintain efficiency during assignments.
Choosing Hard Cases for Maximum Protection
For optimal safeguarding of my optics, I prioritize hard cases constructed from robust materials such as polypropylene or high-density polyethylene. These options provide considerable impact resistance, crucial when traveling through rugged environments.
I always take into account the interior dimensions of the case. A snug fit for each element minimizes movement and potential damage during transport. Custom foam inserts are invaluable; they cradle individual components perfectly, absorbing shocks.

Waterproof and dustproof features are non-negotiable for me. I select cases with hermetic seals and latches that prevent moisture ingress. This way, I can confidently venture into unpredictable weather conditions, knowing my gear remains protected.
Weight is also a factor; I aim for a balance between sturdy protection and manageable portability. While a more substantial case can offer superior protection, it should not become a burden during transit.
Additionally, I consider cases that offer padlock holes for added security, especially when I need to leave my equipment unattended for short periods. This simple feature provides peace of mind without adding significant bulk.
Here’s a summary of key features to look for:
| Feature | Description |
|---|---|
| Material | High-density polyethylene or polypropylene for impact resistance. |
| Interior Customization | Foam inserts that provide a snug fit for each component. |
| Waterproofing | Hermetic seals to prevent moisture damage. |
| Weight | A balance between protection and ease of transportation. |
| Security Features | Padlock holes for additional security. |
When investing in a hard case, each of these attributes enhances the longevity of my equipment, ensuring it withstands the rigors of my photographic pursuits.
Considering Lens Wraps for Compact Storage
Using lens wraps significantly enhances compact storage options for my gear. These padded fabric solutions offer reliable cushioning while minimizing bulk. I prefer wraps that feature velcro closures, allowing for quick access and secure fastening. Select wraps with soft interiors to prevent scratches, ensuring my optics remain pristine.
When choosing wraps, I consider the material’s durability; options like neoprene withstand wear and tear effectively. It’s also beneficial to opt for water-resistant fabrics, adding an extra layer of protection against unexpected weather conditions.
For organizing, I roll each lens within its wrap and stack them inside a larger compartment of my bag. This method maximizes space and keeps everything orderly without compromising protection. Additionally, labeling each wrapped lens helps identify them quickly, saving valuable time during shoots.
Investing in wraps tailored to specific sizes allows me to avoid unnecessary movement, reducing the risk of damage. This approach not only keeps my equipment safe but also ensures everything stays lightweight and manageable while traveling.
Options for Sling Bags for Easy Access
Consider using a sling bag that has quick-access compartments. This design allows me to retrieve my glass without hassle while on the move. Look for bags with exterior pockets or magnetic closures for speed.
I find it beneficial to choose a model that distributes weight evenly. Features like padded shoulder straps can enhance comfort during extended use, ensuring that my setup remains balanced.
Adjustable straps are another feature I prioritize. They not only offer customization for comfort but also facilitate swift transitions between shoulder and back carrying. This adaptability is key during various shooting scenarios.
The inclusion of a padded lens compartment is a must. This protects my gear from impacts while providing a dedicated space that’s easy to access. Ensure the padding is sufficient to guard against drops.
| Feature | Description |
|---|---|
| Quick-Access Compartments | External pockets or magnetic closures for fast retrieval. |
| Padded Shoulder Straps | Enhanced comfort and weight distribution approach. |
| Adjustable Straps | Allows for swift transitions between carrying styles. |
| Padded Lens Compartment | Dedicated space with protection against impacts. |
I also prefer models with weather-resistant materials. This feature keeps my optics safe from light rain or accidental spills. A detachable rain cover can add another layer of defense for extended outdoor sessions.
Lastly, consider a bag with thoughtfully positioned gear loops. This allows me to secure additional equipment, like filters or a small tripod, directly to my sling, keeping everything organized and accessible.
Organizing lenses by focal length
Classifying optics by focal length streamlines quick selection based on shooting requirements. I group my collection from wide-angle to telephoto, allowing for easy access while working. Starting with the shortest focal lengths, I keep compact and lightweight models together for travel versatility. This setup reduces time spent searching for specific gear.
For mid-range optics, I utilize a designated section within my bag, making use of padding to prevent accidental impacts. This prevents any damage while allowing smooth transitions between different focal lengths during shoots. A separate compartment for longer telephoto gear ensures that each item remains secure yet accessible.
Labeling each section can further enhance organization. I often create small tags or use colored tape to denote the specific focal range of each lens. This visual cue not only speeds up selection but helps maintain a tidy workspace, especially during busy sessions.
When planning for shoots, I also consider the most frequently used focal lengths and place them in the most accessible positions. This strategic placement is invaluable during spontaneous moments that require quick adjustments. Regularly reassessing the organization keeps my equipment ready for any situation.
Using Lens Holders Attached to Your Tripod
For secure transport of additional optics while shooting, utilizing holders that attach directly to your tripod can be exceptionally useful. These holders typically come as brackets or specific pouches designed to fit snugly against the tripod legs.
By employing a holder, I can maintain quick access to my favorite optics without compromising stability. Many of these attachments feature adjustable straps, allowing me to customize the fit for various sizes of gear.
It’s wise to choose holders made from durable materials to withstand elements. Water-resistant options are particularly beneficial for fieldwork. Moreover, holders that cushion interior lining can offer extra protection from impacts.
I recommend positioning the holder on the side of the tripod for balanced weight distribution. This placement aids in maintaining overall stability while shooting. Additionally, certain designs include separation features that keep optics secure and prevent them from clanging together.
When selecting a tripod-compatible holder, consider the weight capacity, especially if you’ll be pairing it with heavier telephoto or specialty optics. Multifunctional designs that integrate additional pockets for accessories can also enhance efficiency.
Adjusting Your Setup for Travel Trips
Prioritize versatility by selecting lenses that cover a range of focal lengths. A zoom option, such as a 24-70mm, can be ideal for different situations, reducing the number of primes needed for various shots.
Optimize Weight Distribution
Distribute weight evenly across your gear. This helps maintain comfort during long days of shooting. Consider using cross-body straps for stability while accessing your equipment on the go.
Plan for Quick Access
During excursions, anticipate quick changes in environment or scene. Store frequently used optics in easily reachable compartments to facilitate swift transitions. Utilize magnetic closures or zippers that can be operated with one hand.
Utilizing Shoulder Bags for Lens Carrying
For efficient transport of my additional optical gear, shoulder bags serve as a practical solution. They offer a blend of accessibility and organization, enabling quick retrieval during shooting sessions.
I prefer bags with padded compartments specifically designed for various sizes. This cushioning safeguards my investments against impacts. Look for adjustable dividers to customize the configuration according to the specific dimensions of my glass.
Weight distribution is another factor to consider. An ergonomic design with a padded strap ensures comfort during extended use. I often test the weight balance by adjusting the bag on my shoulder before heading out on assignments.
Side pockets are advantageous for holding essential accessories like filters or lens wipes, preventing clutter inside the main section. Additionally, opting for bags with weatherproof materials protects equipment from sudden rain.
Consider the bag’s style; a sleek design can blend seamlessly in urban environments, while a more rugged look matches outdoor settings. Ultimately, I prioritize functionality without compromising aesthetics.
Finding a solution for carrying multiple lenses
Consider utilizing dedicated lens cases or padded pouches designed specifically for glass. These protective sleeves help to prevent scratches and impact damage while allowing for quick access when needed.
Priority on Organization
Group optics by size and shape. This allows for more efficient use of space inside your bag, reducing the risk of collisions. Employ small dividers or padded inserts to keep them securely separated. Customization in layouts can lead to quicker retrieval and ease of transport.
Utilize Attachments and Straps
Look for specific attachments that can be added to your backpack or shoulder bag, optimizing storage options. For quick access, systems like lens holsters can be clipped onto belts or backpacks, providing an alternative to bulkier setups.
Understanding the importance of lens organization
Organizing your optics leads to enhanced efficiency during shoots. I categorize each piece according to its focal length and usage. This method helps me quickly locate the necessary gear without sifting through a cluttered bag.
Utilizing clear labels or color-coded markers for each section allows for rapid identification. I often opt for transparent dividers within my pack, making it easy to spot and access individual items.
To reflect on weight distribution, I ensure heavier glass is placed closer to my body in the bag. This setup not only balances the load but also protects my items from jostling during movement.
Prioritizing organization reduces stress on location. I create a quick checklist of my preferred setups before heading out. This practice allows me to double-check that I have the right optics and tools before leaving.
Adjusting my approach based on the type of shoot has proven beneficial. For events, I keep my wide-angle and prime glass front and center, while telephoto options are stored in the rear for quick retrieval. Each gear setup will vary, ensuring adaptability to various scenarios.
Lastly, creating a designated spot in my storage for less frequently used optics aligns with my workflow. This keeps my main carrying options clear and accessible while preserving less-used items for future needs.
| Organization Method | Description |
|---|---|
| Category Grouping | Sort by focal length and usage to facilitate quick access. |
| Labeling System | Use labels or color codes for easy identification of components. |
| Weight Distribution | Store heavier pieces closer to the body for balanced carrying. |
| Quick Checklist | Prepare a list of necessary items before each outing. |
| Setup Adaptation | Modify gear organization based on specific shoot requirements. |
| Designated Storage | Reserve space for infrequently used items away from the main pack. |
Using lens bags with quick-release features
I recommend selecting lens bags equipped with quick-release features for rapid transitions between shots. These specially designed pouches allow for seamless access, minimizing downtime during a shoot.
- Magnetic Closures: Look for bags that utilize magnetic closures, which enable you to open the pouch silently and retrieve your gear swiftly.
- Single-Hand Operation: Opt for bags featuring designs that can be opened and closed with one hand. This lets me keep my focus on capturing moments without fumbling.
- Safety Mechanisms: Ensure the bag includes safety locks, preventing accidental openings while moving around, thus keeping delicate optics secure.
- Adjustable Straps: Choose pouches with adjustable straps, allowing flexible positioning on belts or harnesses for comfortable and accessible placement.
Incorporating quick-release lens bags into my kit not only enhances my workflow but also significantly reduces the risk of damaging valuable optics during shoots. Efficiency in accessing my gear empowers creativity, enabling me to seize fleeting opportunities without hesitation.
Taking care of your lenses during transport
To minimize the risk of damage during transit, I always keep my optics in padded pouches. These pouches offer a layer of cushioning that absorbs shock and prevents scratches. It’s essential to select pouches that fit snugly around the specific glass, ensuring there’s no movement inside.
I make it a point to store my glass in a climate-controlled environment, avoiding extremes of temperature and humidity. Rapid temperature changes can cause internal fogging or condensation that could harm delicate components.
Using lens caps and rear covers is non-negotiable. I never leave a lens exposed; this simple practice guards against dust and scratches on the front and rear elements, which can affect image quality.
For transportation, I organize all my optics in dedicated compartments within my bag. This keeps them secure and separate, reducing the chance of unintentional contact and potential damage. I apply dividers to create sections for each piece of gear.
I prefer using hard cases for long trips. A sturdy case can withstand impacts and protect the equipment from environmental hazards. I also make sure any straps or buckles are fastened tightly to prevent shifting during movement.
Before heading out, I inspect each item for cleanliness. I use a lens blower to remove dust and a microfiber cloth for smudges. A quick clean prevents debris from being trapped and causing scratches during transit.
Adjusting Weight Distribution on Long Shoots
I distribute the load evenly across my body, positioning heavier items closer to my center of gravity. This technique reduces fatigue and enhances stability during prolonged sessions. I invest in a well-padded, adjustable harness system to balance the weight comfortably across my shoulders and hips.
When planning a shoot, I categorize my equipment by frequency of use. Placing frequently accessed gear within easy reach allows me to minimize unnecessary movements. I also utilize a combination of shoulder straps and chest rigs to secure lighter optics firmly against my torso, reducing strain on my back.
During adjustments, I periodically assess how the setup feels after extended use. If discomfort arises, I switch the arrangement of my gear or even redistribute the weight by swapping out certain components. Carrying an additional base layer for insulation helps manage comfort as the shoot progresses, especially in varying weather conditions.
Switching the carrying configuration during breaks or changing locations keeps the experience more manageable. I make use of versatile bags with adjustable compartments that allow me to shift the gear layout based on accessibility and comfort needs.
Creating a checklist for lens packing
Before embarking on a photographic adventure, I compile a detailed checklist to ensure that I don’t overlook any essential attachments. This helps streamline my preparation process and minimizes the chances of forgetting critical items.
Lens Packing Checklist
| Item | Description |
|---|---|
| Lens | Make sure to include all focal lengths needed for the shoot. |
| Lens Caps | Always pack front and rear caps to prevent dust and scratches. |
| Cleaning Kit | Include microfiber cloths and lens cleaning solution for maintenance. |
| Protective Sleeves | Choose padded pouches for each attachment to enhance safety. |
| Weight Distribution Tools | Consider packing tools that help balance the load efficiently. |
| Lens Wrappers | Padded wrappers help with compact storage and protection. |
| Quick Release Straps | Facilitates easy access to preferred optics during shoots. |
This checklist aids in verifying that each element is accounted for, minimizing stress during preparation. Regularly updating this list based on my experiences ensures that I continuously adapt to new photographic needs.
Finding padding materials for extra cushion
I recommend using Neoprene, a flexible and durable material commonly found in wetsuits. It’s lightweight yet offers excellent shock absorption. You can purchase sheets and cut them to size for your specific equipment.
Common Padding Options
- Foam Padding: Look for high-density foam, which provides a good balance between protection and weight. It’s great for customizing spaces within a bag.
- Bubble Wrap: An economical choice, ideal for one-off transports. Wrap individual items for extra cushioning.
- Soft Fleece or Felt: These materials can line pouches or compartments, preventing scratches and minor impacts.
Where to Source Padding
- Local craft stores are a prime source for various fabrics and foams.
- Online retailers such as Amazon or specialized photography websites often have suitable padding options.
- Recycling old equipment bags can provide padding. Many bags come with built-in protective foam that can be repurposed.
Consider creating custom padding solutions with a combination of these materials for optimal protection. Experiment with various layers to find the right balance for your specific gear.
Researching Lens Gear for Specific Photography Styles
For specialized photography styles, I prioritize selecting the right type of gear that complements my technique and subject matter.
When exploring options, I consider the following:
- Identify the focal lengths needed for my chosen style, be it portrait, macro, or architecture.
- Research which specific lens brands and models are recommended by professionals in that niche.
- Look into compatibility with mounts and sensors unique to my setup.
- Examine reviews focusing on optical quality and performance under different conditions.
- Consider accessories like filters that enhance creative expression based on the style.
For instance, in portrait photography, a prime lens with a wide aperture is often ideal. Alternatively, landscape or architectural photography might benefit from a wide-angle lens for expansive views.
Exploring user forums or communities dedicated to specific photography styles can yield insights not found in product descriptions.
Finally, I always evaluate how these choices influence my workflow and shooting experience to ensure they align with my artistic vision.
Adapting Your Carry Method to the Shooting Environment
Choosing the right method for transporting your glassware hinges on the location and conditions of your shoot. For outdoor settings like hiking or dynamic urban environments, a sling bag provides easy access while distributing weight comfortably. In contrast, for studio work, a structured backpack allows for organized storage and quick retrieval of specific optics.
Considering Your Shooting Style
If I’m focusing on wildlife photography, a reliable belt system keeps my gear secure and easily reachable while remaining lightweight. When wandering through crowded locations, I prefer a compact shoulder bag to maintain agility. During long sessions in the field, a well-padded system that distributes weight evenly is essential to avoid fatigue.
Weather Conditions Matter
<pIn damp or unstable conditions, investing in waterproof lens sleeves ensures protection without adding bulk. For unexpected weather changes, I bring along a hard case with protective features that allows for quick sealing of all optics. By anticipating environmental challenges and adjusting my transport method, I maximize both safety and efficiency.
Exploring Custom Lens Storage Solutions
I recommend investing in custom storage options designed specifically for your optical equipment. These solutions can significantly enhance organization and protection during transport.
Custom Foam Inserts
- Consider purchasing foam inserts tailored to fit your specific optics. These inserts provide snug compartments that prevent movement and potential damage.
- Companies like Pelican and Think Tank offer a range of customizable foam options to suit various configurations.
Modular Storage Systems
- Modular cases allow flexibility in arrangement. As your gear evolves, you can adapt your storage layout without needing a new case.
- Look for systems that include adjustable dividers to accommodate different sizes and shapes of your tools.
Utilizing a combination of custom designs and modular systems will optimize safety and accessibility for your equipment. Don’t hesitate to reach out to professionals who specialize in bespoke storage solutions for further guidance.
Utilizing camera harness systems for weight distribution
Opting for a harness system has transformed how I manage photography gear during lengthy shoots. This approach allows even weight distribution across my torso, minimizing fatigue and maximizing comfort.
Key benefits of this method include:
- Adjustability: Most harness systems come with multiple adjustment points, enabling a customized fit that accommodates various body types.
- Ease of access: By positioning attachments strategically, I can reach for my gear quickly without removing the harness.
- Stability: The design keeps my equipment secure, reducing the risk of swaying or bouncing while moving.
- Versatility: Some harness systems can be adapted with additional accessories, such as pouches or clips for lens storage.
When considering a harness system, I recommend looking for features like padded straps, breathable materials, and compatibility with existing bags or pouches. An ergonomic design ensures comfort during extended use.
In practice, I found that a dual-harness setup allows me to carry more equipment while maintaining balance. I can distribute load evenly between my shoulders and hips, preventing strain.
Try incorporating a harness system into your workflow, especially for outdoor shoots or events where mobility is crucial. It streamlines the process and enhances overall efficiency.
Understanding the Benefits of Modular Lens Cases
Opting for modular lens cases dramatically enhances my ability to customize storage based on specific needs. These cases allow me to separate and organize different optics, which streamlines my workflow during shoots.
Each module can be tailored for particular focal lengths or types, letting me keep my wide-angle, telephoto, and prime lenses distinct yet easily accessible. The flexibility of modular designs means I can adjust my setup based on the requirements of the day without carrying unnecessary bulk.
Moreover, many modular systems offer padded protection, ensuring that each piece of gear is shielded from impacts while minimizing weight. This is indispensable when I am moving from one location to another.
The ability to connect multiple modules through robust attachment systems means quick access to each lens. I can assemble and disassemble my kit effortlessly, adapting to sudden changes in my shooting environment.
| Benefit | Description |
|---|---|
| Custom Organization | Separation of lenses based on use and focal length enhances efficiency. |
| Padded Protection | Each module provides cushioning against impacts, safeguarding delicate optics. |
| Weight Management | Efficient designs allow for less bulk during transport, aiding mobility. |
| Quick Access | Rapid assembly and disassembly during shoots mean less downtime. |
| Adaptability | Easy modification of configurations based on specific shooting conditions. |
In my experience, investing in a modular lens case system significantly elevates my efficiency, allowing for a tailored photography approach that meets the demands of various projects. The right setup not only enhances my organization but also promotes a seamless shooting experience.
Checking Compatibility of Bags with Photography Gear
Prioritize compatibility between your chosen bag and your collection of optical attachments. Ensure that dimensions of the compartments align with the sizes of your equipment. A snug fit eliminates movement and potential damage during transport.
Measuring Internal Space
Before purchasing a bag, measure the internal dimensions. Take into account the height, width, and depth required for your specific optics. A bag with adjustable dividers can offer versatility, accommodating different lens sizes and shapes as needed.
Material and Padding Considerations
Opt for materials that provide sufficient cushioning, such as padded liners or foam inserts. These features are critical for safeguarding against impacts. Additionally, consider water-resistant materials for protection against moisture. Checking user reviews can give insights into the durability and practicality of the bag during outdoor shoots.
Prioritizing Accessibility During Shoots
Maintain a clear path to the gear I need. I often place frequently used optics in easily reachable compartments of my bag to reduce downtime between captures. Securing quick-release attachments for essential pieces helps me transition smoothly between different tools.
Assess the shooting environment ahead of time. If I’m in a crowded space, I limit the number of items I have readily available to avoid fumbling. Using a small, dedicated pouch for the most crucial optics allows me to stay nimble, even in tight situations.
Practice organizing items based on the anticipated shooting scenarios. Knowing where each piece is located enhances my workflow significantly. I also keep a checklist onhand for my setup, ensuring I have everything I need while reducing unnecessary weight.
Incorporate straps or harness systems for added mobility. By distributing the weight across my body, I can remain agile and responsive to changes in the scene. Ensuring I can access what I need in an instant allows me to capture fleeting moments effectively.
Experiment with positioning compartments for stability. Keeping heavier components closer to my core enhances my balance, particularly during prolonged sessions. This approach minimizes fatigue and helps maintain focus on the subject rather than equipment management.
Always evaluate my organization strategies after a shoot. Reflecting on what worked and what didn’t enables me to refine my methods for future endeavors. Adjusting my setup based on personal experience leads to more seamless shooting experiences.
Managing lens humidity and temperature while traveling
To protect my optics during journeys, I prioritize keeping them dry and at a stable temperature. Here are the steps I follow:
- I use silica gel packets inside my lens bags and cases to absorb moisture.
- A climate-controlled case ensures that temperature fluctuations are minimal, especially when traveling between different environments.
- For long trips, I seal my gear within airtight containers to prevent humidity infiltration.
- I avoid leaving equipment in direct sunlight, opting for shaded areas or using lens wraps that provide insulation against heat.
- Monitoring the local weather helps me forecast conditions that may affect my gear’s sensitivity, adjusting my transport methods accordingly.
By staying vigilant about environmental factors, I can extend the lifespan and performance of my photography gear while on the move.
Exploring lightweight options for portability
I prefer using compact and minimalist gear to manage my additional optics. One effective approach is opting for high-quality, lightweight materials in my storage solutions. This choice significantly reduces the overall weight without compromising on protection.
Here are some strategies I find beneficial:
- Utilize neoprene pouches for individual units. They are stretchy and protect while adding minimal bulk.
- Choose modular systems that allow mixing and matching compartments. This flexibility lets me keep only what I need for each shoot.
- Look for bags designed with lightweight frames and ergonomic designs. A balanced approach alleviates strain during extended outings.
- Invest in lightweight gear like carbon fiber tripods or aluminum holders to minimize overall setup weight.
- Utilize lens sleeves that conform closely to the shapes of my optics, which reduces the space they occupy in my pack.
Additionally, I have discovered that organizing my gear by size and usage frequency helps streamline access while keeping my load light. Incorporating quick-release features into my pack enables fast adjustments without unnecessary handling. Lastly, careful selection of accessories ensures minimal addition to my total kit weight, enhancing my overall shooting experience.
Practical tips for multi-day shoots
For multi-day photography expeditions, I prioritize a lightweight configuration. Opting for compact designs allows me to reduce fatigue and enhances mobility. I find that planning a minimalist lens arsenal streamlines choices without sacrificing versatility.
To keep my optics protected over extended periods, I incorporate padded cases that fit snugly into my gear bag. These cases absorb shocks while preventing dust accumulation. During unpredictable weather, waterproof covers become indispensable; I always have a few handy for added peace of mind.
Managing humidity is essential during my trips. I include silica gel packets within lens compartments to absorb excess moisture. Regular checks on this element ensure that my gear remains in top condition throughout the shoot.
Adjusting the weight distribution across my body is key to comfort during long days. I utilize adjustable harness systems that evenly distribute the load between shoulders and hips, reducing strain on my back.
Creating a packing checklist allows for thorough preparation, ensuring I never overlook crucial items. This simple tool saves time during the setup phase on-site, allowing me to focus on capturing the moment.
When scouting locations, I often map out quick-access zones for my gear. Using lightweight, detachable holders attached to my belt facilitates swift lens exchanges without fumbling through a bag. This enhances my ability to react fast to fleeting opportunities.
Utilizing modular compartments within my main bag not only organizes my equipment but also permits easy adjustments based on the shooting environment. This adaptability proves invaluable when I have to switch between urban landscapes and natural settings without missing a beat.
Lastly, testing different transport options before the shoot ensures that I am comfortable and organized. Whether it be sling bags or shoulder bags, finding the correct fit makes all the difference in stamina and effectiveness.
Using Magnetic Attachments for Quick Lens Swaps
Implementing magnetic attachments has transformed my approach to switching optics on the go. This system significantly reduces the time spent fumbling with traditional mounts. I use a particular brand of magnetic lens caps that securely snap on and off, enabling rapid exchanges without the hassle of twisting or unthreading. The convenience of this method allows me to maintain focus on capturing the moment, rather than worrying about my gear.
For stability, I select lenses with built-in magnetic connectors designed to withstand vibrations and shocks, ensuring they stay securely in place even during active shooting sessions. Additionally, having multiple magnetic bases on my preferred focal lengths allows me to switch seamlessly between a wide-angle and telephoto lens in mere seconds.
It’s essential to keep the magnetic surfaces clean and free of debris. I regularly inspect and wipe them down to maintain optimal performance. This simple maintenance can prevent misalignment and guarantee a snug fit. I also appreciate how lightweight this system is, allowing for ease of use without added bulk.
When traveling, incorporating magnetic lens attachments has streamlined my setup. Lenses can be hung on my bag or jacket, ready for instant access without the need for bulky pouches. This technique balances convenience and safety effectively, making my photography experience more enjoyable.
Learning from professional photographers’ setups
Analyzing the configurations of seasoned photographers reveals numerous valuable strategies for lens management. One of the most effective approaches I observed is the use of modular cases that can be tailored to specific shoots. These systems allow for personalized arrangements and easy access to the required gear without unnecessary bulk.
Taking Notes on Their Storage Solutions
Noticing how professionals categorize their optics according to usage helps optimize organization. They often carry a lightweight messenger bag or a compact sling, featuring multiple pockets, enabling rapid lens exchanges when needed. Furthermore, many employ well-padded dividers to protect each piece while ensuring they remain easily reachable.
Utilizing Travel-Friendly Gear
Travel setups often include utilizing padded wraps or sleeves for added security. I learned that using humidity control packs in their bags is also a common practice to protect against environmental changes. Engaging with their gear setup not only streamlined my workflow but also enhanced the safety of my equipment during transport.
| Photographer | Setup Characteristics | Tips to Adapt |
|---|---|---|
| Pro A | Modular cases, lightweight shoulder bags | Consider using modular systems to enhance flexibility |
| Pro B | Padded sleeves and dividers in backpacks | Add extra padding for protection while traveling |
| Pro C | Humidity control packs in storage | Incorporate silica gel packets to manage moisture |
By studying these setups, I’ve been able to refine my own approach, ensuring efficient management of gear while maintaining protection and accessibility. The focus on practical solutions offered by experienced individuals is invaluable for anyone serious about photography.
Choosing the Right Lens for Specific Photography Needs
For portraits, I select prime lenses with wide apertures, such as 50mm f/1.8 or 85mm f/1.4, to achieve that soft background blur. When capturing landscapes, I opt for wide-angle options like 16-35mm zooms, providing vast scenes with depth. For sports or wildlife photography, a telephoto lens, such as a 70-200mm, ensures sharp focus on distant subjects while allowing for beautiful compression of elements in the frame.
In low-light conditions, fast lenses, like a 24mm f/1.4, let in more light, which is necessary for night or indoor shoots. Macro photography requires a dedicated macro lens, typically around 100mm, for detailed close-ups without distortion. When versatility is required, I consider a standard zoom lens, generally covering the 24-70mm range, which is suitable for a variety of situations.
It’s important to think about my shooting style and subjects when choosing. For events or weddings, a dual lens setup, combining a wide-angle and a telephoto, allows for a range of compositions without needing constant lens changes. Lastly, understanding the crop factor of my camera can help in selecting the equivalent focal lengths needed for optimal framing.
Reviewing the Pros and Cons of Different Lens Transport Methods
After experimenting with various methods to transport my optical gear, I’ve compiled a detailed analysis of each option.
Lens Bags
Pros: Specialized lens bags are designed for impact resistance and can be organized easily; they often come with padding and dividers for safety. They help me maintain good accessibility during shoots.
Cons: Some models can be bulky, adding unnecessary weight to my load. Additionally, they may lack compatibility with my specific gear configurations.
Shoulder and Sling Bags
Pros: These provide quick access and adaptability, allowing me to switch lenses with ease. They also distribute weight more effectively across my body.
Cons: If not properly padded, they may not offer sufficient protection against drops or bumps. I’ve found they can become uncomfortable over long periods.
Custom Solutions
Pros: Custom-made systems can cater to specific needs, ensuring that each component fits perfectly and utilizes space efficiently. I can arrange everything exactly how I like it.
Cons: Custom solutions can be costly and time-consuming to design and create. Additionally, they may not always be adaptable to changing gear setups.
Ultimately, the best method depends on personal preferences and the demands of specific photography scenarios. Adjusting my approach based on the shoot type has helped tremendously in optimizing both transport and accessibility.
FAQ:
What are the best ways to carry extra camera lenses while traveling?
When traveling, it’s important to choose a method for carrying extra camera lenses that ensures both protection and convenience. One popular option is to use a dedicated camera lens pouch. These pouches are designed with padding to protect the lenses from impact and often feature a secure closure to prevent accidental opening. Another method is to utilize inserts that fit into your backpack or camera bag. These inserts provide specific compartments for each lens, ensuring they don’t collide with each other during transport. Lastly, a multi-pocketed camera bag can be a good solution as it can accommodate various equipment and accessories while allowing for quick access.
How can I keep my camera lenses safe while carrying them?
To keep your camera lenses safe while on the go, consider investing in high-quality lens caps and protective filters. Lens caps shield the glass from scratches and dust, while filters can offer an additional layer of protection against impacts. It’s also wise to use padded cases or pouches specifically designed for lenses, which will cushion them against bumps. Moreover, maintain careful handling practices, such as securing your bag when you set it down and keeping the lenses away from high-traffic areas to minimize the risk of accidental knocks.
What should I consider when choosing a bag for carrying multiple lenses?
When selecting a bag for carrying multiple lenses, several factors come into play. First, consider the size and weight of the lenses you plan to carry, ensuring the bag can accommodate their dimensions comfortably without excessive bulk. Next, look for adequate padding within the compartments to protect the lenses from shock and movement. The accessibility of the bag is another important aspect; you want to be able to reach your gear quickly without fumbling. Additionally, think about whether you prefer a bag that allows for easy organization of accessories alongside your lenses, as this can streamline your shooting process.
Is it necessary to have a separate case for each lens?
While it is not strictly necessary to have a separate case for each lens, doing so can enhance their protection. Separate cases prevent lenses from making contact with one another, reducing the chance of scratches or damage to the delicate glass. However, if you’re carrying multiple lenses, using a well-padded bag with dividers can be just as effective in keeping them safe. Ultimately, the decision comes down to your personal preference and the level of protection you feel your equipment requires.
Can I use regular bags to carry my camera lenses?
Regular bags can be used to carry camera lenses, but they may not provide the protection required for sensitive equipment. If you choose this route, make sure to add padding between lenses or use protective cases to prevent them from shifting and colliding. A regular bag lacks dividers, so things can get jumbled, making it harder to access your lenses. For the best experience, investing in a bag specifically designed for camera gear is advisable, as these bags have features tailored for safe transportation.