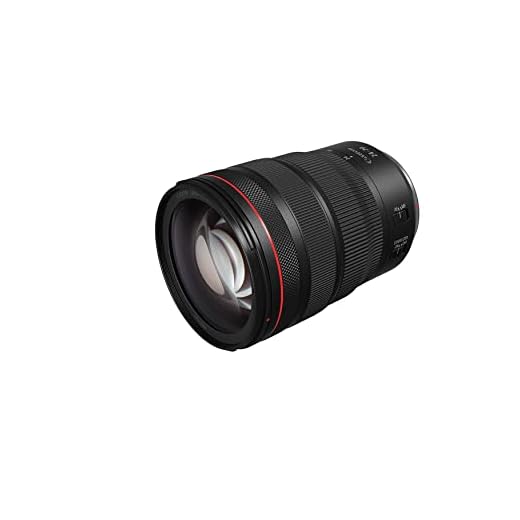


To make informed choices while selecting optical equipment, focus on three primary metrics: focal length, aperture size, and compatibility. Identifying the focal length will dictate the perspective and scale of the composition. A range like 18mm to 55mm typically offers versatility for various situations, while longer lengths, say 200mm, can help with distant subjects.
The aperture size directly affects light intake and depth of field. A larger f-stop number, such as f/16, provides more depth but less light, whereas f/2.8 allows for a brighter shot with a shallower focus. Consider how depth of field will impact the subject and background relationship to enhance compositional clarity.

Compatibility with specific devices is crucial to ensure performance. Look for mounting specifications and sensor formats to match desired outcomes. Make sure to review additional features, like image stabilization and weather sealing, for enhanced usability in different environments.
Understanding Focal Length and Its Impact
Focal length directly influences composition and perspective. Fixed focal lengths create sharper images and wider apertures, while variable focal lengths offer flexibility but can compromise sharpness and light input. Choosing a lens with a focal length between 24mm and 70mm suits most situations, allowing for versatile framing without distortion.
Short vs. Long Focal Lengths
Short focal lengths (e.g., 18mm) excel in capturing expansive scenes, making them ideal for architectural shots and landscapes. They exhibit pronounced depth of field, sharpening foreground and background details. In contrast, longer focal lengths (e.g., 85mm or more) excel in portraiture, isolating subjects through a shallow depth of field and pronounced bokeh, enhancing the subject’s prominence in the frame.
Prime vs. Zoom Options
Prime options generally offer superior image quality and larger apertures, benefiting low light conditions and depth control. Zoom variants provide convenience, especially in dynamic environments where changing lenses is impractical. For instance, an 18-55mm lens provides broad versatility for everyday shooting without sacrificing too much quality.
Decoding Aperture Specifications
Understanding aperture notation reveals the lens’s light-gathering capabilities. Typically expressed as f/numbers, the value denotes the ratio between the lens’s focal length and the diameter of the entrance pupil. For example, a lens labeled as f/2.8 has an entrance pupil diameter equal to one-third of its focal length.
Aperture Values and Their Implications
- Smaller f-numbers (e.g., f/1.8, f/2.8) indicate a larger aperture, allowing more light to enter.
- Larger f-numbers (e.g., f/11, f/16) signify a smaller aperture, resulting in reduced light intake.
The maximum aperture becomes crucial in low-light conditions, impacting shutter speed and depth of field. A wide aperture can produce a shallow depth of field, leading to a blurred background–a desired effect in portrait photography.
Understanding T-stops vs. F-stops
Some lenses use T-stops instead of f-stops. T-stops account for light loss caused by lens elements, offering a more accurate measure of the transmitted light. This distinction is vital for precise exposure settings, especially in video work.
- F-stops: Measure the ratio of the focal length to the aperture diameter.
- T-stops: Measure actual light transmission through the lens, providing better consistency for exposure.
Selecting the right aperture affects creative outcomes. Adjustments influence exposure, clarity, and artistic expression. Mastery of aperture specifications enables informed decisions to achieve the desired photographic result.
Interpreting Lens Mount Compatibility
Understanding compatibility with different mounts is crucial for making informed choices in optics. Each manufacturer designs specific mounts, which influences usability across brands and models. Verify the mount type before any purchase to ensure seamless integration with the intended body.
Here’s a concise table of popular lens mounts and their respective camera systems:
| Mount Type | Compatible Brands |
|---|---|
| EF (Canon) | Canon DSLRs |
| EF-S (Canon) | Canon APS-C DSLRs |
| F (Nikon) | Nikon DSLRs |
| Z (Nikon) | Nikon Z-series |
| E (Sony) | Sony Mirrorless |
| Micro Four Thirds | Panasonic, Olympus |
| PL (Film & Digital) | Theatrical Cameras |
Manual adapters might enable cross-compatibility, but performance may vary. Autofocus and image stabilization could be compromised. Always research adapter reviews for best results.
Compatibility is more than just physical fit; electronic communication between lens and body affects functionality like autofocus speed and exposure control. Check for compatibility charts provided by manufacturers for clarity.
Identifying Optical Stabilization Features
Look for the presence of designations such as “IS,” “VR,” or “OS” in product specifications, which indicate optical stabilization capabilities. These acronyms refer to Image Stabilization, Vibration Reduction, and Optical Stabilization, respectively. Each manufacturer employs distinct terminology, so understanding these labels aids in assessing stabilization technology.
Examine the lens construction details for references to “stepping motors” or “ultrasonic motors.” These features are commonly associated with smooth autofocus, which is beneficial while shooting video or capturing stills in challenging conditions.
Review user reviews and practical tests that evaluate stabilization performance. Often, real-world feedback provides insight into the effectiveness of the system under various conditions, such as low light or dynamic scenes.
Consider lenses with dual stabilization options, where both in-lens and in-body stabilization work together. This collaboration maximizes the potential for steady shots, especially useful in mobile and handheld shooting scenarios.
Take note of the degree to which stabilization compensates for camera shake, typically specified in stops. A lens rated for over four stops of correction generally offers significant benefits for handheld photography.
Finally, assess compatibility with other equipment. Some stabilization features require specific camera bodies to function optimally, ensuring that the full potential of the optical stabilization system is realized.
Exploring Lens Focus Mechanisms
Understanding focus mechanisms is critical for achieving precise control over the focal plane. Manual focus systems typically feature a focus ring, allowing tactile adjustments. In contrast, autofocus mechanisms may vary, but many use phase detection or contrast detection methods to lock onto subjects quickly.
Types of Focus Systems
Autofocus lenses incorporate additional features such as focus motors. The Silent Waves Motor (SWM) or Ultrasonic Motor (USM) found in some models provide near-silent operation, ideal for video. Additionally, some lenses sport hybrid focusing systems that utilize both phase and contrast detection for enhanced accuracy.

Focus Breathing
Focus breathing occurs when the angle of view changes as focus shifts. This phenomenon can affect video shooting, where maintaining a consistent frame is crucial. If shooting video, select lenses designed to minimize focus breathing for smoother transitions between subjects.
Recognizing Distortion and Aberration Types
Identifying key optical imperfections is critical for outstanding results. Pay attention to the types of distortion and aberrations when evaluating a lens. Here’s what to look for:
- Barrel Distortion: Occurs when straight lines curve outward from the center, resembling a barrel shape. Common in wide-angle configurations; check for this in landscapes or architectural photos.
- Pincushion Distortion: The opposite effect of barrel distortion, where straight lines bend inward toward the center. Typically seen in telephoto options; useful to be aware of for accurate framing.
- Mustache Distortion: A combination of barrel and pincushion distortion, exhibiting an S-shaped curve. Usually appears in specific zoom ranges; crucial to recognize when shooting subjects requiring precise geometry.
Aberrations also deserve scrutiny:
- Chromatic Aberration: Results in colored fringes around high-contrast edges. Often most evident in highlights; use images with sharp contrasts to test for this imperfection.
- Spherical Aberration: Occurs when a lens does not focus all light rays to a single point, creating a blurry image. This is especially noticeable in wide-open aperture settings; test at various f-stops to assess performance.
- Coma Aberration: Affects points of light at the edges of the frame, causing them to appear as comets. Particularly problematic for astrophotography; assess star shapes in test shots.
Gather information from reviews, or conduct your own tests in diverse situations to understand these characteristics better. Assessing quality using distortion and aberration metrics ensures the selected optics align with desired creative outcomes.
Analyzing Lens Construction Material
Opt for high-quality glass elements crafted from low dispersion materials to minimize chromatic aberration and enhance image sharpness. Look for coatings such as anti-reflective or multi-coating to improve light transmission and reduce flare. Premium options often utilize magnesium or aluminum alloys for the housing, offering durability while remaining lightweight.
Composite plastics can be found in budget models, which may reduce weight but can compromise durability and thermal stability. Examine how weather-sealing is integrated within the construction; rubber gaskets around the lens mount are indicators of water and dust resistance. For higher-end models, check for internal focusing mechanisms, which can enhance performance by preventing lens element movement during autofocus.
Evaluate the type of filters the front element accepts; lenses with a larger diameter allow for better filter options. In some cases, specialized hoods are designed to fit specific materials, enhancing light control without compromising structural integrity. Always consider the balance between weight and performance, as heavier builds may offer superior optics but can become cumbersome over extended shoots.
Comparing Prime vs. Zoom Lenses
Choosing between prime and zoom optics can significantly influence photographic outcomes. Here’s a breakdown of both types to inform your decision.
- Prime Lenses:
- Fixed focal lengths allow for consistent and often superior image quality.
- Wider maximum apertures (e.g., f/1.4 or f/1.8) enable enhanced low-light performance and greater depth of field control.
- Typically lighter and more compact, making them suitable for travel and street photography.
- Less complex design can lead to reduced distortion and aberrations.
- Zoom Lenses:
- Versatility with variable focal lengths caters to diverse shooting scenarios without the need for lens changes.
- Convenient for capturing a range of subjects in one session without additional gear.
- Quality has improved in many models, providing competitive sharpness and clarity compared to primes.
- May exhibit some distortion and aberration, particularly at the extremes of their zoom range.
When deciding, consider your shooting style and subject matter. For portraiture or low-light environments, prime optics can be superior. For travel or event photography where adaptability is key, zoom options may be more beneficial.
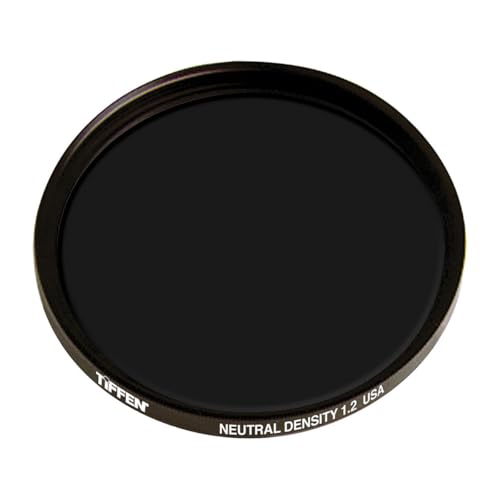
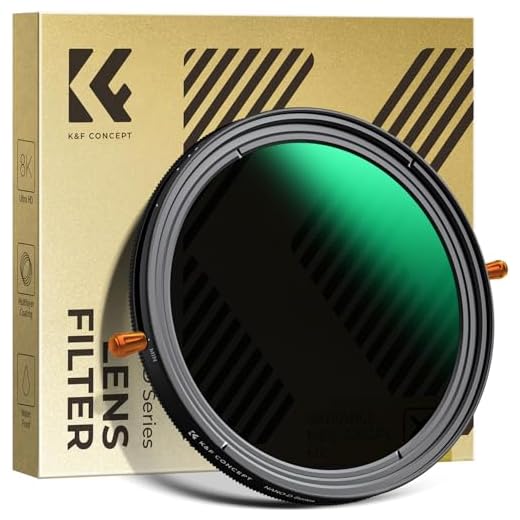
Reading Filter Sizes and Compatibility
Filter sizes are denoted in millimeters, indicating the diameter of the front lens element that accepts filters. This measurement is crucial for compatibility with various filters, such as polarizers or ND filters. Look for a number on the lens barrel, typically marked with a circle and a line through it, e.g., “58mm.”
Ensure that filters match the size indicated on the lens. Using a filter that is too small will not attach securely, while one that is too large won’t fit at all. If struggling to find exact matches, utilizing stepping rings can adapt filters of one size to fit a different size lens.
Consider the type of filter being used. Polarizing filters and UV filters are standard, but ensure any filter doesn’t hinder autofocus, potentially causing issues with lens performance. Specialty filters may require additional attention to compatibility with specific focal lengths or apertures.
For multiple lenses with varying diameters, a selection of filters can become impractical. Investing in a universal filter holder system may streamline the process, allowing attachment of various filters to different lens sizes without needing separate filters for each lens.
Lastly, filter quality matters. Opt for high-quality filters to prevent degradation of image quality. Cheaper filters may introduce flare or reduce contrast, particularly when shooting in bright conditions. Before purchase, research reviews and select reliable brands to enhance photographic results.
Understanding the Importance of Weather Sealing
When selecting a zoom or prime optic, focus on models with weather sealing if you anticipate shooting in adverse conditions. This feature significantly enhances durability, protecting internal components from moisture, dust, and extreme temperatures.
Key Benefits of Weather Sealing
Weather-sealed optics allow for uninterrupted shooting in rain, snow, or humid environments. Investing in such equipment ensures reliable performance and reduces the risk of damage to the internal mechanisms. Remember to check the manufacturer’s specifications, as some brands provide a higher level of protection than others.
Common Weather Sealing Ratings
The following table summarizes typical protection ratings found in sealed optics:
| Rating | Description |
|---|---|
| IP67 | Dust-tight and can withstand immersion in water up to 1 meter for 30 minutes. |
| IP68 | Dust-tight and can withstand immersion in water beyond 1 meter (specifics vary by manufacturer). |
| Weather Resistant | Protected against light rain and splashes, but not suitable for immersion. |
Choose models with these ratings for serious outdoor photography, especially in unpredictable environments. Prioritize the longevity of your gear for a more versatile shooting experience.
Determining Lens Weight and Size for Portability
Consider options with lower weight and compact dimensions for ease of transport. For outdoor shoots, prime optics often offer a lighter alternative compared to their zoom counterparts. Check the specifications–many manufacturers provide details on both weight and size. A lens weighing under 1 kg (2.2 lbs) is generally manageable for handholding over extended periods.
Evaluating Size Specifications
Review the length and diameter measurements to assess how well a lens fits into your gear setup. A shorter focal length may enhance portability; however, this can affect depth of field and perspective choices. It’s beneficial to compare the physical attributes of similar products to identify the most travel-friendly options.
Understanding Weight Distribution
Balance plays a significant role in handling during operation. Lenses with a front-heavy design can lead to fatigue. Consider models featuring a retractable design or those with balanced weight distribution for more comfortable use. Test the feel by mounting on the preferred body to evaluate balance and comfort, particularly during prolonged sessions.