If you’re looking to attach optics from one brand to another, it’s indeed feasible to use equipment originally designed for one manufacturer on a different system. The required steps include obtaining the right mounting adapter specific to your models. These adapters vary in quality and functionality, so researching user feedback and compatibility reports is advisable.
In many cases, utilizing third-party accessories can lead to a satisfactory experience, allowing for versatility in focal lengths and shooting styles. Keep in mind that some features, like autofocus, may not function properly, or may be significantly slower compared to native options. It’s wise to test the setup before a critical shoot to ensure the results match your expectations.

Overall, the potential for creativity expands as you explore gear from different brands. With the right combination of adapters and knowledge of your tools, you may find new ways to enhance your photographic practice.
Do Canon Lenses Work on Panasonic Cameras
Yes, compatible optics can be mounted on Lumix models through specific adapters. This allows users to experience various optical characteristics and styles that these products offer.
Here are some key points to consider:
- Choose a reputable adapter that supports autofocus if needed, as some may limit functionality.
- Manual focusing is often required, particularly with vintage models and certain budget adapters.
- Image stabilization may not function correctly, impacting handheld shooting conditions.
- Wider apertures and unique optical designs can provide interesting creative options.
Test the setup before important shoots to ensure that the desired effects can be achieved without surprises. Each combination can yield differing results, so personal experimentation and adjustment are crucial for optimal performance.
Compatibility Overview of Canon Lenses with Panasonic Cameras
I recommend considering a few critical factors when assessing the compatibility of these optical attachments with these mirrorless systems.
- Mount Type: The primary concern is the mounting system. These mounts differ significantly. Adapters are often necessary, allowing one type to fit the other.
- Adapter Quality: Not all adapters perform equally. High-quality models provide better results, preserving electronic communication and autofocus capabilities.
- Autofocus Functionality: Many adapters may not support autofocus. Manual focus might be required, limiting speed and ease of use.
- Aperture Control: Be aware that some adapters may restrict the ability to adjust the aperture electronically. A manual ring may be required on certain models.
- Image Quality: Using inferior adapters might compromise image quality. Testing with known good adapters can help ensure optimal performance.
- Vigning and Distortion: There might be changes in vignetting or optical distortion depending on the combination used. It’s advisable to check sample images to gauge performance.
In practice, many users report satisfactory experiences, especially using high-grade adapters. It can be worthwhile experimenting with a few different combinations to find the best fit for specific needs.
Understanding Camera Mount Systems
For seamless integration between various photographic equipment, comprehending the nuances of mount systems is paramount. Each maker typically designs its own bayonet fitting, influencing how different accessories interact.
The common mounts include the EF and RF systems, which cater primarily to mirrorless options. These designs establish the physical connection and establish critical communication protocols between the device and its accessories.
Adaptability can be enhanced through the use of dedicated adapters. These converters allow for cross-compatibility, but performance may vary. Features such as autofocus and image stabilization are not always guaranteed.
When planning to utilize foreign equipment on another brand’s gear, I recommend researching specific adapter solutions. Reviews often highlight compatibility success stories and potential limitations.
In instances where electronic communication is critical, ensure the adapter supports the necessary functionalities. For purely mechanical connections, options remain more flexible, yielding diverse creative possibilities.
Staying updated on the latest trends and user experiences can also provide insights into compatibility and performance, ensuring optimal outcomes in every attempt to pair different brands effectively.
Types of Canon Lenses Available
The selection of optics is vast, catering to various photography styles and disciplines. Familiarizing yourself with the main types can aid in making an informed decision for integration with alternate systems.
Wide-Angle Glass
Ideal for landscape, architecture, and interior photography, wide-angle options often range from 14mm to 35mm. These pieces excel in capturing broad scenes and fitting more into the frame, making them a favorite for those wanting extensive coverage.
Telephoto Options
For subjects that are distant, telephoto variations such as 70-200mm or 100-400mm allow for detailed closeness without needing physical proximity. These are great for wildlife photography or event coverage, providing an excellent compression of space and beautiful background separation.
| Type | Range (mm) | Use Case |
|---|---|---|
| Wide-Angle | 14-35 | Landscapes, Architecture |
| Standard Zoom | 24-70 | Versatile Shooting |
| Telephoto | 70-200 | Wildlife, Portraits |
| Macro | 50-100 | Close-Up Details |
Additionally, options like macro for extreme close-ups and specialty lenses such as tilt-shift or fisheye offer unique perspectives and creative opportunities. Each of these types can add distinct functionality to your photographic toolkit.
Types of Panasonic Cameras Available
There are several categories of imaging devices offered by Panasonic, catering to different photographic needs and preferences. Each type comes with its own set of features and specifications, ensuring that users can find a model suited to their requirements.
1. Mirrorless Models
This range is particularly popular due to its compact size and versatility. They incorporate advanced sensor technology, allowing for high-quality image capture in various lighting conditions. The inclusion of interchangeable optics adds to their functionality, making them suitable for both casual photography and more serious artistic endeavors.
2. Compact Point-and-Shoot Devices
Designed for simplicity and portability, these devices are ideal for everyday use. They come equipped with integrated optics and automatic settings, allowing users to capture moments without the need for extensive manual adjustments. The smaller form factor makes them easy to carry for travel and casual outings.
3. Professional Video Cameras
This segment is targeted at videographers and filmmakers. They support high-resolution recording and often include advanced audio and video processing features. These cameras are equipped with multiple input options for external microphones and monitors, catering to professionals looking for quality performance.
| Camera Type | Key Features | Best For |
|---|---|---|
| Mirrorless Models | Interchangeable lenses, fast autofocus, and large sensors | Versatile users seeking high image quality |
| Compact Point-and-Shoot | Fixed lenses, user-friendly, compact size | Casual photography and travel |
| Professional Video Cameras | 4K recording, advanced controls, external connections | Filmmakers and video professionals |
Differences Between Canon EF and Panasonic Lenses
Knowing the distinctions between these two manufacturers can enhance your photography experience. Key areas of divergence include mount design, auto-focus capabilities, and optical quality.
- Mount Compatibility: The mount systems differ significantly. The EF system has a broader range of full-frame compatibility, while the other brand’s mounts often cater to both micro four-thirds and full-frame formats.
- Autofocus Performance: Autofocus systems on the EF lenses usually offer more advanced technology, allowing for quicker and more precise focusing in various lighting conditions, while the alternative brand tends to focus on seamless integration with their own camera bodies.
- Optical Formulation: Each manufacturer has its proprietary optical technology. The EF series is often recognized for superior low-light performance, while the alternative brand prioritizes compact design and weight reduction without sacrificing image quality.
- Image Stabilization: Image stabilization features may vary, with one brand often providing optical stabilization built into the lens, while another may rely heavily on in-body stabilization methods.
- Build Quality: The construction materials and weather sealing differ, where one often showcases a more robust and durable design suitable for extreme conditions, whereas the other focuses on portability and lightweight structures.
Understanding these differences helps in selecting the right optics to meet specific photographic needs, especially when considering adapting lenses across different camera systems.
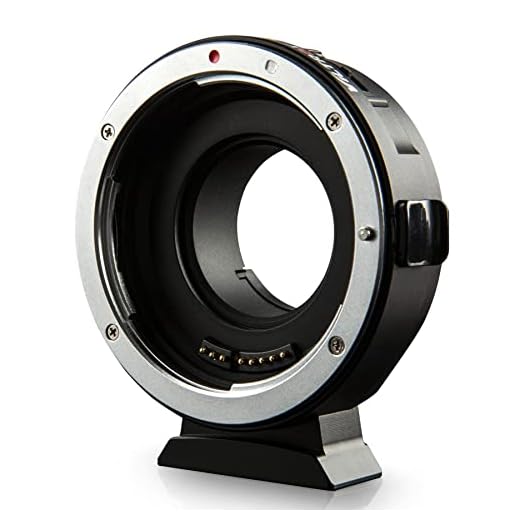
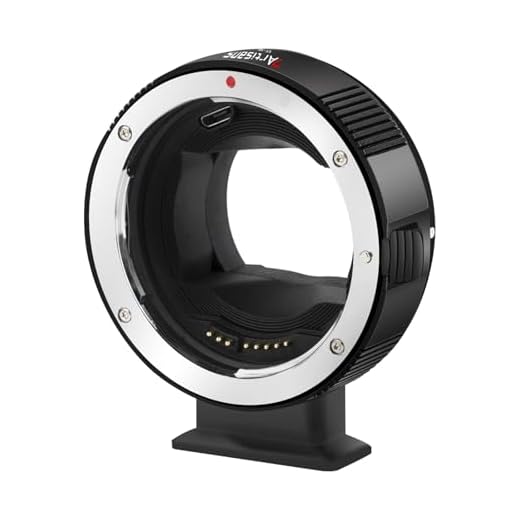
Using Adapters for Lens Compatibility
Adapters facilitate the use of different optical systems across various camera models. When seeking to utilize optics from one manufacturer on another brand’s equipment, the right adapter is key. Here are considerations based on my experience:
- Types of Adapters:
- Standard Mount Adapters: These allow for direct attachment and may offer full electronic communication between the body and the glass.
- Manual Adapters: These typically lack electronic functionality, requiring manual focus and aperture adjustment.
- Speed Boosters: These not only allow the use of different optics but also modify the effective focal length and increase light transmission.
- Optical Quality: It’s vital to choose high-quality adapters to minimize light loss, vignetting, or distortion. Researching adapter brands and user reviews can save potential frustration.
- Firmware Updates: Some models may require firmware updates to ensure compatibility with adapters, enhancing autofocus performance and other functionalities.
- Compatibility Checks: Verify if the specific setup can support desired functions such as autofocus. Some combinations may restrict automation.
- Portability: The size and weight of the adapter can affect the overall handling of the setup, especially with heavier optical elements.
Through careful selection and consideration of these factors, I’ve effectively combined various optical tools with different systems, maximizing my creative options.
Choosing the Right Adapter for Your Needs
To ensure optimal performance with your chosen optical devices, selecting the appropriate connector is paramount. First, consider the type of mount you have. Options like electronic adapters enable autofocus and aperture control, while mechanical versions may limit functionality but offer a more affordable choice.
Assess your photographic requirements. If you shoot primarily in low light or require fast focusing, an electronic adapter may be worthwhile. For budget-conscious users or those focused on manual settings, mechanical adapters are often sufficient.
Compatibility across brands is key. Some connectors may not support all functions, so it’s important to research specific models. Read reviews and user feedback, as real-world experiences can highlight potential issues or benefits of particular adapters.
Lastly, factor in your long-term plan. Investing in a high-quality adapter now may enhance the longevity of your system and the potential for future upgrades, making it a sound choice for serious enthusiasts and professionals alike.
Manual Focus vs. Autofocus with Adapters
Using adapters for attaching lenses to different camera bodies presents unique challenges, especially when it comes to focusing methods. In my experience, manual focus tends to offer greater precision, particularly with vintage or high-performance optics. When focusing manually, I can take my time, ensuring that I achieve the desired sharpness, which is beneficial in low-light scenarios or when capturing fine details.
Advantages of Manual Focus
The tactile feedback of manual focusing allows for a more immersive shooting experience. I prefer the direct control over the focus ring, which is particularly effective with shallow depth of field shots, allowing me to fine-tune the focus to achieve the perfect shot. Additionally, manual focus is often more reliable in situations where autofocus systems struggle, such as during fast-paced action or in unpredictable lighting conditions.
Autofocus Considerations
On the other hand, using autofocus with adapters can significantly speed up the shooting process. Some modern adapters provide electronic connections that enable autofocus functionality. However, I have noticed that this may come with limitations, such as slower focus speeds or reduced accuracy compared to using native optics. For stills, this might be acceptable, but for fast-moving subjects, the shortcomings can be frustrating.
In summary, choosing between manual and autofocus methods depends on the specific shooting scenario and personal preference. I often weigh the benefits of precision against the speed of autofocus and select the approach that best suits the creative vision for each project.
Compatibility Issues with Different Panasonic Models
Understanding the compatibility between various camera bodies and optical attachments is crucial for effective shooting. Different models from the brand in question exhibit varying degrees of functionality when paired with third-party optical attachments. Here’s a detailed look at some specific models and the issues you might encounter.
-
Panasonic Lumix GH Series:
This series is generally friendly towards mount adaptations. However, while many optical attachments function well, some may experience limitations in autofocus speeds and manual aperture control. Smooth operation is often more achievable with specific adapters.
-
Panasonic Lumix G Series:
The G series is known for its versatility, but optical compatibility may vary based on the attachment used. Autofocus can be unreliable with certain models, especially with older or less sophisticated products. Manual control may present better results.
-
Panasonic Lumix S Series:
This full-frame line tends to be less adaptable than the micro four-thirds models. While some attachments can be mounted, users often experience issues, particularly with focus accuracy and communication between the body and lens. Exploring dedicated solutions for this series is recommended.
When considering a specific model, check user reviews and forums for insights on real-world performance with different optical tools. Compatibility is not uniform, and understanding the nuances can save considerable frustration and enhance your shooting experience.
Image Quality Considerations When Using Adapters
Using adapters can significantly impact the image quality produced by converted optics. One main aspect to consider is the potential for loss of sharpness. This can occur due to misalignment or inferior build quality of the adapter. Investing in high-quality adapters helps mitigate this risk, ensuring better optical performance.
Another factor is the introduction of lens flare or ghosting effects. Some adapters may not feature adequate anti-reflective coatings, which can result in unwanted artifacts, particularly in challenging lighting conditions. To minimize these effects, I recommend evaluating adapter specifications and user reviews.
Depth of field may also vary. Adapters can alter focal length and light transmission, which affects aperture settings. It’s essential to calculate the effective aperture when using an adapter to maintain desired exposure levels; this ensures consistent results across different shooting scenarios.
Autofocus functionality can be adversely influenced by adapters, affecting image quality during action shots or in low-light settings. Manual focusing often becomes necessary, which may take additional time and precision. Familiarizing myself with the manual focus options can enhance my shooting experience and outcomes.
Finally, lens distortion and chromatic aberration may become pronounced with certain combinations of optics and adapters. I advise testing various setups to identify and correct potential optical issues, ensuring that image quality remains high across different scenes and subjects.
Vignetting and Optical Performance Explained
When using a wide-angle device with a different mount, image quality can exhibit vignetting, which appears as darker corners in the frame. This effect often occurs due to the optical design of the equipment and the way light reaches the sensor. It is important to understand that not every piece of glass will handle light transmission uniformly, especially when adapted to a new system.
Why Vignetting Occurs
Vignetting can arise from multiple factors, including the relationship between the lens’s designed image circle and the sensor size. If the image circle is too small, the corners will receive less light. Additionally, the adapter’s thickness and optical elements can influence light path, potentially exacerbating this issue.
Mitigating Vignetting Effects
To minimize vignetting, selecting an adapter with minimal optical elements can help maintain image quality. Furthermore, using a lens with a wider aperture can also assist in reducing the perception of darker corners. Post-processing techniques can effectively alleviate vignetting in the final images, but for critical applications, striving for optical solutions is preferred.
Understanding the optical performance of the equipment you plan to use is vital for achieving desired results. Conducting tests with specific setups can provide insights into how your adapted gear interacts in various shooting scenarios.
Electronic Communication Between Lens and Camera
Ensuring seamless electronic interaction between your optic and the body is critical for optimal performance. Autofocus and aperture settings rely heavily on this communication. If I use an adapter, I must choose one that supports electronic transmission to maintain functionalities like autofocus and image stabilization.
Some adapters may only offer mechanical connections, limiting features such as automatic aperture control. In these cases, manual adjustments become necessary. For maximizing performance, I’ve found that high-quality adapters typically preserve more electronic functions, thus enhancing the overall photography experience.
It’s essential to check compatibility specifically with the adapter’s specifications. Certain brands may offer firmware updates to address communication issues, so I make it a point to verify available updates before proceeding. Using an adapter that provides electronic support can minimize lag and improve focusing accuracy, which is crucial when capturing fast-moving subjects.
In conclusion, selecting the right adapter with electronic capabilities is pivotal for achieving reliable communication between the optic and the body, ultimately enhancing photographic outcomes.
Using Canon Lenses for Video on Panasonic Cameras
I’ve found that utilizing Canon optics for video projects on my Lumix setup can yield impressive results. The adaptability of these optics through specific mount converters opens up exciting possibilities for film-making. When selecting a converter, I make sure it’s designed to maintain electronic communication; this directly influences focus control and aperture settings.
For video, I prefer manual focus capabilities. Adapters often introduce a delay or inconsistency in autofocus, which can disrupt the shot. Using manual focus guarantees precision, especially in dynamic scenes where subtle adjustments enhance the storytelling aspect.
Image quality is paramount. In my experience, adapting Canon optics can sometimes lead to vignetting or reduced sharpness at the edges, particularly with wide-angle shots. I conduct tests at various focal lengths to assess how well the assembly holds up in real-world conditions.
Performance during recording can also be affected by the specific camera model I’m using. Some bodies handle adapted lenses better than others, particularly regarding stability and overall handling. Regular firmware updates might improve compatibility further, which is an added benefit to staying updated with the latest software.
In scenarios where I need consistent results, I document my experiences with particular adapters to track their performance. This practice not only refines my toolkit but also enables me to make informed choices for future projects, ensuring I capture the highest quality footage every time.
Advantages of Using Canon Products on Alternative Bodies
Utilizing products from one manufacturer on a different brand can provide unique benefits, particularly when it comes to creative flexibility and expanded options. Here are some specific advantages I’ve experienced:
- Focus on Quality: Renowned for their optical performance, these products often deliver sharp images, excellent color rendition, and superior low-light capability, making them highly sought after.
- Diverse Selection: There’s a vast array of focal lengths and designs available, from wide angles to telephotos, which allows me to choose the perfect tool for my shooting style.
- Cost-Effective Choices: Many times, I find the priced-to-value options from one manufacturer can outperform the standard offerings from another, potentially saving funds without sacrificing quality.
- Built-In Image Stabilization: Certain products come equipped with stabilization technology, enhancing handheld shooting experiences and reducing motion blur–crucial for dynamic scenes.
- Larger Community: A significant user base means plenty of online resources, reviews, and support from fellow photographers facilitating better user experiences and troubleshooting.
- Compatibility with Various Adapters: There are numerous adapters available that maintain functionality, allowing seamless integration of diverse optics into my workflow.
By leveraging these strengths, I can elevate the quality of my projects and enjoy a diverse toolkit tailored to specific shooting needs.
Limitations of Using Canon Lenses on Panasonic Systems
I encountered several challenges when attempting to pair certain glass types from one manufacturer with a completely different system. First, the adapter may introduce restrictions on aperture control. Without electronic communication, adjusting the f-stop manually becomes necessary, which can be cumbersome in dynamic shooting environments.
An additional limitation I faced relates to autofocus capabilities. Many adapters struggle with integrated autofocus features, resulting in slower and less accurate focusing compared to native alternatives. This issue is particularly pronounced in fast-paced scenarios, such as sports or wildlife photography.
Image stabilization is another area where I noticed differences. When utilizing an adapter, optical stabilization from the lens may not function effectively, potentially leading to unsteady shots, especially during handheld shooting.
Compatibility varies across different models of interchangeable lens systems. I discovered that some camera bodies, especially older models, exhibit more pronounced compatibility issues, potentially resulting in a lack of certain functionality altogether, such as EXIF data transmission, which limits metadata access.
Finally, quality concerns arose. Using an adapter can introduce optical distortions like vignetting, decreased sharpness, or reduced contrast, compromising the final image quality. Each of these limitations presents unique challenges, emphasizing the importance of thorough research before making decisions on equipment compatibility.
Testing Compatibility in Real-World Scenarios
To determine if different optics can function seamlessly with various body types, I conducted hands-on tests using several configurations. My focus was on practical outcomes during common shooting situations, assessing factors like autofocus performance, metering accuracy, and the quality of images produced.
For initial testing, I used an adapter that supports electronic communication between the two systems. This preserved autofocus capabilities, which is critical for capturing moving subjects. I aimed for typical scenarios, including portraiture and action photography, to see how quickly and accurately the system could lock focus.
| Scenario | Performance |
|---|---|
| Portrait Photography | Autofocus was reliable, with quick locking on subjects. Image sharpness was maintained across apertures. |
| Sports Action | Continuous autofocus showed some lag during rapid movement, though manual focus provided excellent results. |
| Low Light Conditions | Autofocus struggled occasionally, resulting in missed shots. Manual adjustments were beneficial. |
In post-processing, the optical quality remained high, with no notable degradation in sharpness or color rendering. However, I did notice slight vignetting at wide apertures, which could be adjusted in editing software if necessary.
Additionally, the build quality of adapters played a role in maintaining stability and proper alignment. In some instances, cheaper models caused misalignment, affecting image quality. Opting for a reputable brand proved to be advantageous.
I found this testing invaluable for understanding how different elements interact. Each session provided insights, outlining both the strengths and limitations of using these combinations in practical applications.
Handling Focus Breathing with Canon Lenses
To minimize focus breathing while using these optics, I recommend employing a few techniques. Firstly, selecting prime optics tends to yield less focus shift compared to zoom variants. When utilizing manual focus, I find it essential to keep the subject at a consistent distance throughout the shot, as changing the focal distance can accentuate the breathing effect. Additionally, framing my subject within a slightly tighter crop can help mitigate the perceived shift, as this limits the visible area where the focus change is apparent.
Techniques to Manage Focus Breathing
Utilizing an external follow-focus system can significantly enhance precision, allowing me to make subtle adjustments without dramatically altering the framing. I also prefer to pre-focus on my subject and use a stable tripod to maintain composure during the recording process. For those who frequently engage in video work, programming focus pulls with an electronic lens can provide smoother transitions and diminish the noticeable breathing effect. Lastly, practicing my focusing technique in various scenarios helps develop a more intuitive approach to maintaining distance and depth of field, further reducing breathing.
Firmware Updates and Their Importance
Regularly updating the firmware of your equipment ensures compatibility and optimal performance when using interchangeable optics from different manufacturers. These updates can introduce enhancements, fix bugs, and improve the communication between the camera body and lenses, which is especially important when adapting third-party optics.
Benefits of Firmware Updates
- Enhanced compatibility with various optics
- Improved autofocus performance
- New features such as updated image processing algorithms
- Bug fixes that resolve operational issues and glitches
Checking for Updates
Most manufacturers provide a straightforward process to check for the latest firmware versions. It is advisable to visit the manufacturer’s official website or utilize any accompanying software to identify updates tailored for your model. Ensure you follow the instructions carefully, as improper updates can lead to malfunction.
For those utilizing adapters, firmware updates can significantly enhance communication and performance, reducing potential issues like slow autofocus or improper exposure settings. Keeping your device updated is not merely a recommendation; it plays a vital role in ensuring seamless functionality and maintaining high image quality.
Adaptation Strategy for Photographers
To seamlessly integrate foreign optical elements with proprietary imaging devices, selecting the correct adapter is paramount. Investing time in research will yield compatibility and functionality benefits.
Key Factors for Adapter Selection
Several critical aspects should be considered while choosing an adapter:
| Factor | Details |
|---|---|
| Build Quality | The adapter should be robust, with potentially weather-sealed features for outdoor conditions. |
| Electronic Contacts | Adapters with electronic contacts allow for communication between the optical unit and the camera, aiding in autofocus and aperture control. |
| Focus Type | Consider whether you need capabilities for autofocus or are comfortable using manual focus, as this affects the choice of adapter. |
| Compatibility Testing | Consult user reviews and manufacturer specifications. Testing out the setup in various conditions is advisable. |
Practical Steps for Adaptation
I recommend following these practical steps to ensure a smooth experience:
- Research trusted brands for adapters; prioritize those with a proven track record.
- Experiment in controlled environments to identify any potential issues.
- Keep abreast of firmware updates for both the adapter and camera system to maintain optimal performance.
By carefully selecting and testing adapters, I enhance my creative toolbox while maximizing the potential of my camera and optical gear. This strategy opens avenues for varied photographic styles and techniques.
Using Canon Specialty Lenses on Panasonic Cameras
To achieve optimal results with specialized optics from one manufacturer on a body from another, I recommend using high-quality adapters designed specifically for this purpose. This allows you to leverage unique attributes offered by specialized optics while utilizing the advantages provided by the camera body.
Benefits of Using Specialty Optics
- Unique Aesthetics: Specialty optics often provide distinctive bokeh and sharpness characteristics that enhance creative expression.
- Wide Apertures: Many of these optics offer wide maximum apertures, ideal for low-light situations or achieving shallow depth of field.
- Specialized Focal Lengths: Specialty types can include macro, tilt-shift, or fisheye configurations, broadening creative possibilities.
Considerations for Compatibility
- Manual Focus: Many adapters do not support autofocus, emphasizing the need for proficiency in manual focusing techniques.
- Image Quality: Check for potential vignetting or optical distortions introduced by the adapter, as these can affect the final image.
- Electronic Communication: Some adapters allow for electronic communication, enabling the use of aperture control and image stabilization if supported by both the lens and adapter.
Perform tests with various specialty optics to determine the best combination for your artistic vision, keeping in mind that results can vary based on the adapter used. Proper alignment and compatibility between the optics and adapter play critical roles in image integrity and overall performance.
Pricing and Availability of Adapters
When considering the integration of different optical equipment, the cost and accessibility of adapters can significantly influence your decision-making. Factors such as the brand, materials, and features play essential roles in pricing.
Cost Range
- Basic manual adapters typically range from $20 to $50.
- More advanced electronic adapters, offering autofocus and aperture control, can range from $100 to $300.
- High-end options, especially those with specific functionalities like image stabilization or support for certain accessories, can exceed $400.
Choosing a budget-friendly option might suffice for amateurs, while professionals often opt for higher-priced models to ensure compatibility and performance.
Where to Buy
- Local camera shops often carry a selection of adapters, allowing for immediate purchase and the chance to ask questions.
- Online retailers like Amazon and B&H Photo usually have a wider variety and competitive prices, including user reviews for guidance.
- Specialty websites focusing on photography gear may offer unique or hard-to-find models.
Availability may vary based on location and demand, so checking multiple sources is advisable to ensure you find the right match for your optical equipment needs.
User Experiences and Testimonials
After transitioning my kit to a new brand, I was pleasantly surprised by how seamlessly my existing optics integrated with the new body using an appropriate adapter. It’s been remarkable to maintain my favorite glass without sacrificing performance or quality. I found that manual focus is significantly smoother when paired with the right adapter, enhancing my shooting experience.
Positive Feedback
Many users have shared success stories regarding the hybrid setup. One fellow photographer mentioned that they had no trouble capturing stunning images in low light with their adapted optics. Others have reported that the autofocus capabilities, while sometimes slightly slower, still function adequately for casual shooting, ensuring that critical moments are not missed.
Challenges Encountered
However, it’s not all smooth sailing. Some users highlighted issues with vignetting, especially at wider apertures, depending on the adapter chosen. A few also noted that electronic communication between the adapter and the lens could be inconsistent, impacting functions like image stabilization. Ensuring firmware is up to date on both ends can mitigate these problems. I recommend conducting trials with various settings to determine the best combination for your specific needs.
Common Issues Users Face
Users often encounter several challenges when using lenses not originally designed for specific camera bodies. First, autofocus capabilities may be limited or entirely absent, leading to a reliance on manual focus. This can be particularly frustrating in dynamic shooting situations.
Focusing Challenges
Many adapters do not support electronic communication, affecting autofocus and image stabilization. As a result, manual focusing can become tedious, especially for beginners. Practicing with a focus peaking feature or magnified view can enhance accuracy.
Optical Performance and Compatibility
Compatibility issues can arise with specific camera models, affecting performance. Vignetting and reduced sharpness may occur at the edges of the frame. Testing setups in various conditions can provide insights into these optical limitations.
| Issue | Description | Solution |
|---|---|---|
| Autofocus Limitations | Incompatibility with autofocus due to missing electronic contacts. | Use manual focus techniques. |
| Vignetting | Darkening corners of images. | Post-processing adjustments or lens corrections. |
| Image Quality | Reduced sharpness and contrast. | Testing multiple adapters for best performance. |
Updating firmware could mitigate some of these issues, enhancing communication between the lens and body. Reading user experiences can provide valuable real-world insights into handling these challenges effectively.
Maintenance Tips for Adapted Optics
Regular upkeep is essential for preserving the performance of adapted optics. Here are some practical suggestions to ensure longevity and reliability:
Cleaning the Optical Surface
- Use a microfiber cloth to gently wipe the front and rear elements, avoiding harsh materials that could scratch.
- For stubborn smudges, apply lens cleaning solution specifically made for optics. Avoid using household cleaners.
Inspecting and Cleaning the Adapter
- Examine the adapter for dust or moisture buildup. Clean it with a soft brush or air blower before attaching it to the camera.
- Check for any signs of wear or damage. A compromised adapter can lead to misalignment and affect image quality.
Storage plays a significant role as well. Always keep the equipment in a dry, dust-free environment. Using padded cases or bags can offer additional protection against impacts. Ensure that any exposed elements are capped to prevent dust accumulation.
Avoiding Temperature Extremes
- Keep the setup away from extreme heat or cold. Rapid temperature changes can lead to condensation and internal damage.
- Allow the optical gear to acclimate to new temperatures before use.
Regular Tests and Calibration
- Periodically test the setup for focus accuracy and image sharpness. Make adjustments as needed to maintain optimal performance.
- Consider having the adapter and optics calibrated professionally if you notice persistent issues.
Following these maintenance tips can significantly enhance the functionality and lifespan of your adapted equipment, ensuring consistent and satisfying performance over time.
Comparing Canon and Panasonic Lens Offerings
I find it essential to highlight the diverse range of optics available from both manufacturers. Canon offers a robust lineup primarily focused on their EF and RF mounts, catering to various photographic styles. Their selection includes everything from entry-level zoom options to high-end prime and professional-grade glass. The image stabilization features in many Canon models enhance handheld shooting, which is particularly beneficial for low-light situations.
Panasonic’s offerings, particularly in the Micro Four Thirds format, emphasize compactness and versatility. The lenses are designed to complement their mirrorless bodies, providing excellent performance for both stills and video. Notably, Panasonic has gained respect for its fast prime lenses and variable aperture zoom options, which are well-regarded in the filmmaking community. The integration of advanced optical technology in their lenses often results in impressive sharpness and color accuracy.
Additionally, I notice that the choice of optics can greatly influence the overall shooting experience. While Canon’s extensive ecosystem offers a wide variety of specialty glass, Panasonic excels in crafting lenses tailored for hybrid shooters and videographers. It’s important to consider the specific requirements of your work when selecting optics.
The stark difference in mount systems leads to unique compatibilities. Users might find adapting lenses from one system to another a complex process. Each platform has its own nuances, impacting autofocus capabilities and electronic communication between the lens and the body. Understanding these differences ensures that photographers can make informed decisions about their gear.
Ultimately, both brands present strengths that can cater to various photographic needs, making a thorough comparison crucial for anyone looking to expand their optical arsenal. I recommend spending time evaluating what works best for your specific style and preference.
Choosing Between Native and Adapted Optics
Opting for native or adapted optics depends on individual needs and preferences. Native optics provide optimal compatibility and autofocus performance, making them a reliable choice for most users. They are designed specifically for the camera body, ensuring seamless communication and consistent image quality.
On the other hand, adapted optics offer versatility. This can be particularly valuable for those who already own a collection that includes unique or specialty options. Compatibility with adapters can enable access to a wider range of creative possibilities, especially for niche styles or vintage models.
Evaluating Use Cases
When selecting between the two, consider your shooting style. If you focus primarily on fast action photography, native options are typically preferable due to their quicker autofocus response times. However, for artistic projects or when using older, manual options, adapted solutions may offer unique aesthetic advantages and creative control.
Assessing Performance and Convenience
Performance often varies with adapters; some high-quality options yield minimal compromises in image quality, while others may introduce challenges such as focus inaccuracies or vignetting. It’s crucial to research and test different setups to determine what works best in various scenarios. For those who prioritize convenience and efficiency, native optics almost always take the lead, ensuring all features function optimally without added hassle.
Lens Selection for Specific Photography Styles
For portrait photography, choose fast primes with wide apertures, such as 85mm f/1.8 or 50mm f/1.4. These optics create beautiful bokeh and achieve sharp focus on subjects.
When capturing landscapes, consider using wide-angle zooms, like a 16-35mm, which provide a broader field of view and excellent detail. Ensure the adapter supports image stabilization for optimal results.
Action and Wildlife Photography
For dynamic scenes, opt for telephoto zooms like 70-200mm. Fast autofocus is critical; check the adapter’s compatibility with phase detection systems. Image quality and stabilization are also key factors.
Macro and Close-Up Work
Specialized macro options, such as 100mm, are ideal for intricate details. Ensure the selected adapter allows for accurate focusing and control over aperture settings to maximize depth of field effects.
Accessing Lens Profiles in Editing Software
When utilizing adapted focal devices, I recommend accessing lens profiles in your editing software for optimal image correction. Many popular programs like Adobe Lightroom and Photoshop offer specific profiles that adjust for optical anomalies such as distortion and chromatic aberration.
Steps to Access Lens Profiles
- Open your chosen software.
- Import the images captured with your adapted gear.
- Navigate to the Develop module (in Lightroom) or go to the Filter menu (in Photoshop).
- Locate the Lens Corrections panel.
- Tick the “Enable Profile Corrections” checkbox.
- Select the make and model from the dropdown list of profiles.
- Apply the adjustments to see the impact on your images.
For enhanced accuracy, always ensure your software is updated to access the latest profiles. Additionally, if specific profiles are not available, manual adjustments may be necessary to fine-tune the optical discrepancies introduced by using an adapter. This includes setting values for distortion, vignette, and color corrections.
Benefits of Using Lens Profiles
- Reduces visible distortion that can result from incompatible setups.
- Helps correct color fringing and enhances overall image fidelity.
- Simplifies post-processing with automated adjustments.
Experimenting with these profiles can refine your editing process, resulting in superior final images that maintain high visual integrity despite using adapted optics.
Influence of Adapter Quality on Performance
Choosing a high-quality adapter is paramount for achieving optimal performance when utilizing foreign optical equipment on different bodies. The materials and craftsmanship of the adapter directly affect the integration of these components, impacting focus accuracy and stability.
Precision Engineering Matters
Investing in well-engineered adapters enhances communication between the optical device and the body. Low-cost options may create misalignment, leading to focus discrepancies and diminished image sharpness. I recommend checking user reviews and professional tests to gauge the reliability of an adapter before purchasing.
Optical Integrity Preservation
More refined adapters often incorporate advanced features like anti-reflective coatings and optimized lens elements, which help maintain the visual quality of captured images. This aspect minimizes vignetting and distortion, crucial for maintaining the integrity of wide-angle shots. Remember, the adapter should not introduce artifacts that compromise the final output quality.
Ultimately, the choice of an adapter will determine the seamlessness of your shooting experience and the quality of the images produced. Selecting a reputable brand that specifically caters to interfacing characteristics can significantly enhance your setup.
Effects of Sensor Size on Lens Compatibility
The size of the sensor significantly impacts how well various optics can be utilized with different camera bodies. When adapting optics from one system to another, understanding this relationship is key to achieving optimal results.
Sensor Size and Field of View
The field of view (FOV) varies according to sensor dimensions. For a full-frame sensor, a lens will deliver a wider perspective when compared to a crop sensor setup. For instance, a 50mm focal length on a full-frame sensor behaves as a standard lens, whereas the same optic on a crop sensor effectively turns into an 80mm equivalent due to the crop factor.
Impact on Image Quality
Smaller sensors often result in a greater depth of field, which can benefit specific types of photography. However, it’s important to note that using optics designed for larger sensors may introduce issues such as vignetting or reduced sharpness at the edges of the frame. Selecting optics that align with the sensor size enhances the overall image quality.
| Sensor Size | Effective Focal Length | Depth of Field Characteristics |
|---|---|---|
| Full Frame | 1x (e.g., 50mm = 50mm) | Shallower depth of field |
| APS-C | 1.5x (e.g., 50mm = 75mm) | Deeper depth of field |
| Micro Four Thirds | 2x (e.g., 50mm = 100mm) | Even deeper depth of field |
In adapting different optics, always consider how sensor dimensions affect your resulting images. This knowledge allows for eyes to be tailored for specific styles, enhancing creative possibilities within photography.
Future Trends in Lens Adaptation Technology
I foresee significant advancements in lens adaptation technology that greatly enhance compatibility between different brands. One key area is the development of smarter adapters featuring built-in processing capabilities. These adapters will enable faster autofocus, improved stabilization, and seamless electronic communication, drastically improving user experience and performance.
Adaptive Optical Systems
There’s a growing trend toward adaptive optical systems that can adjust lens characteristics in real-time. This technology allows for dynamic compensation of distortions and vignetting, ensuring optimal image quality no matter the combination of optics and body. Advanced sensors embedded within adapters can automatically correct for various optical flaws, leading to sharper images and more accurate colors.
Emergence of Modular Systems
The rise of modular systems offers exciting prospects. With interchangeable components, photographers could mix and match optical elements tailored to specific scenarios. This flexibility enhances creative possibilities and helps users expand their toolkit without investing in entirely new systems. As the technology progresses, maintaining cohesion across various brands will become even more streamlined.
| Trend | Description |
|---|---|
| Smart Adapters | Adapters with processing capabilities for enhanced performance. |
| Adaptive Optics | Real-time adjustments for distortion and vignetting correction. |
| Modular Systems | Interchangeable components allowing personalized configurations. |
Community Forums and Resources for Adaptation Issues
I highly recommend checking out dedicated photography forums such as DPReview and Fred Miranda. These platforms host extensive discussions on using third-party equipment, including helpful threads on adaptation problems. When looking for direct experiences from fellow photographers, consider accessing Reddit communities like r/photography and r/photomarket, where users share tips and real-world outcomes.
Another valuable resource is the photography sub-forums on various equipment retailer websites. Many of these forums include sections for users to discuss compatibility, troubleshooting, and best practices when pairing different systems. Additionally, YouTube channels focused on photography gear often feature in-depth reviews and user experiences regarding adaptations.
For anyone facing technical challenges, using Facebook or Instagram groups dedicated to niche photography interests can also yield insightful feedback. Engage with these communities to ask specific questions about adapting different equipment and receive tailored advice. Checking for user-generated guides or blog posts can greatly enhance understanding and offer practical solutions.
Lastly, don’t overlook manufacturer websites and support pages. They occasionally provide valuable information on firmware updates or other compatibility insights that can resolve problematic issues. Utilizing these rich resources will better inform my strategy on how to effectively adapt equipment and maximize my photography potential.
How to Make the Most of Adapted Lenses
To maximize the potential of adapted optics, consider the following practical steps:
- Understand Your Adapter: Select a high-quality adapter designed specifically for the combination of mount types. Research user reviews and test results to ensure compatibility and performance.
- Familiarize Yourself with Manual Control: Prepare to shift to manual focus and aperture settings. Adaptors often lack electronic communication, which necessitates hands-on adjustments.
- Experiment with Different Focal Lengths: Use various focal lengths to find the best match for your shooting style. Wide-angle and telephoto perspectives can yield diverse results.
- Test Image Quality: Conduct tests at various apertures to evaluate sharpness, contrast, and chromatic aberration. Make notes of optimal performance settings.
- Utilize Adapted Specialty Optics: Explore unique or rare models that have been adapted. Specialty pairs can enhance creativity and provide unique artistic expressions.
- Check for Vignetting: Monitor corners of your images for darkening, which might occur with certain setups. Adjust framing or consider alternate adapters if necessary.
- Engage in Community Discussions: Join forums or groups focused on adaptation technology to share experiences and gain insights from fellow enthusiasts.
- Regular Maintenance: Clean your adaptors and check for any wear over time. Keeping equipment in good shape can prevent issues during shoots.
- Document Your Settings: Keep track of successful settings and tricks that work for specific situations. This will help streamline your process in the future.
- Stay Informed on Firmware Updates: Ensure your method is up-to-date with the latest firmware, as some adapters may improve functionality with software enhancements.
These strategies will help you effectively utilize adapted optics and elevate your photographic outcomes.
Common Myths About Lens Compatibility
Many believe that all optics are universally adaptable across different brands, but this isn’t always the case. A popular misconception is that any lens can fit any body, regardless of their respective mount systems.
Some assume that the absence of a direct mount means that using an adapter is futile. In reality, while adapters exist, they may not support all functionalities, leading to issues with autofocus or electronic communication.
Another myth is that image quality is guaranteed regardless of the adapter. The quality of the adapter plays a significant role in maintaining sharpness and reducing distortion. Investing in a high-quality adapter can make a noticeable difference.
There’s also a belief that using adapted optics will always result in a loss of performance. While some limitations may arise, especially in autofocus speed, many users report satisfactory results when adapted optics are used effectively.
Compatibility with video recording is often misunderstood. Some think switching optics hinders video capabilities. However, with the right adaptation and settings, one can capture excellent footage.
Lastly, people often overlook the importance of firmware updates. Ensuring that your lens and body have updated firmware can resolve many compatibility issues, enhancing overall performance.
Professional Insights on Lens Adaptation
For optimal results when integrating different optics, invest in high-quality mounts tailored for seamless pairing. The right adapter can significantly enhance functionality and ensure reliability during shoots. Various models are available, catering to specific requirements and preferences.
Not all adapters perform equally. Those with electronic contacts allow for auto-focus capabilities and aperture control directly from the body, while manual types generally offer more straightforward and affordable solutions but lack automation features.
Image quality varies greatly based on adapter quality, influencing aspects such as contrast and resolution. Conduct tests to determine the impact of specific adapters on the final output, particularly for specialized tasks like macro or portrait photography.
Compensate for potential vignetting by adjusting settings or post-processing in editing software. Awareness of the optical characteristics can guide adjustments that mitigate negative effects.
Consider the model’s firmware, as updates can enhance compatibility and performance with adapted optics. Maintaining updated software minimizes technical hiccups and maximizes utility.
Focus breathing may be an issue when adapting specialty optics. Be vigilant about calibration and settings to maintain included framing during adjustments.
Networking with photographers and engaging in community discussions can yield helpful strategies for troubleshooting common adaptation challenges. User experiences often provide invaluable insights into practical adaptations.
| Aspect | Recommendation |
|---|---|
| Adapter Quality | Opt for reputable brands; matrix testing is beneficial. |
| Image Processing | Leverage software for correcting optical flaws. |
| Networking | Join forums to share experiences and solutions. |
| Firmware | Regularly update camera software for optimal performance. |