


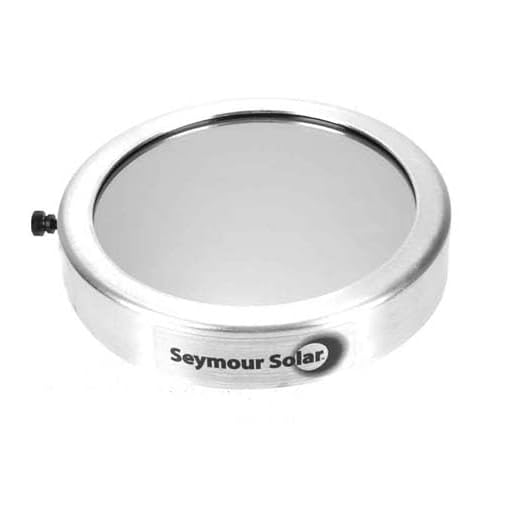
Direct observation of an astronomical event with optical devices is a common yet risky practice. Using protective filters suitable for solar observation is non-negotiable. A solar filter attached securely to the front of an optical device prevents harmful rays from damaging both eyesight and equipment.
Different types of filters exist. My preference leans towards multiple-layer glass filters, which offer superior clarity and durability compared to alternatives like film or plastic. Ensure the filter provides full-spectrum protection, blocking not only visible light but also harmful infrared and ultraviolet radiation.
While adjusting settings, select a low ISO value to minimize noise and preserve detail. A tripod stabilizes the device, crucial for long exposures. Aim for shutter speeds that capture motion without blurring, as celestial events can change rapidly. Monitoring weather conditions is critical; clear skies are paramount for the most captivating results.

Preparation involves testing the setup beforehand. Doing so helps me understand exposure settings and framing. Experimentation with different focal lengths offers unique perspectives, emphasizing the stunning celestial dance without compromising safety. Observing these phenomena can lead to breathtaking captures; however, protective measures must be paramount.
Viewing an Eclipse Using a Lens
Utilizing a lens for observing a solar event necessitates proper filtering to prevent damage to the eyes and equipment. A solar filter is mandatory; never use standard filters or sunglasses, as they do not provide adequate protection.
Here’s how to do it safely:
- Choose a filter explicitly designed for solar observation.
- Ensure the filter fits snugly on the front of the optical device.
- Before directing the device at the sun, double-check that the filter is intact and properly secured.
- Do not attempt to view without the filter, even briefly.
For photography, select an appropriate exposure settings to capture the phenomenon effectively. Using manual settings allows for more control over ISO, aperture, and shutter speed, accommodating the intensity of sunlight.
Additional tips for capturing images:
- Experiment with different focal lengths to achieve desired compositions.
- Consider using a tripod for stability during long exposures.
- Take multiple shots to ensure at least a few have the perfect balance of light.
Post-processing can drastically enhance the final results. Adjust contrast and brightness to highlight specific features of the celestial body.
Understanding Solar Eclipses and Their Visibility
For optimal viewing, it’s essential to know that solar phenomena occur either partially or totally. A total obscuration takes place when the moon entirely blocks sunlight, creating a dramatic shadow on Earth, while a partial occurrence allows some sun rays to reach the planet. Timing determines visibility; precise locations and duration of these events vary.
Visible phases can be determined by tracking the moon’s path relative to the sun. Specialized glasses or solar filters are mandatory for direct observation, as unprotected exposure can lead to irreversible eye damage. For those photographing, employing appropriate solar filters on equipment is equally necessary to prevent damage to sensors or lenses.
Optimal dates correspond with specific regions, requiring advanced planning. I recommend using interactive eclipse maps to chart visibility zones. This preparation ensures I do not miss dramatic visual displays that can captivate audiences in seconds.
During the peak moments of totality, surrounding environment shifts. Colors deepen, temperatures drop, and animals may exhibit unusual behaviors. Observing these changes enhances the experience and reminds us of our connection to astronomical events.
Understanding visibility parameters maximizes enjoyment of celestial occurrences, allowing enthusiasts to appreciate both the visual grandeur and the scientific implications. I prioritize awareness of these factors, ensuring each observation is memorable.
The Risks of Observing an Eclipse Through a Camera Lens
Observing a solar event via a photographic device without proper precautions can lead to severe eye damage. The intensity of sunlight, particularly at the moments leading up to totality, can be concentrated by the optics, resulting in potential harm.
- Optical Damage: Direct exposure of lenses to bright sunlight risks burning the internal components, affecting the device’s functionality.
- Eye Safety: Attempting to capture images without a solar filter exposes vision to harmful rays. Filters designed for safe observation are imperative.
- Retinal Burns: Prolonged exposure to the concentrated light can lead to permanent damage to retinal cells, resulting in vision loss.
- Inattention to Other Hazards: Focusing solely on photography may distract from the celestial phenomenon, leading to unintentional exposure.
Utilizing protective gear, like ISO-certified solar filters or welder’s glasses, is non-negotiable for safeguarding both equipment and eyesight during these events. Always prioritize safety over capturing the perfect shot.
Types of Camera Lenses Suitable for Eclipse Viewing
Telephoto lenses offer the best option for observing solar phenomena, as they enable significant magnification of the sun. Lenses with a focal length of 300mm or greater are recommended to capture detailed images of solar events. Additionally, using lenses with a wide aperture (f/2.8 or lower) can improve performance in varying lighting conditions.
Wide-angle lenses can serve a different purpose, providing context in broader shots, showcasing the surrounding environment during celestial occurrences. However, for direct solar imaging, caution is necessary to prevent damage to equipment and human eyesight.
Using specialized solar filters with any lens is essential. These filters reduce brightness and protect against harmful rays. My preference leans toward high-quality, solar-specific filters that match tightly to the lens diameter to ensure safety while shooting.
Remember, some lenses, especially older models, may not support filter attachment securely. It is wise to check compatibility beforehand. Adapters are available for lenses lacking filter threads, but they should be used with caution to avoid light leaks.
As an alternative, consider dedicated solar telescopes that come equipped with built-in solar filters, providing optimal safety and quality for viewing solar phenomena. These instruments often include a mount, making them ideal for prolonged observations.
Ultimately, the right choice of lens and filter significantly enhances the experience, allowing for breathtaking captures of the sun in its various stages during celestial events.
Using Solar Filters on Camera Lenses
Always equip lenses with solar filters during observations of solar events. These specialized accessories are designed to reduce harmful solar radiation and allow for safe imaging.
- Choose filters that conform to the ISO 12312-2 safety standard, ensuring they block 99.999% of sunlight.
- Fit the filter securely over the lens or use a dedicated solar filter holder to prevent light leaks.
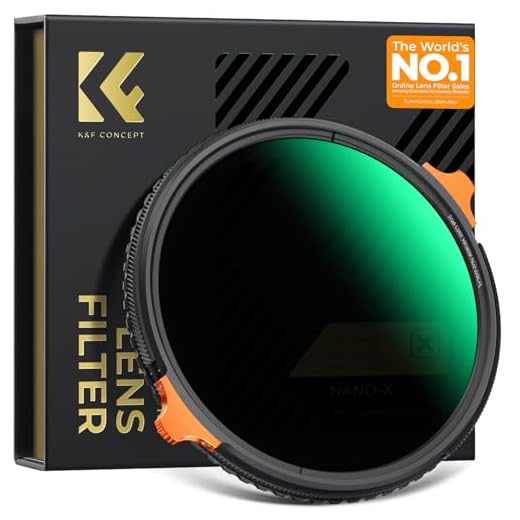
- Opt for high-quality neutral density filters designed explicitly for solar photography if a dedicated solar filter isn’t available.
Using a solar filter is non-negotiable when working with focal lengths above 200mm. Longer lenses can concentrate sunlight, potentially damaging both the filter and the camera sensor.

Check the filter for any damage before use. Scratches or imperfections can jeopardize your imaging and safety.
Keep in mind that while using a solar filter, autofocus and exposure metering functions might be unreliable. Manual adjustments are often necessary for optimal results.
Finally, always conduct a test shot before the main event to ensure everything functions correctly and adjust settings as needed. This practice can save time and ensure consistent results during a solar occurrence.
How to Choose the Right Solar Filter for Your Camera
Begin with a dedicated solar filter designed specifically for optical devices. Avoid makeshift solutions, as they can lead to dangerous reflections and excessive heat buildup.
Key Specifications to Consider
- Optical Density: Look for filters with an optical density of 5 or greater. This will reduce sunlight intensity to safe levels.
- Material: Choose between glass and mylar options. Glass filters tend to offer better durability and optical quality.
- Size: Ensure the filter fits snugly on the lens. Select a product that matches the diameter of the front element.
Types of Filters Available
- Full-Aperture Filters: Ideal for direct imaging, placed on the front of the lens.
- ND (Neutral Density) Filters: Not all ND filters are suitable; verify their specifications for solar observation.
- Solar Film Filters: Lightweight and effective, these can be custom-fit to various lenses.
Test the filter before any outdoor use. Inspect it for scratches or damage, as any compromise could lead to harmful exposure. Keep a backup filter on hand, in case of unforeseen issues.
The Importance of Proper Exposure Settings
The right exposure settings are non-negotiable for capturing moments during a solar phenomenon. In manual mode, I typically adjust the shutter speed to a fraction of a second, often ranging from 1/1000th to 1/4000th, depending on the brightness of the event.
Shutter Speed Adjustments
A faster shutter speed is necessary to prevent overexposure due to intense sunlight. Experimenting within this range can lead to a balanced image, ensuring that the solar disc remains visible without washing out the details.
Aperture and ISO Settings
Optimizing aperture is equally critical. A narrow opening, around f/8 to f/16, allows adequate depth of field while managing light entry. ISO should be set low, typically around 100 or 200, to minimize noise and enhance clarity. Adjusting these settings allows for clean, sharp images under bright conditions.
Also, utilizing the histogram feature on a camera aids dramatically in achieving perfect settings. This tool visually represents exposure levels, enabling precise adjustments to prevent clipping highlights or shadows.
In conclusion, fine-tuning these settings is indispensable for capturing stunning photographs during a solar event. Skipping this step can result in missed opportunities or poorly exposed images. Proper exposure takes practice, but the results are worth the effort.
Techniques for Photographing Solar Eclipses Safely
Employing a solar filter is non-negotiable. Attaching a filter specifically designed for solar viewing to any optical device protects both your equipment and eyesight from harmful rays.
Utilize a tripod for stability. Eclipses occur over several minutes; a stable base minimizes movement and enables clearer images.

Consider using a remote shutter release. This gadget prevents camera shake during exposure, ensuring sharper results.
Experiment with exposure settings before the moment arrives. Test various ISO values and shutter speeds to find optimal settings for different phases of the phenomenon.
Practice taking images of the sun during normal conditions leading up to the event. Familiarity with your settings and equipment produces better outcomes during critical moments.
Explore planning ahead for the location. An unobstructed view without distractions enhances composition and captures the event’s grandeur.
Capture stages of brightness changes. Experiment with multiple shots as the celestial body aligns, documenting the intricate transition between light and shadow.
Review the results immediately after snapping shots. Evaluating exposures and making adjustments on the spot promotes successful capturing of this rare occurrence.
Finally, share your experiences. Engaging with photography communities allows for valuable insights and tips, enriching future attempts.
How to Avoid Lens Damage During an Eclipse
Utilizing a solar filter is mandatory. Ensure it’s specifically designed for optical equipment; standard UV filters fall short in protection. Secure it properly to prevent accidental detachment.
Avoid direct sunlight exposure’s peak intensity. Especially during totality, ensure the filter is in place before viewing resumes. Sunlight can cause irreversible harm in seconds.
Monitor your equipment temperature. Excessive heat may affect sensitive components. If it’s too warm, allow it to cool down before exposing it to light once again.
Keep your equipment in shaded areas as much as possible when not in use. This approach helps prevent overheating and lens degradation.
Stay mindful of reflections. External light sources bouncing off surfaces can intensify sunlight exposure to your gear. Protect the front element using a lens hood, which can also minimize flare.
Always inspect your filter for scratches or defects before use, as it may compromise the shield’s safety and clarity. Regular maintenance extends the life of your protective layer.
Incorporate lens caps immediately after capturing images to shield from accidental exposure. Building a routine for covering your glass preserves its integrity and performance.
Lastly, consider utilizing remote shutter releases or self-timers to reduce vibration risks and further protect your equipment. Solid footing matters; unstable mid-capture scenarios can lead to mishaps.
The Role of Tripods in Eclipse Photography
Stability is paramount for capturing detailed images of astronomical events, especially during solar phenomena. Utilizing a sturdy tripod allows me to eliminate camera shake and maintain consistent framing as the moon obscures the sun.
When selecting a tripod, I consider the following specifications:
| Specification | Importance |
|---|---|
| Weight Capacity | Must support the weight of my equipment without tipping or bending. |
| Material | Aluminum provides durability, while carbon fiber offers lightweight options. |
| Height Adjustment | Flexible height settings facilitate different angles and perspectives. |
| Leg Locks | Secure locking mechanisms prevent accidental collapse during shooting. |
| Head Type | Ball heads enable smooth adjustments for precise alignment of my shot. |
During setup, I ensure the tripod’s legs are fully extended and firmly planted on solid ground. This helps to minimize vibration from wind or minor movements. Leveling the tripod provides an accurate frame, particularly for wide shots.
For prolonged shooting sessions, I often utilize additional weight, such as a camera bag, suspended from the tripod’s center column. This extra stability withstands gusty conditions during critical moments.
At times, quick adjustments might be necessary. I practice using the quick release plate, allowing me to switch perspectives efficiently while maintaining my setup’s integrity. Fine-tuning the composition is easier when I know the camera remains secure.
In summary, investing time in selecting the right tripod and ensuring proper setup streamlines the process of capturing unforgettable moments in the sky. The results often reflect the quality of the support I provide my equipment. Tripods, when utilized effectively, enhance the overall photographic experience during celestial events.
Capturing Different Phases of the Eclipse with a Camera
Utilize a telephoto lens for optimal detail during the various stages of this astronomical event. As the moon obscures the sun, it’s crucial to adjust settings for different phases to secure vivid images. Start with long exposures when visible light is at its peak, transitioning to shorter intervals as totality approaches.
Consider using manual focus for clearer images, particularly during partial phases when the contrast increases. Try these phase durations for your photography:
| Phase | Recommended Exposure Time |
|---|---|
| Partial Phase | 1/500 to 1/1000 sec |
| Totality | 1/1000 to 1/4000 sec |
| Re-emerging Partial Phase | 1/500 to 1/1000 sec |
Experiment with various apertures to achieve desired functionality; lower f-stop values yield more light but reduce depth of field. Increase ISO settings if needed, but be wary of noise that detracts from sharpness.
Employ time-lapse techniques to capture transitions; use intervals of a few seconds between shots for a smooth playback effect. Be mindful of battery life; extended usage drains power rapidly. Always have backup batteries at hand to ensure coverage throughout all phases.
As darkness falls during totality, adjust your exposure settings promptly to prevent loss of details in brighter areas. This phase offers the opportunity for vibrant color captures of the corona and prominences.
Post-processing enhances images after capturing. Utilize software to adjust contrast, saturation, and sharpness, emphasizing details often missed in camera settings. Store images in RAW format for maximum flexibility during editing.
Understanding the Effects of Lens Focal Length
Utilizing different focal lengths significantly impacts the portrayal of solar phenomena. A longer focal length compresses the perspective, allowing for detailed close-ups of the sun, while a shorter focal length provides a broader view, capturing more of the surrounding sky. In essence, knowing how to choose the right focal length can enhance your photographic results.
Here’s a comparative table showcasing how various focal lengths affect solar imaging:
| Focal Length (mm) | Field of View | Image Detail | Best Use Case |
|---|---|---|---|
| 24-35 | Wide | Low | Capturing surrounding sky and landscapes |
| 50-100 | Standard | Medium | General shooting, including partial phases |
| 200-400 | Narrow | High | Close-ups of solar details, such as spots |
| 600+ | Very Narrow | Very High | Extreme close-ups and solar phenomena |
When engaging with this type of photography, flexibility and understanding of optical performance across various focal lengths is essential. Investing in multiple lenses enhances versatility, enabling adaptation to different conditions and desired outcomes. Selecting the correct focal length aligns with intended goals–whether it’s wide scenic captures or tight solar detail.
Using Telephoto Lenses for Detailed Eclipse Shots
For capturing intricate details during a solar event, telephoto optics stand out as an optimal choice. These lenses provide magnification, allowing for close-up images of celestial phenomena. A focal length of at least 300mm is recommended for favorable results, but even longer lenses can enhance the experience.
Here are some specific benefits of utilizing telephoto optics:
| Benefit | Description |
|---|---|
| Increased Magnification | Telephoto lenses dramatically enlarge the view of the solar disc and surrounding features. |
| Better Composition | These optics allow for tighter framing, isolating interesting elements such as solar prominences and surface textures. |
| Enhanced Detail | Longer focal lengths capture details that might be missed with standard lenses, providing clearer solar images. |
When setting up for photography, ensure that the lens has a compatible mount for your body. Utilizing a sturdy tripod is advisable to avoid unwanted vibrations, especially given the longer focal lengths. If possible, consider using an adapter for better stability.
Additionally, assessing the atmospheric conditions is vital. Telephoto lenses are sensitive to heat distortion, so it’s best to shoot in cooler temperatures or choose early morning hours for optimal clarity. Remember to practice proper sun screening to protect both your optical equipment and your eyesight.
In conclusion, telephoto optics serve as a pivotal tool for any photographer aiming to capture the beauty of solar events. Their advantages in magnification and detail are unmatched, making them a preferred choice for these unique occasions.
Adjusting White Balance for Solar Photography
For solar imaging, setting the appropriate white balance is crucial for capturing accurate color reproduction. I recommend starting with the “Daylight” setting, as it typically provides a balanced output. Alternatively, utilize the “Custom” white balance feature to calibrate based on specific lighting conditions encountered when photographing solar phenomena.
Using Manual Adjustments
In some cases, the automatic settings may not yield satisfactory results. I find it helpful to manually tweak the Kelvin temperature. A value between 5000K and 6000K often works well. Adjust according to the scene to retain rich colors and optimal contrast. Experimentation with increments of 100K can fine-tune the result to match the desired aesthetic.
Post-Processing Considerations
After capturing images, software such as Adobe Lightroom or Photoshop can allow for further refinement. Utilizing the white balance slider helps adjust the tone without compromising image integrity. Always aim to keep the sun’s features well-defined while avoiding excessive color casts.
How to Frame the Eclipse in Your Shots
Consider incorporating foreground elements to add depth and context to your images. Trees, buildings, or people can create unique compositions that enhance the visual narrative of the celestial event.
- Plan your location in advance. Scout out positions that offer interesting foregrounds while maintaining an unobstructed view of the sky.
- Utilize the rule of thirds. Position key elements along the lines or at their intersections to create visually appealing compositions.
- Experiment with different angles to find the most compelling perspective. Sometimes a slight shift in position can dramatically change the framing.
Be mindful of the sun’s position during different phases. Capture images during unique moments, such as totality, when lighting conditions shift dramatically.
- During partial phases, highlight the sun’s position against landmarks.
- During totality, focus on capturing the corona and surrounding stars.
Adjust your focal length based on the approach you want to take. A wider angle may be suitable for including more of the environment, while a telephoto can isolate the sun.
Lastly, practice patience and wait for the right moment. Nature photography often rewards those who are prepared and willing to capture fleeting instances as they occur.
Common Mistakes in Eclipse Photography and How to Avoid Them
Neglecting to use proper solar filters can lead to permanent damage to both equipment and eyesight. Ensure a high-quality solar filter is attached before attempting any shots.
Incorrect Exposure Settings
Setting inadequate exposure levels may result in blown-out highlights or overly dark images. Use manual mode for greater control, especially by adjusting ISO, aperture, and shutter speed to achieve a balanced shot.
Ignoring Focus Issues
Failing to ensure that your focus is sharp can ruin wonderful opportunities. Employ autofocus prior to the event, and switch to manual focus during the photography session for better precision.
Overlooking the importance of composition can detract from magnificent moments. Frame your images carefully; consider surrounding elements to create a more engaging picture.
Using a shaky support results in blurry photos. A robust tripod stabilizes equipment, particularly in low-light conditions, allowing for crisp images and minimizing camera shake.
Failing to prepare for varying light conditions may lead to missed captures. Cease shooting in bright light prior to totality and increase exposure settings as the illumination changes.
Positioning too close to the sun can result in overheating and lens damage. Maintain a safe distance and monitor for any signs of overheating during the process.
Finally, neglecting to practice beforehand gives an unplanned outcome. Familiarize yourself with your settings and equipment by experimenting during lesser astronomical events.
Post-Processing Tips for Eclipse Photos
Adjust contrast levels to enhance solar features without losing details. Utilize software like Adobe Lightroom or Photoshop for control over shadows and highlights.
Proceed with white balance adjustments to render colors accurately. A cool tone can emphasize the celestial object against the dark sky.
Cropping images can eliminate unwanted elements while focusing on the main subject, ensuring a visually appealing composition.
Apply noise reduction techniques, especially in low-light conditions prevalent during totality. Maintain detail while softening grainy textures.
Explore layer adjustments for fine-tuning exposures across various segments. This method allows combining multiple shots for a balanced final output.
Consider using histogram analysis to monitor tonal distribution. Aim for a balanced histogram to avoid clipping highlights or shadows.
Utilize sharpening tools selectively to enhance clarity in key areas, such as the corona or prominences, without oversharpening the entire image.
Keep an eye on color grading options to evoke desired emotions or themes in your photos. Adjust saturation and vibrance for impactful results.
Finally, always save original files separately. This practice ensures access to unaltered images for future edits or alternate styles.
| Tip | Description |
|---|---|
| Contrast Adjustment | Enhance solar features while maintaining detail. |
| White Balance | Render colors accurately, emphasizing cool tones. |
| Cropping | Focus on the main subject for a refined composition. |
| Noise Reduction | Soften grainy textures in low-light conditions. |
| Layer Adjustments | Combine multiple exposures for balance. |
| Histogram Analysis | Aim for a balanced tonal distribution to prevent clipping. |
| Selective Sharpening | Enhance clarity in key areas without oversharpening. |
| Color Grading | Adjust saturation and vibrance for emotional impact. |
| Saving Originals | Maintain access to unaltered images for future edits. |
Sharing Your Eclipse Photos on Social Media
After capturing amazing shots of a solar phenomenon, sharing them on platforms like Instagram or Twitter is a fantastic way to showcase your work. Begin by creating a unique hashtag that reflects your personal style or the event itself. This helps others find your photos easily and contributes to a larger conversation around the event.
Editing and Enhancing Your Images
Post-processing can elevate your images. Use software like Adobe Lightroom or Photoshop to adjust contrast, brightness, and saturation. Consider cropping to eliminate distractions and highlight the celestial event. Don’t forget to maintain the integrity of your original captures; over-editing can detract from the beauty of the experience.
Engaging Your Audience
Write compelling captions that tell the story behind each shot. Share insights about your photography setup, the challenges faced, or the emotions felt during the event. Engaging with your audience encourages comments and shares, increasing the visibility of your posts. Tag relevant astronomy pages or photography groups to reach a wider audience and attract others with similar interests.
What to Bring for a Successful Eclipse Shoot
Bring a sturdy tripod to keep your setup stable. A flexible model with adjustable height will help frame your shots perfectly. Don’t forget extra batteries; capturing multiple phases requires significant power. Consider bringing a remote shutter release or utilizing the timer on your device to minimize camera shake.
Lens and Filters
Use a dedicated solar filter compatible with your optical equipment. A high-quality filter ensures safe viewing and protects your gear from damage. Pack multiple filters if you own different lenses, like wide-angle and telephoto options.
Bring a lens cleaning kit as well. Dust on your optics can ruin images, especially in bright conditions experienced during solar phenomena.
Accessories and Comfort
Carry a notebook for recording settings and observations during your sessions. Consider packing snacks and water to stay energized throughout the experience. Since conditions may change rapidly, include a lightweight jacket or sunhat for comfort.
Finally, have a plan for sharing your captured images. Ensure you have the necessary cables or wireless options to transfer photos to your devices for editing or posting.
Using Smartphone Cameras for Eclipse Viewing
For safe observation of celestial events, using smartphone photography requires protective measures. Utilize dedicated solar filters compatible with your device. Ensure the filter is securely attached to prevent accidental exposure to harmful rays, which could damage internal components.
Adjusting exposure settings helps capture distinct phases effectively. Most smartphones allow manual control over ISO and shutter speed. Start with a low ISO to reduce noise and experiment with shorter shutter speeds to find the ideal balance for bright conditions.
Familiarize yourself with your smartphone’s capabilities regarding zoom and focus. Digital zoom can compromise image quality, so utilize telephoto attachments if available. These enhancements allow for more detailed photographs without sacrificing clarity.
Frame your shots according to the phase you intend to capture. Consider using grid lines for alignment, ensuring the celestial body is positioned attractively within the frame. Planning compositions prior to the event improves the likelihood of stunning images.
Post-processing software on smartphones can enhance images taken during the event. Adjust contrast and saturation to bring out details. Take advantage of sharing options available within the camera app or editing software to showcase your captures immediately.
Preparing a checklist of essentials, including tripods, extra batteries, and storage, guarantees a seamless experience. Reliable support stabilizes your device, especially during transitions between phases, resulting in sharper images. Keeping backups of your work ensures memories are preserved regardless of time spent capturing each moment.
Legal Considerations for Eclipse Photography
Before engaging in photographic activities related to a solar event, understanding legal aspects is crucial. Here are some points to consider:
Copyright and Ownership
- Check if acquired images could possibly infringe on copyright. Original works are protected instantly upon creation.
- If capturing images of public locations or events, be informed about any specific rights regarding photography in those spaces.
- Commercial usage of photographs may require obtaining permissions or licensing from entities that own the visual rights.
Liability Issues
- Accidents can occur while setting up equipment or during the shooting process. Liability waivers may be prudent if working at organized events.
- If using property owned by others, obtaining permission or a release might prevent potential disputes.
- In some regions, photographers are responsible for any damage to locations or properties resulting from their activities.
Awareness of these legal factors can mitigate issues and enhance the overall experience while capturing stunning solar phenomena. Always stay informed about local regulations before proceeding with a photo shoot.
Weather Conditions and Their Impact on Eclipse Viewing
Clear skies are paramount for optimal observation during celestial events. Overcast conditions severely hinder visibility, causing disappointment for many enthusiasts. Checking reliable weather forecasts days in advance aids in planning your location carefully.
Factors to Consider
- Cloud Cover: Dense clouds obstruct sunlight, preventing any view of the event. Light clouds may allow some visibility but can create a hazy effect.
- Humidity: High humidity can lead to mist or fog, further obstructing the view.
- Wind: Wind can affect visibility, especially with pollen or dust in the atmosphere; calm conditions are preferable.
- Temperature: Rapid temperature changes can create atmospheric disturbances and impact the clarity of the sky.
Strategies for Optimal Viewing
Choosing a location with historically favorable weather patterns increases chances for clear visibility. Alternatively, following local weather updates on the day of the occurrence helps in adjusting positioning accordingly.
- Scout Locations: Find open spaces away from urban light pollution.
- Arrive Early: Surprising weather shifts may occur; being early ensures flexibility to adapt.
- Have Backup Options: Knowing multiple viewing spots increases the likelihood of success if weather conditions worsen.
Being prepared not only enhances the chances for successful viewing but also maximizes the overall experience during remarkable astronomical events.
Understanding Eclipse Time Zones for Planning
Determine the event’s timing based on your geographical location to maximize observation. Use online tools or apps that provide local timings and adjust for specific time zones. Pay attention to the UTC offset during the occurrence–this varies depending on daylight saving time, which can affect the exact schedule.
For optimal experience, identify your position relative to the path of totality. Check if your area experiences total darkness or just a partial view, and plan accordingly. If traveling is necessary, aim to reach your destination well in advance to avoid last-minute complications.
Consider weather forecasts leading up to the event, as conditions can significantly influence visibility. Cloudy skies might obstruct views, so having a backup location can be beneficial. Investing in a reliable weather app can provide real-time updates for your planned observation point.
Finally, mark the date on your calendar and set reminders a week prior to ensure all arrangements are on track, including any necessary equipment checks and transportation logistics. Proper planning guarantees a memorable and successful viewing experience.
Evaluating the Quality of Your Eclipse Shots
Begin your assessment by examining the sharpness and clarity of your photos. A well-focused image highlights solar details like prominences and sunspots. Utilize 100% zoom in your editing software to ensure every aspect is crisp.
Color Accuracy and Dynamic Range
Analyze color fidelity in your captures. Adjust the white balance post-shoot for more realistic hues, particularly if you employed filters or polarizers. Check if the highlights retain detail and shadows display depth; effective dynamic range is crucial for dramatic celestial scenes.
Composition Techniques
Consider framing methods. Ensure you incorporated the surrounding context or foreground elements for a compelling visual narrative. Balance your shots by following the rule of thirds–an effective way to enhance compositional appeal.
| Aspect | Evaluation Tips |
|---|---|
| Sharpness | Use 100% zoom to check focus and detail |
| Color Accuracy | Adjust white balance in editing software |
| Dynamic Range | Assess highlights and shadows for depth |
| Composition | Apply rule of thirds for balance |
After evaluating, consider enhancing images with software tools to adjust contrast and saturation. This post-processing step can significantly elevate your visual story. Compare various adjustments to identify the most striking results.
The Importance of Practice Before the Eclipse
Familiarizing myself with technique and equipment ahead of time was crucial for capturing this astronomical event. I dedicated time to practice photographing bright celestial bodies and adjusting to varying light conditions. Here’s how I approached preparation:
Key Components of Preparation
- Understanding Settings: Experimenting with ISO, aperture, and shutter speed before the significant day ensured I could quickly adjust as conditions changed.
- Testing Filters: I practiced attaching solar filters to my equipment, confirming that all components functioned properly to protect my gear.
- Focusing Techniques: Practicing manual focus helped me create sharp images, especially as light diminished during various stages of the event.
Mock Trials
- Conducted mock sessions during sunset and sunrise to simulate varying lighting.
- Experimented with different focal lengths, noting how each affected composition and depth of field.
- Reviewed all images captured, analyzing settings and making necessary adjustments for improvement.
By taking these measures, I markedly increased my confidence and proficiency. This preparation directly enhanced the quality of my final photographs, allowing me to enjoy the experience while capturing exciting moments effectively. Prior practice made all the difference when it counted.
Setting Up Your Nikon Gear Early on Eclipse Day
Arrive at your chosen shooting location well in advance of the astronomy event. I recommend getting there at least two hours prior to the start. This allows ample time to set everything up without rushing.
Begin with a thorough inspection of your Nikon equipment. Ensure that all parts, including the body, lenses, and tripod, are in proper working order. Clean your lenses properly to avoid unwanted spots that could compromise image quality.
Next, select a sturdy tripod that can withstand winds. A solid support system is crucial for stability, especially during longer exposures. I always bring a tripod that’s easy to adjust for different heights and angles.
Have your solar filters ready. Ensure they fit securely on the lens without any gaps that could allow harmful rays to enter. I find it helpful to keep spare filters at hand, just in case.
Plan your framing options. Visualize how you want to capture this astronomical phenomenon. Consider the surrounding scenery or other celestial elements that might enhance your composition.
While waiting, familiarize yourself with your camera settings. Test various exposure levels prior to the event so you can make quick adjustments as needed. I recommend practicing different manual settings to find the optimal ISO, aperture, and shutter speed.
Charge all batteries beforehand. On eclipse day, I keep a backup charged battery in my bag to avoid any unexpected interruptions. Remember to format your memory cards, ensuring you have enough space for all potential shots.
As the event approaches, make last-minute checks to ensure everything is in place and functioning. This includes double-checking the solar filter, ensuring it’s securely attached before any viewing begins.


