


Interchanging optics on classic photographic equipment is feasible, yet depends on several factors. First, identifying the specific make and model is crucial, as compatibility varies widely across brands and formats. Certain models from makers like Leica, Canon, and Nikon exhibit a rich ecosystem of existing optics that can enhance photographic versatility.
Be aware that many vintage models adhere to proprietary mounts. Researching adapters may be necessary if the desired attachment does not align with the camera’s original specifications. Brands like Voigtländer and Mamiya often offer options that cater to enthusiasts keen to expand their optical choices.
Consider the impact of aperture and focal length on your creative expression. Altering optics not only shapes depth of field but also influences other performance metrics, such as sharpness and bokeh. Testing different combinations can uncover unique visual characteristics that enhance your work.

Lastly, proper handling and maintenance of vintage gear ensure longevity. Always clean and inspect both the camera body and the lens interface before any swaps. With diligence and care, the world of optics can flourish in ways that inspire fresh artistic endeavors.
Interchangeability of Optics for Vintage Photographic Devices
Switching optics on vintage photographic devices typically depends on the specific model and its design. Many classic models feature a dedicated mount that allows for some degree of interchangeability, while others may be restricted to a fixed optic configuration.
Common mount types include Leica M, LTM (Leica Thread Mount), and Contax, which facilitate swapping of compatible glass. This versatility offers options for various focal lengths and characteristics. It’s crucial, however, to verify the mount type and compatibility with desired optics before proceeding.
For those utilizing a bayonet-style mount, interchangeability might be straightforward, but always consider potential differences in flange distance. This measurement can impact focus, especially with alternative optics not originally designed for the device.
A helpful resource for confirming compatible optics is online forums and communities centered on vintage photographic enthusiasts. These platforms often share extensive lists of compatible model numbers and recommended lenses for specific uses.
| Mount Type | Optical Compatibility | Recommended Use |
|---|---|---|
| Leica M | Wide range of M-mount lenses | General photography, portraiture |
| LTM | Thread mount lenses | Street photography, low light |
| Contax | Contax/Yashica glass | Landscape, architectural |
Experimenting with different optics can expand creative possibilities. It’s recommended to test various configurations to discover unique visual styles and results.
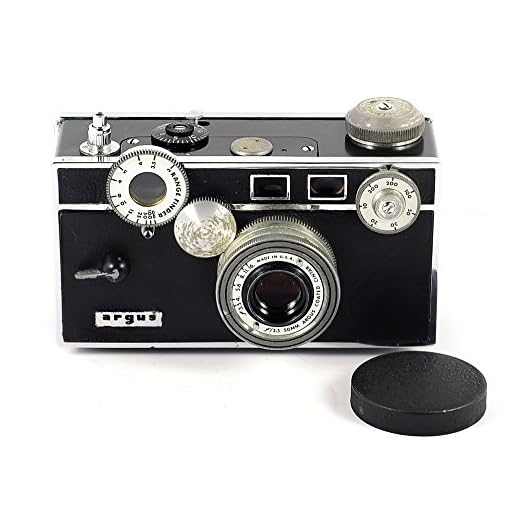
Understanding Rangefinder Camera Mechanics
Focusing precision on rangefinder devices is achieved through a unique optical system where a coupled rangefinder mechanism aligns images for accurate focusing. This involves two optical paths, allowing the photographer to adjust the viewfinder until the two images overlap perfectly, indicating sharp focus.
Film transport in these devices typically relies on a mechanical system driven by a wind-on lever, which ensures consistent frame spacing and alignment. This advancement results in reliable image placement on the film plane.
The design often features a small, compact body and a collapsible lens mount, which work together to minimize bulk while maximizing performance. Below are key features that define the mechanics:
- The viewfinder provides a frame line that corresponds to the focal length used, allowing for composition adjustments in real-time.
- The shutter mechanism varies by model; some incorporate a leaf shutter, while others employ a focal-plane shutter, leading to different handling of exposure timing and sync with flash.
- Lens mounts are generally specific to individual models or brands, which are a consideration when exploring alternate optic options.
Understanding these mechanical aspects is fundamental for maximizing the capabilities of these devices, especially when utilizing different optical attachments or exploring maintenance techniques.
Types of Lenses Used in Rangefinder Cameras
When selecting optics for a rangefinder body, I focus on several categories based on focal length and design. Wide-angle options, typically ranging from 21mm to 28mm, excel in capturing expansive scenes, making them ideal for landscapes and architectural photography. These models often feature unique characteristics like barrel distortion, which I appreciate for its artistic expression.
Standard primes, usually around 35mm to 50mm, offer versatility for various subjects. They provide natural perspectives closely resembling the human eye. I find that these options deliver exceptional image quality, ensuring sharpness and contrast, particularly in well-lit conditions.
Telephoto variants, extending from 85mm to 135mm, enable intimate portraits or distant subjects. Such optics possess the ability to isolate the subject from the background, enhancing focus on details. The compression effect in these lenses can create stunning visual narratives.
Macro alternatives allow for extreme close-ups, ideal for capturing intricate textures or small subjects. These designs offer unique focusing mechanisms, permitting detailed work that traditional lenses may overlook.
Each type of optics often comes with varying maximum apertures, affecting bokeh quality and low-light performance. I prefer faster models for their capacity to provide softer backgrounds and cleaner images in dim conditions.
Finally, specific manufacturers may introduce unique characteristics within each lens category. For instance, the Leica Summicron line has a notable reputation for incredible sharpness and pleasing rendering. I always assess my preferences and shooting style to select the most suitable optics for my photographic endeavors.
Popular Rangefinder Models and Their Compatibility
The Leica M series stands out for its versatility. The M3 and M6 models are compatible with a range of M-mount optics. However, caution is advised when pairing older lenses, as they may not fully engage the camera’s metering systems.
Contax Rangefinder Options
Contax G series, particularly the G1 and G2, support G-mount lenses. This model allows for autofocus which provides a unique user experience. Be aware that using non-G lenses might limit functionality, particularly in auto exposure.
Voigtländer and Zeiss Compatibility
Voigtländer Bessa models provide a range of lens mounts, most commonly M39 and M-mount variations. Zeiss Ikon rangefinder cameras also offer compatibility with M-mount lenses. It’s crucial to check for any modifications needed when integrating newer models into the mix, especially with legacy systems.
Identifying Mount Types on Your Rangefinder
To ensure compatibility with various optical attachments, I focus on recognizing the specific mount types found on these models. Each mount type typically has key characteristics that set it apart. Researching the manufacturer and model can provide invaluable information about the mount’s specifications, such as diameter and thread pitch.
Common Mount Types
Here are some prevalent types of mounts and their defining features:
| Mount Type | Key Features | Examples |
|---|---|---|
| Screw Mount (M39) | 39mm diameter, 1mm thread pitch. Widely used in early models. | Leica III, Canon Rangefinder |
| Bayonet Mount (Leica M) | Quick-release mechanism, tight fit for better alignment. | Leica M3, M6 |
| Threaded Mount (Exakta) | Various thread sizes, often specific to particular brands. | Exakta VX |
Identifying Your Mount
I recommend examining the lens attachment point closely. Make use of a caliper or ruler to measure the diameter and thread characteristics. Additionally, consulting reference materials or online databases can significantly aid in confirming the mount type. Using these methods ensures selecting the right optical components for enhanced photographic experiences.
Limitations of Lens Interchangeability
When considering adapting optics for vintage devices, several factors restrict options. Most notably, not all mounts offer compatibility across various makes and models. Each manufacturer typically developed proprietary fittings, which can create challenges for enthusiasts.
Mechanical Constraints
- Flange Distance: The distance between the lens mount and the film/sensor plane varies significantly across different brands, affecting focus accuracy.
- Focus Mechanism: Some systems rely on a specific focusing method that may not be replicable with different optics, limiting functionality.
- Viewfinder Coupling: Many devices couple the viewfinder to the lens, which leads to issues with parallax error when using non-compatible optics.
Optical Quality and Performance
- Aperture Configuration: Different optics can feature varied aperture blades, impacting bokeh and light transmission.
- Lens Design: Optical formulas designed for specific systems may not achieve the same sharpness and color rendition when mounted on a foreign body.
- Vignetting: Mounting incompatible lenses can result in unexpected vignetting, reducing image quality.
Careful analysis of mount types and mechanical specifications is crucial for those interested in exploring the world of interchangeable optics for these classic devices. A thorough understanding of each component can lead to optimal choices that enhance photographic results while maintaining mechanical integrity.
Tools Needed for Lens Replacement
For successful lens swapping on vintage models, gather specific equipment. A lens spanner wrench is indispensable for loosening or tightening retaining rings without damaging components. Make sure the wrench fits the retaining ring precisely to avoid slipping or scratching the surface.

Opt for a microfiber cloth to clean both the mounting area and the contact points on the optical elements. Keeping surfaces free of dust and grime helps maintain image quality.
A soft brush or blower is effective for removing debris that might interfere with the installation. Use these tools before attempting to attach or detach any optical element.
A good-quality torque screwdriver allows for accurate fastening of screws without stripping them. If your model includes screws for securing the optical assembly, this tool provides the necessary precision.
Finally, having a guide or manual specific to your model assists in understanding the assembly steps and unique characteristics of your setup. Annotating notes during disassembly can be a helpful reference for reassembly.
Steps to Safely Remove the Lens
To remove the optic attachment safely, follow these precise actions:
- Prepare Your Workspace: Select a clean, flat surface. Ensure ample lighting to avoid missing any details during the process.
- Use the Right Tools: Have a lens cap, microfiber cloth, and compatible lens mount tool ready. These assist in preventing scratches and provide a better grip.
- Check Camera Settings: Make sure the device is powered off. This minimizes any risk of accidental activation.
- Position the Camera: Hold the device with one hand on the body and the other on the lens unit. This ensures stability when loosening.
- Release the Lock: Locate the lens release button and gently press or slide it, depending on the model. Take care not to apply excessive force.
- Twist to Remove: With the release engaged, gently rotate the lens counterclockwise until it detaches. Avoid jerky movements to prevent damage.
- Inspect and Clean: Once detached, inspect both the lens and the mount on the body for dust or debris. Utilize a microfiber cloth for cleaning if necessary.
- Cap the Lens: Immediately after removal, place the lens cap on to protect the glass and contacts while not in use.
These steps ensure a safe removal process and maintain the integrity of both the lens and the device.

Inspecting the Lens and Camera Mount
Before attempting any lens manipulation on a vintage photographic device, thorough examination of both the optical component and the mounting mechanism is paramount. This ensures compatibility and helps avoid potential damage during the process.
Visual Assessment
Start with a careful visual inspection:
- Look for scratches or dust on the lens glass. Minor imperfections may affect image quality.
- Check for fungus or haze; these can often be remedies through professional cleaning.
- Inspect the aperture blades to ensure they’re moving smoothly and not stuck.
Mount Compatibility
Evaluate the mount type on both the optical unit and your device:
- Identify the specific mount system, such as M39 or M mount, which indicates compatibility with various models.
- Tilt the lens slightly back and forth to see if there is any play, as this could indicate wear or misalignment.
Pay attention to the locking mechanism; it should be secure and operate without excessive force. Any looseness can signal potential issues. Double-checking the mount helps ensure a proper fit and optimal functionality when swapping optics.
Choosing Compatible Lenses for Your Rangefinder
Research the lens mount compatibility of your model. Popular mounts include M39, M42, and Leica M, among others. Each type has its own set of compatible optics. Specifics can be found in online forums or dedicated camera websites.
Check the focal length preferences for your photographic style. For wide-angle shots, consider focal lengths under 35mm. For portrait photography, 50mm to 85mm is advisable. Each focal length category offers different perspectives and compositions.
Evaluate the maximum aperture of potential optics. Lenses with larger apertures (e.g., f/1.4, f/1.8) allow for better performance in low-light environments and provide a shallower depth of field, enhancing subject isolation.
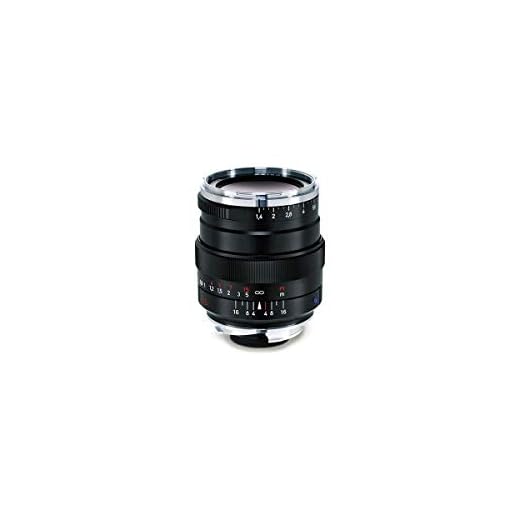
Explore brand reputation. Renowned manufacturers often provide higher-quality glass and better build materials. Zeiss, Voigtländer, and Leica are examples of brands known for their exceptional optics, but third-party options also merit consideration.
Be aware of limitations regarding focal lengths and distortion characteristics. Some lenses may introduce barrel distortion or vignetting, which can impact image quality. Research reviews and sample images to gauge how each lens performs in real-world scenarios.
| Mount Type | Compatible Focal Lengths | Popular Brands |
|---|---|---|
| M39 | 28mm – 135mm | Industar, Jupiter |
| Leica M | 21mm – 135mm | Leica, Voigtländer |
| M42 | 35mm – 200mm | Helios, Takumar |
Finally, test any potential attachment before finalizing your decision. Many photography shops allow testing to ensure proper fit and performance, which can be invaluable for achieving desired results.
Installing a New Lens: Step-by-Step Guide
Begin by ensuring that the camera body is powered off and that you’re working in a clean, dust-free environment.
1. Preparing the Camera
Hold the body securely while pressing the lens release button. Rotate the existing optic counterclockwise until it clicks and detaches from the mount. Always support the body to prevent any stress on the internal mechanics.
2. Checking Compatibility
Before attaching a fresh optic, confirm that it aligns with the camera’s mount type. Inspect both the camera’s and the lens’s mount for any signs of damage or foreign particles. Clean the surfaces with a soft, lint-free cloth if necessary.
Gently position the new optic in line with the mounting points. Align the red dot or indicator on the lens with the corresponding mark on the camera body. Rotate the lens clockwise until it locks into place, signaling a secure connection. Always handle the elements with care to avoid fingerprints or scratches.
3. Final Checks
Once the lens is installed, check for any play or wobble by gently tugging on it. Ensure that all aperture settings are functioning properly. Power on the camera and test functionality by taking a few test shots. Examine the images for quality and focus accuracy.
Storage of the original optic is equally important. Place it in a protective case when not in use to prevent dust accumulation and damage.
Testing Focus Accuracy After Lens Change
First, I ensure proper calibration of the viewfinder and the camera body. This is crucial, as misalignment can lead to focus discrepancies.
Next, I select a test setup that includes a high-contrast target, such as a focus chart or a detailed scene. Using a tripod helps maintain stability during the process.
Following that, I take several test shots at different apertures to check the sharpness and detail across the frame.
- Choose wide open settings to assess the lens performance and depth of field.
- Stop down to f/8 or f/11 for critical sharpness evaluation.
Once the images are captured, I analyze them at 100% on a computer screen. I focus on the center and corners of each image to determine if the focus is accurate.
If focus issues arise, I might adjust the lens alignment or check for unnecessary play in the mount. The use of shims or adjustments may be necessary in some cases to correct any discrepancies.
Additionally, repeating the test after adjustments allows me to confirm the effectiveness of the corrections made. Consistent results indicate a successful adaptation of the newly fitted optic.
Common Issues When Changing Lenses
First, ensure compatibility between the mount and the selected optical attachment. Mismatched mounts can lead to damage. Inspect for dust and debris on both the camera body and lens before detachment to prevent contamination of the sensor or inner elements.
Next, be mindful of the condition of the aperture blades. If they are sticky or not functioning correctly, it can affect exposure settings. Verify that the focusing mechanism operates smoothly to avoid frustration during your shooting experience.
Watch for misalignments when reattaching a new optical unit. Incorrect alignment can result in uneven focus across the frame. The weight of the new element may impact balance, making it feel front-heavy or awkward during use.
Also consider potential electronic issues. Some attachments rely on electronic connections for autofocus and aperture control. If the camera and attachment are not designed for cooperation, settings may be limited or inoperable.
Lastly, remember that even physical stress during the swapping process can affect internal calibration. Handle with care to maintain precision and performance. Taking time to understand these factors can enhance your overall photography experience.
Cleaning the Lens Contacts for Better Performance
For improved functionality, maintaining the cleanliness of lens contacts is paramount. Over time, dirt and oxidation can impede electrical connections, leading to inaccurate exposure readings or autofocus failures. Here’s a straightforward approach to ensure your equipment operates efficiently.
- Gather Required Tools: A microfiber cloth, isopropyl alcohol (preferably 99%), and cotton swabs are essential for this task.
- Prepare the Work Area: Choose a dust-free environment to minimize the chances of adding more contaminants during the process.
- Remove the Lens: Follow the outlined steps from previous sections to safely detach the optical element from the body.
- Inspect Contacts: Examine the metal contacts for signs of grime or corrosion. A clean contact is critical for optimal performance.
- Cleaning Process:
- Moisten a cotton swab with isopropyl alcohol.
- Gently wipe the metal contacts both on the lens and the camera mount. Avoid applying excessive pressure to prevent damage.
- Use a dry microfiber cloth to remove any remaining moisture, ensuring no residue is left behind.
- Final Inspection: Double-check the contacts for cleanliness before reattaching the optical device.
- Reassemble Equipment: Carefully mount the lens back onto the camera body, ensuring a secure fit.
- Test Functionality: Take a few test shots to verify that all features are working accurately, focusing on exposure and autofocus performance.
Regularly checking and cleaning the contacts enhances the longevity of your optical equipment and ensures the best possible image quality. Schedule this maintenance regularly to avoid future issues.
Effects of Using Non-Original Lenses
Using non-original optics can lead to several notable outcomes on image quality and camera performance. It’s essential to assess these aspects before making a decision.
- Image Quality: Non-original optics might exhibit softness in focus, unusual chromatic aberrations, and contrast issues. Artifacts like vignetting can be more pronounced, especially in extreme lighting conditions.
- Field of View: Different focal lengths change the way scenes are captured. A non-standard lens may offer a unique perspective but can distort the intended composition.
- Mechanical Fit: Depending on the manufacturer, a third-party accessory may not align perfectly with the camera body. This misalignment can cause focus errors or hinder the aperture mechanism.
- Focus Accuracy: Achieving precise focus can prove challenging. Third-party mounts may not offer the same depth of field characteristics, leading to potential misfires in critical shooting situations.
- Color Rendering: Optics from different brands may render colors differently. If consistent color profiles are critical, a mismatch can complicate post-processing.
- Lens Coating: Non-original optics might lack advanced coatings found in the standard models, affecting flare control and further compromising contrast.
- Build Quality: The durability of less expensive options may not match the original manufacturer’s standards. Consider long-term use versus potential wear and tear.
Testing various options can yield interesting results. Depending on the type of photography pursued, some variations may overcome limitations inherent in original equipment. Always review the potential trade-offs against desired outcomes.
Adapting Modern Lenses to Vintage Rangefinders
Modern optics can be adapted to vintage shooting systems, significantly expanding creative possibilities. Specific adapters allow connection of contemporary glass to older models, enhancing versatility.
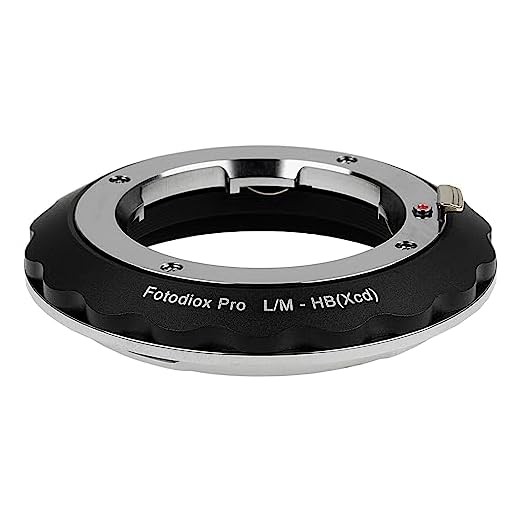
Choosing the Right Adapter
Research is key. Different systems have varying mount standards. Select an adapter that perfectly fits both the modern glass and your classic body. Brands like Fotodiox or M42 to L39 adapters are common choices.
Impact on Image Quality
Using contemporary optics often results in improved contrast and sharpness. Keep in mind that wide apertures can affect focus accuracy due to alignment discrepancies. Test thoroughly to gauge performance.
Converting a model may require manual focus adjustments, as most modern optics are designed for autofocus systems. Emphasize manual control for precise image composition.
Compatibility Checks
Always verify the compatibility of your chosen adapter with both the camera and the lens. Read reviews and forums for feedback from other enthusiasts. Updated designs may offer better performance than older models.
Final Thoughts
Experimenting with modern glass on vintage systems can breathe new life into your photography. Turn these timeless pieces into creative tools rather than mere collectibles.
Evaluating Image Quality with Different Lenses
To assess image quality after swapping optical elements on vintage models, I focus on several key factors such as sharpness, contrast, color rendition, and bokeh characteristics.
Sharpness varies widely between different optical products. High-quality glass can yield outstanding detail, particularly at optimal apertures. Testing should occur across various f-stops to identify the sweet spot for each optical accessory.
Contrast plays a significant role in perceived image depth. Vintage optics may exhibit lower contrast, which can lead to softer images. Comparing results side by side against known higher-contrast models helps determine how lens choice affects overall output.
Color fidelity is another aspect worth inspecting. Some vintage elements may impart a unique color cast. Utilizing a color checker during evaluation can provide an objective reference for comparison, assisting in determining which optical accessory best preserves accurate color representation.
Bokeh, or the quality of the out-of-focus areas, greatly influences the aesthetic appeal of photographs. Each element will behave differently based on design and construction. Testing in various scenarios, particularly with busy backgrounds, reveals how well the chosen glass isolates subjects.
Systematic testing should include direct comparisons with a known reference lens. Keeping environmental conditions constant and documenting results methodically enhances the accuracy of evaluations. I often review images on a computer screen at 100% magnification to pinpoint differences in performance.
Additionally, observing how the chosen glass interacts with autofocus systems, if present, provides insight into usability. Sometimes non-original optics may affect focus accuracy, especially in complex lighting scenarios.
Regularly analyzing these elements aids in making informed decisions about optical accessories, ensuring a breadth of creative possibilities with every shoot.
Understanding Light Metering with New Lenses
Determining exposure accurately after switching to a different optic is vital. Many vintage devices may rely on specific matched optics for their internal metering systems to function correctly. After an exchange, recalibrating the light metering can become necessary due to variations in lens design, coatings, and aperture mechanics.
Adjusting Exposure Settings
If using a non-matching optic, manual adjustments might be required, as the built-in meter may not provide accurate readings. Employing a handheld light meter or a smartphone application can provide a reliable alternative to verify exposure. Experimenting with settings while conducting test shots ensures realizing the best results in various lighting scenarios.
Understanding Light Characteristics
Each optic presents unique attributes that influence how light is captured, altering depth of field and contrast. Pay attention to maximum aperture values, as wider apertures allow more light compared to narrower ones. Recognizing how these characteristics affect exposure can enhance creative control over images, ensuring optimal use of varying optics.
Using Lens Hoods and Filters with Rangefinder Lenses
For optimal performance, integrating lens hoods and filters significantly enhances imaging. Employing these accessories reduces flare and minimizes unwanted reflections while shooting in bright environments.
Benefits of Lens Hoods
- Prevents stray light from degrading image quality.
- Offers protection against accidental impacts and scratches on the lens front.
- Improves contrast and color saturation in photographs.
Choosing Filters
- UV filters can safeguard the lens without altering exposure, serving as a protective layer.
- Polarizing filters help reduce glare and enhance colors, particularly useful for landscape photography.
- Neutral density (ND) filters enable longer exposure times, allowing for creative effects like motion blur.
Ensure the thread size of the lens matches the filter or hood to avoid complications. Always test images after adding accessories to verify focus and exposure adjustments, as some filters may impact light transmission.
Maintaining Your Rangefinder Camera Post-Lens Change
After installing a different optic, performing a thorough examination of both the camera body and the lens is important. Make sure all contacts are clean to ensure proper communication between the lens and body.
Check the lens mount for any debris or damage that might affect stability and performance. Tighten any loose screws if needed. It’s advisable to use a microfiber cloth to gently wipe any smudges from the glass elements.
Once the new optic is attached, it’s crucial to test the focus accuracy. I usually take several photos at various distances and apertures to confirm sharpness. If focus is off, I might need to calibrate the camera accordingly.
Make it a habit to check for dust inside the lens and the camera body regularly. Clean the sensor if applicable, especially for mirrorless configurations. Use a blower or soft brush to remove particles without scratching the surfaces.
Employ lens hoods and recommended filters when photographing outdoors. They help reduce glare and protect the front glass from scratches. Ensure any filter is of high quality to avoid affecting image quality.
Monitor any changes in exposure readings after a lens swap, as different optics can influence light metering. Use a light meter app or a handheld device for precision.
Document every lens change, noting any visible effects on image quality. This helps track performance and adjust my choices for future projects. Regularly evaluate how each lens fits into my photographic style and requirements.
Tips for Storing Extra Lenses Safely
Use padded cases specifically designed for optical equipment to prevent scratches and impact damage. Ensure that each lens is capped on both ends.
Maintain a stable environment by storing the lenses in a cool, dry area. Avoid places with high humidity levels, as moisture can lead to mold growth.
Regularly inspect your lenses. A quick check for dust or fungus every few months can help detect potential issues early.
| Storage Tip | Description |
|---|---|
| Padded Cases | Protects against physical damage during storage and transport. |
| Caps On | Prevents dust and debris from settling on the glass. |
| Humidity Control | Use silica gel packs or a dehumidifier to manage moisture levels. |
| Regular Checks | Monitor conditions frequently to address any issues promptly. |
Consider labeling each lens case with details such as focal length and mount type for easy identification.
Maintain a consistent temperature where you store your optical equipment. Avoid heat sources or direct sunlight that can warp or damage components.
Exploring Alternative Lens Options
Many enthusiasts consider various optics for their vintage film shooters. Here are some quality alternatives to explore:
Popular Aftermarket Brands
- Voigtländer: Known for high-quality build and excellent optics, this brand offers M-mount lenses compatible with several classic models.
- Zeiss: Renowned for exceptional clarity and detail, Zeiss lenses can elevate the overall image quality when paired with suitable camera bodies.
- Sewn: Provides a range of vintage-inspired optics that deliver unique rendering qualities, attracting those looking for a distinct photographic style.
Adapting Modern Optics
Adapting contemporary glass can be a game-changer. Using adapters allows modern lenses to fit vintage bodies, enhancing versatility. Popular modern brands include:
- Canon EF: Excellent choice, but requires careful consideration of focus requirements.
- Nikon F: Known for durability and image sharpness; suitable adapters can be found.
- Leica L: Recent optics with compatibility options for traditional mechanics, tweaking frame coverage and metering.
Regardless of choice, ensure a proper understanding of each lens’ characteristics to maximize results. Testing several options will reveal the most suitable pairing for your photographic style.
Final Thoughts on Lens Choices
Exploring non-original optics can lead to remarkable creative outcomes. Always verify compatibility and potential focus challenges to make informed decisions. Transitioning to alternative optics might require practice and adjustments, but the rewards in image quality can be profound.
Field Testing After Lens Installation
Begin field testing immediately after installing the new optic to ensure performance meets expectations. Select a variety of subjects in different lighting conditions to evaluate the installation comprehensively. Pay attention to focus accuracy, sharpness at various apertures, and any signs of vignetting or aberrations.
Focus Accuracy Assessment
Check the focus consistency by capturing images of a well-defined target, such as a grid or ruler. Use both wide-open and stopped-down apertures, as some optics may exhibit varying performance based on aperture settings. Utilize the camera’s focus mechanism while ensuring the rangefinder patch aligns correctly to your subject.
Image Quality Evaluation
Analyze the resulting images for sharpness, contrast, and color rendition. Print or view them at 100% on a monitor to scrutinize any issues. Keep an eye out for soft corners or undue distortion that may indicate incompatibility. Compile notes on these observations to guide any future purchases or adjustments.
Comparing Fixed and Interchangeable Lenses
For someone focused on enhancing photographic capabilities, understanding differences between fixed and interchangeable optics is pivotal. Fixed optics typically offer a designated focal length and aperture, which can yield superior image quality due to optimized design and construction specific to that focal range. In contrast, interchangeable optics provide versatility, allowing adaptation to various scenarios without the need for multiple camera bodies.
Weighing advantages, fixed options are often lighter and more compact, making them ideal for street photography or travel. They usually feature wider maximum apertures, allowing for improved low-light performance and depth of field control.
Interchangeable options excel in flexibility, accommodating diverse styles from portraiture to landscapes. This adaptability is crucial for someone who may shoot in varying conditions or prefers to experiment with different compositions and techniques.
The table below outlines key comparisons between the two types:
| Feature | Fixed Lenses | Interchangeable Lenses |
|---|---|---|
| Size and Weight | Typically smaller and lighter | Can be bulkier and heavier |
| Image Quality | Optimized for specific focal lengths | Varies widely by model |
| Aperture | Often faster, better low-light performance | Limited by specific lens design |
| Versatility | Single focal length only | Multiple focal lengths available |
| Cost | Generally more affordable | Costs can accumulate based on variety |
The choice between the two largely depends on photographic intent. It is advisable to assess shooting habits and preferences to determine which type aligns with specific needs and creative endeavors.
Addressing Media and Resolution Compatibility
When swapping optical components on a vintage model, one must meticulously evaluate the media and resolution compatibility. Ensure proper match between the image sensor or film format and the specifications of the optical attachment.
Film Formats and Sensor Considerations
Identify whether your film or sensor adheres to 35mm standards or other formats. This choice impacts the field of view and depth of field:
- 35mm film tends to support a wide variety of adapted optics.
- Square formats often necessitate different focal lengths.
Be aware that using modern lenses may lead to discrepancies in image coverage, which can result in vignetting or unwanted cropping.
Resolution Requirements
Resolution plays a pivotal role in image quality. Here are key points to keep in mind:
- Assess the resolution rating of your chosen lenses; higher quality will yield better results.
- Consider the optimal aperture settings for maximum sharpness and clarity.
- Examine compatibility between lens and media resolution; mismatched elements can produce soft imagery.
Prioritize testing combinations. Take test shots under varying conditions to ascertain performance and suitability. This approach will help achieve the best outcomes when adapting different components.
Developing Film with New Lens Specifications
Using a modern optics system often involves adapting to new specifications that influence film development. First, I recommend checking the lens aperture range and characteristics. This ensures that the exposure settings align with the film type and desired results.
To maximize image quality, I have found that matching the lens’s focal length and coverage with the film format is crucial. If working with a wider aperture, select a film stock that accommodates high contrast and saturation, as some films perform better under specific lighting conditions. Testing different ISO ratings with your new optics can yield varying contrast levels and grain structures.
Evaluating Compatibility with Film Types
It’s essential to understand the characteristics of the film being used. For instance, some emulsions handle underexposure better than others, while others might lack detail when overexposed. Adjusting development times based on the lens performance can drastically improve outcomes. For example, if images appear soft or hazy, consider modifying the development process to enhance clarity.
Using Filters and Other Accessories
Incorporating filters can add a layer of control over the final image. Using polarizers or ND filters with new optics can help manage reflections and reduce light intensity, respectively. Always test these combinations before committing to a full development cycle to ensure that they meet personal expectations and match your photographic vision.
Rangefinder Lens Calibration Techniques
Accurate calibration of the optical units is pivotal for achieving precise focusing in vintage optical devices. For this, it is crucial to understand the relationship between the lens and the camera mount. Begin by using a calibrated focus target to evaluate the focusing accuracy. A simple printed target at a distance of around 3-5 meters works well.
The following steps outline a practical approach to ensure optimal calibration:
Measurement and Adjustment
1. Visual Inspection: Check for any signs of damage or misalignment in the lens and mount. Ensure everything is clean and free of debris.
2. Initial Focus Test: Mount the optical unit and take a series of test shots of the focus target. Compare the results with your intended focus to ascertain any discrepancies.
3. Adjustment Method: If the lens does not focus correctly, small adjustments at the mounting flange or the alignment of the lens elements are necessary. Some models allow for registered adjustments, while others may require shimming.
Fine-Tuning for Precision
4. Repeating Tests: After making changes, repeat focus tests to quantify improvements. Consistently check if the results are aligning with expectations.
5. Documentation: Keep records of adjustments made during the calibration process. Noting specifics helps in future calibration attempts or when changing other optical units.
6. Final Review: Once satisfied, conduct a full-range focus test to ensure all distances are accurately represented. This confirms that the calibration executed is reliable across various focal lengths.
Following these calibration techniques will significantly enhance the performance of the optical units, ensuring sharp, focused images with desired accuracy.
Identifying and Avoiding Lens Flare Issues
To minimize lens flare during photography, pay attention to lighting conditions. Always position the light source behind the subject to reduce direct light entering the lens. When shooting towards the sun or bright artificial lights, consider using a lens hood to block unwanted rays and protect against flare.
Inspecting the front element for scratches or smudges is crucial, as these can exacerbate flare problems. Regular cleaning with a microfiber cloth ensures optimal clarity. If flare persists, evaluate your current aperture settings. Using wider apertures can increase susceptibility to flare, so consider narrowing the aperture for clearer results.
Experimentation with various angles can also help. Slight adjustments in your shooting position may eliminate flare reflections. Additionally, adding filters can aid in managing light. Polarizing filters, in particular, are effective in reducing glare and enhancing colors, subsequently decreasing flare occurrence.
When combining lenses from different brands, be aware of potential incompatibilities that could introduce flare issues due to varying coatings and optical designs. Always check the manufacturer’s specifications to understand how different optics may interact with light.
For those using modern adaptations on vintage optics, take note that newer lenses typically have advanced coatings designed to minimize flare more effectively than older models. Thus, pairing them with classic lenses might mitigate flare but requires careful testing to ascertain compatibility.
Post-shooting, assess your images for any flares that made it through. Understanding how light interacts with your specific setup over time will enhance your ability to predict and counteract flare effectively in future sessions.
Assessing Build Quality of Replacement Lenses
Focus on specific build elements crucial for ensuring functional compatibility with your vintage equipment. Key aspects to consider include materials used, construction techniques, and weight. Quality materials like high-grade glass and metal body construction typically indicate reliability and longevity.
Material Composition
- Glass Quality: Look for multi-coated optics that minimize flare and improve light transmission.
- Body Material: Metal lenses offer greater durability compared to plastic alternatives.
- Lens Groups: Higher quality models often have multiple elements arranged in groups, enhancing optical performance.
Build Techniques
- Helicoid Mechanism: Smooth focusing action is essential; test the helicoid for any stiffness or binding.
- Sealing: Check for rubber gaskets or weather-sealing that can protect against dust and moisture.
- Assembly Quality: Inspect for even spacing between glass elements and signs of misalignment.
Check weight as well; lighter options may indicate lower-quality materials. Compare with original optics to evaluate feel and sturdiness. Testing various specimens at local shops can help refine my choices based on personal handling preferences.
Understanding Focal Length Impact on Photography
Choosing the right focal length significantly influences the outcome of photography. For instance, wide-angle options, typically below 35mm, enable capturing expansive scenes with impressive depth, making them ideal for architecture and landscapes. Conversely, a focal length of 50mm closely resembles human eyesight, making it versatile for portraits and street photography.
Popular Focal Length Categories
Here’s a breakdown of common categories along with their typical uses:
| Focal Length (mm) | Category | Common Uses |
|---|---|---|
| 14-24 | Ultra Wide Angle | Landscapes, Architecture |
| 24-35 | Wide Angle | Group Shots, Indoor Photography |
| 35-70 | Standard | Portraits, Everyday Photography |
| 70-200 | Telephoto | Wildlife, Sports |
| 200+ | Super Telephoto | Long-Distance Shots, Astronomy |
Choosing between these focal lengths impacts not only framing but also perspective and compression. Longer options compress the background, making subjects appear closer together, whereas shorter options widen the scene, potentially emphasizing the distance between subjects. Understanding these nuances can greatly enhance the effectiveness of your photographic storytelling.
Determining Contextual Needs
Selecting a focal length should also consider the shooting environment. For tight spaces, shorter focal lengths suit my needs better. In contrast, for distant subjects or isolating details, telephoto options become essential. Evaluating the context helps me decide which focal length will yield the most impactful images.
Using Wide-Angle vs. Telephoto Options
For those looking to explore diverse photographic techniques with their interchangeable setups, understanding the impact of wide-angle versus telephoto options is key. Both types serve unique purposes and can significantly alter composition and storytelling.
Characteristics of Wide-Angle Optics
Wide-angle alternatives, generally defined by a focal length of 35mm or less, create an expansive perspective, making them ideal for capturing interiors, architecture, and landscapes. They enable a large field of view, allowing more elements to be included in the frame. When utilizing this type, I often find myself stepping closer to subjects to maintain focus and clarity.
Benefits of Telephoto Equipment
On the flip side, telephoto tools, typically starting around 70mm and extending to over 300mm, excel in isolating subjects from their background. They compress space and create a pleasing bokeh effect, ideal for wildlife and portrait photography. I appreciate the ability to maintain distance while still capturing fine details, which enhances the subject’s prominence in the frame.
| Feature | Wide-Angle | Telephoto |
|---|---|---|
| Focal Length | 35mm or less | 70mm and above |
| Field of View | Wide, expansive | Narrow, focused |
| Best For | Landscapes, architecture | Portraits, wildlife |
| Compression Effect | Minimal | Significant |
When choosing between these two options, I assess the photographic environment and my vision for the final image. With experience, I’ve discovered how each type can complement my creativity and technical execution, leading to more compelling visuals.
Legality and Availability of Vintage Lenses
When sourcing glass for classic photographic devices, I make sure to verify the legal standing of the items within my region. Several countries have regulations concerning the sale and import of vintage equipment. It’s important to research any restrictions or requirements specific to the purchase of older optics. Many platforms specialize in the resale of vintage items, ensuring legality and authenticity.
Where to Find Vintage Optics
Prominent marketplaces like eBay, Etsy, and specialized camera shops often house a selection of vintage glass. Local auctions and flea markets may yield hidden treasures as well. Engaging with camera enthusiast forums and social media groups can provide leads on where to find specific mounts and types, often from collectors willing to sell or trade.
Condition Assessment
Before finalizing any acquisition, I meticulously assess the optical condition, looking for scratches, fungus, or haze. Ensuring the mechanics are in working order, I check focus accuracy and mount compatibility. Investing time in examining the details can save me from costly surprises down the road.
Building a connection with reputable sellers and fellow enthusiasts enhances the experience, allowing me to share knowledge and possibly gain access to rare finds. Prioritize finding optics that resonate with my personal style and photographic goals. The pursuit can yield gratifying results, enriching my photographic journey.
Resources for Finding Quality Replacement Lenses
Reliable sources for acquiring high-quality optics include specialized online retailers, marketplace platforms, and camera shows. Consider focusing on the following:
- Online Retailers: Websites like B&H Photo Video, Adorama, and KEH provide extensive selections of vintage and modern optics.
- Marketplace Platforms: eBay and Etsy feature listings from multiple sellers, allowing for competitive pricing and unique finds.
- Camera Conventions: Local and international photography trade shows often showcase a variety of lenses, with direct seller interactions enhancing the purchasing experience.
- Photography Forums: Communities such as Rangefinder Forum or groups on Reddit can offer valuable recommendations and connections for sourcing lenses.
- Local Camera Shops: Visiting independent camera stores can yield hidden gems and provide insights from knowledgeable staff.
Ensure you check seller ratings and reviews to confirm the quality of the optics before making a transaction. Education on specific models and compatibility will aid in selecting the best options available.
Joining Communities for Lens Advice and Tips
Joining photography communities is an excellent way to gather insights and suggestions regarding optics for vintage equipment. Online forums, social media groups, and local clubs often host discussions tailored to specific models and user experiences. These platforms allow users to share knowledge about compatible optics, maintenance tips, and firsthand reviews.
Where to Find Online Communities
Websites like Reddit, dedicated photography forums, and Facebook groups serve as goldmines for enthusiasts. Specialized subreddits focused on vintage filming gear can provide immediate feedback and recommendations from seasoned photographers who have experimented with various setups.
Engaging with Other Enthusiasts
Active participation in these communities encourages knowledge exchange. Contributing posts or asking questions will lead to valuable advice from others who have faced similar challenges. Engaging in discussions not only enhances personal understanding but also fosters a supportive network of individuals who share a passion for classic photographic tools.
Documenting Your Lens Changes for Future Reference
Each modification I make to my camera’s optical components, from specific settings to attached accessories, is logged meticulously. Such documentation allows for easy tracking of performance across different setups, enhancing my photographic endeavors.
Recommended Documentation Practices
Utilizing a dedicated notebook or digital app helps me maintain a structured record of every alteration. Key details I note include:
| Date | Lens Model | Type of Photography | Settings Used | Results Observed |
|---|---|---|---|---|
| 2023-10-01 | 35mm f/2 | Street Photography | 1/125s, f/2.8, ISO 400 | Sharp, excellent bokeh |
| 2023-10-15 | 50mm f/1.4 | Portraits | 1/200s, f/2, ISO 200 | Great subject isolation |
Benefits of Keeping Detailed Records
This practice not only aids in recalling what worked well but also assists in troubleshooting issues. For instance, if I notice inconsistent focus or exposure, my notes reveal settings and conditions that may help identify the underlying cause. Over time, this leads to a deeper understanding of how various lenses interact with my specific setup, ultimately enhancing my creative output.
Recommended Brands for Rangefinder Lenses
Leica stands out as a premier choice for rangefinder optics, particularly with their M-mount lenses. Their designs prioritize sharpness, excellent contrast, and a unique characteristic rendering that many photographers desire.
Voigtländer offers a range of affordable and high-quality alternatives for enthusiasts. Their lenses feature solid build quality and pleasing optical performance, making them perfect for various shooting scenarios.
Zeiss lenses are renowned for their precision and clarity. Their ZM line provides exceptional image quality with minimal distortion, ideal for professionals seeking top-tier performance.
Canon’s vintage optics, specifically from their RF range, provide unique qualities and vintage charm. While sometimes harder to locate, these lenses can deliver outstanding results on compatible mounts.
Rollei also produced beautiful lenses that are compatible with certain rangefinder systems. They are often overlooked but can provide great optical performance at competitive prices.
For those exploring adaptability, brands like Olympus and Nikon have created lenses that, with the right adaptors, can be used on select rangefinder bodies. This broadens the options available for creative expression.
Lastly, consider third-party manufacturers, like Sigma and Tamron, which may offer adaptors or specific models suited for rangefinder systems, providing additional choices for various styles and budgets.


