


Switching optics on a traditional photographic device is not just possible, it’s a practice embraced by enthusiasts worldwide. For those with compatible systems, a variety of optical pieces enhance versatility and creativity in capturing images. From wide-angle to telephoto, each piece brings unique capabilities, allowing for a tailored approach to different photographic situations.
Begin by ensuring the mount type aligns with the body of the apparatus. Many renowned brands provide multiple options that interchange seamlessly within their own ecosystems. Look for the “mount” specifications before investing in new glass. Compatibility is key; mismatched attachments jeopardize both functionality and image quality.
When attaching new optics, gently line up the markings and rotate until you hear an audible click, confirming a secure fit. Avoid excessive force, as this may lead to damage. Experiment with various settings to fully appreciate the new perspective each optic offers. Capturing vibrant landscapes or intimate portraits can entirely shift based on the choice of glass, fine-tuning how you express your vision.

Regular maintenance and care are advisable, as dust and smudges can significantly affect image clarity. Always store your equipment properly and consider using protective filters to preserve the condition of the optics. By thoughtfully selecting and managing these optical components, one can truly enrich the artistic journey of analog photography.
Interchanging Optics on Analog Devices
Yes, swapping optical components on analog devices is possible. It’s crucial to ensure compatibility between your selected attachments and the body of your specific unit.
Types of Mounts
Compatibility primarily hinges on the mount type. Here are some common options:
- Canon FD: Popular in vintage models, these require specific adapters for modern attachments.
- Nikon F: A long-standing standard allowing a wide variety of optics to be utilized seamlessly.
- M42 Screw Mount: Notable for adaptability, this mount supports many third-party optics without complex adjustments.
Best Practices
To optimize the performance of your unit, consider the following tips:
- Check Compatibility: Verify that the attachment fits the mount without forcing it.
- Secure Connection: Ensure the attachment is tightly fastened, preventing any light leaks.
- Test Before Important Shoots: Run a few trial shots to ensure functionality and quality before critical moments.
Understanding Interchangeable Lenses
Interchangeable optics open up a realm of possibilities for various photographic outcomes. Having the ability to swap glass means adaptability to different shooting environments and creative visions.
Types of Interchangeable Optics
- Prime Lenses: Fixed focal length systems that excel in sharpness and low-light performance.
- Zoom Lenses: Variable focal lengths provide versatility for capturing a range of subjects without needing to swap systems often.
- Wide Angle and Telephoto: Specialty optics for expansive vistas or distant subjects, enhancing perspective in a composition.
Mount Compatibility
Ensuring mount compatibility is crucial. Each optical series may feature unique connections. Familiarity with the specific mount type for your apparatus allows a seamless transition. Be cautious of adapters, as they may introduce complications with autofocus or exposure settings.
Checking the manufacturer’s guidelines is advisable when selecting new optics. This keeps performance optimal and avoids operational issues.
Maintaining Your Equipment
- Keep the mount and glass clean to avoid image degradation.
- Store optics in protective cases to shield from dust and physical damage.
- Periodically check for fungus, especially in humid environments.
Exploring options enhances photographic expression. Each lens opens unique opportunities to interpret scenes, making knowledge of interchangeable systems invaluable for any enthusiast.
Types of Film Cameras with Changeable Lenses
When exploring various types of photographic devices equipped with interchangeable optics, the spotlight falls on a few key categories that stand out. Firstly, SLR (Single Lens Reflex) models are highly favored due to their precise through-the-lens viewing system, which allows for accurate framing and focusing. Popular brands like Canon, Nikon, and Pentax offer versatile systems that accept a wide range of optic options, covering everything from wide-angle to telephoto.
Next are rangefinder cameras, which, while slightly less common, provide a unique shooting experience. Models like the Leica M series are renowned for their build quality and exceptional lens selection. Although distinct from SLRs, rangefinders allow for swapping optics and can deliver striking images with character.
Medium format cameras also deserve mention, particularly those with interchangeable lens systems such as the Hasselblad and Mamiya series. These devices capture larger negatives, producing superior image quality and allowing for extensive creative flexibility through various focal lengths.
The mirrorless designs in the film category, though less prevalent, provide compact alternatives with interchangeable optics. They eliminate the mirror mechanism in SLRs, making them lighter and offering high-quality image capture with a selection of optics tailored for diverse photography styles.
For enthusiasts seeking adaptability, numerous accessory options, such as extension tubes and adaptors for older optics, further enhance the possibilities across these different camera types. Each of these categories showcases a wealth of choice, catering to varied artistic visions and practical requirements.
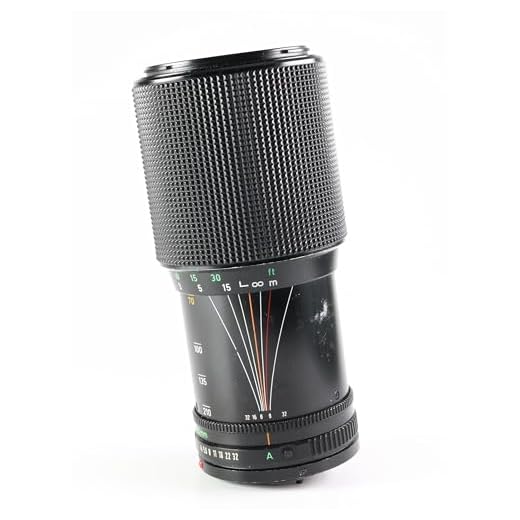
Common Lens Mounts for Film Cameras
Discovering the different types of mounts enhances the experience of using various optical attachments. Here are the most prevalent systems:
- Canon FD: This mount was popular in the Canon AE series and other manual focus models. It features a bayonet design, allowing quick attachment and removal.
- Nikon F: A well-established option since 1959, compatible with numerous manual and autofocus units. It offers a robust build and reliable performance.
- Pentax K: Known for its versatility, this mount works seamlessly with a variety of lenses, from wide-angle to telephoto. It’s favored for its solid construction.
- Minolta SR: This bayonet system sees use in Minolta’s manual focus cameras. Adapters available open options for diverse functionality.
- Leica M: A classic choice revered by enthusiasts, this mount is designed for rangefinder models. It’s known for precision and superior optical quality.
- Contax/Yashica (C/Y): This system features a unique design that allows for easy switching and solid compatibility with Zeiss optics, celebrated for their sharpness.
Less Common Yet Notable Mounts
- Olympus OM: Compact and lightweight, this mount supports various high-quality optics. Design focuses on portability and ease of use.
- Rolleiflex Bayonet: Mostly used in twin-lens reflex models, ideal for specific artistic styles and perspective control.
- T mount: A universal system suitable for various brands, primarily employed for telephoto and specialty lenses across different devices.
Exploring these mounts leads to a broader choice of optics tailored to distinct photographic needs. Each system carries unique features, aiding in the selection of precise tools for your creative vision.
How to Identify Your Camera’s Lens Mount
To accurately determine the mount utilized by your camera, follow these targeted steps:
- Inspect the front of the body. Most mounts have a prominent indicator or logo near the lens attachment area.
- Look for markings or inscriptions. Many manufacturers engrave specific model names or designations on the mount itself.
- Consult the user manual or manufacturer’s website. These resources often provide detailed information about compatible mounts.
Measuring the diameter of the mount can also help. Use a caliper to get an exact measurement:

- Record the diameter in millimeters for comparison.
- Cross-reference with known mount specifications to identify your system.
Lastly, join online photography communities or forums. Fellow enthusiasts can often quickly identify mounts based on images and descriptions shared.
Compatibility: Which Lenses Fit Your Film Camera?
To determine suitable optics for your model, first identify the specific mount type. Each brand often has proprietary mounts, making compatibility crucial for optimal functionality. For instance, common mounts include Canon FD, Nikon F, and Pentax K, each designed with unique locking mechanisms and electrical contacts.

Circular and Adaptable Options
Certain mounts allow for the use of adapters, providing flexibility to utilize a variety of optics. Adapting an M42 or body-mounted lens to a bayonet mount can expand creative possibilities, though awareness of potential limitations, such as lost automatic functions, is necessary.
Recommendations for Lens Selection
When exploring options, consider focal lengths, apertures, and image quality. Prime optics often yield sharper results compared to zooms, while wider apertures are advantageous in low light. Testing various brands within your mount type can lead to discovering the perfect combination that complements your shooting style.
Regularly consult compatibility charts or manufacturer specifications to confirm which optics enhance performance. Joining communities or forums can also provide insights from fellow enthusiasts about practical experiences with specific lenses.
Step-by-Step Guide to Changing Lenses
First, ensure the device is powered off. This prevents any electrical issues during the process and protects the internal components.

Next, locate the lens release button, usually found on the body close to the lens mount. Press this button while twisting the lens counterclockwise until it detaches. Handle with caution to avoid damage to the contacts or mount.
Once the original optic is removed, place the rear element facing upward on a soft surface to prevent scratches or dust accumulation. Ensure the front element is pointed away from any surfaces to avoid contamination.
Take the new optical unit and align the mounting marks on the lens and the body. Gently insert the lens into the mount and rotate it clockwise until you hear a click, indicating it is securely locked in place.
Before turning the device back on, inspect the new lens for any dust or smudges. Clean with a microfiber cloth if necessary to ensure clarity during shooting.
Finally, power on and test the functionality of the assembly, checking the autofocus (if applicable) and exposure settings to confirm everything operates correctly. This completes the installation process.
Tools You Might Need for Lens Changes
For successful lens swaps, certain tools enhance the experience and ensure safety. A lens pouch offers protection during transport. Using a microfiber cloth keeps optical surfaces free from dust and fingerprints, optimizing image quality.

An air blower removes loose debris without direct contact, offering a gentle cleaning method. A lens cap is crucial for safeguarding the glass when not in use, preventing scratches and dirt accumulation.
Having a screwdriver set can be useful for cameras with vintage lenses that may require adjustments or fine-tuning of mounts. A light meter aids in achieving accurate exposures, especially when switching to a different focal length or aperture.
If engaging in manual adjustments, consider a magnifying glass for better visibility of intricate components. Finally, a notebook might assist in keeping track of which lenses give the best results in various settings.
How to Clean Your Camera Lens
Begin with a blower to remove dust particles from the surface. Avoid using canned air, as it can introduce moisture. Hold the camera upside down while blowing to allow debris to fall away.
Utilize a microfiber cloth for smudges and fingerprints. Gently rub the lens in a circular motion, applying light pressure. Ensure the cloth is clean to prevent scratching.

Cleaning Solution
For stubborn spots, employ a lens cleaning solution. Apply a few drops onto the microfiber cloth, never directly on the glass. Wipe gently and consistently to avoid streaks.
Additional Tips
Regular maintenance of your optical components prolongs their lifespan. Store your gear in a dry place, using a lens cap or cover when not in use to minimize exposure. For deeper cleaning, consider professional services if mold or heavy contaminants are present.
Common Issues When Switching Optics
A few problems may arise while swapping out optics, and I have found it helpful to be aware of them in advance.
Dust and Debris
- Ensure the rear of the optic and the camera mount are clean before attachment.
- Use a blower to remove dust particles that could scratch the lens or sensor.
Accidental Damage
- Handle each optic with care; dropping an element can cause irreparable damage.
- Be cautious of mounting alignment; forcing a lens may result in damage to both the lens and camera body.
Improper Mounting
- Double-check that the lens locks into place securely; a partially mounted optic may not function correctly.
- Listen for a click sound upon secure attachment, confirming proper locking.
Interference with Accessories
- Be mindful of filters or hoods still attached to the optic as they may not fit well with other models.
- Ensure compatibility of each accessory with the new lens.
Optical Quality Variations
- Recognize that different optics can produce varied results; be prepared for changes in image quality.
- Test new combinations prior to important shoots to gauge performance.
Best Lenses for Various Photography Styles
For portrait work, I recommend using an 85mm f/1.8 prime. This focal length creates a flattering perspective and provides beautiful background blur for a professional look.
If street photography is your passion, a 35mm f/2 lens offers versatility and a natural field of view that captures candid moments without being intrusive.
Macro Photography
A 100mm f/2.8 macro lens excels at capturing intricate details in subjects like flowers or insects. The longer focal length allows for working distance while maintaining sharpness and clarity.
Wildlife Photography
For wildlife enthusiasts, a 300mm f/4 telephoto is ideal. It provides the reach necessary to observe subjects from afar without disturbing them, while maintaining image quality.
Understanding Lens Adaptors for Film Cameras
Lens adaptors allow diverse optics to be mounted on various camera bodies, expanding creative possibilities and versatility. Selecting the appropriate adaptor is crucial for ensuring compatibility and proper function.
Adapting a lens involves matching it to the specific mount of the camera. It’s vital to research the mechanical and electronic couplings, as some adaptors retain automatic controls while others may require manual adjustments for aperture and focus.
When considering an adaptor, pay attention to the following specifications: thickness, build quality, and brand reputation. A well-constructed adaptor minimizes light loss and distortion while optimizing image quality.
Several popular configurations exist, such as M42 to Pentax K or Nikon F to Sony E. Online communities and resources help in identifying the best combinations for specific photography needs. Always check user reviews and compatibility lists.
Calibration may be necessary for some adaptors. Testing focus accuracy and vignetting on different apertures helps ensure optimal performance with adapted optics. Carrying a lens test chart provides a practical method for evaluating results.
Lastly, keep in mind that using an adaptor might introduce limitations, such as reduced functionality of autofocus systems. Always consider how the adaptor will affect the shooting experience to maintain desired control over images.
Manual vs. Automatic Lens Changing Techniques
Choosing between manual and automatic methods for swapping glass elements can greatly influence a shooting experience. Manual techniques offer direct control, while automatic systems provide convenience. Here’s a breakdown of both approaches.
| Technique | Advantages | Disadvantages |
|---|---|---|
| Manual | Complete control over the process; skill-building; greater understanding of equipment. | Time-consuming; potential for mistakes during rapid transitions. |
| Automatic | Quick and efficient; ideal for fast-paced environments; often incorporates built-in features. | Less control over the specifics; reliance on technology which may fail. |
In my experience, manual techniques yield a deeper connection to your tools, promoting a careful approach. I meticulously turn the release mechanism and gently detach the optic piece, ensuring no dust enters the body. In contrast, the automated function of specific models simplifies transitions during events like weddings or sports, where speed is vital.
Familiarity with both methods enhances flexibility and adaptability. I switch to manual when precision is critical, and I rely on automatic features when time constraints dictate. Mastering these techniques can significantly improve photographic outcomes.
Protecting Your Film Camera While Changing Lenses
To shield my precious equipment while switching optics, I ensure the area is clean and dust-free. I work in a designated space, away from wind and disturbances, to minimize the risk of debris entering the body.
Keeping the camera pointed downward during the swap limits exposure to contaminants. I also cover the rear of the detached element and the camera mount immediately to prevent any particles from settling on sensitive surfaces.
Wearing gloves is advantageous for maintaining cleanliness and avoiding fingerprints on glass elements. Before the task, I double-check that I have a suitable lens ready in a protective case, minimizing the time the camera remains unprotected.
Using a lens cap when not in use is a basic yet critical practice. Additionally, having a blower or brush handy can assist in keeping both the sensor area and the new optic clean during installation.
Regular maintenance checks on seals and mounts can help spot any potential issues before they arise, ensuring that the entire system remains functional and free of complications when swapping components.
How Weather Affects Lens Changing
For optimal performance while swapping optics, monitor environmental conditions closely. Extreme temperatures, whether too hot or cold, can cause components to expand or contract. This may lead to difficulty in detaching or attaching elements smoothly. Maintain a stable temperature to avoid issues.
Humidity and Dust Considerations
High humidity can lead to moisture accumulation on both the front and rear elements. This moisture can obstruct clear images and foster mold growth inside barrels. Always ensure surfaces are dry before any optic swaps. On windy, dusty days, shield the mount to prevent foreign particles from entering the casing.
Precipitation Preparedness
Rain poses a significant threat. If you must operate during such conditions, use rain covers or bags designed for protection. Take care to minimize exposure time when exposing the body or optics to wet environments. Quick actions to change should be executed carefully to reduce water damage risk. Always dry the outer structure promptly after any incident.
Tips for Storing Extra Lenses Safely
Always use original lens caps or high-quality third-party alternatives to protect the glass and mount from dust and scratches. Store each optic in its dedicated padded case or bag to prevent jostling during transport.
Keep a desiccant packet inside storage containers to absorb moisture, especially in humid environments. This helps prevent fungus and condensation damage that can ruin your optics.
Avoid exposing optics to extreme temperatures or direct sunlight, as these conditions can affect glass coatings and internal mechanics. Maintain a stable room temperature for storage.
Position stored equipment upright or flat but ensure they are secure and won’t roll or shift. Use appropriate shelving or drawers that provide easy access while keeping the gear protected.
Label each container or case with details such as the model and specifications for quick identification, minimizing the risk of unintentional damage from mismatched gear use.
Regularly inspect stored optics for signs of mold or dust accumulation. Clean as necessary with suitable materials, ensuring no residue is left behind that could impair function.
Impact of Lens Quality on Image Results
Investing in superior optics directly influences the photographic outcomes. Superior glass elements minimize chromatic aberration, enhance clarity, and offer better contrast, resulting in sharper images. Moreover, coatings on the lens significantly reduce glare and increase light transmission, contributing to improved performance in challenging lighting conditions.
Key Factors of Lens Quality
Three main aspects determine the effectiveness of optics:
| Factor | Impact on Image Quality |
|---|---|
| Optical Design | Shapes and arrangement of elements affect focus accuracy and distortion. |
| Glass Quality | Higher purity leads to cleaner images with better color fidelity. |
| Coatings | Reduce reflections and improve light transmission, enhancing overall brightness. |
Comparing Different Lenses
Testing multiple optics reveals varying characteristics. For instance, prime optics often outperform zoom equivalents in terms of sharpness and bokeh quality. Choosing a well-regarded brand enhances reliability and image consistency.
To maximize results, consider the specific requirements of your photographic style alongside the optical qualities. For portraits, f/1.8 or f/2.8 settings can yield stunning background blur, while wide-angle tools are preferable for landscapes and architecture. Lower quality optics may cause issues such as softness or color fringing, which are easily noticed upon closer inspection.
Choosing the Right Lens for Specific Shots
For portrait photography, I prefer using prime optics with a focal length of 85mm to 135mm. This range creates flattering images with beautiful background blur.
When capturing landscapes, a wide-angle optic in the range of 16mm to 35mm is ideal. Such optics allow for expansive scenes and dramatic perspectives.
Close-up shots benefit from macro optics, often starting from 50mm onwards. These allow for detailed focus on small subjects, enhancing texture and intricacy.
For street photography, zoom optics with a focal length of 24-70mm provide versatility. I can quickly adjust the frame to catch spontaneous moments.
Wildlife photography calls for telephoto optics of at least 300mm, enabling me to maintain distance from my subjects without disturbing them.
In low-light scenarios, using fast optics with a wide maximum aperture, like f/1.4 or f/1.8, helps capture sharp images with minimal noise.
Experimenting with specialty optics, such as fisheye or tilt-shift, can add unique perspectives to my creative projects.
Evaluating image quality and distortion at various apertures aids in selecting the most appropriate optic for my intended shots.
Considering weight and size is essential for ensuring portability during extended shoots. I often balance this against the optical performance needed.
Finally, testing different optics on my camera during practice sessions grants insights into how each performs under various conditions.
Historical Development of Interchangeable Lenses
The first successful interchangeable optics appeared in the late 19th century. In 1900, the Kodak camera introduced a lens mount that allowed for different glass elements to be attached, significantly enhancing versatility in photography. This shift marked a crucial moment, empowering users to adapt to various shooting conditions.
By the 1930s, manufacturers like Leica popularized the Screw mount system, facilitating quick swaps between lenses. This mechanism offered sharper optics and allowed photographers to utilize specialized lenses for portraiture and landscapes alike.
The advent of the bayonet mount in the mid-20th century further advanced lens interchangeability. The Canon F-1 (released in 1971) and Nikon F (1959) demonstrated the benefits of a secure, smooth lens attachment, enabling rapid exchanges in challenging environments. The bayonet style remained dominant for decades, supporting a range of optical options, from wide-angle to macro.
In the 1980s, the introduction of autofocus systems prompted innovations in attachment technology. The emergence of the A-mount by Minolta showcased the integration of electronic communication between body and optics, allowing automated functions and advancing photography’s technical capabilities.
| Year | Significant Development | Camera/Manufacturer |
|---|---|---|
| 1900 | Introduction of interchangeable optics | Kodak |
| 1930s | Screw mount system popularity | Leica |
| 1959 | Release of Nikon F with bayonet mount | Nikon |
| 1971 | Canon F-1 with improved bayonet design | Canon |
| 1985 | Introduction of autofocus and A-mount | Minolta |
Throughout the years, the evolution of interchangeable optics has continuously reshaped photographic expression, greatly influencing style, accessibility, and technical possibilities within the craft. The journey from manual adjustments to automated attachments showcases a remarkable progression that still impacts modern shooting practices today.
Resources for Learning More About Film Camera Lenses
For in-depth knowledge regarding optical components used in analog photography, I recommend visiting dedicated forums and websites such as APUG (Analog Photography Users Group) and Luminous Landscape. These platforms offer articles, discussions, and resources tailored to enthusiasts and professionals alike.
Books and Guides
“The Camera” by Ansel Adams provides insights into various photographic techniques, including the role of optical elements. Another excellent read is “Understanding Exposure” by Bryan Peterson, which, while primarily focused on exposure techniques, discusses the influence of various optical equipment on image quality.
Online Courses and Tutorials
Platforms like MasterClass and Skillshare offer courses specifically focusing on analog techniques. Websites like YouTube also feature numerous tutorials from experienced photographers detailing practical aspects of using optical attachments. I often find these videos helpful for visual learners.
FAQ:
Can I change lenses on all film cameras?
No, not all film cameras allow for lens changes. Most single-lens reflex (SLR) cameras and some rangefinder cameras have interchangeable lenses, while point-and-shoot cameras and many compact models come with fixed lenses that cannot be changed. It’s important to check the specifications of your camera model to determine if lens interchangeability is possible.
What types of lenses can I use on my film SLR camera?
On a film SLR camera, you can typically use a variety of lenses including standard primes, zoom lenses, wide-angle, macro, and telephoto lenses. The compatibility depends on the camera mount. For example, Canon, Nikon, and Pentax have specific mounts that dictate which lenses can be used. Always verify that your lens matches the mount type of your camera for proper functionality.
How do I change the lens on my film camera?
To change the lens on a film camera, first ensure that the camera is turned off or that you are not exposing the film to light. Press the lens release button, usually located on the camera body, and turn the lens counterclockwise until it detaches. Align the new lens with the camera mount and turn it clockwise until it clicks into place. Make sure it’s secured before taking photos.
Are there any risks when changing lenses on a film camera?
Yes, there are some risks associated with changing lenses. Dust and debris can enter the camera body when the lens is removed, which might scratch the sensor or film. To minimize this risk, try to change lenses in a clean environment and do it quickly. Additionally, ensure that you don’t accidentally touch the glass elements of the lens, as that can lead to smudges or damage.
Can I use modern lenses on vintage film cameras?
Using modern lenses on vintage film cameras can be challenging and depends on compatibility. Some modern lenses might require an adapter to fit physical mounts, but functionality may vary. Autofocus and metering might not work properly, so manual adjustments might be necessary. It’s advisable to research compatibility and potential limitations before attempting to use modern lenses with older cameras.


