I confirm that carrying optical devices on flights is typically permissible. However, specific protocols must be adhered to for a smooth experience at security checkpoints. It’s advisable to keep these items in your carry-on luggage rather than in checked bags, as this minimizes the risk of damage and enhances accessibility.
Packaging is key; use padded cases or protective wraps to safeguard your gear against impacts. Placing items in a dedicated compartment of your bag can expedite the screening process, as security personnel can easily identify and inspect them without having to rummage through your belongings.
Be prepared to remove these pieces during inspection; TSA guidelines usually require that they be placed in separate bins. Always check with the airline for any additional restrictions or requirements they might impose regarding these specific items. Staying informed will ensure your travel remains hassle-free.
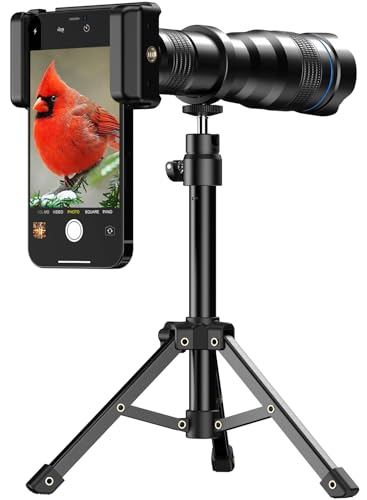
Can You Bring Your Photography Gear on Board?
Yes, it is permissible to bring photographic equipment on board, but there are specific guidelines to follow.
- Check with the airline regarding carry-on restrictions, as each may have different allowances.
- Ensure that all items are securely packed to prevent damage during handling.
- Consider the size and weight of your equipment, as oversized items may require check-in.
Security screening is crucial. Place your gear in separate bins for scanning. Make sure to remove larger components for closer inspection, if requested.
It’s advisable to carry necessary documentation, such as receipts, especially for high-value items. This can help avoid complications with airport security.
Lastly, using padded cases or backpacks can provide extra protection and convenience while traveling.
Understanding Airline Regulations for Camera Equipment
Always check the specific rules of your airline regarding photographic gear before flying. Most carriers allow these items in both carry-on and checked baggage, but restrictions may apply based on size and weight. Be mindful that some airlines limit the amount you can bring in carry-on.
Pack fragile items like photographic tools with care, using protective cases or padded bags. This precaution helps prevent damage during handling. It’s advisable to label your gear clearly, which aids in identification should you face any issues at security checkpoints.
Some airlines also require you to declare valuable equipment when checking in or boarding. Being transparent about high-value items can expedite the process. When going through security, it’s best to remove any equipment from bags and place them in separate bins for screening to speed things up.
If traveling internationally, be aware that customs regulations differ from country to country. Certain places might impose restrictions on carrying specific types of devices, so I always research local regulations in advance. Keeping receipts for your gear can also facilitate smoother customs checks.
Investing in insurance for your valuable tools provides peace of mind when flying. In the event of loss or damage, you’ll be covered, making your travels less stressful. Overall, staying informed about these regulations allows for a trouble-free travel experience with your photographic equipment.
Checking Carry-On vs. Checked Baggage Rules
Always verify airport regulations regarding whether to store expensive photography gear in carry-on or checked luggage. Most airlines permit fragile items in hand luggage, reducing the risk of damage. Here are critical points to consider:
Carry-On Baggage Regulations
- Many airlines allow larger bags up to a specific size, but lenses or similar equipment should fit within those dimensions comfortably.
- Additional screening may apply; ensure quick access for security checks.
- Pack items securely to prevent movement and impact during transit.
Checked Baggage Guidelines
- Storing valuable photography gear in checked bags increases risk; consider this option only if necessary.
- Use sturdy cases or cushioned wraps to minimize damage from handling.
- Check for specific allowances on maximum weight and size, as exceeding limits can result in extra fees or inspection delays.
Choosing wisely between carry-on and checked luggage for delicate photography items can preserve their functionality and extend their lifespan.
Maximum Size Limitations for Lenses
Checking the maximum allowed dimensions for optical equipment is essential before traveling. Each airline sets specific rules regarding the size of items that can be carried onboard. Here are key points to consider:
- Most carriers permit a maximum length ranging from 22 to 24 inches for items in the cabin.
- The combined dimensions (length + width + height) should not exceed 45 inches for carry-on baggage.
- Weight restrictions commonly range from 15 to 25 pounds, depending on the airline.
For larger optical gear, alternatives like checking them in might be necessary.
Verify your airline’s website or contact customer support for detailed information. It’s beneficial to have precise measurements and understand how to pack securely to avoid damage while complying with restrictions.
In special circumstances, such as premium ticket classes, additional leniencies might apply, allowing for larger items. Always confirm these provisions beforehand.
Weight Restrictions for Carrying Photography Gear
I recommend checking with your airline regarding the maximum weight limits for carry-on items. Most carriers allow between 7 kg (15 lbs) to 10 kg (22 lbs) for overhead storage, but some may have stricter policies. Weigh your gear before departure to avoid surprises at the gate and plan accordingly.
Be aware that the total weight of your bag includes all content. Heavy tripods or numerous accessories can easily push you over the limit, so consider packing only what is strictly necessary for your shoot. If possible, consolidate equipment into fewer pieces to stay within acceptable thresholds.
For photographers traveling with heavier equipment, look into purchasing a high-quality shoulder bag or a rolling bag that is both lightweight and spacious. Using an empty bag first to gauge weight can help ensure compliance without exceeding limits.
Some airlines may allow for additional items, such as a personal item or equipment like a laptop, but be sure to check individual policies to avoid complications. Balancing your load while adhering to weight specifications is crucial for hassle-free travel.
Also, remember that exceeding weight restrictions can lead to additional fees or even being required to check your gear, which could put your sensitive equipment at risk. Always stay informed and prepared to make adjustments if needed.
Security Screening Procedures for Lenses
Prior to security checks, ensure your optical gear is organized for a smooth inspection process. Lenses need to be extracted from bags and placed in bins if they exceed specified dimensions. This action significantly reduces scanning time and potential delays.
Preparing Your Gear
Use padded cases for your optics, as this can help protect them during security handling. Clearly label your bag to facilitate easy identification. If your lenses are large or numerous, consider grouping them carefully to avoid additional scrutiny from security personnel.
Understanding Procedures
Be prepared for manual inspections if you’re carrying multiple high-value items. If asked, comply with requests to remove any protective filters, as these might cause confusion during scanning. Always keep your boarding passes accessible, as you’ll need to present them alongside your identification.
Best Practices for Packing Camera Lenses
Always use padded cases designed for optical gear to protect against impacts and pressure changes. Ensure each piece of equipment is individually wrapped with microfiber cloths or bubble wrap before placing them in the case to avoid scratches.
Organizing Elements
Utilize dividers or compartments within the carrying case. Keep shorter focal length optics separate from longer ones to prevent unwanted contact that might cause damage. Consider adding desiccants to absorb moisture, helping to preserve equipment integrity during transit.
Weight Distribution
Be mindful of weight distribution in your bag. Heavier items should be placed closer to your back for better balance and padding. This helps in carrying the load comfortably and reduces strain during long travels.
Label your case with contact information in case of loss or misplacement. It can also be helpful to have a digital inventory of your gear accessible in your phone or an online document.
Risk of Damage During Air Travel
I recommend investing in high-quality padding for your equipment when flying. While airlines provide a certain level of care, mishandling can lead to significant harm to fragile items. Always use protective cases designed for sensitive gear, ensuring they fit snugly and securely.
During transit, turbulence and sudden movements can result in unwanted impacts. To mitigate this risk, pack each piece tightly within your bag, preventing movement. Bubble wrap or soft cloth can be excellent materials for additional cushioning.
Humidity and temperature fluctuations inside the cargo hold may also present a threat. If possible, keep your valuables in your carry-on for consistent exposure to climate control. This is especially important for items sensitive to moisture or extreme temperatures.
When preparing for security checks, quickly remove fragile items from your bag and place them in separate bins, drawing attention to their delicacy. This helps security personnel handle them with extra care, reducing the likelihood of damage during the screening process.
Here’s a summary of recommended protective measures:
| Protective Measure | Details |
|---|---|
| Use Quality Cases | Invest in padded bags made specifically for delicate gear. |
| Cushioning | Incorporate bubble wrap or soft cloth around each item. |
| Carry-On Storage | Keep sensitive equipment with you for controlled environments. |
| Alert Security | Communicate delicacy when presenting items for screening. |
By following these practices, I can significantly lessen the risk of damage to my gear during air travel. Proper planning and protective measures are key to ensuring everything remains intact and functional.
Insurance Options for High-Value Equipment
For high-value photographic gear, obtaining the right insurance coverage not only protects your investment but also provides peace of mind when traveling. Look for specialized policies designed for electronic equipment, which often cover theft, loss, and damage, both in transit and at your destination.
Recommended Insurance Types
Consider personal property insurance, which often includes your valuable items in home policies, but be sure to verify coverage while traveling. Alternatively, specific photography insurance packages offer targeted protection tailored for equipment. These often include provisions for rental gear and global coverage, essential for those who travel frequently.
Important Coverage Aspects
Always check for deductibles and limitations on claims, as well as the replacement cost versus actual cash value distinctions. Opt for policies that provide replacement coverage for lost or damaged gear, ensuring you can replace your items without substantial out-of-pocket expenses. Keep a detailed inventory of your gear, including receipts and appraisal documents, to streamline the claims process in case of an incident.
Renting vs. Bringing Your Own Optics
Opting for rental equipment versus bringing personal gear hinges on several factors, such as travel duration, specific needs, and personal preferences. Renting can minimize weight and bulk, useful for short trips or when specialized gear is necessary.
For extended travels or unique shooting conditions, personal optics might outperform rentals in terms of quality and familiarity. Knowing your equipment’s quirks enhances creativity and speeds up the workflow.
| Aspect | Renting | Bringing Own |
|---|---|---|
| Cost | May accumulate quickly depending on duration and type | Initial investment already made |
| Weight | Lighter luggage, as often limited gear can be chosen | Can be heavier, especially with multiple units |
| Familiarity | Often requires adjustment to new equipment | Comfort with personal equipment, boosting confidence |
| Quality | Variety available, can try high-end models | Quality assured with known performance |
| Risk of Damage | Rental contracts may include insurance options | Personal responsibility for any damage incurred |
Think through these points carefully; each choice carries potential benefits and drawbacks. Balance factors like style, shooting conditions, and convenience before deciding.
Common Mistakes When Traveling with Lenses
Avoid using inappropriate baggage for fragile optical gear. Packing these valuable items in checked luggage increases the risk of damage. Always use a padded case that meets carry-on requirements.
Neglecting to Check Regulations
Assuming that all airlines have the same rules can lead to complications. Regulations can differ significantly, so meticulously reviewing policies for each airline before traveling is necessary to prevent issues at security checks.
Ignoring Insurance Options
Failing to secure insurance for high-value equipment is unwise. Research coverage options available for loss or damage during transit. This step provides peace of mind and financial protection against unforeseen incidents.
What to Do if Your Lens is Damaged
If my equipment sustains damage during a trip, I immediately assess the severity. First, I check for visible cracks, bends, or loose components. For minor issues, such as scratches, lens repair kits may help, but I prefer professional assistance for significant damage.
I promptly document the condition with photographs, as this will assist with any insurance claims or discussions with airlines. It’s crucial to report the incident to airline staff if the damage occurred during travel. I gather any necessary paperwork that confirms the incident for future reference.
Next, I contact my insurance provider if I have coverage for photography gear. Providing clear images and documentation will streamline the claims process.
If repair is necessary, I locate a trusted service center that specializes in my specific type of optical equipment. Comparing repair costs against the potential value of the lens helps in making an informed decision.
| Damage Type | Recommended Action |
|---|---|
| Cracks or Breaks | Seek professional repair |
| Minor Scratches | Use a repair kit or consult a pro |
| Loose Parts | Do not attempt to fix; consult a specialist |
| Unidentified Issues | Take it to a professional for evaluation |
In case of severe damage or if repairs are too costly, considering replacement options may be necessary. Researching alternatives help in finding replacements that fit my needs without overspending.
International vs. Domestic Flight Regulations
Before traveling, I always check the differences between international and domestic flight protocols relating to my photographic gear. International regulations often impose stricter restrictions. For example, some countries have limits on the amount of equipment I can carry through security and may require specific declarations for valuable gear.
Security Policies
When flying internationally, I encounter various security screening procedures. Security measures can involve additional checks for equipment, especially high-value items. It’s prudent to arrive early to accommodate any extended security processes. Domestic flights may have less rigorous policies but can vary significantly among airlines.
Customs and Declarations
Crossing borders means I must be aware of customs requirements. Certain nations mandate the declaration of expensive equipment upon arrival, potentially leading to taxes or tariffs. Familiarizing myself with the destination country’s policies prevents any unpleasant surprises. Domestic travel typically does not involve customs, making it easier to move during my adventures.
Specific Airline Policies on Photography Gear
Reviewing airline policies is critical for traveling photographers. Each carrier has unique regulations affecting how I manage my photography equipment during flights. Below is a table summarizing some prominent airlines and their respective rules concerning photography gear.
| Airline | Carry-On Allowance | Checked Baggage Policy | Special Notes |
|---|---|---|---|
| Delta Airlines | One personal item and one carry-on bag. Equipment must fit under the seat or in the overhead. | Up to 2 checked bags, fees may apply for excess weight. | No special restrictions, but fragile items should be packed securely. |
| United Airlines | One carry-on plus one personal item allowed; equipment counts as personal item if it fits. | Up to 2 bags included, with weight limits varying. | Encourage travelers to label gear and consider insurance for high-value items. |
| American Airlines | Standard carry-on and personal item rules; gear must be stored securely. | Two checked items allowed; fees apply for additional bags and overweight gear. | Advise on packing stories for diving lenses and use padded dividers. |
| Southwest Airlines | Two items allowed; recommend checking dimensions of larger equipment. | Two free checked bags, with specific weight limits. | Careful handling encouraged; avoid placing gear in full baggage. |
Recommendations Based on Airline Policies
Prior to my journey, I always check the specific regulations of the airline I am using. This not only saves me from potential hassles at the airport but also allows me to plan my packing efficiently. Some carriers offer options for additional gear permits or even special handling for fragile items, which is crucial for my expensive and delicate equipment.
Conclusion
Understanding different airline guidelines aids in smooth travel with photography gear. I minimize risks and protect my investment by staying informed about each airline’s requirements.
Using Lens Caps and Filters During Flight
Always secure protective caps on optics before packing. This simple step helps prevent scratches and damage during transit. Choose high-quality lens covers that fit snugly to ensure they stay in place.
Filters can offer additional safeguarding. I prefer UV filters for keeping front elements safe from dust and scratches. However, remove polarizing or ND filters before going through security; their presence can cause extra scrutiny during scans.
- Ensure all lens caps and filters are clean before packing to avoid foreign particles.
- Store filters in a protective case to avoid breakage.
If traveling to areas with different weather conditions, consider using weather-sealed components or protective filters to shield against moisture and dust. It’s wise to know the specific environment you’ll encounter.
Above all, handling equipment with care is essential, particularly during boarding and disembarkation. I typically keep optics within reach to avoid unnecessary handling by security personnel.
Tips for Traveling with Multiple Lenses
Use padded lens cases or dividers within your bag to prevent impact. Ensure each piece is securely stored to minimize movement.
Label your gear with your name and contact information. If lost, this increases the chances of a safe return.
Keep a list of your equipment with serial numbers and photos. This comes in handy for insurance claims or recovery if stolen.
Carry a small cleaning kit. Dust can accumulate during transit, and a simple wipe can maintain clarity.
Consider the arrangement of your equipment. Heavier items should be placed closer to your back for better weight distribution and comfort.
Test your equipment thoroughly before your trip. Ensure everything is functioning perfectly to avoid last-minute issues.
Research your destination’s photography regulations. Some locations may have restrictions on the use of equipment.
Protect your gear against varying temperatures. Use protective cases during extreme weather changes when moving from one environment to another.
Limit the number of accessories carried along. Only bring what is absolutely necessary to reduce weight and enhance mobility.
Utilize your smartphone for backup shots. This way, I’m always prepared to capture moments without stressing about equipment.
Finding Space for Lenses in Your Carry-On
Allocate designated compartments within your bag for each optic. This ensures quick access and minimizes potential damage during travel.
- Utilize lens pouches or cases that offer padding. These can fit into your main carry-on while providing extra protection.
- Consider a camera insert for your backpack. This creates an organized space specifically designed for your gear.
- Opt for a roller bag or backpack with adjustable dividers that allow customization based on your equipment size.
Organize gear by size and weight, placing heavier items at the bottom. This keeps the bag stable and prevents lighter pieces from shifting.
Always check dimensions against airline regulations to ensure a snug fit within the overhead bins or personal item space.
Utilize every inch of space efficiently. Store small accessories such as filters, cleaning kits, and lens caps in pockets or side compartments.
Prioritize easily accessible pockets for valuables. Keeping essential items like memory cards and batteries on top simplifies the security check process.
Efficiently managing space not only enhances protection but reduces stress, allowing you to focus on capturing moments during your travels.
Security Lines: Preparing Your Lens for Inspection
Remove your optics from the bag before reaching the checkpoint. This speeds up the security process. Ensure your glass is easily accessible so you can place it in the designated bin quickly.
Steps for Smooth Inspection
Follow these steps for smooth security checks:
- Use a dedicated pouch or case for your optics.
- Clearly label any gear, which can make the inspection process faster.
- Take off any removable filters or attachments for clarity during screening.
Security Check Guidelines
According to TSA regulations, most optics must be placed in a separate bin for X-ray screening. Here are guidelines to follow:
| Item | Action |
|---|---|
| Optics | Remove from bag |
| Tripods | Leave in bag if small |
| Accessories | May stay in bag, depending on size |
Being well-prepared can avoid delays and ensure a smooth passage through security. Always be polite to the security personnel, as their job is to keep everyone safe.
Impact of Camera Lens Size on Airline Policies
The dimensions of photographic equipment significantly influence airline rules regarding transportation. Larger items may invoke stricter regulations, leading to potential complications during travel.
Size Classifications
- Compact Equipment: Typically accepted as carry-on without issues.
- Medium to Large Equipment: May require additional scrutiny, especially in terms of fit within carry-on restrictions.
- Extra Large or Specialty Glass: Often necessitates checking as luggage, which raises concerns about safety and potential damage.
Specific Airline Guidelines
Different carriers impose varying limitations based on size:
- Low-cost airlines often have stricter size policies.
- Major international airlines sometimes allow more leeway, especially for high-value equipment.
Staying informed about specific guidelines for the airline you’re using can prevent disputes at the gate. Researching ahead of time ensures compliance with their unique size requirements, ultimately facilitating a smoother travel experience.
Traveling with Vintage or Fragile Glassware
Always pack your delicate and vintage glassware with extra caution to avoid damage. Use padded cases or hard-shell bags specifically designed for fragile equipment. Ensure that each piece is properly secured and separated to prevent any vibrations or impacts during transit.
- Use lens wraps or pouches to provide additional cushioning.
- Keep the items in the center of your carry-on for maximum protection.
- Avoid placing heavy items on top of or near fragile glassware.
Consider climate changes during your travels. Rapid shifts in temperature and humidity can adversely affect old or sensitive components. Allow the glassware to acclimate after removal from cold environments before use.
Insurance coverage for vintage items is advisable. Check providers who specialize in photography equipment or collectibles. Document all pieces thoroughly with photographs to streamline claims if needed.
Upon arrival, inspect each item for any potential damage before use. If any issues arise, contact your insurance provider to discuss your options for repair or replacement.
Traveling with cherished and vintage glassware requires careful planning. Being mindful of packing techniques and environmental factors can ensure that your valuable gear arrives safely at your destination.
Carrying Tripods and Other Accessories
Before flying, check the size and weight restrictions for tripods and additional accessories with your airline. Lightweight and compact options are often easier to manage within carry-on limits.
For tripod use, many airlines allow them in the cabin, but they must typically be stored in overhead compartments or under the seat. Ensure that your tripod is collapsible to meet size regulations and doesn’t restrict emergency exits or aisles.
Bag layouts can be tricky; I often utilize a dedicated compartment for my tripod and accessories within my main travel bag. This organization not only protects my gear but also helps expedite security checks.
Here are specifics regarding other valuable accessories:
| Accessory | Airline Guidelines | Recommended Measures |
|---|---|---|
| Tripod | Allowed as carry-on | Opt for a compact model |
| Filters | Usually permitted in hand luggage | Store in padded cases |
| Remote Shutter Release | Allowed in carry-on | Keep in accessible pocket |
| Extra Batteries | Follow specific limits | Check watt-hour rating |
| Memory Cards | Permitted in cabin | Keep in a safe compartment |
Storing these items securely not only protects them from damage but also facilitates a smoother screening process. Always remove larger accessories during security checks for quicker access and avoid complications.
When arriving at your destination, quickly inspect all accessories for any possible damage. Knowing the regulations of the country you’re traveling to can help prevent any issues upon entry.
Understanding TSA Guidelines for Electronics
Before traveling, I always check the TSA guidelines for electronics, especially regarding photography gear. Each electronic item must be removed from bags during security screening. It’s advisable to place these in a separate bin to facilitate a smoother inspection process. This applies to high-end accessories, allowing security personnel to determine quickly if the equipment poses any risk.
Prohibited Items
According to TSA regulations, items that resemble weapons, such as tripods with spike attachments, may be flagged. It’s wise to ensure all components comply with security standards to avoid complications. This includes checking any specialized gear against the regulations, as this can vary significantly.
Battery Regulations
Be cautious with lithium-ion batteries; these are subject to strict rules. Always keep spare batteries in your carry-on and avoid packing them in checked luggage to prevent fire hazards. Additionally, I ensure they’re properly protected to avoid short-circuiting during transit.
Familiarizing myself with these guidelines beforehand helps to avoid unexpected delays and ensures that I can keep all my photo equipment safe and secure throughout my travels.
Alternative Packing Solutions for Lenses
To protect optical gear during travel, I recommend investing in dedicated lens cases that offer superior cushioning. These cases often feature dense foam interiors to absorb shocks and impacts.
Here are some reliable options to consider:
- Hard-shell cases: These provide the best protection against crushing and dropping. Look for ones with customizable foam inserts for a snug fit around each piece.
- Soft padded bags: Lightweight and flexible, making them easy to fit into carry-ons. Ensure they include dividers to prevent contact between items.
- Lens wraps or pouches: For simplicity, using soft pouches can offer a good defense against scratches while being compact.
For additional safety, I recommend wrapping each lens in a soft microfiber cloth before placing it in the chosen case. Use a bubble wrap layer for extra cushioning when you feel it’s necessary.
Utilize the available space strategically by placing smaller accessories, such as caps and filters, inside larger cases. This not only saves room but also keeps everything organized and accessible.
Before travel, double-check the dimensions of your packing solution to ensure it meets airline carry-on regulations. Staying informed can save you hassle at security checkpoints.
Managing Customs for International Travel with Lenses
Be aware of import regulations for photography gear in your destination country. Before traveling, research customs policies and any duties that may apply to your equipment. Each nation has specific rules, so check if there are limits on the number of items you can bring.
Document Your Equipment
Keep records of your gear. This includes:
- Purchase receipts
- Serial numbers
- Insurance documents
Having this information can help clarify ownership and value if questioned at customs.
Declare High-Value Items
If your equipment is worth a significant amount, declare it upon entry to avoid issues when returning home. Filling out a customs declaration may prevent potential penalties or seizure during inspections.
Consider using a temporary import permit if staying for an extended period or traveling to countries with strict customs regulations. This can simplify the process and ensure hassle-free inspections.
Connecting with Other Photographers for Advice
Engaging with fellow photographers enriches knowledge and offers practical tips for traveling with gear. Online forums and social media platforms serve as excellent venues for exchanging experiences. Joining specialized photography groups or communities can provide insights specific to air travel concerns.
Utilizing Online Resources
Leverage websites like photography blogs, YouTube channels, or Q&A platforms to gather advice from seasoned travelers. Many photographers share their personal stories regarding gear transport, including difficulties faced and solutions found. Participating in discussions can also lead to networking opportunities.
Participating in Local Meetups
Attending local photographic events or meetups allows for face-to-face interaction with others passionate about the craft. Such gatherings often feature experienced attendees who can provide firsthand tips on managing equipment while traveling. Building relationships in these settings can lead to ongoing support and guidance.
Using Lens Pouches and Cases for Protection
Opt for padded lens pouches and hard cases to safeguard your optical equipment during travel. A well-constructed pouch provides an extra layer of defense against bumps and drops, essential for maintaining functionality. Consider those designed with shock-absorbing materials or water-resistant fabrics for additional security.
Selecting the Right Pouch
When choosing a pouch, ensure it fits snugly around the glass elements without excessive movement. Look for adjustable straps or loops to attach to a backpack or belt, keeping your gear secure and accessible. For frequent travelers, investing in cases with foam inserts or customizable compartments can further enhance protection, reducing the risk of damage from shifting during transit.
Place your protected gear in your carry-on rather than checked luggage. This minimizes exposure to rough handling and varying temperatures. If using a hard case, opt for one with a pressure-release valve, as it helps prevent internal damage from changes in air pressure experienced in flight. Additionally, consider keeping spare padding or bubble wrap on hand for extra cushioning before packing into larger bags.
Understanding Local Laws for Photography Gear
Researching local regulations that apply to photography equipment is essential prior to traveling. Each country may have distinct laws governing the importation and use of photographic tools, which can affect my experience when carrying these items across borders.
Inquire about customs requirements in the destination country, as some locations may impose restrictions on specific types of gear. Additionally, I should check if there are any obligations to declare high-value equipment.
It’s advisable to keep receipts or certificates for high-priced items, which can be beneficial for customs officials. Having proper documentation can expedite inspections and minimize potential hassles during journeys.
I also remain informed about the local laws regarding photographs in public spaces. Specific areas might have limitations on commercial photography or require permits for shooting. Understanding these rules can help avoid unnecessary fines or disputes with authorities.
Engaging with local photography communities online can provide insight into recent changes in legislation and best practices. They often share experiences that can prove invaluable for navigating the local terrain.
Lastly, if I plan to take photos at cultural or historical locations, I should check if any restrictions or fees apply. Respecting local customs and regulations not only ensures a smoother experience but also fosters goodwill with the community.
| Aspect | Consideration |
|---|---|
| Customs Regulations | Check country-specific import rules |
| Documentation | Prepare receipts for high-value gear |
| Public Photography Laws | Research permits needed for shooting |
| Local Insights | Connect with local photographers for tips |
| Cultural Sensitivity | Understand restrictions at historical sites |
Traveling with Lenses: Airline Customer Service Tips
Before booking your flight, contact the airline for specific guidance regarding transporting optical gear. Different carriers may have unique protocols regarding this equipment, leading to varying experiences. Always have a clear understanding of regulations specific to your airline.
Verify Policies Prior to Departure
Utilize the airline’s official website or customer service hotline to confirm allowable measurements and weight limits. This proactive approach helps avoid surprises at the airport. Keep a record of any verbal confirmations for reference.
Engage with Customer Service During Travel
If uncertainties arise while traveling, immediately reach out to airline staff for assistance. Express any concerns about handling equipment during the flight, particularly if you feel the items require special attention. Establishing a rapport with crew members may facilitate better support while onboard.
Don’t hesitate to advocate for any special needs regarding your fragile gear. Showing preparedness and knowledge of airline protocols often encourages staff to be more accommodating. If policy exceptions are necessary for the safety of your sensitive equipment, clearly communicate that necessity to the airline representatives.
Recommendations from Airlines for Photographers
Check with your airline before traveling. Each carrier has specific rules that can affect your equipment’s transport.
Key Airline Guidelines
- Verify the carry-on restrictions for your particular flight.
- Ensure that your gear is easily accessible for security checks.
- Pack as much of your gear in your carry-on to avoid damage.
Heightened Security Preparations
- Inform security staff about fragile items during screening.
- Remove protective covers and bags for faster clearance at checkpoints.
- Have additional documentation ready for high-value items if requested.
Staying informed about regulations and preparing gear properly can significantly smooth your travel experience. I always recommend reaching out directly to customer service for any specific concerns or scenarios.