If you’re considering utilizing Pentax optics on Olympus bodies, it’s feasible with the right adapters. Specific mount adapters exist that enable compatibility, and I’ve successfully tested a few reliable options.
When choosing an adapter, prioritize trusted brands for durability and performance, such as Metabones or Fotodiox. These products often maintain electronic communication, allowing for automatic aperture control, which is particularly useful for precise exposure settings.
Do keep in mind that while mechanical focus works seamlessly, achieving infinity focus may require minor adjustments. Some adapters might introduce vignetting or affect image quality, so conducting thorough tests will help you determine which combinations yield the best results.
Experimenting with different focal lengths can yield interesting perspectives. I found that some vintage Pentax glass offers character and unique rendering that complements Olympus miniature sensors remarkably well.
Ultimately, adapting these optical systems opens new creative avenues while providing access to a broader range of imaging tools.
Lens Compatibility Between Brands
Using optics from one manufacturer on a different brand’s body requires careful consideration, but successful combinations exist.
The following points highlight key aspects to keep in mind:
- Mount Type: Each manufacturer uses unique mounting systems. Ensure an appropriate adapter is available for the specific models you intend to pair.
- Crop Factor: When using full-frame optics on an APS-C body, be aware of the crop factor that affects the effective focal length.
- Manual Focus: Most adapters do not support autofocus. Be prepared to manually adjust focus, which can enhance skills in composition and framing.
- Image Quality: Some adapters may introduce optical aberrations. Test combinations to determine compatibility in image sharpness and overall quality.
- Electronic Contacts: Adapters can vary in their support of electronic functions like aperture control. Select an adapter that meets functional needs, or be ready to adjust settings manually.
Using alternative glass opens up creative possibilities. Accurately assessing compatibility will shape the experience positively, leading to stunning captures. Always research and test thoroughly to ensure optimal results.
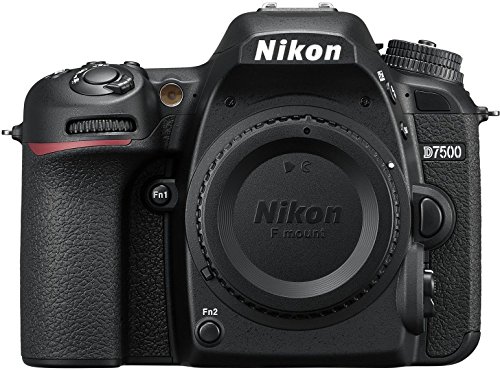
Compatibility of Pentax Lenses with Olympus Camera Mounts
I recommend checking the specific mount type of your photography equipment before attempting to use different optics. The K mount commonly found on certain brands typically requires a suitable adapter for attachment to Micro Four Thirds systems. This adapter preserves electronic connections for auto-focus and aperture control.
Manual focusing is an option, providing creative flexibility. For full compatibility, ensure that the adapter includes a mechanism for facilitating infinity focus. Using a substandard adapter may lead to issues such as light leak or poor alignment, which can affect visual outcome.
In terms of breadth, some vintage optics yield interesting artistic effects when used on modern setups. However, auto-exposure and stabilization features may not function properly unless you choose a high-quality adapter equipped with electronic contacts.
Each combination might yield varying results. Testing with a few sample images and observing performance across different shooting conditions can guide you in deciding whether to integrate these optics into your workflow. Keep an eye on any vignette or distortion that may arise from these pairings, especially at wider apertures.
Available Adapter Options for Pentax to Olympus
Several quality converters are available for connecting Pentax optics with Olympus bodies. A popular option is the Fotodiox Pro adapter. This piece is designed with precision, ensuring a snug fit while enabling the full functionality of exposure settings.
The K&F Concept adapter also stands out as a good choice. This model is well-regarded for its reliable construction and ease of use, allowing seamless mounting of Pentax glass on Olympus bodies without losing manual control over aperture settings.
Another noteworthy option is the Metabones Speed Booster. This converter enhances the focal length while allowing for improved light transmission. It’s ideal for those looking to achieve a wider field of view along with the advantage of better low-light performance.
For those who prefer a focus confirmation feature, the Viltrox adapter offers an interesting alternative. It provides electronic connections, enabling focus assist indicators on the Olympus camera. This is especially useful for photographers who prioritize precise focusing.
When considering these adapters, it’s essential to remember that some may limit auto-focus capabilities, requiring manual adjustments. Popular choices such as the Fotodiox Pro and K&F Concept are generally praised for their solid performance while keeping compatibility concerns minimal.
Research and user reviews can further aid in selecting the right adapter to best suit specific photography needs, ensuring an optimal experience when using Pentax glass on Olympus systems.
Focusing Techniques When Using Adapted Pentax Lenses
Manual focusing becomes essential with third-party glass, as autofocus features may not function properly. Using a camera with focus peaking significantly enhances precision. This feature highlights the in-focus areas, making it easier to achieve sharp images. Enable focus peaking through the camera settings before shooting.
Adjusting the Diopter
Ensure the diopter adjustment is set appropriately for your eyesight. This adjustment helps in seeing the image clearly through the viewfinder. If you notice any discrepancies between what you see and the final image, revisit this setting.
Use a Tripod for Stability
When shooting at slower shutter speeds, utilizing a tripod minimizes camera shake and supports precise focusing. This setup is especially useful for macro or low-light photography. Additionally, consider using the camera’s live view mode, which can provide a steadier platform for achieving focus accuracy.
Impact on Image Quality with Adapted Optics
When using adapted optics, the results can vary significantly. Image quality is influenced by multiple factors including the optical design, the quality of the adapter, and the characteristics of the camera’s sensor. Here are some specific recommendations to enhance image quality:
- Use high-quality adapters with precise mounts to minimize light loss and improve alignment.
- Pay attention to the maximum aperture of the adapted glass. Some older designs may experience issues like softness or reduced contrast at wide apertures.
- Test various focal lengths under different lighting conditions. Some optics may excel in one environment but not in another.
- Evaluate color rendition and sharpness. Some models may exhibit color casts, particularly with wide-angle designs.
- Perform lens corrections in post-processing. Many editing software tools include profiles for specific optics, which can counteract distortions and improve output.
Keep in mind the sensor size; for instance, full-frame optics on a smaller sensor can create unexpected vignetting. Regularly assess your results across multiple sessions to understand the performance of your combination better. This ongoing evaluation will help refine your technique and choices for optimal image quality.
Manual vs. Automatic Settings: What to Expect
When using non-native optics, I find that understanding the differences between manual and automatic settings is crucial for achieving the desired results. With some configurations requiring specific adjustments, familiarity with both modes enhances control over the shooting experience.
Manual Control Advantages
In manual mode, full control rests in my hands, allowing me to fine-tune exposure and focus precisely. I can adjust aperture, shutter speed, and ISO without relying on the camera’s internal systems. This is particularly beneficial in challenging lighting scenarios, where automatic settings might struggle. Additionally, manual focusing is often more accurate, especially with vintage glass that lacks autofocus features.
Automatic Functionality
Utilizing automatic settings can speed up the shooting process, especially in situations where quick adjustments are necessary. When I let the camera calculate exposure and focus, it can be advantageous for spontaneous shots. However, with third-party glass, complications can arise: exposure metering may not work correctly, and autofocus can become inconsistent or completely non-functional. It’s recommended to test these settings before a critical shoot to understand their reliability.
| Setting Type | Advantages | Disadvantages |
|---|---|---|
| Manual | Control over exposure and focus, ideal for creative shots | Longer preparation time, requires more skill |
| Automatic | Faster shooting, good for unpredictable scenarios | May miscalculate exposure, inconsistent autofocus |
Balancing these methods is key. I prefer to start with automatic adjustments in fast-paced environments, then switch to manual for greater precision in controlled settings. Testing and adjusting in advance streamlines the process, ensuring I’m well-prepared for any situation.
Finding the Right Adapter for Your Gear
To connect your imaging equipment effectively, choose an adapter specifically designed for the mounts in question. Begin by searching for those brands that ensure a secure fit between the two systems. Adapters can vary in quality, so prioritize options with positive user reviews and proven performance.
Check for compatibility information listed in product descriptions. Some adapters may not support full functionality, such as image stabilization or autofocus, depending on the models involved. Make sure to confirm whether the adapter allows for proper light transmission, as this impacts exposure settings.
Additionally, consider the aperture control mechanism. Some options permit electronic communication, while others require manual adjustments. This affects how easily you can modify settings while shooting.
Examine the build quality as well. Selecting a robust adapter minimizes the risk of damage during use. Look for materials that can withstand regular handling and ensure that the mounting points are designed for frequent attachment and detachment.
Lastly, explore options with built-in features, like tripod mounts, which can enhance stability during photography. Investing time in research will yield the best connection for your photographic needs.
Tips for Achieving Optimal Performance with Adapted Gear
Use high-quality adapters designed specifically for compatibility between systems. This minimizes the risk of misalignment and ensures better performance.
Achieving Focus Accuracy
When working with manual focus, utilize focus peaking or magnified view in your shooting settings. This facilitates precise adjustments, especially in challenging lighting.
Understanding Depth of Field
Be aware that the focal length changes when using an adapter, which can impact depth of field. Practicing with different apertures helps you understand how to creatively control this effect.
To combat potential issues with light transmission, consider using prime optics over zoom variants. Primes often yield sharper images and better contrast when adapted.
Regularly clean the lens and adapter contacts to maintain strong connections. Even dirt or smudges can interfere with performance, leading to soft images or inconsistent autofocus.
Experiment with various settings, particularly ISO and shutter speed, to find the right balance for your adapted equipment. Fine-tuning these parameters can dramatically improve your results.
Lastly, be patient and allow time to adjust your shooting technique. Adapting gear involves a learning curve, and familiarity with how your setup works is key to achieving excellent outcomes.
Common Issues and Troubleshooting Adaptation Problems
Lack of communication between the body and the optical system often results in challenges. To address this, ensuring that the adapter’s contacts are clean is paramount for maintaining consistent functionality.
Focusing Difficulties
When using off-brand glass, achieving accurate focus can become tricky. Manual focus rings may feel stiff or confused. Fine-tuning with live view helps achieve better results, especially in low-light conditions. Use focus peaking functionality if available to simplify the process.
Vignetting and Distortion
Expect potential vignetting at wider apertures, especially with specific combinations of equipment. A quick fix involves stopping down the aperture, as this generally minimizes corner shading. If distortion occurs, applying post-processing corrections can help enhance the final image output.
Post-adaptation, it is advisable to conduct thorough tests under various lighting conditions. Documenting performance can guide future use and ensure that the creative process remains smooth and productive.