

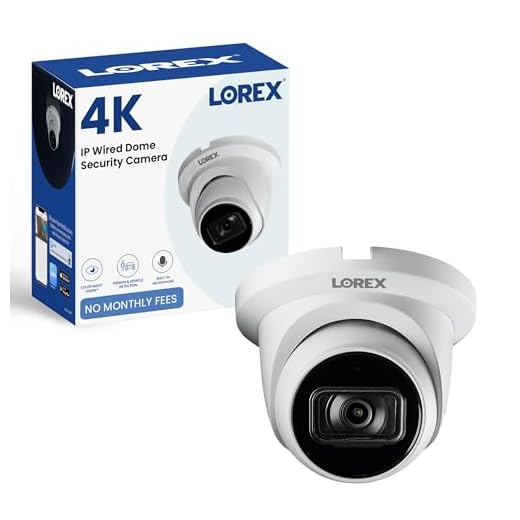


If you are looking to enhance the security of your property or keep an eye on your loved ones, installing a security camera is a great solution. However, setting up a security camera system may seem daunting, especially when it comes to connecting the Ethernet cable. In this article, we will guide you through the process of connecting an Ethernet cable to a security camera, so you can have peace of mind knowing that your property is under surveillance.
Before we get started, it is important to understand the importance of Ethernet cables in security camera systems. Ethernet cables are used to transmit video surveillance footage from the camera to the recorder or monitor. These cables provide a stable and reliable connection, ensuring smooth and high-quality video transmission.
To connect an Ethernet cable to a security camera, you will need a few tools and follow a step-by-step process. First, you will need to locate the Ethernet port on your security camera. It is usually located at the back of the camera, marked as “LAN” or “Ethernet”. Once you have located the port, plug in one end of the Ethernet cable firmly into the port.
Next, you will need to connect the other end of the Ethernet cable to the recorder or monitor. Locate the Ethernet port on the recorder or monitor, and plug the other end of the cable into the port. Ensure that the connection is secure and tight to avoid any interruptions in the video transmission.

Once the Ethernet cable is properly connected to both the security camera and the recorder or monitor, you can power on the camera and check if the video is being transmitted successfully. It is recommended to test the connection by accessing the camera’s live feed on your computer or smartphone to ensure everything is working as expected.
By following these steps, you can successfully connect an Ethernet cable to a security camera and enjoy the benefits of a reliable and efficient surveillance system. Remember to choose high-quality Ethernet cables and make sure they are long enough to reach the desired location. Now you can have peace of mind knowing that your property is secure and under surveillance.
Step-by-step guide to connecting ethernet cable to security camera
Connecting an ethernet cable to a security camera is a crucial step in setting up a reliable surveillance system. Follow these steps to connect the ethernet cable successfully:
Step 1: Start by locating the ethernet port on the security camera. It is usually found on the back or bottom of the camera and is labelled as “LAN” or “Ethernet.”
Step 2: Take the ethernet cable and plug one end into the ethernet port of the security camera. Make sure the connection is secure and tight.
Step 3: Now, take the other end of the ethernet cable and plug it into the ethernet port of the network switch or router. Ensure that the connection is firmly inserted.
Step 4: If your security camera requires power, connect the power adapter or power over ethernet (PoE) cable to the camera. Follow the manufacturer’s instructions to do this properly.
Step 5: Once all connections are made, power on the security camera and the network switch or router. Wait for a few moments to allow the camera to initialize and establish a connection with the network.
Step 6: To verify whether the connection is successful, access the camera’s web interface or use the manufacturer’s software to view the live stream or configure the camera’s settings.
Note: Some security cameras may require additional steps or settings configuration, such as assigning a static IP address or configuring network settings through the camera’s interface. Consult the camera’s user manual or seek further assistance if needed.
By following these step-by-step instructions, you can easily connect an ethernet cable to a security camera, enabling you to monitor your property or premises with ease.
Gathering the necessary equipment
Before you can connect an Ethernet cable to your security camera, you’ll need to gather a few essential pieces of equipment. Here’s what you’ll need:
- A security camera compatible with Ethernet connections
- An Ethernet cable (Cat 5e or Cat 6)
- A power adapter for the camera
- A power source (outlet or power over Ethernet switch)
- A network video recorder (NVR) or a computer with video management software (VMS)
Make sure you have all these items before you begin the installation process. This way, you’ll be able to connect the Ethernet cable to your security camera smoothly and efficiently.
Choosing the right ethernet cable
When it comes to connecting a security camera to your network using an ethernet cable, it is important to choose the right cable for your specific needs. There are a few factors to consider before making your selection.
Cable Category
The first thing to consider is the category of the ethernet cable. The most common categories are Cat5e, Cat6, and Cat6a. Cat5e cables are suitable for most security camera installations as they can support speeds up to 1,000 Mbps and are cost-effective. Cat6 and Cat6a cables offer higher speeds and better performance, making them ideal for situations where higher bandwidth is required or for future-proofing your installation.
Cable Length
Another important factor to consider is the length of the cable. Ensure that you measure the distance between the security camera and the network switch in order to choose a cable length that will comfortably reach. It is always a good idea to add a little extra length for flexibility and ease of installation.
Note: It is important to remember that there are limitations on the maximum length of ethernet cables, so make sure the length you require falls within those limitations.
Shielding
Depending on the environment in which the security camera will be installed, you may want to consider a cable with shielding. Shielded cables provide better protection against interference from external sources such as power lines or other electronic devices. This is especially important if the cable will be run near electrical equipment or in an area with high levels of electromagnetic interference.
Consider these factors when choosing the right ethernet cable for your security camera installation. By selecting the appropriate cable category, length, and shielding, you can ensure reliable and efficient connectivity for your security camera system.
Preparing the security camera
Before connecting the Ethernet cable to your security camera, it is important to properly prepare the camera for installation.
1. Choose the installation location
First, you need to select the appropriate location for your security camera. Consider factors such as visibility, coverage area, and accessibility to power sources and network connections.
2. Mount the camera
Next, mount the camera securely to the chosen location. Use a mounting bracket or screws to ensure stability and prevent the camera from moving or falling.
3. Adjust the camera angle
Once the camera is mounted, adjust its angle to achieve the desired view. Ensure that the camera is aimed at the intended area and that no obstacles obstruct the view.
4. Connect the power source
Now, connect the power source to the security camera. This may involve plugging the camera into an electrical outlet or connecting it to a power over Ethernet (PoE) switch.
5. Test the camera
Before connecting the Ethernet cable, it is essential to test the camera’s functionality. Ensure that the camera can power on and capture clear images or video recordings.
By properly preparing the security camera, you can ensure a smooth and secure installation process.
Identifying the ethernet connection port
Before connecting the ethernet cable to your security camera, you need to identify the ethernet connection port, which is where the cable will be plugged in. This port is typically located on the back or bottom of the camera.
Here are some steps you can follow to help you identify the ethernet connection port:
- Inspect the camera housing: Look for any labels or markings that indicate the location of the ethernet connection port. These labels could include terms like “ethernet,” “network,” or “LAN.”
- Check the user manual: If you have the user manual for your security camera, refer to it for information about the location of the ethernet connection port. The manual may have diagrams or illustrations to help you locate the port.
- Look for other ports: If you are unable to find a specific label or marking for the ethernet connection port, examine the other ports on the camera. The ethernet port is typically slightly larger than other ports and may have a distinctive shape or design.
- Consult the manufacturer’s website: If all else fails, visit the manufacturer’s website and search for your specific security camera model. They may have documentation or support resources available that provide information about the location of the ethernet connection port.
Once you have identified the ethernet connection port, you can proceed with connecting the ethernet cable to your security camera.
Plugging in the ethernet cable
Connecting your security camera to your network requires plugging in the ethernet cable. This cable is necessary for transmitting data and power to the camera. Here are the steps to plug in the ethernet cable:
Step 1: Locate the ethernet port
Start by locating the ethernet port on your security camera. The ethernet port is usually marked with the word “LAN” or an image depicting two arrows pointing in opposite directions. It is typically located on the back or bottom of the camera.

Step 2: Insert the ethernet cable
Take one end of the ethernet cable and carefully insert it into the ethernet port on the camera. Make sure to align the connector with the port and insert it firmly until it clicks into place. The cable should fit snugly and not be loose.
Ensure that the ethernet cable is not bent or damaged while inserting it into the port. A damaged cable may not establish a proper connection.
Testing the connection
Once you have connected the Ethernet cable to the security camera, it is important to test the connection to ensure it is working properly. Here are the steps to test the connection:

Step 1: Make sure the security camera is powered on and receiving power.
Step 2: Check the Ethernet cable connection on both ends, ensuring it is securely plugged in.
Step 3: Open a web browser on your computer or mobile device.
Step 4: Enter the IP address of the security camera in the address bar of the web browser.
Step 5: If connected successfully, the security camera’s login page should appear.
Step 6: Enter the appropriate login credentials (e.g., username and password) to access the security camera’s settings.
Step 7: Once logged in, navigate through the settings and ensure all the features and functions of the security camera are working properly.
Step 8: If there are any issues or if the camera is not working properly, double-check the Ethernet cable connection and consult the camera’s user manual for troubleshooting tips.
By following these steps, you should be able to test the connection after connecting the Ethernet cable to your security camera.
Securing the cable and finalizing the setup
Once you have successfully connected the ethernet cable to your security camera, it’s important to secure the cable and finalize the setup to ensure optimal performance and functionality.
1. Secure the cable
Start by carefully routing the ethernet cable to its desired location. Avoid placing the cable near any power sources or other cables that may interfere with its signal. You can use cable clips or cable ties to secure the cable along walls, ceilings, or any other surface, keeping it neat and organized.
It’s also crucial to protect the cable from environmental elements such as moisture, extreme temperatures, or physical damage. You can use outdoor-rated conduit or protective tubing to shield the cable from these potential hazards.
2. Finalize the setup
After securing the cable, it’s time to finalize the setup of your security camera system. Follow these steps:
a. Connect the other end of the ethernet cable to the network switch or router. This will provide the necessary connection to your camera system and enable it to communicate with your network.
b. Power on the security camera and check if it successfully establishes a network connection. You can do this by accessing the camera’s settings through a web-based interface or dedicated software provided by the manufacturer.
c. Ensure that your camera system is correctly configured, including network settings, camera placement, and any additional features or functionalities you wish to activate.
d. Test the camera’s live feed and ensure that it is displaying properly on your desired monitoring device, such as a computer, smartphone, or video recorder.
e. If necessary, make any adjustments to camera positioning or settings to optimize the camera’s field of view and image quality. You may also need to adjust network settings or consult the camera’s user manual for any specific requirements.
By securing the cable and finalizing the setup, you can now enjoy the benefits of a reliable and efficient security camera system.
FAQ,
What is an ethernet cable?
An ethernet cable is a type of network cable that is used to connect devices to a local area network (LAN) or the internet.
Why do I need to connect an ethernet cable to a security camera?
You need to connect an ethernet cable to a security camera in order to provide a reliable and secure connection for transmitting video footage and receiving power.
How do I connect an ethernet cable to a security camera?
To connect an ethernet cable to a security camera, you will need to locate the ethernet port on the camera and plug one end of the cable into the port. The other end of the cable should be connected to a network switch or router.
What type of ethernet cable should I use to connect my security camera?
You should use a Cat5e or Cat6 ethernet cable to connect your security camera. These types of cables are designed to support high-speed data transmission and are commonly used for networking purposes.
Can I connect my security camera wirelessly instead of using an ethernet cable?
Yes, some security cameras support wireless connections. However, connecting your camera with an ethernet cable is generally more reliable and secure, especially for long-distance installations.


