If you’re looking to increase the security of your home or business, installing a security camera can be a wise investment. One common method for mounting security cameras is attaching them to the soffit. The soffit, which is the exposed underside of the roof overhang, provides a sturdy and inconspicuous location for your camera. In this guide, we will walk you through the step-by-step process of attaching a security camera to the soffit.
Before you begin the installation process, it’s important to choose a suitable location for your security camera. Look for an area that provides a wide field of view and covers the entry points to your property. Additionally, ensure that the camera is positioned high enough to deter tampering, but accessible for maintenance and adjustments.
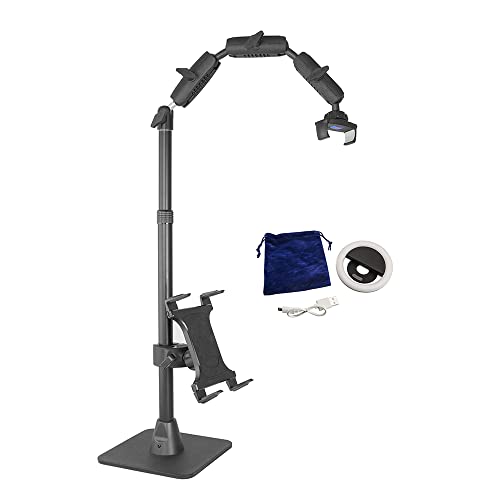
Once you have selected the ideal location for your camera, gather the necessary tools and equipment for the installation. These may include a ladder, power drill, screws, mounting bracket, and cables. It’s also important to check whether your camera requires a power source or if it is wireless and battery-powered.
To attach the security camera to the soffit, begin by drilling pilot holes for the mounting bracket. Place the bracket against the soffit, making sure it is level, and mark the hole positions. Use the power drill to create the pilot holes in the marked locations. Then, secure the mounting bracket to the soffit using screws, ensuring it is firmly attached.

Choosing the Right Security Camera
When it comes to ensuring the safety and security of your property, installing a security camera can be an effective solution. However, choosing the right security camera for your needs can be a daunting task. There are various factors to consider before making a decision.
Determine your surveillance needs
Analogue vs. IP: Decide whether you want an analogue or an IP camera. Analogue cameras are more cost-effective and are suitable for basic surveillance needs. On the other hand, IP cameras offer better resolution and advanced features, such as remote access and motion detection.
Indoor vs. outdoor: Consider whether you need a camera for indoor or outdoor surveillance. Outdoor cameras should be weatherproof and have infrared night vision capabilities to capture clear footage even in low light conditions.
Consider the important features
Resolution: Look for a camera with high resolution to ensure clear and detailed footage. Higher resolution cameras also allow for better digital zoom capabilities.
Field of view: Determine the coverage area you want the camera to capture. Wide-angle cameras provide a broader view, while cameras with adjustable lenses allow you to focus on specific areas.
Storage and recording: Decide whether you want a camera with local storage, such as an SD card, or prefer cloud-based storage. Consider the duration of footage you want to store and the ease of accessing and reviewing the recorded footage.
Additional considerations
Budget: Set a budget for your security camera and choose a camera that offers the best value for your money.
Integration: If you have an existing security system, ensure that the camera you choose can be integrated with it for a seamless monitoring experience.
Installation: Consider whether you want a wired or wireless camera and assess the ease of installation and the availability of power source for the camera.
Security features: Look for cameras with advanced security features, such as encryption and authentication, to prevent unauthorized access to your camera feed.
By considering these factors and making an informed decision, you can choose the right security camera that meets your surveillance requirements and helps ensure the safety of your property.
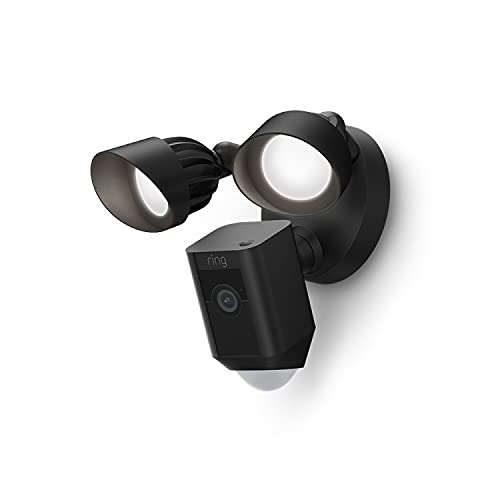
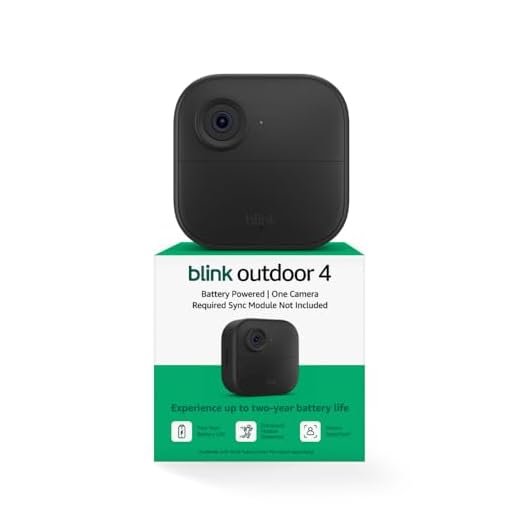
Outdoor Security Cameras
Outdoor security cameras are an essential component of any home or business security system. They provide a sense of safety and protection by monitoring the area surrounding your property and capturing any suspicious activities. With advancements in technology, outdoor security cameras have become more affordable, reliable, and easy to install.
There are several factors to consider when selecting an outdoor security camera. Firstly, you need to determine the type of camera you want: wired or wireless. Wired cameras require a physical connection to a power source and a recording device, while wireless cameras operate using Wi-Fi and can be connected to a smartphone or a computer. This choice depends on your specific needs and preferences.
Another important factor to consider is the camera’s resolution. The higher the resolution, the clearer and more detailed the footage will be. High-resolution cameras allow you to easily identify faces and license plates, which can be crucial in case of an incident. Additionally, look for cameras with night vision capabilities, as they can provide clear footage even in low light conditions.
When installing outdoor security cameras, it is essential to choose suitable locations and angles. Optimal mounting positions would be high enough to prevent tampering, yet low enough to capture facial features. A well-placed camera can cover entry points, driveways, and other vulnerable areas effectively.
Monitoring the footage from outdoor security cameras is another significant aspect. You can opt for a camera with built-in storage or choose a camera that requires a separate recording device or cloud storage. Make sure you have a reliable and secure method of accessing and reviewing the footage.
Finally, consider the weather resistance of the camera. Outdoor security cameras are designed to withstand various weather conditions, such as rain, snow, and extreme temperatures. Look for cameras with an ingress protection (IP) rating to ensure that they can handle the outdoor environment without any issues.
| Advantages | Disadvantages |
|---|---|
| Provides visual deterrence to potential intruders | May require professional installation |
| Allows remote monitoring of your property | Can be susceptible to hacking |
| Provides evidence in case of incidents | May require ongoing maintenance |
In conclusion, outdoor security cameras are a valuable addition to your home or business security. They offer peace of mind and can play a significant role in deterring crime. With proper installation and careful selection, you can find the perfect outdoor security camera to meet your specific needs and requirements.
Types of Security Cameras
When it comes to choosing a security camera for your soffit, there are several different types available. Each type of camera has its own unique features and benefits, so it’s important to choose one that best fits your specific needs. Here are some of the most common types of security cameras:
| Type | Description |
|---|---|
| Dome Cameras | Dome cameras are a popular choice for outdoor surveillance. They are discreet and offer a 360-degree view of the area. |
| Bullet Cameras | Bullet cameras are long and cylindrical in shape. They are often used for long-distance viewing and have a built-in infrared illuminator for night vision. |
| PTZ Cameras | PTZ (pan-tilt-zoom) cameras are capable of rotating horizontally and vertically. They can be controlled remotely and offer the ability to zoom in and out. |
| Wireless Cameras | Wireless cameras are easy to install and offer flexibility in terms of placement. They rely on Wi-Fi or Bluetooth technology to transmit the video feed. |
| IP Cameras | IP cameras are digital cameras that can send and receive data via a computer network or the internet. They offer high-resolution images and advanced features. |
| Hidden Cameras | Hidden cameras are designed to be discreet and blend into the environment. They can be disguised as everyday objects or installed covertly. |
Consider the specific requirements of your security needs when choosing a camera for your soffit installation. Whether you prioritize visibility, range, control, or discretion, there is a security camera that will suit your needs.
Mounting the Camera
Mounting the security camera to the soffit is a straightforward process. Follow these steps to ensure a secure installation:
1. Position the Camera
Decide on the ideal location for your security camera. It should provide a wide field of view and cover the desired area. Make sure there are no obstructions that could interfere with the camera’s view.
2. Mark the Drilling Points
Using a pencil, mark the drilling points on the soffit. Ensure they align with the mounting holes on the camera bracket. Use a level to ensure the drilling points are straight.
3. Pre-Drill the Holes
Using a drill with the appropriate size drill bit, pre-drill the holes on the marked points. Be careful not to damage the soffit during this step.
4. Attach the Camera Bracket
Take the camera bracket and align it with the pre-drilled holes. Use screws or bolts (depending on the bracket design) to attach the bracket securely to the soffit.
5. Connect the Camera
Connect the security camera to the bracket by aligning the mounting holes on the camera with the bracket’s holes. Use the provided screws to secure the camera to the bracket.
6. Adjust the Camera
Once the camera is attached, adjust its position and angle to achieve the desired view. Use the camera’s adjustable mount or bracket to make necessary adjustments.
Remember to consult the camera’s user manual for specific instructions and recommendations regarding mounting and adjusting.
Soffit Mounting Options
When it comes to attaching a security camera to a soffit, there are several mounting options that you can consider. The best option for you will depend on the specific layout of your home and the type of soffit you have.
One common option is to use a soffit bracket, which is specifically designed to attach a security camera to a soffit. This bracket typically comes with screws and other hardware that allows you to securely mount your camera to the underside of the soffit. It provides a stable and adjustable platform for your camera, allowing you to position it at the desired angle and direction.
If you prefer a more discreet mounting option, you can also consider using a recessed soffit mount. This type of mount is installed inside the soffit, creating a clean and unobtrusive look. It requires cutting a hole in the soffit and properly wiring the camera, so it may require more installation work compared to a standard soffit bracket.
Another option is to use a junction box mount, which is installed on the exterior surface of the soffit. This type of mount provides a secure and sturdy base for your camera, and it also allows for easy access to the camera’s wiring. However, keep in mind that a junction box mount may be more visible compared to other mounting options.
Before choosing a mounting option, it’s important to carefully assess your soffit and the area where you want to install the camera. Consider factors such as the material and thickness of the soffit, the desired camera angle and coverage, and any potential obstructions that may affect the camera’s view. By choosing the right mounting option, you can ensure that your security camera is securely attached to your soffit and optimally positioned for surveillance purposes.
| Mounting Option | Description |
|---|---|
| Soffit Bracket | A bracket designed to attach the camera to the underside of the soffit. |
| Recessed Soffit Mount | A mount installed inside the soffit, creating a discreet look. |
| Junction Box Mount | A mount installed on the exterior surface of the soffit. |
Tools and Materials Needed
Before attaching a security camera to a soffit, it’s important to gather all the necessary tools and materials. Here is a list of items that you will need:

- A security camera
- Mounting brackets (specifically designed for soffit installation)
- A soffit mounting kit
- Screws and anchors
- A power drill
- A screwdriver (Phillips or flathead, depending on the type of screws)
- A ladder or step stool for accessing the soffit
- A measuring tape
- A pencil or marker for marking the installation points
- A level for ensuring a straight installation
- A cable management system (like cable clips or conduit) for neatly routing the cables
- A power source for the security camera (either a nearby power outlet or a power over Ethernet (PoE) adapter)
- Optional: a wireless bridge or Wi-Fi extender for extending the wireless range to reach the security camera
By having these tools and materials ready, you’ll be well-prepared for attaching the security camera to the soffit.
Attaching the Camera to Soffit
Attaching a security camera to a soffit can be a great way to ensure optimal surveillance coverage around your property. Follow these steps to securely attach the camera to the soffit:
1. Positioning
First, identify the best location on the soffit to install the camera. Choose a spot that provides a wide-angle view of the desired area while also being discreetly positioned.
2. Marking the Holes
Using a pencil or marker, mark the mounting holes on the soffit based on the camera’s mounting bracket. Ensure that the holes are in line with the desired camera position and are evenly spaced.
3. Drilling
Next, drill pilot holes into the marked spots on the soffit. Use a drill bit that matches the size of the screws provided with the camera. Take caution to not drill too deep, as you don’t want to damage any electrical wiring or insulation.
4. Mounting the Bracket
Securely attach the camera’s mounting bracket to the soffit using the screws provided. Ensure that the bracket is level and firmly attached to the soffit.
5. Connecting the Camera
Connect the camera to the mounting bracket by aligning the camera’s screw holes with the holes on the bracket. Use the provided screws to firmly attach the camera to the bracket. Double-check that the camera is securely mounted and positioned correctly.
6. Wiring
Carefully route the camera’s wiring through the soffit, ensuring that it is hidden and protected from the elements. Use cable clips or adhesive clips to secure the wiring along the soffit’s edge or underside.
Note: If necessary, consult a professional electrician to assist with the wiring to ensure proper installation and adherence to electrical codes.
7. Final Adjustments
Once the camera is securely mounted and wired, make any necessary adjustments to ensure the camera’s field of view covers the desired area. Test the camera’s functionality by checking the live feed on your monitoring device or security system.
By following these steps, you will have successfully attached your security camera to the soffit, providing enhanced security and surveillance for your property.
FAQ,
What is a soffit and why would I want to attach a security camera to it?
A soffit is the underside of a roof overhang or a ceiling that extends beyond the walls of a building. Attaching a security camera to a soffit can provide optimal placement for surveillance, as it is typically elevated and allows for a wide field of view.