


Are you looking to take your videography skills to the next level? Recording onto a computer with a mirrorless camera can open up a whole new world of possibilities for content creation. Whether you’re a beginner or an experienced filmmaker, this guide will walk you through the steps of connecting and recording with your mirrorless camera.
Step 1: Choosing the Right Camera
Before you can start recording onto your computer, you need to make sure you have a mirrorless camera that is compatible with this feature. Many mirrorless cameras offer the option to connect to a computer via USB or HDMI cable. Do some research and make sure your camera supports this functionality.
Step 2: Connecting Your Camera
Once you have determined that your camera supports connecting to a computer, the next step is to physically connect the two devices. Depending on your camera and computer, you may need to use a USB cable or an HDMI cable. Consult your camera’s manual for specific instructions on how to connect it to a computer.
Step 3: Setting Up Your Camera
After you have connected your camera to your computer, you will need to set up your camera to begin recording. This may involve adjusting the settings on your camera to enable live view or video mode. Refer to your camera’s manual for instructions on how to navigate these settings.
Step 4: Configuring Your Computer
Once your camera is connected and set up, you need to configure your computer to recognize and receive the video feed from your camera. This may involve installing drivers or software specific to your camera, or simply selecting the camera as a video input in your video editing software. Check the instructions provided by your camera manufacturer or software developer to ensure proper configuration.
Step 5: Start Recording
With your camera connected, set up, and your computer properly configured, you are now ready to start recording onto your computer. Open your preferred video editing software and select the camera as your video input. You can now monitor the video feed from your camera on your computer screen and record your footage directly onto your computer.
By following these steps, you can easily record onto your computer with a mirrorless camera. This opens up a world of possibilities for content creators and filmmakers, allowing for greater flexibility and creativity in their projects. So grab your camera, connect it to your computer, and start capturing your vision on screen!
Advantages of Recording onto Computer with Mirrorless Camera
Recording onto a computer with a mirrorless camera offers several advantages over traditional recording methods. Here are some of the key benefits:
1. High-Quality Video and Audio
One of the main advantages of using a mirrorless camera to record onto a computer is the ability to capture high-quality video and audio. Mirrorless cameras are equipped with advanced sensors and lenses that can produce sharp and detailed footage. Additionally, many mirrorless cameras support external microphones, which can greatly enhance the audio quality of your recordings.
2. Flexibility in Post-Production
Recording onto a computer allows for greater flexibility in post-production. Once the footage is transferred to your computer, you can use various editing software to make adjustments, correct any mistakes, and enhance the overall quality of your videos. This flexibility ensures that you have complete control over the final product.
3. Easy File Management and Organization
Storing and organizing your recorded files is much easier when using a mirrorless camera with a computer. With the help of file management software, you can easily categorize and label your recordings, making them easier to find and access in the future. This saves you time and allows for a more efficient workflow.

4. Live Streaming and Real-Time Monitoring
Mirrorless cameras with computer recording capabilities offer the advantage of live streaming and real-time monitoring. By connecting your camera to your computer, you can stream your recordings directly to platforms like YouTube or Facebook, allowing you to reach a wider audience in real-time. Additionally, you can monitor your recordings on a larger screen, which provides a better view of the framing and composition.
Overall, the ability to record onto a computer with a mirrorless camera provides numerous advantages in terms of video and audio quality, post-production flexibility, file management, and live streaming capabilities. Whether you are a content creator, vlogger, or professional filmmaker, incorporating a mirrorless camera into your computer recording setup can greatly enhance the overall quality and efficiency of your work.
Better Image Quality
When recording onto your computer with a mirrorless camera, you have the opportunity to achieve better image quality compared to traditional webcams. Mirrorless cameras are designed to capture high-resolution photos and videos, offering superior image quality and detail.
Here are some tips to achieve better image quality when recording with a mirrorless camera:
1. Adjust the camera settings
Before recording, make sure to adjust the camera settings for optimal image quality. Set the camera to record in the highest resolution available, usually 1080p or higher. Adjust the ISO, aperture, and shutter speed based on your specific recording environment to ensure proper exposure.
2. Use a high-quality lens
The lens you use also plays a significant role in image quality. Invest in a high-quality lens that is specifically designed for video recording. Look for lenses with a wide maximum aperture that allows for better light gathering and improved depth of field.
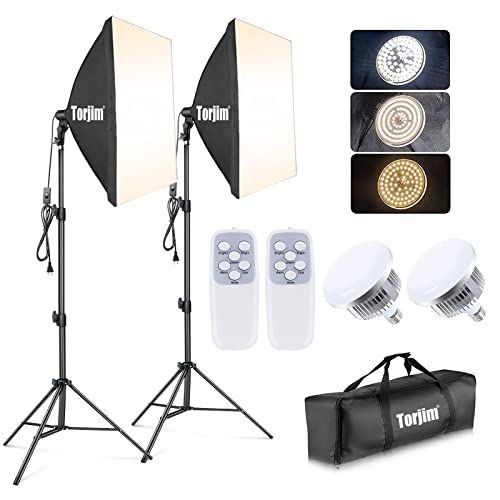
3. Proper lighting
Lighting is crucial for achieving better image quality. Ensure that your recording space is well-lit, either with natural or artificial light. Use soft lighting sources or diffusers to minimize harsh shadows and create a more flattering image.
4. Stable camera setup
While recording, it’s essential to have a stable camera setup to avoid shaky footage. Use a tripod or other stabilizing tools to keep the camera steady. This will help maintain image sharpness and reduce the chances of blurry footage.
5. Post-processing
After recording, you can further enhance the image quality through post-processing. Use video editing software to adjust the brightness, contrast, color balance, and sharpness of your recorded footage. This step can significantly improve the overall image quality.
By following these tips, you can take advantage of the superior image quality offered by mirrorless cameras and record high-quality videos onto your computer.
Greater Control over Settings
One of the advantages of using a mirrorless camera to record onto a computer is the greater control over settings. Unlike traditional webcams, which have limited settings and adjustments, mirrorless cameras allow you to fine-tune various aspects of your video recording.
Firstly, you have the ability to adjust the aperture, shutter speed, and ISO settings. This is especially useful if you want to achieve a specific look or if you’re recording in challenging lighting conditions. By adjusting the aperture, you can control the depth of field and create a blurred background effect. Changing the shutter speed allows you to capture fast-moving objects without blur or create artistic motion blur. Finally, adjusting the ISO helps you control the camera’s sensitivity to light, which is crucial in low-light scenarios.
In addition to these basic settings, mirrorless cameras often provide advanced features like manual focus and white balance control. Manual focus allows you to precisely focus on specific subjects or create intentional focus effects. With white balance control, you can ensure accurate color reproduction by adjusting the camera’s settings to match the lighting conditions of your recording environment.
Customization Options
Another advantage of using a mirrorless camera is the extensive customization options it offers. Many mirrorless cameras allow you to set custom picture profiles, which let you save and load your preferred settings for different recording situations. This helps you achieve consistent results across your videos.
External Controls
Furthermore, mirrorless cameras often have external controls that give you quick access to important settings. These physical buttons and dials allow you to make adjustments without going through on-screen menus, saving you time and allowing for a more seamless recording experience.
In conclusion, using a mirrorless camera to record onto a computer provides greater control over settings compared to traditional webcams. With the ability to adjust aperture, shutter speed, ISO, manual focus, white balance, and more, you have more options to optimize your video recording and achieve professional-looking results. Additionally, the customization options and external controls of mirrorless cameras enhance user convenience and efficiency.
Simplicity of Post-Production
After recording your footage onto your computer using your mirrorless camera, you will need to engage in post-production to enhance your videos and make them ready for sharing or distribution. The post-production process can sometimes be overwhelming if you are new to video editing, but with the right tools and knowledge, it can be a straightforward and enjoyable experience.
One of the main advantages of using a mirrorless camera is the ease of post-production. Unlike traditional video cameras that may require specialized software or additional steps to transfer footage, mirrorless cameras often have built-in Wi-Fi or USB connectivity options that allow for simple and quick file transfer to your computer.
Editing Software
Once your footage is transferred to your computer, you will need to use video editing software to trim, cut, and enhance your videos. There are various options available, ranging from free software like iMovie or Windows Movie Maker to more advanced paid software like Adobe Premiere Pro or Final Cut Pro X. Choose a software that suits your skill level and budget.
Organizing Files
Before diving into the editing process, it is essential to organize your files to ensure a smooth workflow. Create a folder for your project and separate your raw footage into subfolders based on the content or shooting date. This organization will make it easier to locate specific clips during the editing process.
| Step | Description |
|---|---|
| 1 | Create a new folder for your project. |
| 2 | Inside the project folder, create subfolders for different types of footage (e.g., interviews, B-roll, etc.). |
| 3 | Within each subfolder, organize the clips based on the shooting date or any other relevant criteria. |
By organizing your files properly, you can save time searching for specific clips and keep your project files neat and manageable.
In conclusion, the simplicity of post-production with mirrorless cameras lies in the ease of transferring footage to your computer and the availability of user-friendly video editing software. By following a systematic file organization approach, you can streamline your workflow and make the editing process more enjoyable.
Selecting the Right Mirrorless Camera
When it comes to recording onto a computer with a mirrorless camera, choosing the right camera is crucial. Here are some factors to consider when selecting a mirrorless camera:
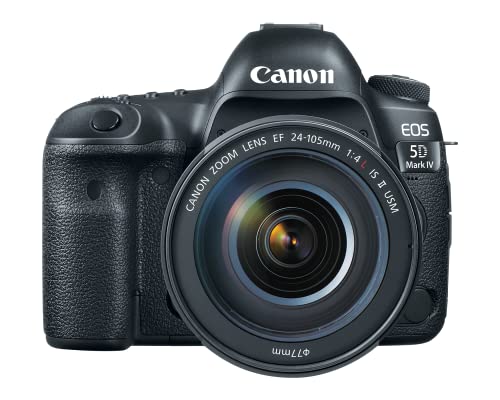
1. Sensor Size: The size of the camera’s sensor plays a significant role in image quality. A larger sensor generally provides better low-light performance and captures more detail. Consider the type of recording you’ll be doing and choose a camera with an appropriate sensor size.
2. Resolution: The resolution of the camera determines the level of detail in your recordings. Higher resolutions such as 4K and beyond are ideal for professional use, while lower resolutions may be suitable for casual recording. Choose a camera with a resolution that meets your specific needs.
3. Autofocus: Having a reliable autofocus system is crucial for capturing sharp and well-focused recordings. Look for a mirrorless camera with advanced autofocus features such as face detection and eye-tracking to ensure your subjects are always in focus.
4. Video Features: Consider the specific video features you require for your recording needs. Look for cameras that offer features such as manual control over exposure, frame rates, and video codecs. Having access to these features will give you more control over the look and feel of your recordings.
5. Size and Weight: One of the main advantages of mirrorless cameras is their compact size and lightweight design. Consider the portability of the camera, especially if you plan on using it for on-the-go recordings. A smaller and lighter camera can be more convenient to carry and handle.
6. Price: Mirrorless cameras range in price from budget-friendly options to high-end models with advanced features. Set a budget and consider your specific needs to find a camera that offers the right balance of features and affordability.
By considering these factors, you can select the right mirrorless camera for recording onto your computer. Remember to compare different models, read reviews, and test cameras before making your final decision.
Consider Image Sensor Size
When recording onto a computer with a mirrorless camera, it is important to consider the image sensor size. The image sensor is responsible for capturing the light that enters the camera and creating the image. Mirrorless cameras typically come with different sensor sizes, such as full-frame, APS-C, and micro four-thirds.

The size of the image sensor can affect various aspects of the recording process, including the depth of field, low-light performance, and dynamic range. Full-frame sensors are larger and can capture more light, resulting in better low-light performance and higher dynamic range. They also provide a shallower depth of field, which can be useful for creating a blurred background effect.
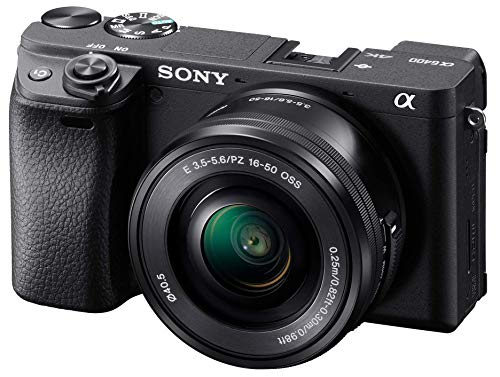
APS-C sensors are smaller than full-frame sensors but are still larger than micro four-thirds sensors. They offer a good balance between image quality and size, making them popular among photographers and videographers. Micro four-thirds sensors are the smallest and are commonly found in compact mirrorless cameras. While they may not offer the same level of image quality as full-frame or APS-C sensors, they are lightweight and portable.
When recording onto a computer, consider the type of content you will be creating and choose a camera with an image sensor size that best suits your needs. Full-frame and APS-C sensors are generally preferred for professional-quality videos, while micro four-thirds sensors are suitable for casual recording or vlogging.
Look for External Microphone Input
In order to record high-quality audio, it’s important to connect an external microphone to your mirrorless camera. This allows you to capture clear and professional-sounding audio that complements your video footage. Here’s how you can look for the external microphone input on your camera:
- First, refer to your camera’s user manual to locate the external microphone input. The manual will provide detailed instructions on where to find the input, which is usually indicated by a microphone symbol or labeled as “Mic In”.
- Once you have identified the external microphone input, you will need to connect your microphone to the camera using the appropriate cable. Most mirrorless cameras use a 3.5mm audio jack for microphone input.
- Ensure that your microphone is securely plugged into the camera’s external microphone input. A loose connection can result in poor audio quality or no audio recording at all.
- Once the microphone is connected, adjust the camera’s audio settings to enable the external microphone input. This will typically involve accessing the camera’s menu and navigating to the audio settings section. From there, you can select the external microphone as the audio input source.
- Before you start recording, it’s important to test the audio levels and make sure they are not too high or too low. You can adjust the microphone’s input level using the camera’s audio settings or the microphone itself if it has volume controls.
By utilizing the external microphone input on your mirrorless camera, you can enhance the audio quality of your recordings and create content that is more professional and engaging.

Check for HDMI Output
Before you can record onto your computer with a mirrorless camera, you need to check if your camera has an HDMI output. HDMI (High-Definition Multimedia Interface) is a common method for transferring high-quality video and audio signals from your camera to your computer.
To check for HDMI output on your mirrorless camera, follow these steps:
- Turn on your camera and navigate to the settings menu.
- Look for an option related to video or display settings.
- Within the video or display settings, check if there is an HDMI output option.
- If you find the HDMI output option, verify that it is enabled.
Once you have confirmed that your mirrorless camera has an HDMI output and it is enabled, you can proceed with connecting your camera to your computer using an HDMI cable.
Setting up the Mirrorless Camera for Computer Recording
If you want to record onto your computer using a mirrorless camera, you will need to properly set up the camera and make sure it is compatible with your computer. Here are the steps to get started:
Step 1: Check Camera and Computer Compatibility
Before you begin, make sure your mirrorless camera is compatible with your computer. Check the camera’s specifications and requirements to ensure it can be connected and recognized by your computer.
Step 2: Connect the Camera to the Computer
Once you have confirmed compatibility, connect your camera to your computer using a USB cable. Make sure both ends of the cable are securely plugged in to avoid any connection issues.
Step 3: Set the Camera to “PC” or “Mac” Mode
Next, navigate to your camera’s settings menu and find the option to switch the camera into “PC” or “Mac” mode. This mode is specifically designed for connecting the camera to a computer and enables the necessary features for recording onto your computer.
Step 4: Choose the Correct Connection Type
Once your camera is in “PC” or “Mac” mode, you may need to choose the correct connection type on your computer. This can typically be done by selecting the “USB” option or by using dedicated software provided by the camera’s manufacturer.
Step 5: Set up Recording Software
After establishing the connection, you will need recording software on your computer to capture the video feed from your mirrorless camera. Install and set up the preferred recording software according to its instructions.
Step 6: Adjust Camera Settings
Before you start recording, adjust the camera settings, such as resolution, frame rate, and exposure. These settings may vary depending on the recording software and intended use of the footage.
Step 7: Start Recording
Once all the settings are properly configured, you can begin the recording process. Start recording using the recording software on your computer, and the camera will capture the video feed according to your specified settings.
By following these steps, you can set up your mirrorless camera for recording onto your computer and start capturing high-quality video footage for various purposes.
FAQ
What is a mirrorless camera?
A mirrorless camera is a digital camera that does not have a mirror reflex optical viewfinder and uses a digital display system instead.
Can I use a mirrorless camera to record videos?
Yes, mirrorless cameras are capable of recording high-quality videos.
What equipment do I need to record onto a computer with a mirrorless camera?
To record onto a computer with a mirrorless camera, you will need a USB cable or an HDMI capture card, depending on the camera model, and video capture software on your computer.
Can I use any video capture software to record onto my computer?
While most video capture software should work, it’s best to check the compatibility of the software with your specific mirrorless camera model.
What are the benefits of recording onto a computer with a mirrorless camera?
Recording onto a computer with a mirrorless camera allows you to have more control over your recordings, access advanced settings, and easily transfer and edit your videos on a larger screen.